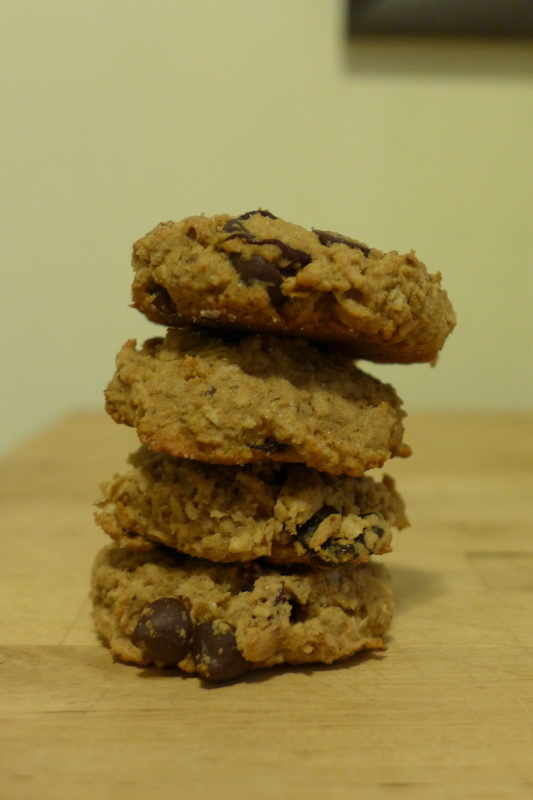
My dad and I are very alike in the fact that we love to snack. I could (and usually do) forgo meals altogether and just pick at different things all day long. I love variety in my diet. If I eat the same things at the same time during the day, I get so bored that I'd rather not eat at all. There's no fun! These cookies are absolutely perfect. They can be eaten at any time of day (yes, even breakfast!). They're approximately 1,000 times more nutritious than their predecessors. I updated a recipe that I've had my eye on for quite some time. The original is full of butter, sugar, refined flour, and shame. I made these rangers full of fiber, vitamins, antioxidants, and feel-good vibes. B) Any ranger would do well in the line of duty with these cookies in his/her lunch box/stomach! Make a batch and share some with your dad or someone who you appreciate for supporting you. Nothing says "thank you, I love you and your mustache" like chewy delicious cookies! 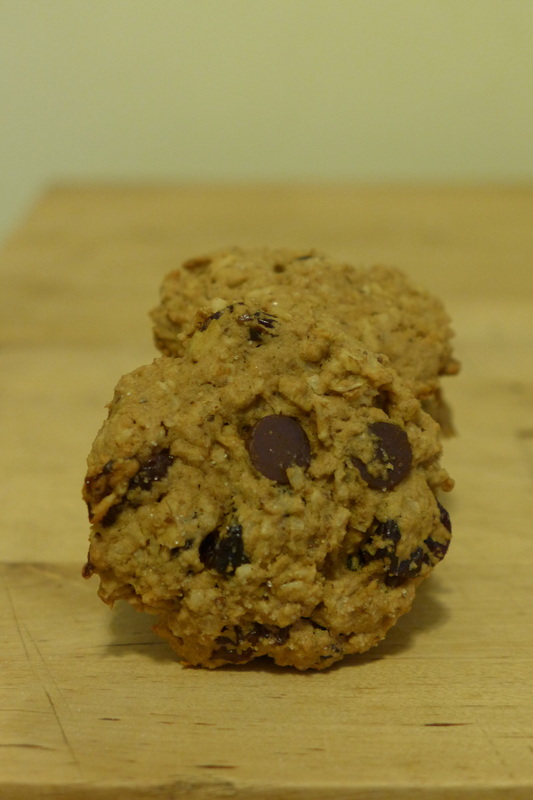
Chocolate Cherry Ranger Cookies
Yield: approx 48 cookies Adapted from Better Homes and Gardens Ingredients
Instructions
Oh-and P.S.-Tomorrow is also special because it's the Game of Thrones season finale! Get pumped!! 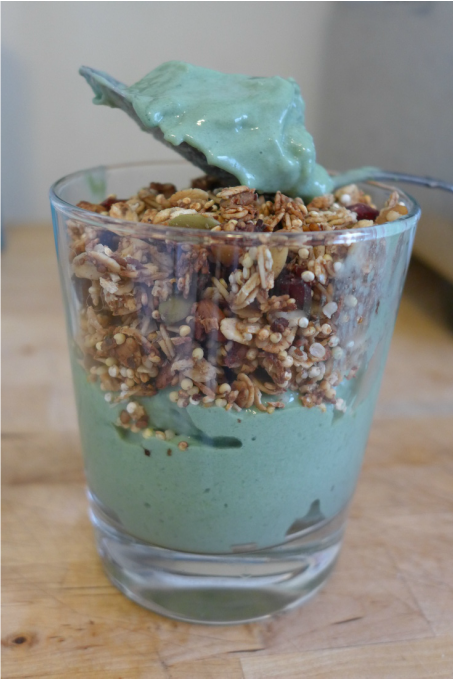
So, like I said, I'm still on my "spring cleaning" detox theme. Any detox that involves delicious ice cream is good for me! This idea started with a granola recipe. I was never keen on buying pre-made granola. Even though some varieties are very high quality, they can cost a fortune! Realistically, it's far cheaper to buy organic oats in bulk and then toast them yourself. Yep. Granola is basically toasted oats with stuff mixed in it. I also like making granola at home so I can control what goes in it. Too often are pre-packaged cereals laden with added sweeteners and oils. Some fat and sweeteners make granola delicious, this is true. However, I like to keep these ingredients in check for both health and flavor. Granola that is as sugary as candy doesn't do anyone any favors. This granola is great because it's also multi-grain! I added some millet and quinoa for nutritional and textural benefits! I love the cunch the two grains add to the granola. By using the base ingredients for this mixture (oats, quinoa, millet, liquid ingredients...) you can change up what nuts/seeds/dried fruit/chocolate(!) you add. Customize and have fun! Granola is also wonderful (let me count the ways!) because you can always serve it with something. I love using granola as a topping or garnish for breakfast porridge, smoothies, chia pudding, and ICE CREAM!!! I devised a completely clean and naturally sweet ice cream that can be eaten for any meal or snack of the day. This concoction is basically a bunch of fruits blended together with a bit of spirulina...not complicated at all! (It's also a lovely mint green color that is absolutely adorable!) Go ahead, whip some up for a midnight snack! If you wake anyone up with the sound of the blender, appease them with ice cream and send them back to bed. #Nobigdeal 
Oh, yeah.
Avocado Ice Cream and Granola Parfait Serves 1-2 Avocado Ice Cream Ingredients
Blend all ingredients together in a high speed blender or food processor till smooth. You may add a little liquid if it needs help moving (water, coconut water, non-dairy milk). Consistency will be like frozen yogurt soft serve! YUM 
Gluten Free Multi-Grain Granola
Yield: approx. 3 cups Ingredients
Instructions Preheat oven to 375. Combine all wet ingredients and spices in a bowl and microwave to melt the coconut oil. Pour the mixture into a blender/food processor and blend until it forms a thick paste. In a separate mixing bowl, combine all other ingredients with a large spoon. Pour the wet mixture into the dry and combine. Spread granola on a baking sheet and bake for about 17 minutes, tossing everything about half way through baking time to ensure even cooking. Let cool and munch! =) Happy parfait making!! ^_^ 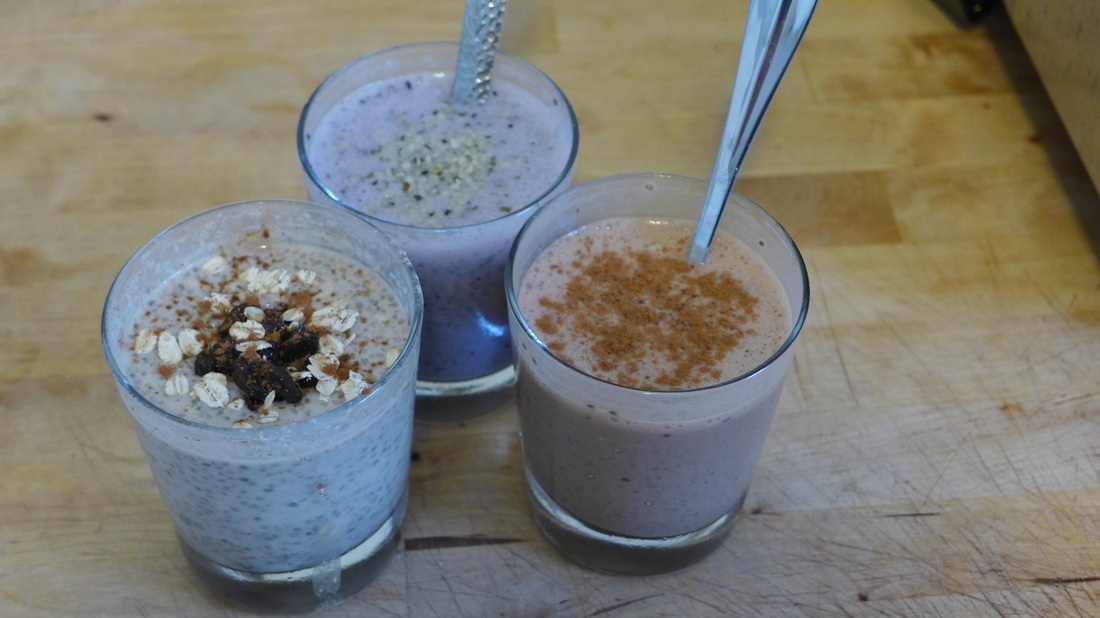
Lately, the weather has been warming up quite a bit! There were a few days last week that felt like summer had decided to come early, but they came and went so quickly. I honestly prefer spring temperatures that hover around the high 60's-low 70's. That's my happy place. When the weather changes, I try to change my eating habits to suit the energy of the air. In very hot conditions, my body seems to crave more raw foods or lightly cooked foods. This is true of most people, I would think. A huge bowl of soup in 85 degree weather seems a bit unappealing, unless the soup is chilled. I will still drink hot tea and coffee in the summer, but only when the temperature drops when the sun goes down. This pattern of eating is difficult for me because I LOVE hot food. The fall and winter are my favorite seasons because warm foods are back in vogue and they keep me cozy in the chilly air. This year, I am determined to get myself excited for spring and summer foods. I'm trying to eat more raw at this time. It's almost like a spring cleaning or "detox" for my body and eating habits before the sweltering heat of summer arrives. Breakfast has been a bit of a challenge for me to convert to raw food mostly because it usually consists of some hot porridge, hot rice, hot soup, hot tea...ANYTHING hot! I've known about chia pudding for a while now and I've tried it a few times. Only recently did I realize how versatile and amazing this concoction is! Thanks to a bunch of awesome healthy Instagrammers, I've gotten a ton of #foodspiration on how to make raw breakfasts interesting. I've pretty much been obsessed with chia pudding and overnight oats for the past week now. I eat some form of them every morning. This is wonderful for my sleep patterns too because I can mix my ingredients the night before and they create deliciousness in my fridge come 3:30 am when I wake up! (I know...insane.) This post is dedicated to three of my favorite raw breakfast puddings that I've created lately. I am constantly trying new flavors and ingredients to mix things up. It's similar to what Chocolate Covered Katie does with oatmeal and baked oatmeal. Please check out her recipes if you love oats and tasty dessert-inspired flavors! They're delectable! I will definitely take her lead and try to create more fun flavors for my breakfast puddings. I'm just getting warmed up! (Or...cooled down?) 
Oatmeal Raisin Cookie Chia Pudding Serves 1 Ingredients
Instructions Blend the oat milk, vanilla, maple syrup and cinnamon in a blender to dissolve (or whisk briskly! try saying that 10x fast...). Pour in a glass/bowl and stir in the rest of the ingredients. Place in fridge overnight. Top with some coconut sugar if desired and savor when you're ready for breakfast! Oat Milk Yield: 1 cup Ingredients
Instructions Blend all ingredients in a high powered blender until completely smooth. Use to drink, in cereal, in baking, sauces, soups, or smoothies! 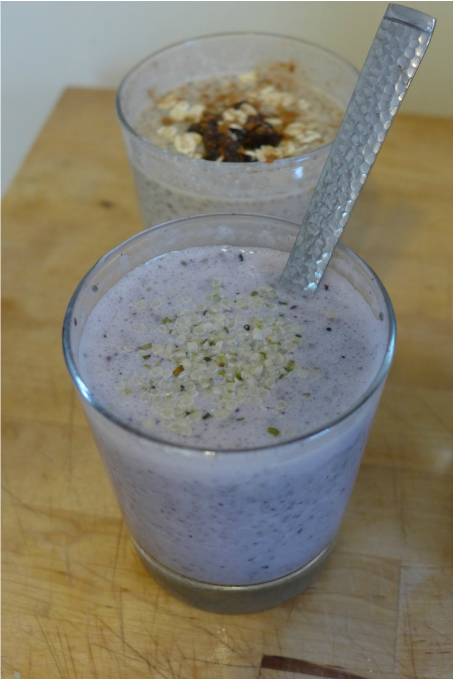
Blueberry Pie Chia Pudding Serves 1 Ingredients
Instructions Blend all ingredients (only 1 Tb of the berries) except chia in a blender, but not until smooth. Some pieces of blueberry are okay-you are just looking for a nice purple hue! Stir in the other 1 Tb blueberries and chia seeds. Let set in the fridge overnight. 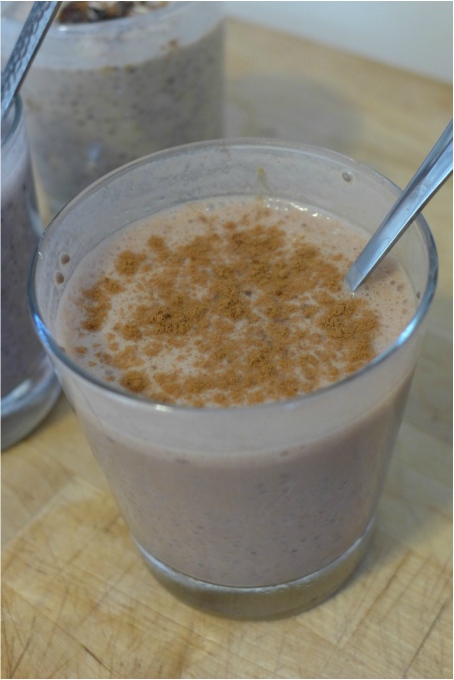
Cinnamon Mocha Chia Pudding
Serves 1 Ingredients
Instructions Combine all except the chia seeds in a blender to dissolve. Pour the mixture in a glass/bowl and stir in the chia. Top with some cinnamon or cocao powder. Let set in fridge overnight. Use it to recharge in the morning! #screwstarbucks If you want to see more foodspiration, check out my new Instagram page! It's just pictures of things that I eat in (mostly) real time! Like I said, I'm totally addicted. =D 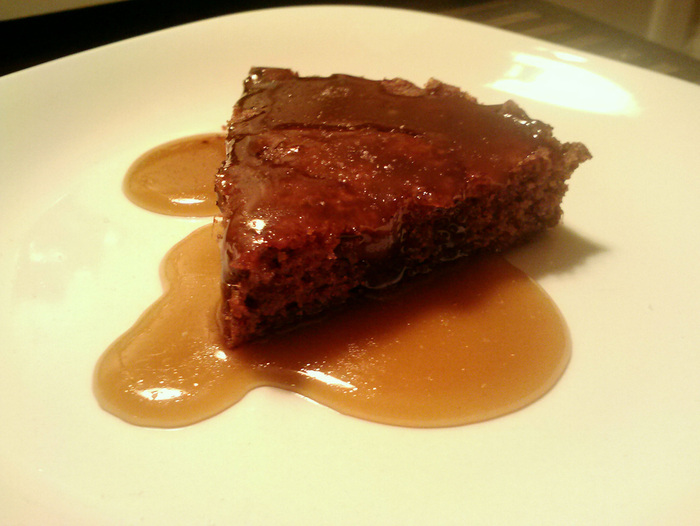
So, Vegetarian Times and Arrowhead Mills are hosting a gluten free holiday re-do contest. When I saw this, I screamed like a little fangirl and automatically reached out to my mom for a family recipe to enter. She and my grandma unearthed a recipe from my great-grandmother: Steamed Pudding. Not having grown up eating this recipe, I immediately envisioned a steaming jell-o mold. This is definitely not what steamed pudding is (thank God)! This specific recipe is technically a steamed date nut bread, which my mom grew up eating each Christmas. I was excited once I saw the ingredients. It's was simple to make and it wasn't hard to convert to a vegan and gluten free delight! 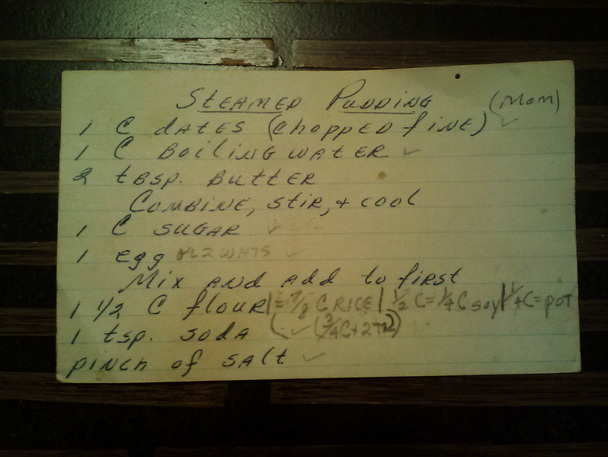
My great-grandma's original recipe. You can see where my grandma marked her changes in with pencil. She had her own blend of flours that looks way more complicated than mine!
Usually when I try to veganize and de-glutenize an old family recipe, things go wrong for the first few attempts. I've learned over the years to have very low expectations! It's just the nature of gluten free baking, I suppose. Vegan baking has become second nature to me now, so that I'm not too scared of. The gluten free flours that I've experimented with don't even scratch the surface of their vastness. There are so many flours to choose from and so little patience I have! If you do venture out of the prepared gluten free flour blends (which can be awesome!), you will have to prepare yourself for a little trial and error work. After using grain flours like sorghum, teff, millet and rice in baking, I now have a (somewhat) better understanding of their properties. Sorghum is fattier and makes very moist but crumbly cakes. Teff is similar in texture, but I find it to me more crumbly and have a more pronounced flavor. Millet and brown rice flours are my favorite to use because of their mild flavors and their lighter texture. Rice flour is lighter than millet, so I usually use more of it in my ratio.
In the beginning, I was very irritated with xanthan gum. This is used to replace the bounciness of gluten in gluten free recipes. One time, I used way too much in a cookie recipe and my cookies had the consistency of glue. Gross. After omitting xanthan gum from my recipes after that, I learned my lesson. Xanthan, like all fine things, needs to be used in moderation (most of the time, sparingly!). I have begun to use it again because my baked goods would come out to be too crumbly and fell apart. The xanthan gum, when mixed with flax seed "eggs", helps to bind batters together and give them a sturdiness that gluten would normally do. I use only a quarter teaspoon here, but it makes all the difference. I kept the flavors the same in this recipe. Although, if you would like to experiment with different nuts and/or dried fruits, feel free! I used hazelnuts for this batch, but I would definitely like to use pecans or walnuts to see how the texture changes. Also, you do not have to use the sea salt as a garnish, but I highly recommend it! It's a simple yet extraordinary experience to taste sweet and salty together. Mmmm... So, without further a-do, my 4th generation vegan, gluten free steamed pudding! Date Nut Steamed Pudding with Salted Caramel Sauce Yield: 6-8 servings *Note: You will need a steamer to make this recipe the traditional way. However, I've tried it in the oven and it comes out pretty good that way. I'll include those instructions too! Ingredients
Instructions In a small pot, bring water to a boil. Add the dates and oil/Earth Balance. Lower heat to medium-low and stir until thickened, about 3 minutes. Turn heat off and add sugar, flax, vanilla, and vinegar to the date mixture. Let it cool while you prepare the dry ingredients. Sift together the flours, spices, baking soda, baking powder, salt, and xanthan gum. Add the wet ingredients to the dry and stir to combine with a sturdy spoon. Fold in the nuts, if using. Prepare a stove top steamer by filling the bottom with water, making sure to leave some room between the water and the pot. Pour the batter into the pot and steam for about 2 hours or until a cake tester comes out clean. Check the water level periodically to make sure there is some still in there. Let the pudding cool thoroughly before turning it out onto a plate or platter. Serve with the caramel sauce and perhaps a sprinkling of course sea salt (if you wanna). Sing Christmas carols. If you want to bake the pudding instead, grease a loaf pan or line a muffin tin with liners and pour/scoop the batter in. Bake at 350 F for about 25-30 mins for muffins and about 35-40 for a loaf. Make sure to test the pudding with a cake tester or toothpick before removing it. The batter is quite moist and it can be hard to tell when it's finished. Salted Caramel Sauce
Instructions In a small saucepan, bring sugar and oil/Earth Balance to a boil. Let boil and thicken, stirring to make sure it does not burn. Once thickened, lower heat and add salt, vanilla, and milk of choice. Turn heat up to medium-low and stir until thickened and glossy. Pour on top of pudding and devour! P.S. If you'd like more information about the Vegetarian Times contest, visit this link. I'm excited to see what everyone makes (so I can take their ideas! =P)!  Welcome to Ichiban Vegan!
This is my blog that covers all kinds of seasonal vegan recipes that I create and/or adapt. Since I decided two years ago to cut all animal products from my diet and spending budget (no more leather and cheese sandwiches!), I have been on a mission to sharpen my culinary skills and master the use of all plant based ingredients. All the while, I try to make food that I would want to eat even if I wasn't vegan. I've found that by thinking this way, I can sell my food to non-vegans fairly easily. I mean, let's face it. If you hand someone a plate of delicious pumpkin snickerdoodles, you don't really need to tell them that you didn't use eggs or butter, right? Until, after they've eaten 10 of them, you say, "Oh, so those are actually vegan!", will they look at you in astonishment and/or horror. Luckily, throughout the past two years, my family and friends have been very supportive of my lifestyle. I was hesitant at first to attempt to cook things from scratch with the idea that my skills were not as honed as they should be. In order to produce palatable vegan food for those who aren't too keen on vegetables can be a bit of a challenge. Most people when they hear the term "vegan" automatically think of a block of tofu and a big question mark. They also like to throw you pity parties whenever they mention meat. "Oh, but you can't eat that...", they say with a false sense of remorse. I just want to say that I really find this funny; I don't find it offensive at all. I always laugh along with people when they make fun of my diet. I realize it seems extreme to many people, but I also realize that everything is relative. In case you didn't notice, I'm taking this opportunity to tell my vegan origin story. I know no one wants to hear it every single blog post, but they may be curious later on. Many people ask why I live and eat the way I do, so now they have a convenient place to go read about it (and I can get on with my day...just kidding =P). Going back to when I was a senior in high school, I decided to give up meat for New Year's because one of my best friends was a vegetarian and she had introduced me to classic veg foods like falafel and hummus. These are staples in my diet now, but back then they were strange and exotic treats that I was in awe of. (WTF are chickpeas?!) Since I found new foods that were meat-free, I thought I could give up meat and be totally satisfied. Well, I was right. My diet then consisted of lots of pretzels, grilled cheese, and frozen veggie burgers made from GMO soy. YUM. Well, at least no cows were harmed in the process. (Or so I thought!) The funny thing is, I still ate fish for years after I gave up meat. I became what I found to be a "pescetarian". I loved the diet. I ate all the sushi I wanted and didn't feel guilty. Because, let's face it, fish don't have souls, right? That was my thinking. Or rather, I didn't think of it at all. Inside, I knew I was contributing to the death of a living thing, but I let my taste buds run the show. To this very day, I still remember how delicious fresh fish tasted. It is the one thing I miss the most. I often tell people that so they understand that I'm actually a former person (I'm being sarcastic, I hope you realize! ^_^). I also wanted to stay true to the way I grew up. My all-time favorite comfort meal was broiled fish and gohan, Japanese white rice. My heritage is definitely something that has inspired me to cook the way I do. I am a cluster of ethnicities, one of which is Japanese. My paternal grandmother (Ba-chan!) is from Japan. On both sides of my family, I come from WASP ancestors who hail from Ireland, England, Wales, Poland, and Germany. There's also a teeny bit of Spanish and Italian Catholics in there. (That and the Japanese really throw people off.) I've always loved learning about peoples' ancestry. It's one of the great characteristics of America. You never know who will show up (or what food they'll bring)! I always try to mix things up by taking inspiration from other cultures in my cooking. I think that is one of the best ways to connect with others apart from language. Sometimes, vegan diets can be boring (just like any diet!). One of the ways I make food interesting is to use different ingredients. The word ichiban means "number one" in Japanese. I used this term in my blog name because I hope to create the best possible vegan food that I can with all types of ingredients. Most of my food will be free of gluten, if not all of it. Gluten-freedom comes from my other side of the family that carries celiac disease. I've grown up with my grandmother being gluten free and eating that way when I visited her. She always struggled to find good packaged foods to eat. My mom was diagnosed later in life once her symptoms became too unbearable. I haven't been diagnosed, but I decided recently to try gluten free cooking and baking just to force myself to become more creative. I realize that, like anything else, variety is the spice of life! So, using wheat for everything is probably not ideal. As far as why I'm vegan, I direct you to Food, Inc. and The Vegan Girl's Guide to Life. Those books peaked my interest in the diet and also in the ethics surrounding said diet. My decision was an "experiment", just like my decision in high school to be a pescetarian. As for the first few weeks, I was upset I couldn't eat sushi. Other than that, giving up dairy and eggs was easy. I was already drinking almond milk all the time, so that wasn't an issue. In a culinary sense, eggs are only useful to bake with in my opinion. Otherwise, they often made me sick when I ate them anyway. Not an issue there, either. After two years, I barely think about cheese or eggs as food. I don't crave them at all. (Plus, there are some REALLY good ways to substitute them. I'll just say, thank God I'm not allergic to nuts or seeds!). So, here I am: a vegan in her early twenties with a food obsession. What else is there to do but blog about it? =) Now, with all the origin story crap out of the way, I'd like to get to the fun part: COOKIES! These snickerdoodles are a fall celebration in your mouth. Snickerdoodles are traditionally a Christmas cookie in my family. My grandma would make them with us every year and I couldn't get enough of them. Once I started baking on my own, I made sure to make them for Christmas whether anyone else wanted them or not. (More for me!) I decided that I didn't want to wait to eat my beloved snickerdoodles this year. As soon as October rolled around, I switched into Fall Mode. That means cinnamon on EVERYTHING! Cinnamon toast, cinnamon oatmeal, cinnamon tofu...it's all fair game. Naturally, I think of snickerdoodles when I think of cinnamon. But, in order to appease the retail gods who tell us that we should put pumpkin into everything once September comes, I decided to alter my recipe. Pumpkin-doodles, it is! I used pumpkin pie spices to coat these cookies for a little dimension. Really, this recipe isn't that original. But, these are mine! I adapted them from my family's go-to recipe for every Christmas. I love snickerdoodles for their airy and crumbly texture. These are a little bit more moist in texture from the pumpkin. This is definitely not a bad thing. They almost resemble a cross between a cookie and a quick bread. You will find out sooner or later that I am a bit obsessed with quick bread, my favorite baked good in the universe (along with it's portable alter-ego, the muffin). Please feel free to enjoy these cookies with friends and family, the way they should be (ie, a batch for you and a batch for them!). Here's to a new blog and new beginnings! I hope after this rant you will still follow me on my vegan journey to achieve deliciousness! Kanpai (Cheers)! Pumpkin Spice Snickerdoodles Adapted from Better Homes and Gardens Yield: approx. 25 cookies
Notes * I find that the cookies appeal to those who aren't used to coconut sugar's mild sweetness with the addition of the cane sugar or sucanat. If you prefer your cookies more subtly sweet, omit this. ** You can also use a silpat. Otherwise, lightly grease your cookie sheet to avoid a catastrophe. =) |
I'm Jess!This is my very first food blog! I post revised conventional recipes of foods that I hold near and dear to my heart. My cooking here is all gluten-free and cruelty-free, but full of flavor and comfort.  


 Archives
December 2017
Categories
All
|
 RSS Feed
