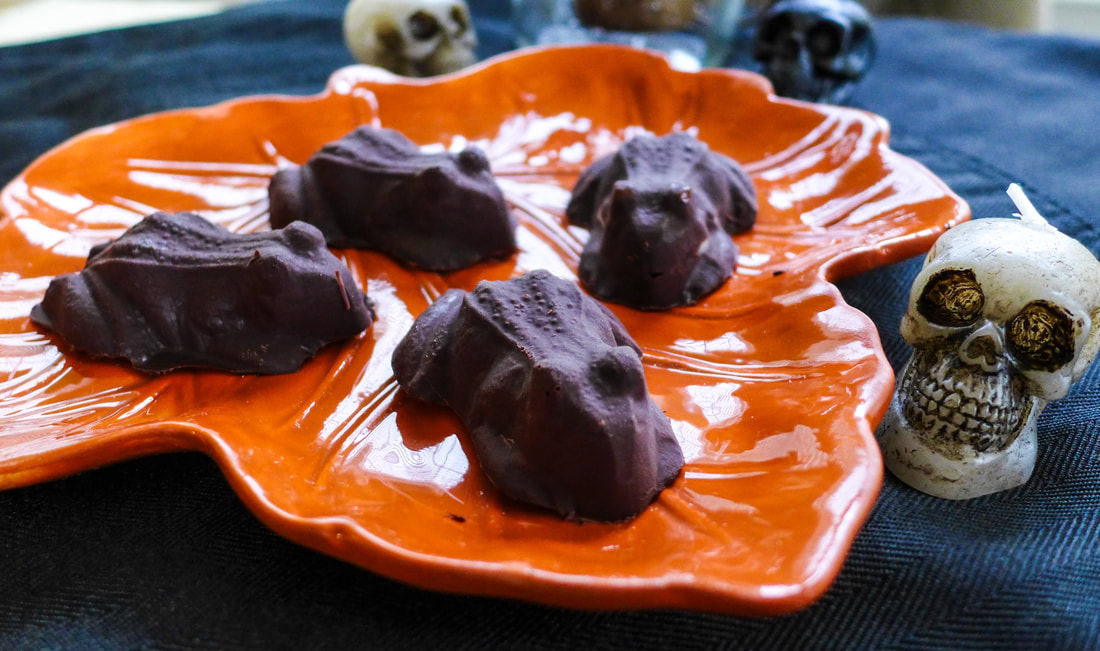
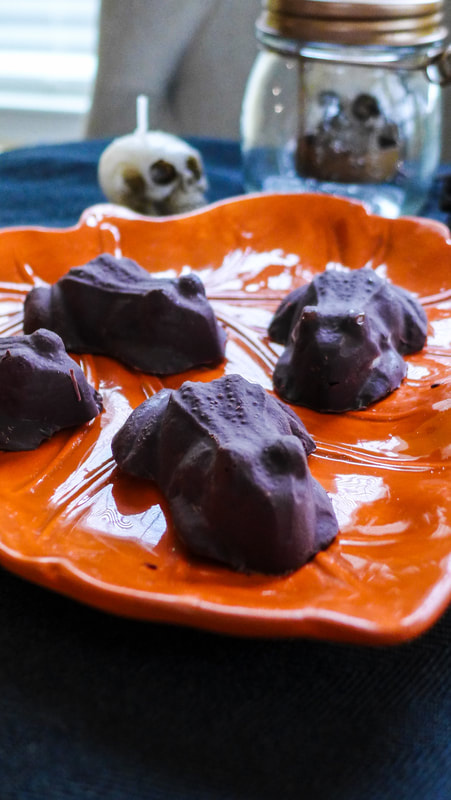
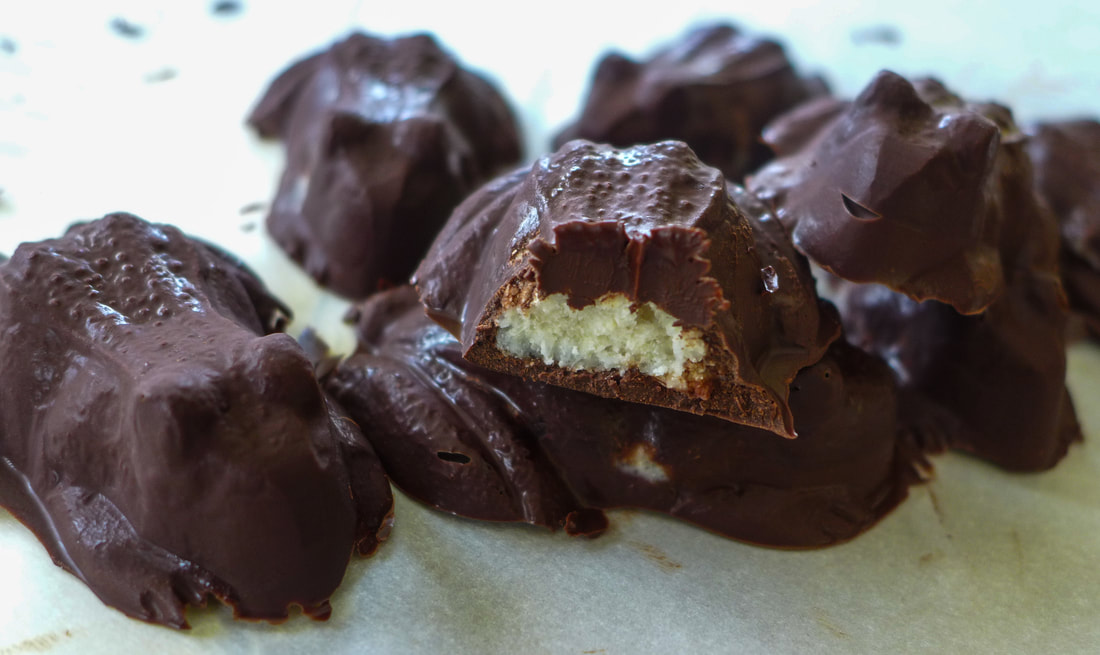
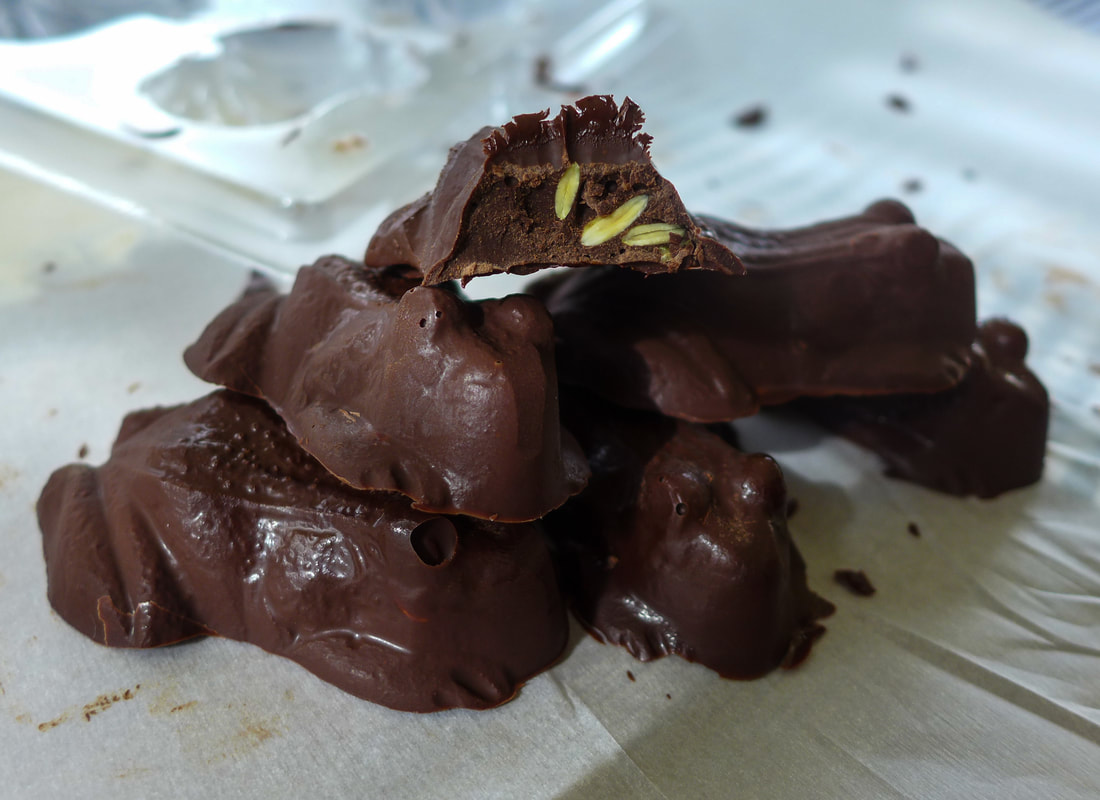
 For my Halloween post, I wanted to make something chocolate and fun, but still pretty simple. So often it is difficult to come across vegan chocolate candy to purchase. I love all the chocolate bars...they were my favorites growing up. I'm not a huge fan of fruit flavored candy with the exception of Skittles and Twizzlers. Luckily, they're both vegan (though not healthy at all) so I still get to indulge in them once in a while. Chocolate bars, at least conventional ones, are very much not vegan (with the exception of Peanut Chews, which are accidentally vegan). I usually just end up buying a bar of Endangered Species dark chocolate as a treat sometimes. I'll break off a square here and there if I want something sweet, bitter and caffeinated. Sometimes, though, I like to have a little fun with my chocolate! It brings me back to my bakery days... We used to make chocolates using various molds for holidays, cake garnishes, and special orders quite often. I decided, since I don't own one, to buy a chocolate mold for myself. This is my first investment: frog molds! Because, duh, CHOCOLATE FROGS! I've already posted a recipe for rock cakes this year. I decided to take my Harry Potter inspiration to this post with vegan chocolate frogs. I couldn't get these frogs to move on their own, unfortunately (but not from lack of trying). They are, however, delicious. The best part about them is that they are whatever chocolate you would like them to be. You can choose your own percentage of dark chocolate, make chocolate from scratch, buy vegan milk chocolate, or even vegan white chocolate! I decided to use vegan chocolate chips for mine since they were readily available. There are a ton of raw chocolate recipes out there, though. Check them out and experiment! The mold will always be there waiting for you. I made two flavors of frogs here. The first one is stuffed with vanilla coconut butter. I wanted to try my hand at making homemade coconut butter finally. I saw a post from Chocolate Covered Katie forever ago about how to do this and I've wanted to ever since! The Minimalist Baker also has a great tutorial. But, in a nutshell, you're basically pulverizing dried coconut until it becomes a paste (nut butter-like) consistency. It takes a lot of patience, but it's so worth it! Coconut butter comes with a high price tag in stores otherwise. This is a great economical option if you're going to use it for a recipe especially. The other frogs are pumpkin spice flavored. No, there's no actual pumpkin in them. However, there are pumpkin seeds and pumpkin pie spices. They're deliciously festive for Halloween! The pumpkin seeds are also a good nut-free alternative for those who are allergic. There are instructions provided here for you, but feel free to take the idea and run with it! Chocolates are easy to make and even easier to customize. I recommend storing these in the freezer long term. If you want one, take it out and let it come to room temp before enjoying! If you will be consuming these quickly, keep them in the fridge. Have a spooky day, everyone! 🤡😈☠👻👹🌕 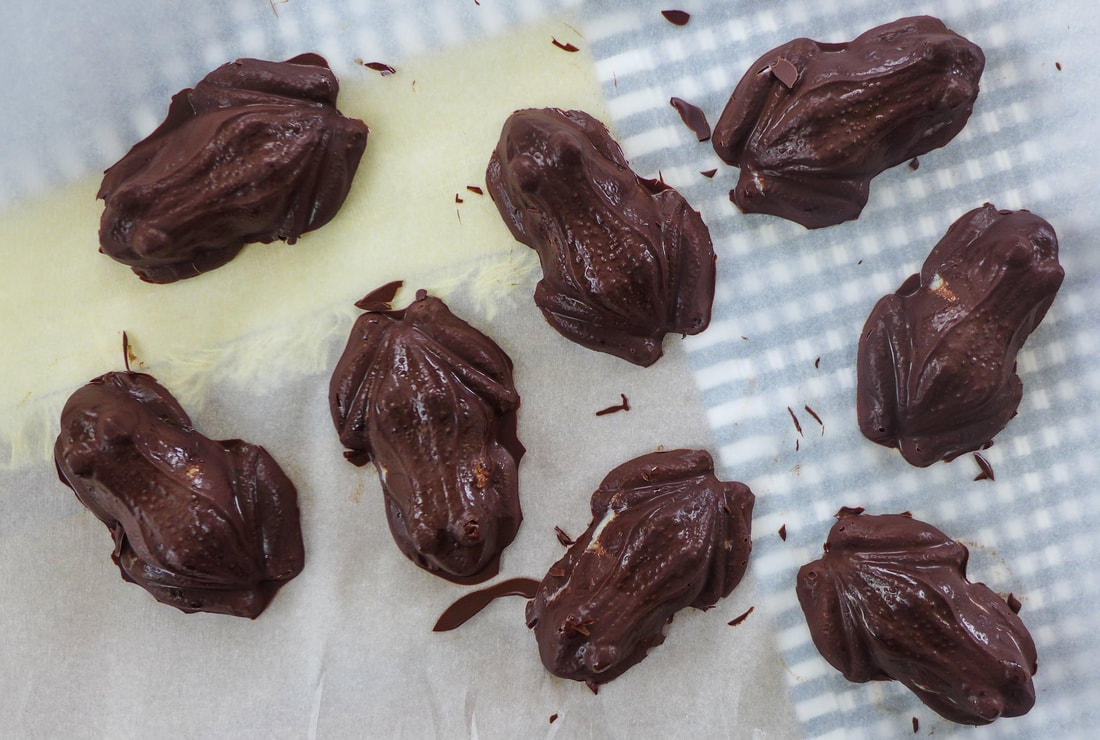 Vegan Chocolate FrogsIngredients Yield: Makes about 12 frogs depending on the size mold you use Free from: Nuts, Gluten, Soy* *Use soy-free chocolate for this option
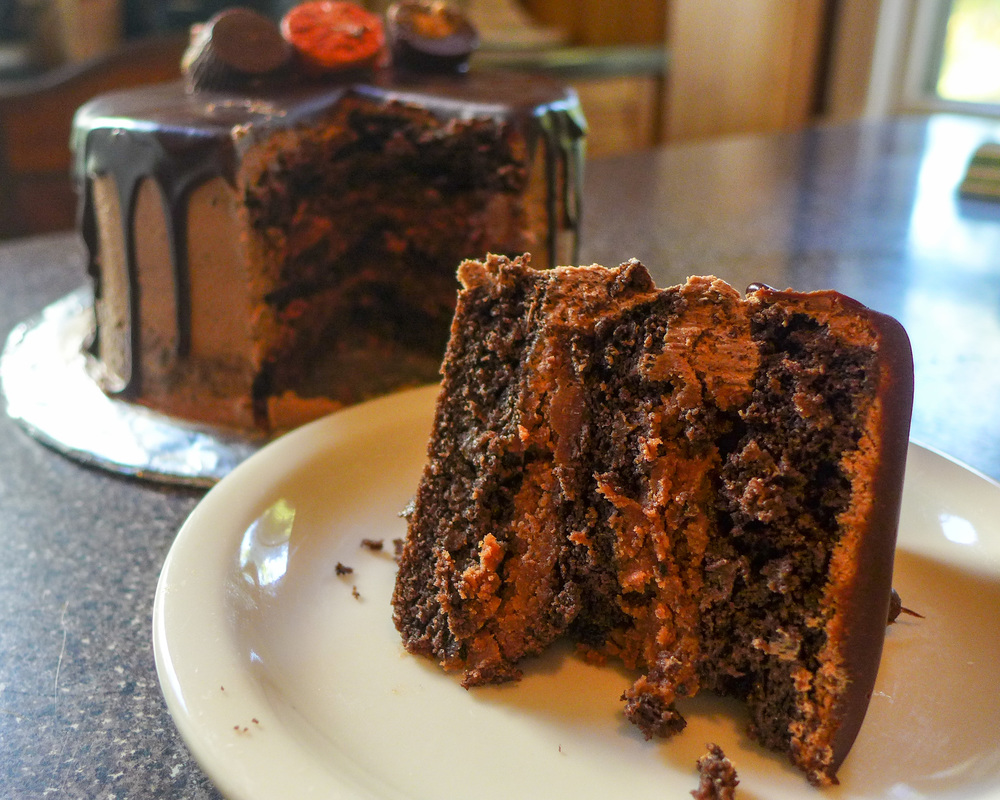
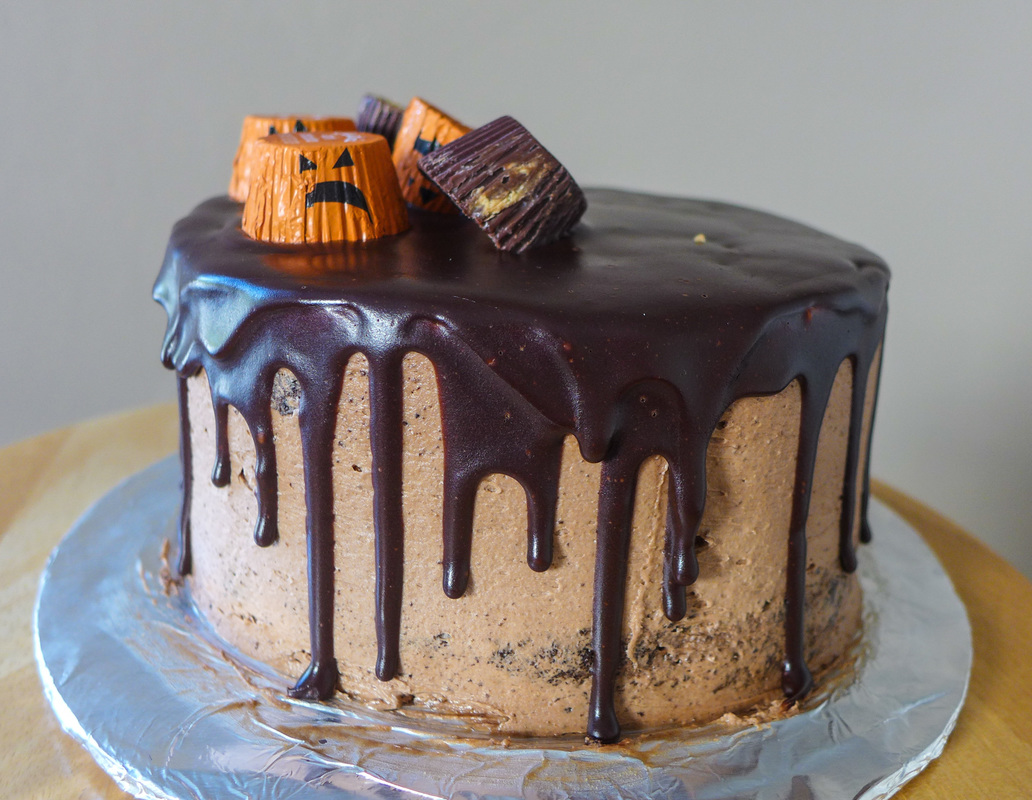
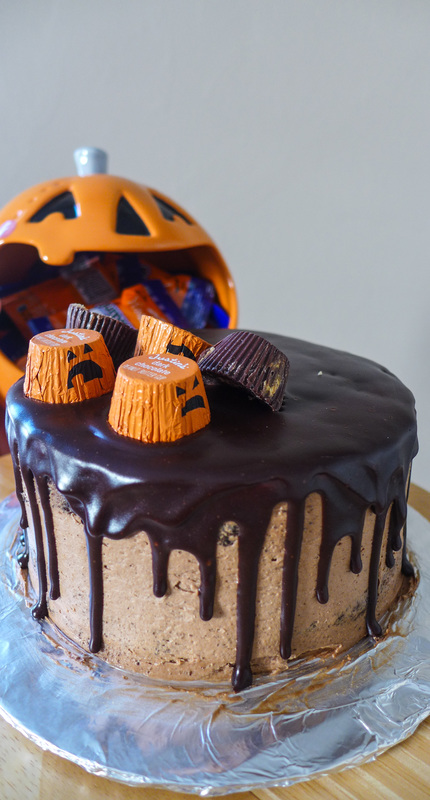 He wants a piece o' that. Fall is here! This October, my posts are going to be Halloween all the way. Candy-themed delights, fun colors, and fall-inspired flavors. I'm kicking it off today with a doozy: Chocolate Peanut Butter Cup Cake ! One of my favorite candies growing up were Reese's peanut butter cups. This was a strange anomaly for me, however, because I actually despised peanut butter throughout my childhood and adolescence. It wasn't until college did I finally warm up to nut butters. Being a broke vegetarian responsible for buying food will foster creativity. I began to try almond butter around this time, which I didn't totally dislike. I think this was mostly because of almond butter's more mild flavor. I also bought all natural almond butter, because it was all I could find at the time. I had grown up finding regular sickeningly sweet and pungent peanut butter horrifying, especially to smell. Once I decided that almond butter wasn't so bad, I decided to try sunflower butter. That stuff, man. Let me tell you, I became infatuated immediately. It's deliciously sweet, a little roasty, creamy and mild in smell. I loved it and couldn't get enough of it. After buying a couple jars, I realized that sunflower butter was very expensive. So, I decided to finally give peanut butter another go. This time, I bought creamy all-natural peanut butter with no added sweeteners or oils. I was amazed. The texture was very similar to the almond butter that I used to buy. The taste was a little more pungent than sunflower butter, but it still had the earthy tang that I had grown to love. I've been a huge peanut butter advocate ever since. Actually, I've grown to love all types of nut and seed butters. I'll try anything that's creamy and spreadable. But, anyway, back to peanut butter cups! I've actually always loved peanut butter cups. I'm a big chocolate fan, as many people are. I found the sweet and roasty chocolate a great foil to the peanut butter as a child. The overly-sweet peanut butter icing inside was tolerable just because of how sweet it was. I think if I had never grown to like peanut butter cups, I would still be averted to peanut butter today. So, even though Reese's are certainly not vegan, they did help me to move towards a path of peanut acceptance in my later life. So, for that, I thank them. <3 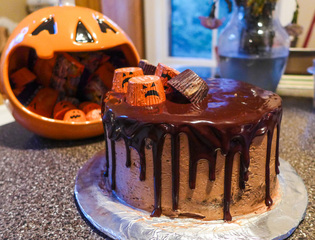 As for this cake, I've combined my age-old love of chocolate and peanut butter and created a cake that's perfect for celebrating the greatness of anything, weddings, birthdays, Halloweens, Christmases, anything you want! For me, peanut butter cups are almost a symbol of Halloween in today's consumer culture. So, why not play along a little? Except, ditch all the junk. You don't need that cramping your cake style. I always opt for natural (or if not, organic) peanut butter. I don't really like extra sugar or salt in my nut butters, but if they are GMO-free, they're alright in small amounts. The sugar I used is also organic, to ensure that it contains no animal products or GMO's. The mousse was fun to make. I very loosely consider it to be a "recipe" here, since I just whipped up some aquafaba and mixed in peanut butter and sweetener. Nothing too complicated, but the result is to die for! As far as the decoration of the cake, I went for a very simple look. This could also be done as a super lazy sheet or pan cake. After the cake is cooled completely, just layer the mousse on first and spread evenly. Then, pour the melted ganache all over the top to seal it. Let the cake sit in the refrigerator for a few hours or overnight and you will have an equally delicious and no-muss no-fuss cake to serve and eat immediately! Alternatively, you can cut, fill and ice it like me. But only if you want to. 😛 Here's to a very delicious October and Halloween! 🎃 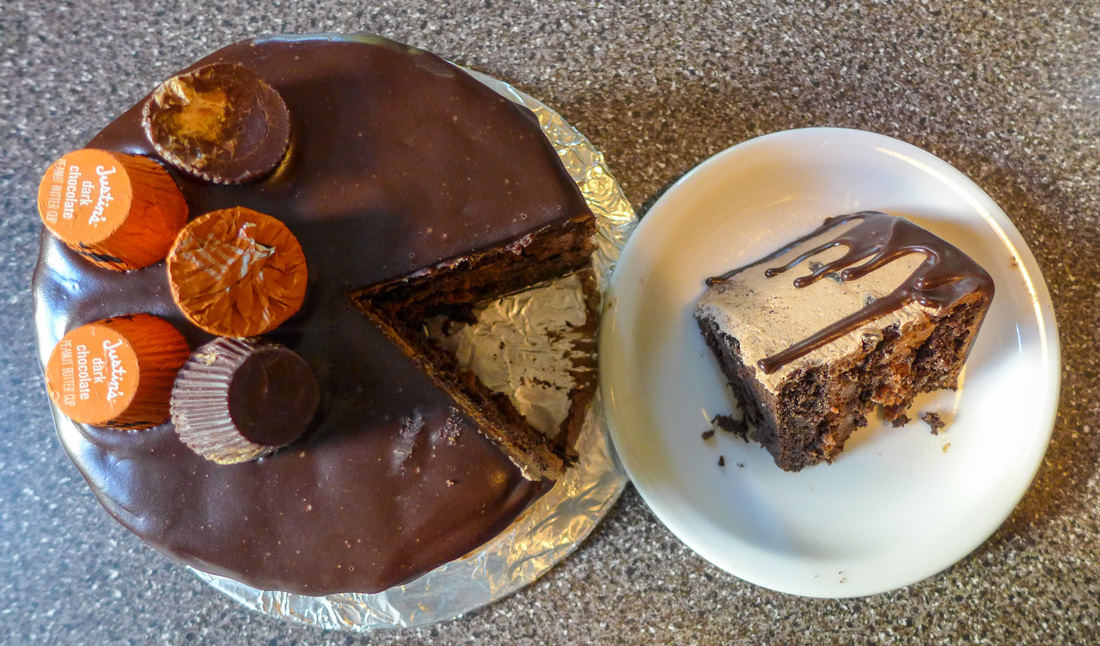 Peanut Butter Cup Cake
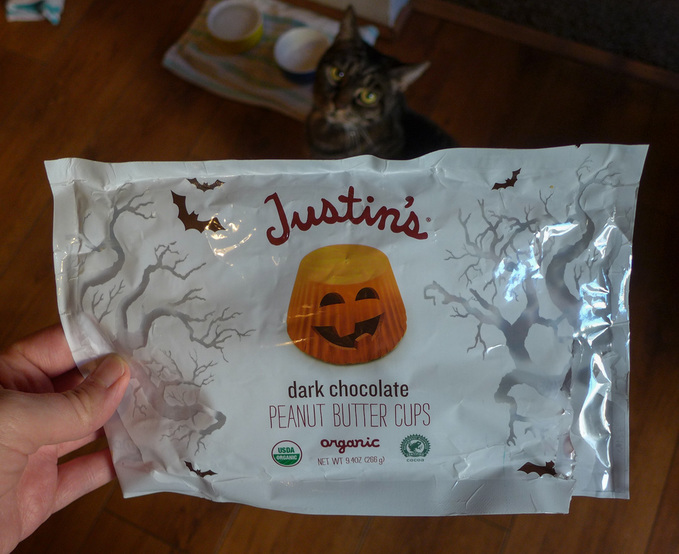 Photobomb by Gretchen. <3 Instructions Preheat oven 350 F.
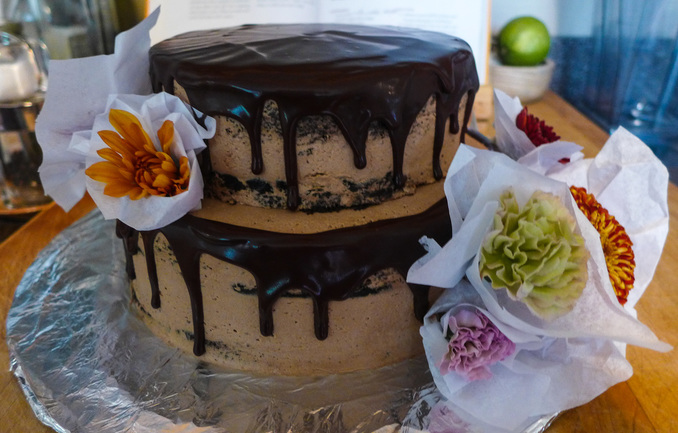 Alternate prep for a wedding! I just propped some fresh fall flowers on the outside for color! Ganache Again. this is a rough recipe as ganache is pretty easy to eyeball. You want a consistency that is pourable yet thick enough to hold its shape. I'd say a 1 to 1 ratio of chocolate to liquid is a good starting point, and then add more of either to adjust as needed. Definitely let the ganache cool for at least 15 minutes before garnishing your cake. Otherwise, it will run everywhere!
In a small saucepan, melt the chocolate and coconut milk together on low heat. Stir constantly with a rubber spatula. When mixture is fully melted with no lumps, remove from heat and let cool before using, or pour directly onto some ice cream (if you happen to have any). 😜 Assembly and Decoration For the assembling of the cake, I made a slide show to demonstrate how to put everything together. If you've never iced a cake before, then I suggest you search a tutorial because I haven't got one here just yet! It's simple, but if you don't want to be bothered, I totally understand. That's the beauty of making cake...you can do it so many ways! Bake in a sheet pan, slap the layers on and be done! But, if you want to be fancy, here are the steps:
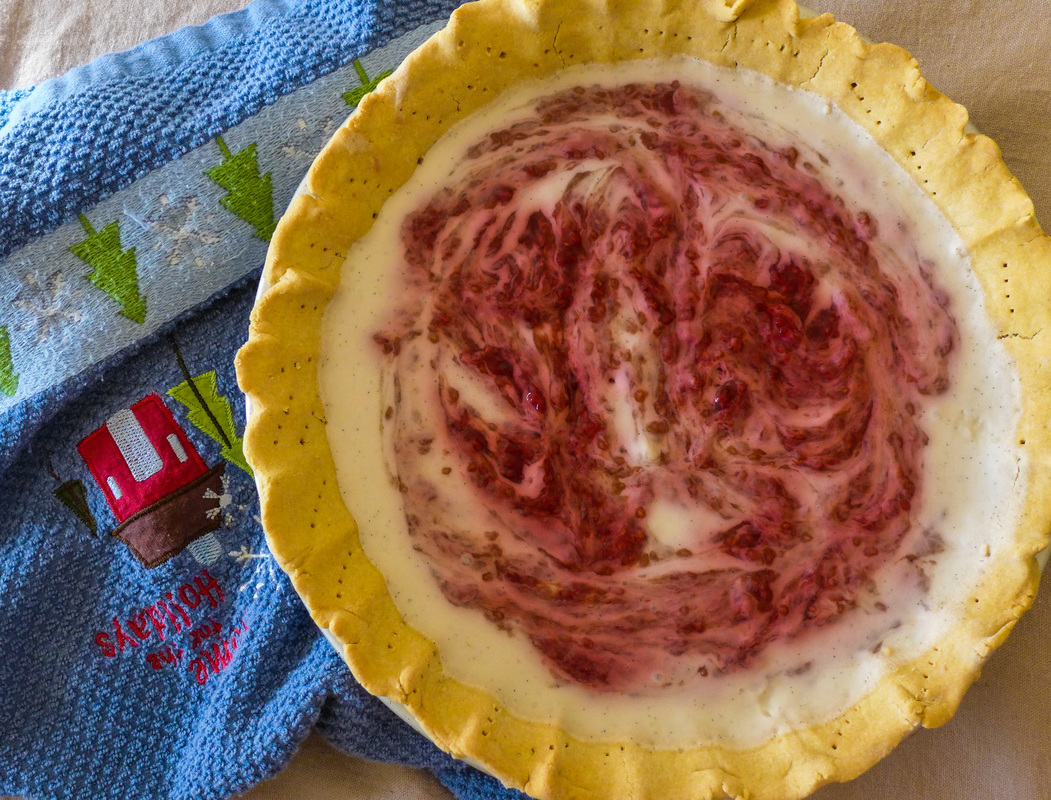
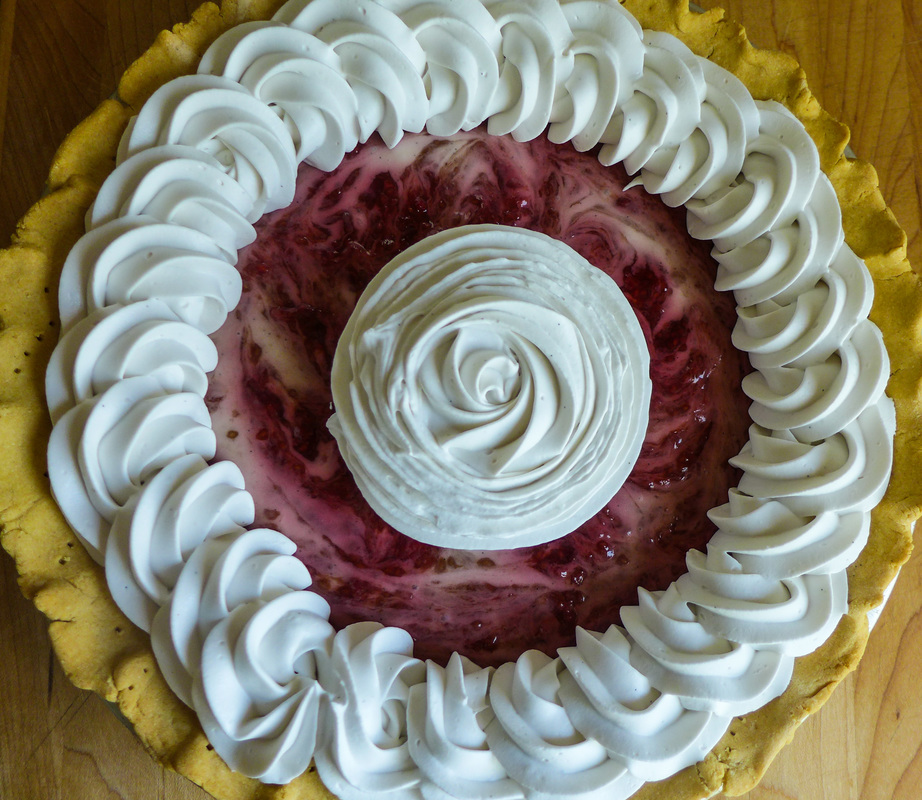
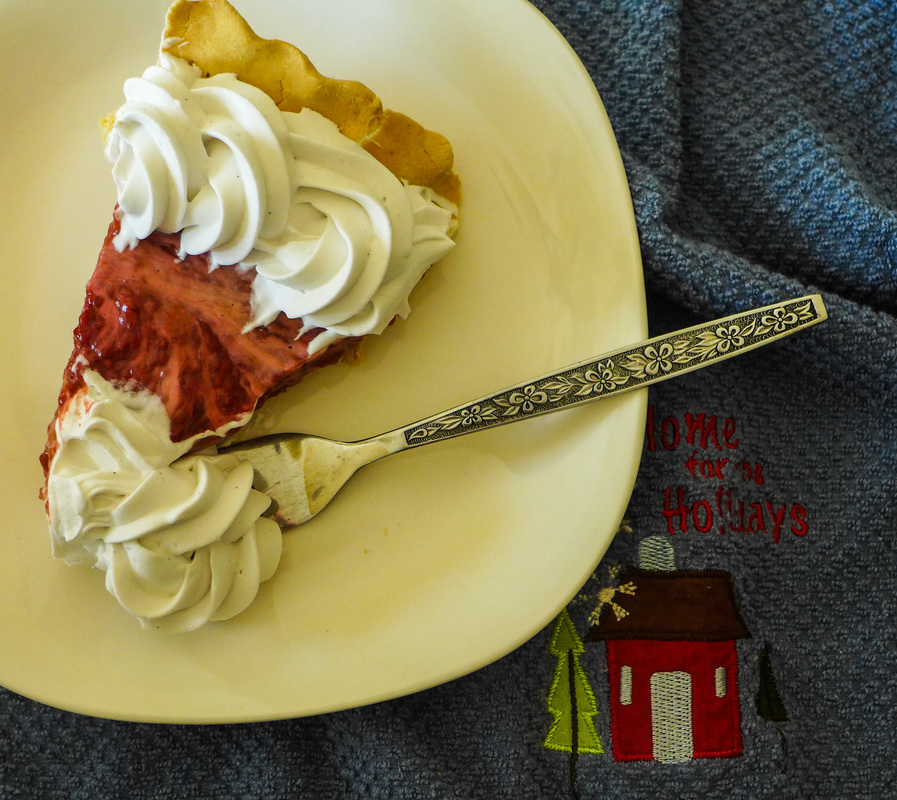
  It's a perfect autumn day. I've got a pumpkin candle burning, hot coffee and a turtleneck. What could be more perfect? Oh, pie? Yeah, that would be cool. I'm going to begin my long string of posts leading up to Thanksgiving with a pie recipe. This pie isn't your typical holiday fruit or squash custard pie. Nope. It's actually a recipe that seems more like something you could bring to a Fourth of July barbecue. This is a cold refrigerated pie that only requires baking if you are making your crust from scratch. What a weird thing to feature for the holidays, you may think. My reasoning behind this recipe was to feature something that could be as quick and easy as you need it to be. The recipe is great because it can be made totally from scratch the day before you need it or only as "scratch" as you have time for. Many elements of this pie can be store-bought and thrown together with all the other components when you assemble everything. Another great thing about this pie is that it's light and simple as it features classic flavors such as raspberry and vanilla. There is definitely room for tinkering if you'd like to make the pie more custom. I wanted to keep mine simple, though. The base recipe I've written for you is something that most will enjoy. The coconut filling is basically a vegan stove top pudding that tastes like vanilla bean ice cream. Wonderful. I've also included a sugar-free option. The flavor of jam and/or pie crusts you use are totally up to you. I used a basic gluten-free pie crust and I've included the recipe if you are ever in need of it. It's a great thing to have a basic single pie crust recipe on hand for anything you may need to make. This recipe is simple and can be made quickly. If you'd like to up the flavor, try substituting some of the flour (maybe 1/4 cup) for cocoa powder. Chocolate raspberry pie? Sign me up. The raspberry jam recipe I've included is also homemade. If you find that you would rather save time (I don't blame you!), definitely substitute your favorite store bought jam or fruit preserves. So, if you're looking for a dessert that will surely please a crowd, need something quick and simple, and are aiming to please herbivores and gluten-freers alike, give this recipe a try. It is almost Thanksgiving, after all. Who doesn't want a pie? ;D 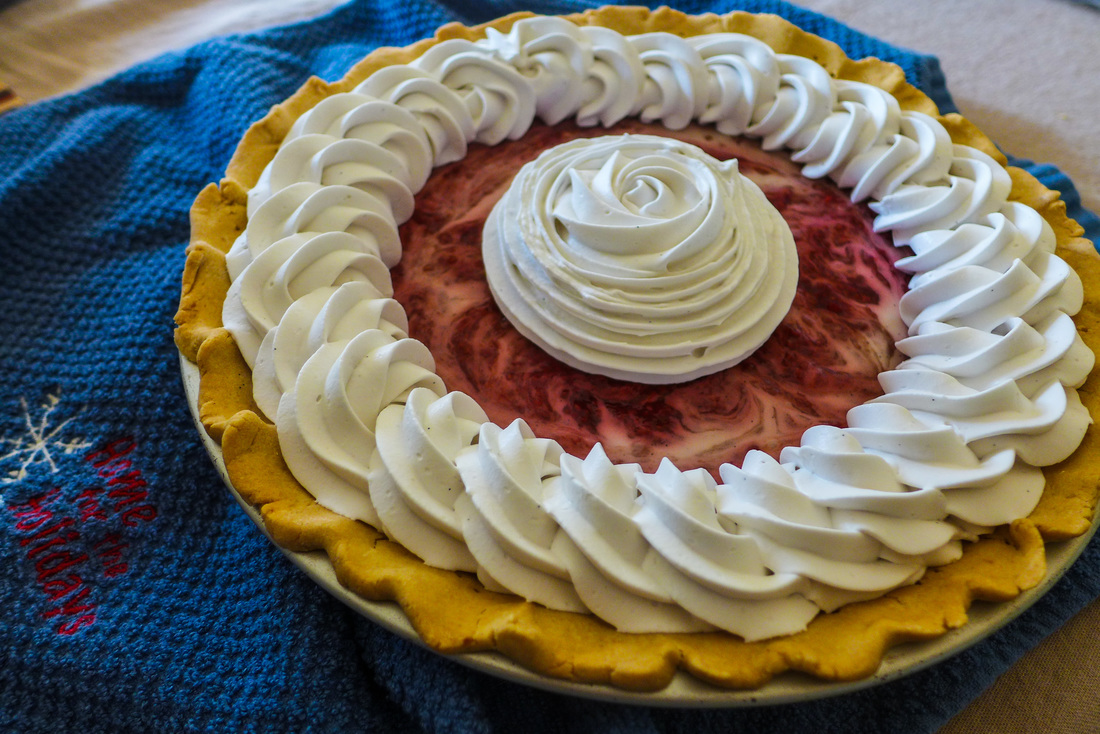 Raspberry Coconut Cream PieYield: 1 - 9 inch pie Free from: Gluten, Soy Ingredients Crust
Raspberry Jam
Garnish:
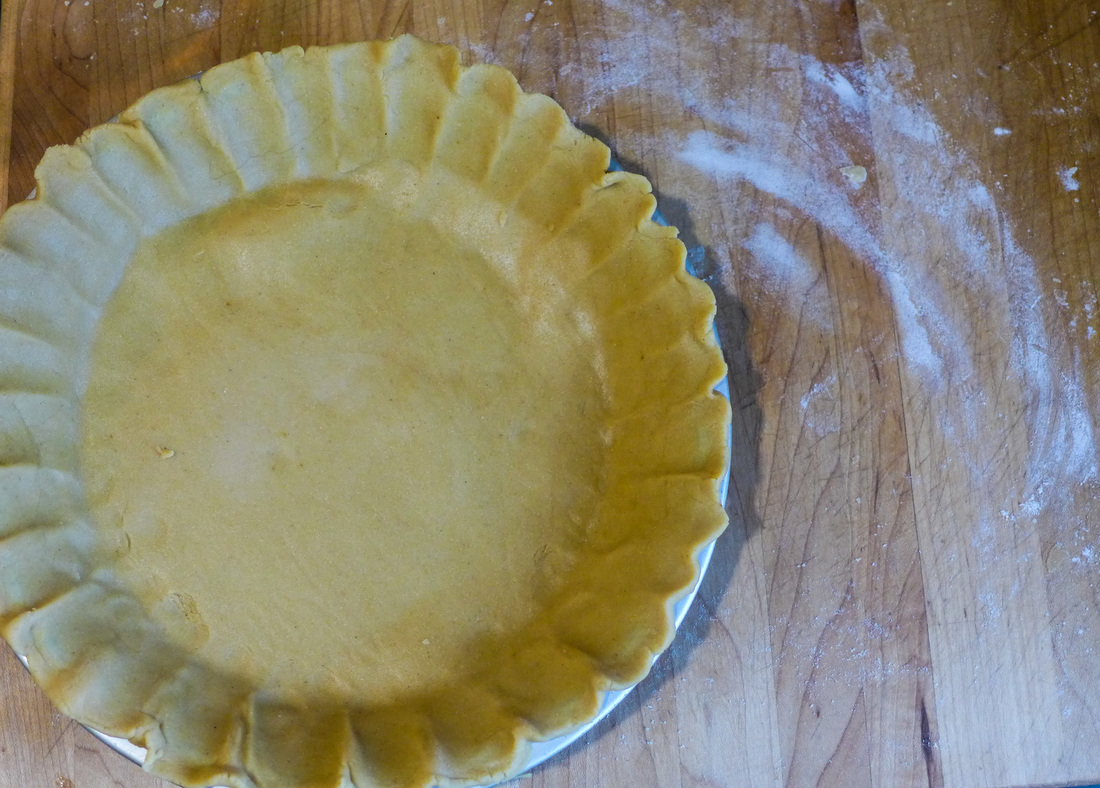 Instructions Crust Preheat oven 345 F.
 Coconut Cream Filling
Raspberry Jam
  This is my first entry into the Earth Balance Holiday Bake-Off contest! I encourage everyone else who loves to bake to enter. The prizes seem pretty awesome and it's a great way to spark some creative juices for others who are wondering what to make this holiday season! Click on the image below and it will bring you to a page with more information about how to enter! Happy Baking! <3 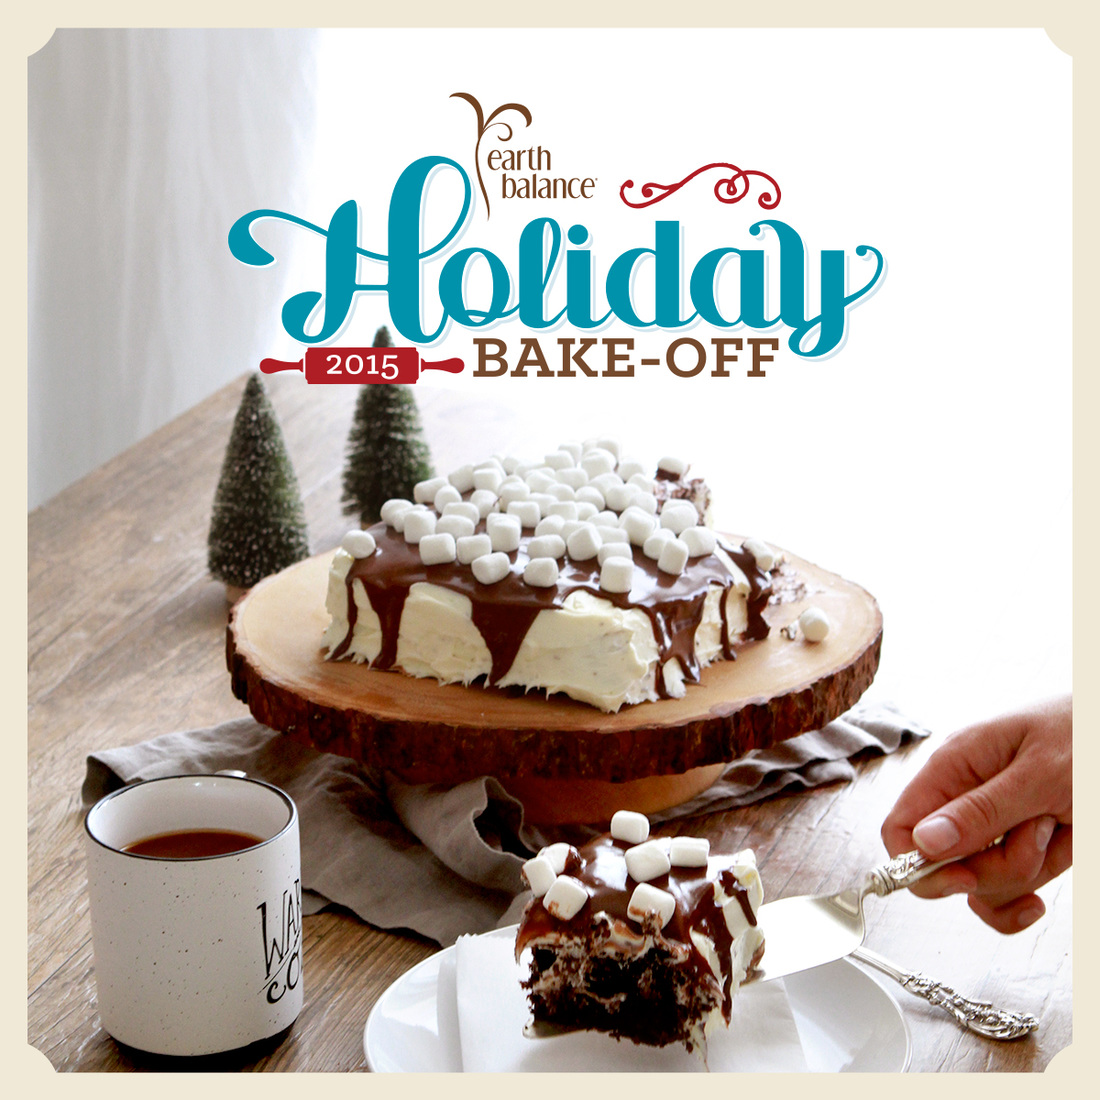
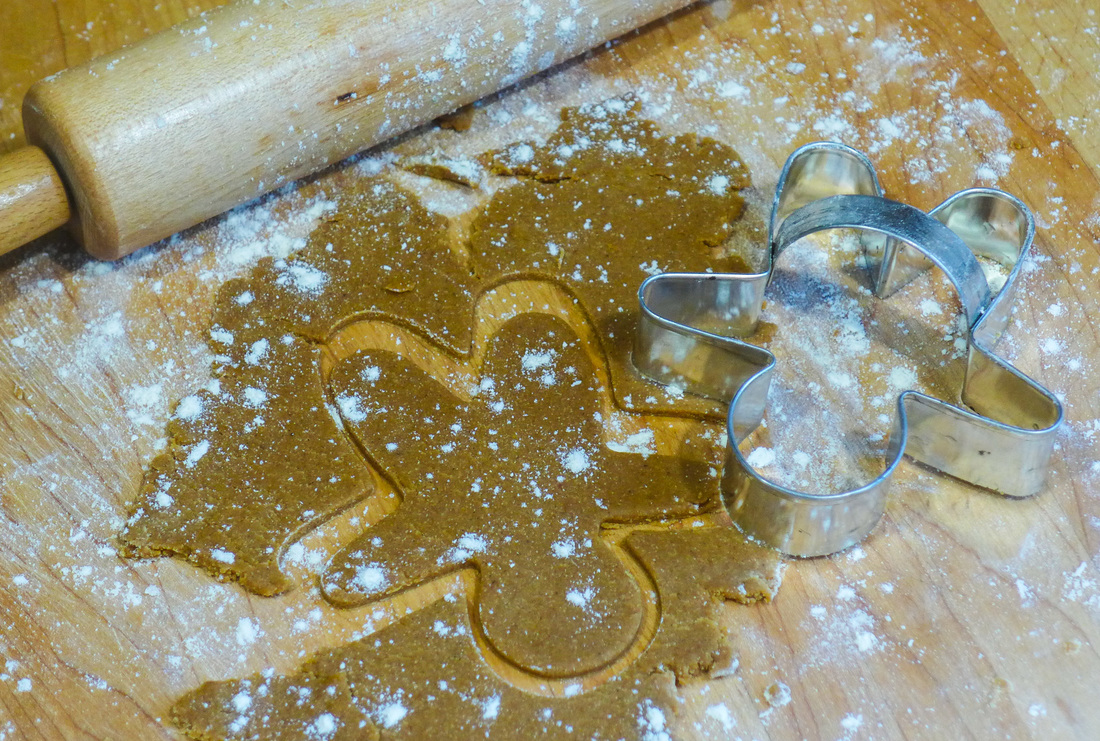
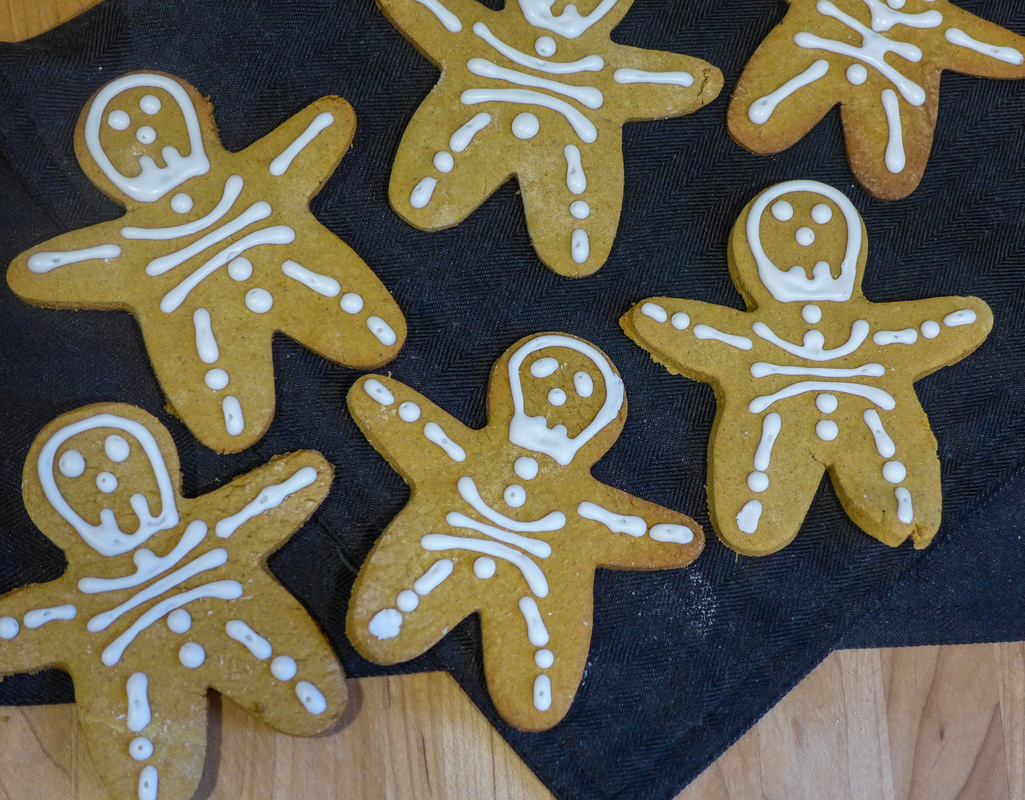
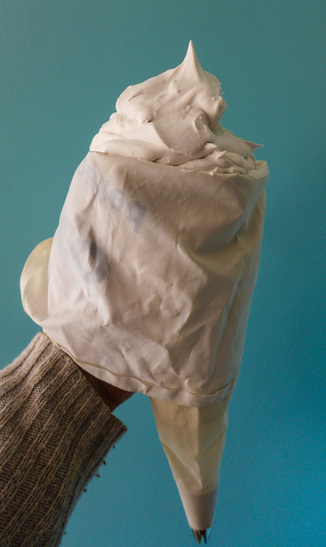
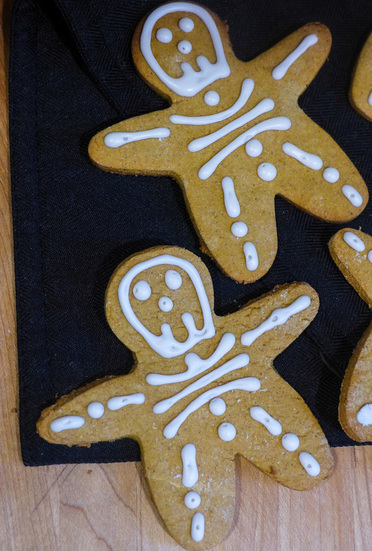
This vegan royal icing is easy to pipe, sets quickly and isn't too sweet. It's everything I've ever wanted out of an icing. It's also egg-free, soy-free and fat-free. What else could you want? The cookies themselves are very simple to make. They are an adaption of a simple rolled sugar cookie recipe from one of my favorite cookbooks (non-veg). The fact that they are gluten-free is great because they never change in consistency no matter how many times you roll them out. It's pretty wonderful. =) I love that the cookies are aromatic without being too sweet. You can easily add up to 1/4 cup more coconut sugar (or regular sugar) if you want them sweeter. I prefer them more buttery because I don't like cookies to be too sweet after they are iced. That is entirely up to you, though! Feel free to play around with the design/cookie cutter you choose. I made mine look like skeletons and used a gingerbread man cutter. These would also be great as pumpkin shapes (of course) and even circles (ghosts? skulls?). Since the cookies are pumpkin flavored, you could easily make these for Thanksgiving and change up your cutter/design for that too! The possibilities are (almost) endless! Happy cutting, everyone! ;D  Pumpkin Cutout Cookies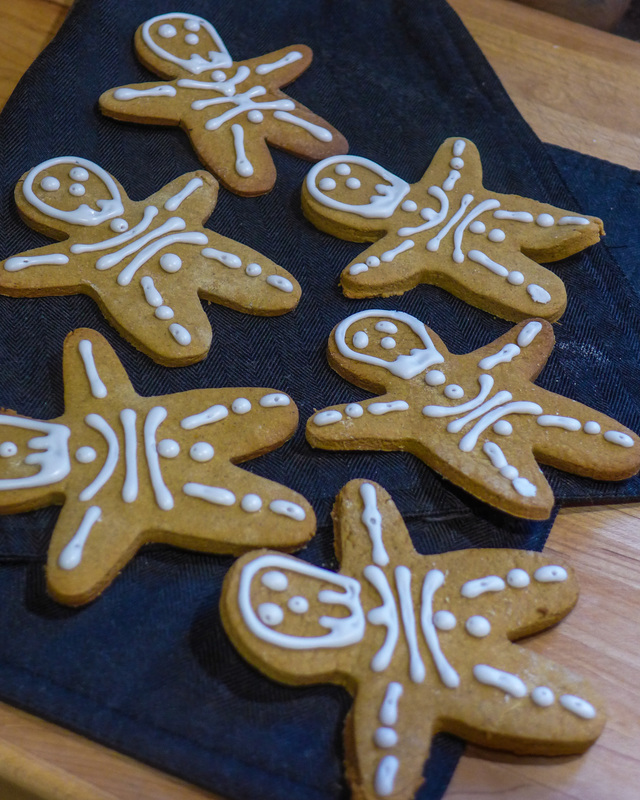 Yield: Approx. 24-36 cookies (depending on the shape) Free of: Gluten, Soy, Nuts Ingredients Cookies
Royal Icing Adapted from The Blenderist's Recipe
 Instructions Cookies
Royal Icing Instructions
 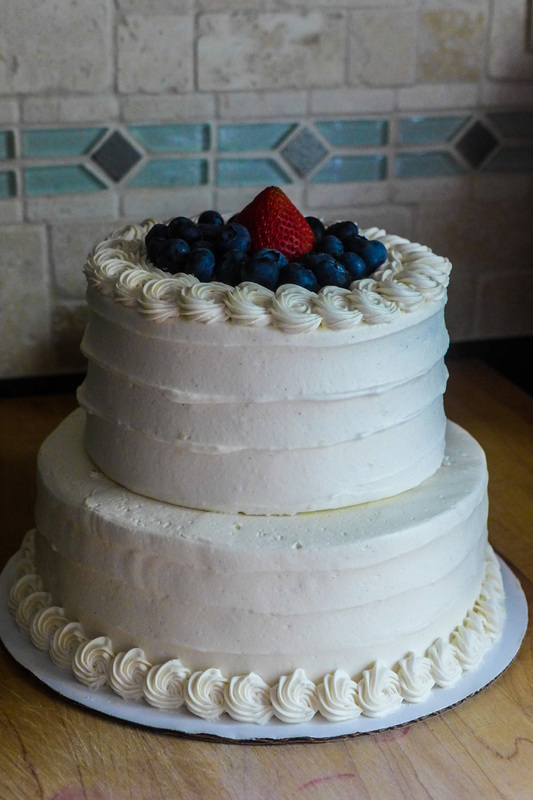 When I first became enamored with baking cakes and cupcakes, I struggled to match them with a good icing recipe. Even as a non-vegan hobby baker, I had a pretty strong dislike for most icing that I could make. The standard American buttercream (usually a mixture between shortening and/or butter and powdered sugar with some milk and vanilla added) always seemed too sweet for me. Also, what a pain it is to make! So much of each ingredient needed to go into the recipe in order to do anything with it. I usually use a ratio of equal parts powdered sugar and shortening/butter (or Earth Balance) divided, so it would be for example: 1 cup shortening 1 cup butter/non-dairy substitute 2 cups powdered sugar milk vanilla This is a lot of each ingredient to yield enough icing to ice a cake or some cupcakes...Also, look at the amount of fat and sugar goes into it! A bit much, I think. I prefer things to be slightly sweet and more rounded in flavor when it comes to desserts...I've mentioned this many times in my posts! But, when it comes to icing, it seems almost impossible to balance flavor in an icing that has a stable texture for decorating...well, until now!! ;) 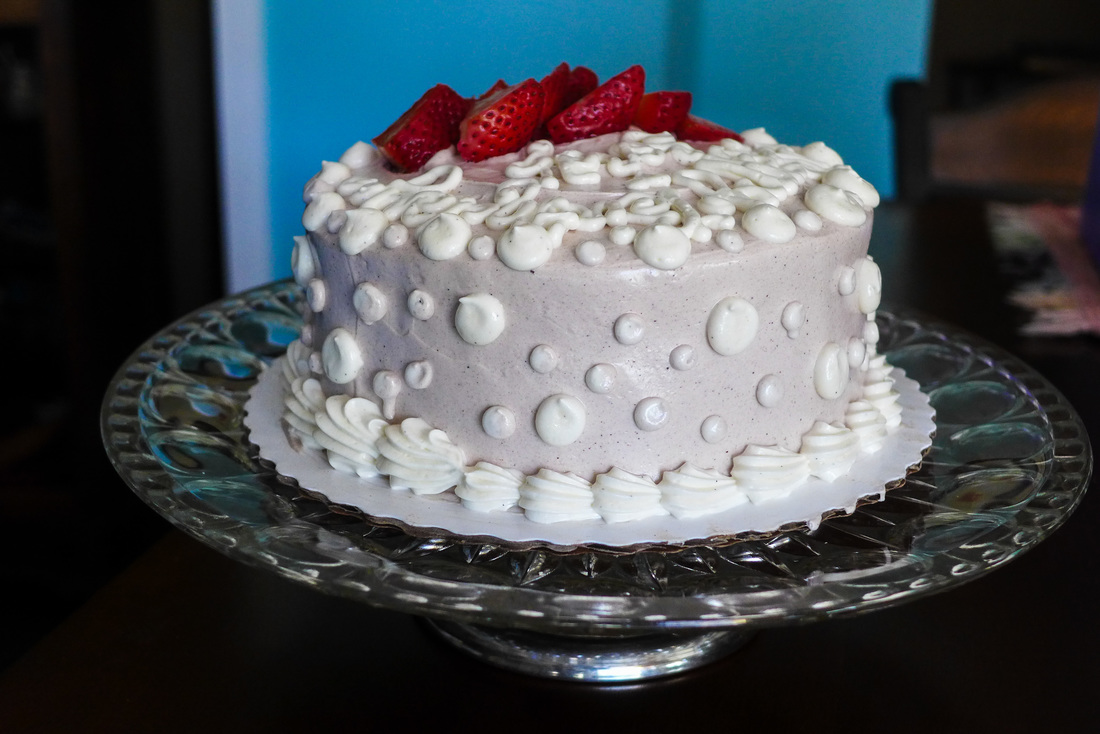 With the amazing discovery of aquafaba, I have learned how to create amazing Swiss Meringue-style buttercream that is free of eggs or dairy! I have worked with this type of buttercream for years now at my job and I love working with it because it is always smooth and easy to work with for decorating cakes. It also hardens when it's cold so your cakes are more stable once they have set in the fridge for a while. The only issue with it is that it is an egg white-based recipe. I learned to make this type of buttercream by cooking granulated sugar and egg whites, whipping them and then adding a ton of butter to them until the entire mixture emulsifies and becomes soft, smooth buttercream. The process is quite long, especially if you are making a large batch. This batch that I've created is a small one, ideal for a 6 inch round cake or 12 cupcakes. It is ideal for the home kitchen because it is quick, does not require any cooking, and is only reliant on 1 cup of non-dairy butter substitute. The amount of sugar is dependent on your taste, as well! I believe that you might be able to substitute the sweetener if you choose, but make sure you are ready to experiment a little with the ratios of the other ingredients as it may change the texture. The goal is for this buttercream to firm up enough to pipe and ice, so make sure there is still some structure there. I love that I managed to make this buttercream work! I like the way it looks compared to other vegan icings I've used. A veganized American buttercream can sometimes be bubbly if it is over-whipped. This buttercream is always smooth and silky, ideal for piping roses/flowers, borders, etc. on your cake or cupcakes! I'm so happy I've found a way to make this recipe and I'm so excited to share it with all of you! Feel free to sub the non-dairy butter with coconut oi. I've tried this and it works beautifully. As long as you refrigerate your cake prior to serving, the icing will stay in its proper place! Leaving it out of the fridge, as long as it is in a cool environment for a couple hours is fine, too. Here are a couple of cakes I've used this buttercream for (one was for yesterday's VeganMoFo post!) I hope they inspire you to do your own homemade cakes or cupcakes! =) Happy icing! Vegan Swiss Meringue Buttercream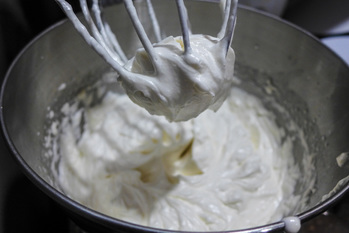 Yeild: About 4 cups, finished Enough to ice: 1-6" cake/12 cupcakes Free of: Gluten, Soy*, Nuts *Depending on your non-dairy butter Ingredients
Instructions
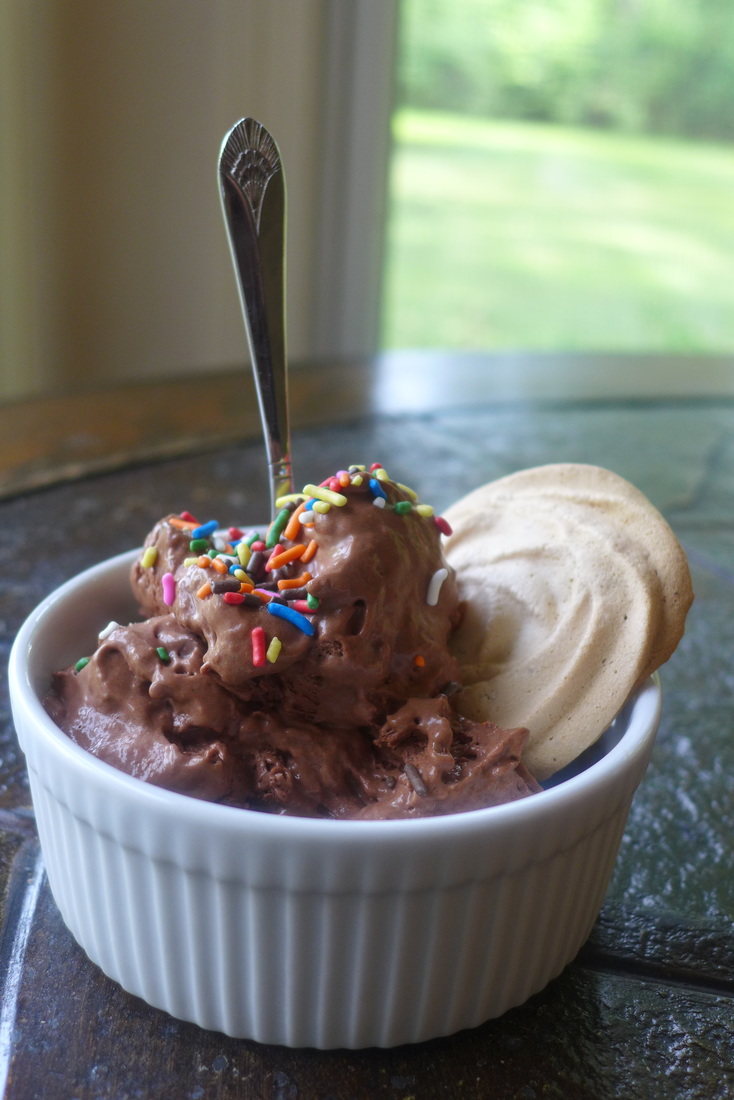
 Pssst! That cake has booze in it! =P 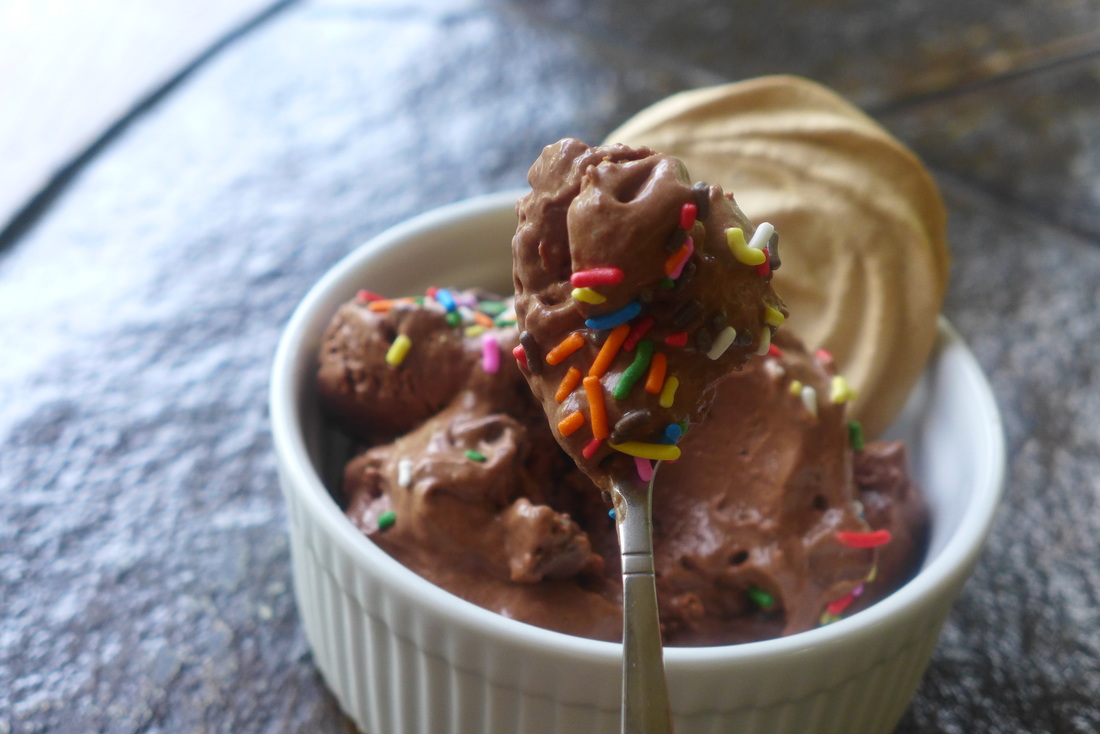 That's a spoonful, alright. So, with some free time on my hands, some spare cans of chickpeas in my pantry, and a big craving for chocolate left me no choice but to make some delicious ice cream mousse. I made a homemade ice cream cake around this time last year. The result was sweet, creamy, dense and satisfying. There is something to be said for that type of ice cream and usually it's "mmmmm!". But, today, I wanted to try something different. I wanted to create a light, fluffy yet richly flavored ice cream that would stand up to any dairy-filled gelato or frozen custard. I turned once again to my new-found friend aquafaba! I recently made a sponge cake using aquafaba (chickpea brine) and I was quite pleased with the results. I wasn't quite prepared, however, to witness how wonderful aquafaba is on its own. 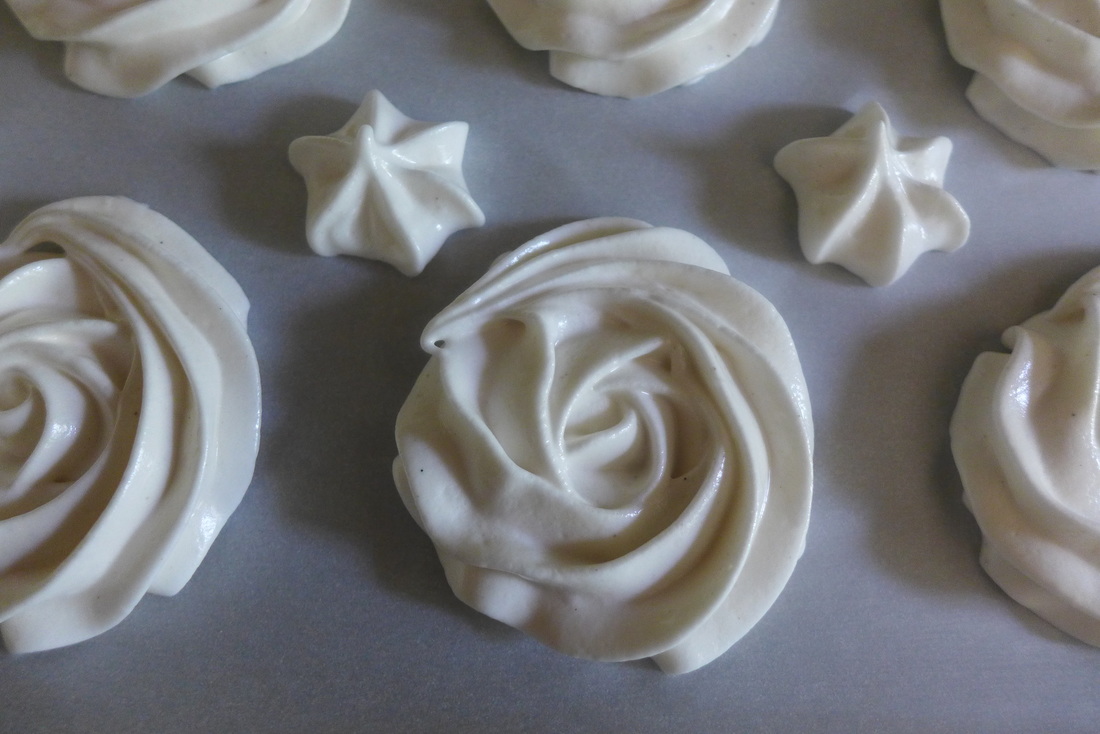 This time, instead of making my vegan meringue in the food processor, I used my trusty Kitchen Aid mixer! I absolutely love my mixer. It was my grandmother's first and now it's mine. It helps me make sweet and beautiful creations that I otherwise wouldn't on my own. I was so surprised to see how quickly the meringue whipped up and also how stiff (!) it got with the whip attachment! It behaved just like a traditional egg white meringue would. It also didn't deflate on me! ;) 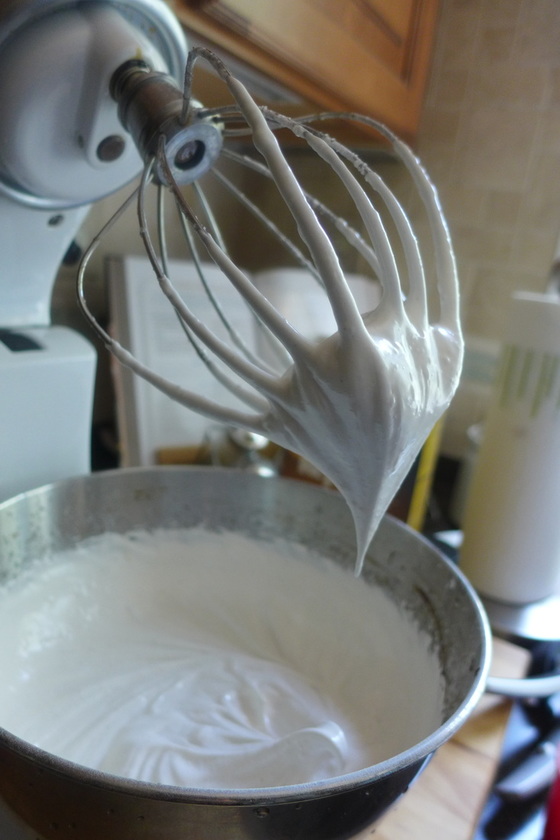 Yeah. Nice peak. ;) I ended up with an entire batch of meringue that I didn't have a use for. So, in order to test its pipe-a-bility (?) I made little meringue cookies with my pastry bag. I've also never, even with eggs, attempted to make meringue cookies. They were never something I actually liked, so I never felt compelled to make them. My grandma loves meringue so I'm hoping I can make these for her one day and just not tell her that they're vegan. ;D I was pleased with the meringue's consistency and its ability to hold up to piping. I made well-defined rosettes with ease and they never collapsed, even after baking them. I think I may have over-baked my cookies a tad, but they seemed to have the correct consistency inside. I still don't think I think them though...too sweet for me. ^_^' At least they look cute! Here is the recipe for my meringue. It's absolutely amazing if done in a mixer with a whip attachment. I can't vouch for any other method except the food processor one, and I wouldn't recommend that method for this recipe. Vegan Meringue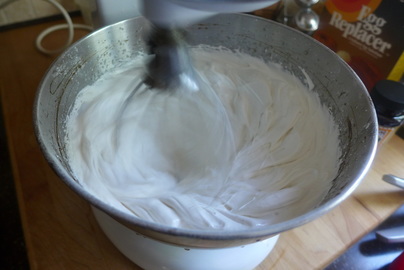 Yield: about 4-5 cups of finished meringue Ingredients
Instructions
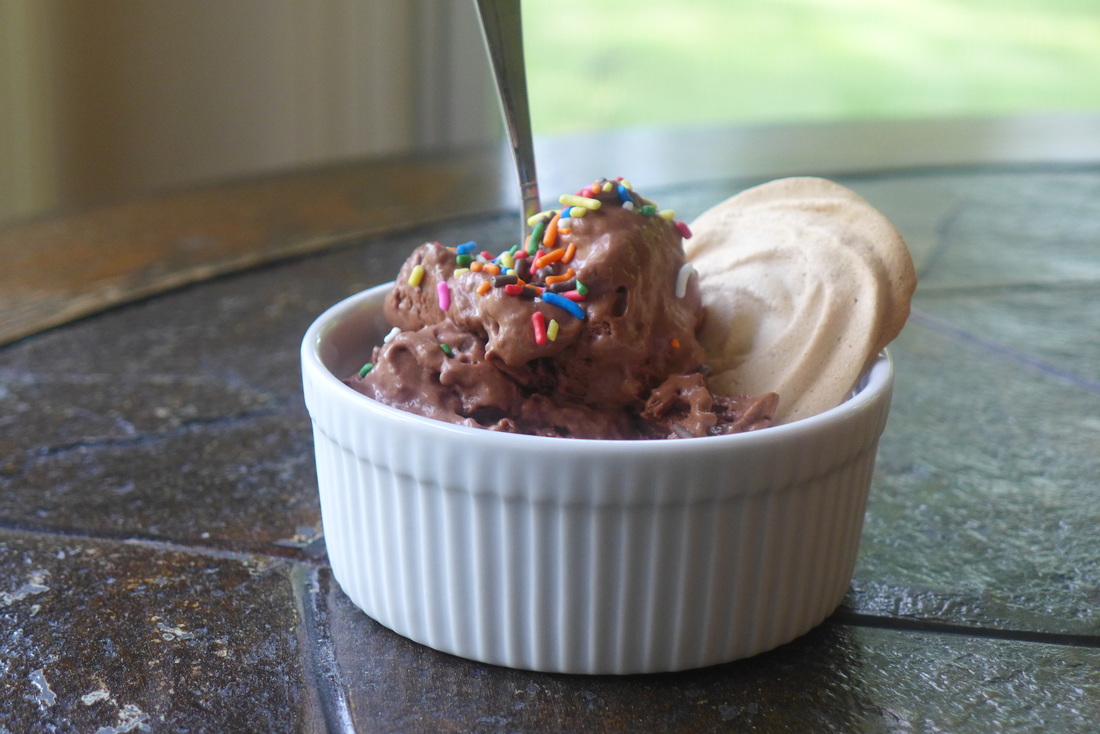 Now, on to the good stuff... Chocolate Mousse Ice Cream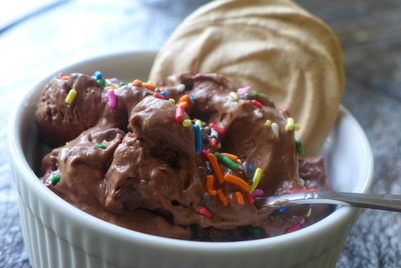 Adapted from: Chocolate Coconut Ice Cream from Vegan Chocolate by Chef Fran Costigan Yield: a little more than a pint Soy, Dairy, Gluten, and Nut free! Ingredients
Instructions
 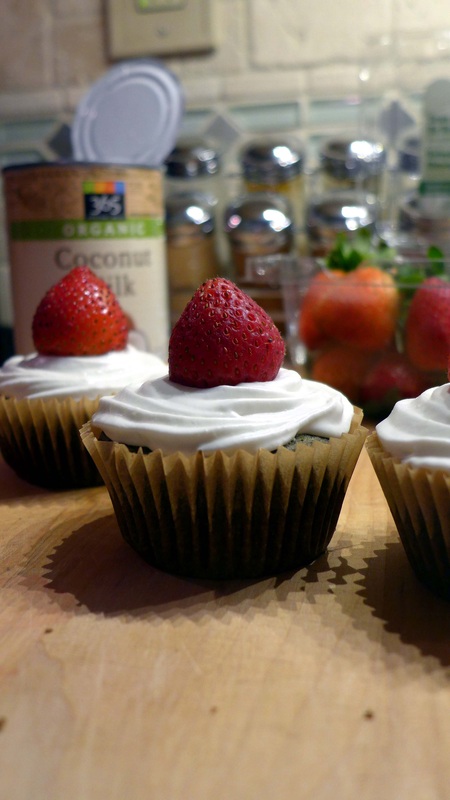
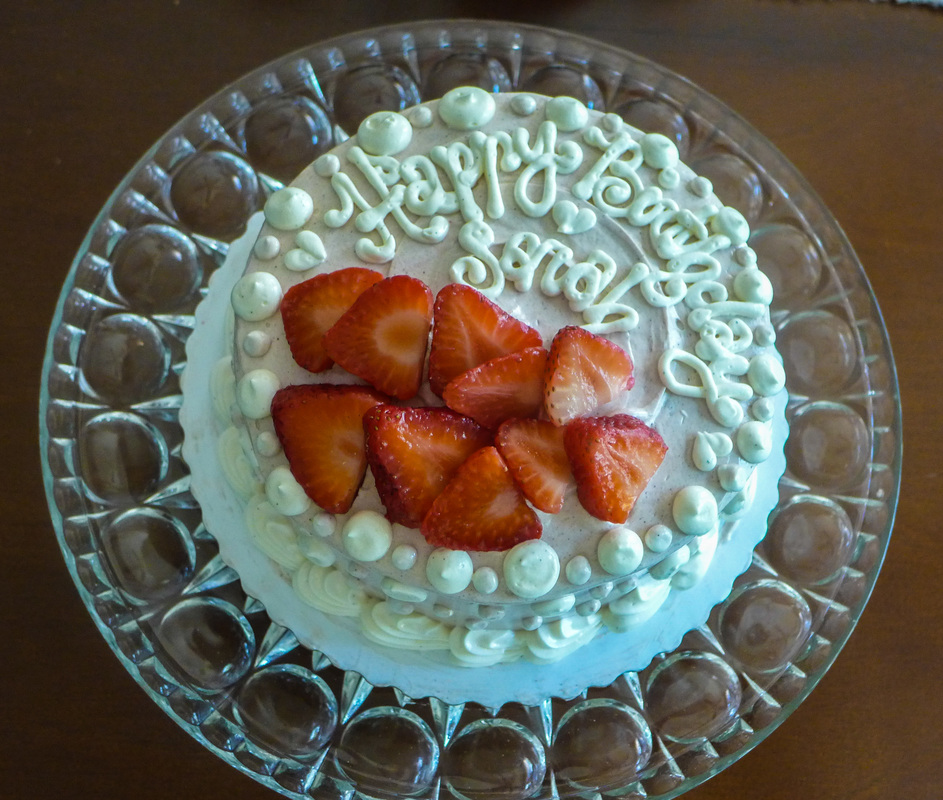
Sometimes, you just want a specific cake. Ever since I've had delicious Japanese-style strawberry shortcake, I've been on a mission to recreate it in my own kitchen. Although it's been a while since I've had a traditional cake made with eggs, I can still remember the springy and light texture that I enjoyed so much. I loved how the cake was not too heavy. This type of cake is a variety called castella cake, which is of a Portuguese origin. Sponge cakes are difficult to recreate into a vegan and gluten-free variety because they usually call for a lot of eggs or egg whites for volume. But, somehow, some way, I've formulated a recipe that yields a light and springy (but more delicate) sponge cake that is free of egg, dairy and gluten! This recipe was a bit of a work in progress so I made it a few times. I'll share the cupcake version as well as the full-on cake version! I decided to share this recipe as a matcha (green tea) flavor since I wanted to drive home the Japanese theme. The cake can be made into a vanilla flavor by omitting the matcha powder and adding in some vanilla extract. Easy, right? =) The strawberry shortcake that I loved so much was made with heavy whipped cream. I used to love and hate whipped cream before I became vegan. I loved the way it tasted and I loved how it was less sweet than buttercream, but I hated how I felt after I ate it. I felt borderline sick after consuming whipped cream. I also felt this way after eating eggs sometimes...you can see why I've chosen to eat the way I do! If coconuts didn't exist, I don't know what I would do. Coconuts have allowed me to enjoy whipped cream again without the sick feeling (or the guilty feeling for that matter!). I'm sure it is now almost common knowledge that coconut cream can be a wonderful substitute for whipped cream in any situation (unless it's super hot out). If you aren't familiar with how to make coconut whipped cream, please head on over to this page and read all about it! It's the easiest thing in the world...and it tastes way better than traditional heavy cream, at least I think so. ;) 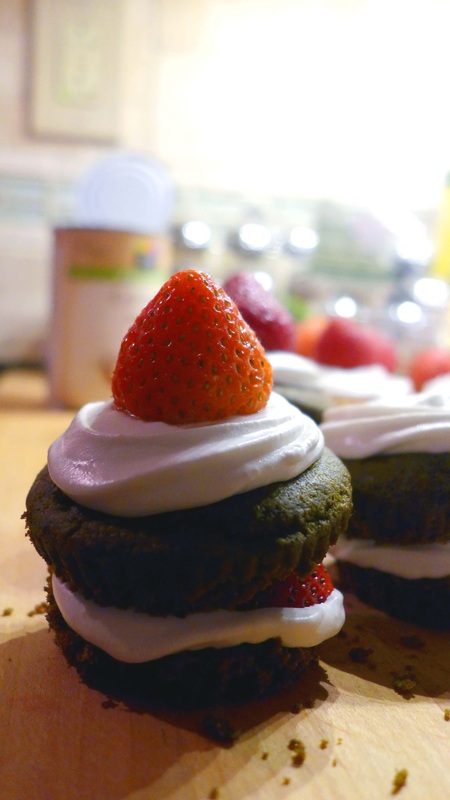
Naked shot! =P
I recommend using ripe organic strawberries for this recipe. It's the end of the summer season, so the strawberries are still beautiful by me! If you want to make this cake in the winter and eat seasonally, maybe use some fruit preserves or serve with a custard filling instead. This is a great cake base for all types of flavors and ingredients, so play around! (I just realized that these cakes look really Christmas-y because of the green, red, and white...whoops!) ^_^' Green Tea Strawberry Shortcake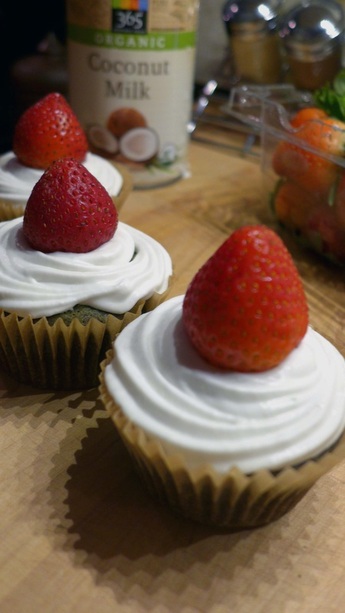 Are those shadows not cool-looking?! Super geometric! Are those shadows not cool-looking?! Super geometric! Yield:
Ingredients
* coconut sugar will change the flavor of the cake a little to something more reminiscent of caramel; I wanted a neutral sweetness so I used Florida Crystals Instructions Preheat oven to 325 degrees F.
#nofilter super naked cakes!
**Sifting the flours will ensure your batter will be smoother. If you skip this step, you will have to work extra hard to get the lumps out when you stir everything! Here is a picture of how I made the cake look for it's 6" size. I used a strawberry buttercream on this one instead of whipped cream. Although, if you make your whipped cream stiff enough, you can certainly use it for icing. I would add some confectioner's sugar and/or Ener-G egg powder to it for stability. 
Happy baking, fellow MoFo'ers! =P
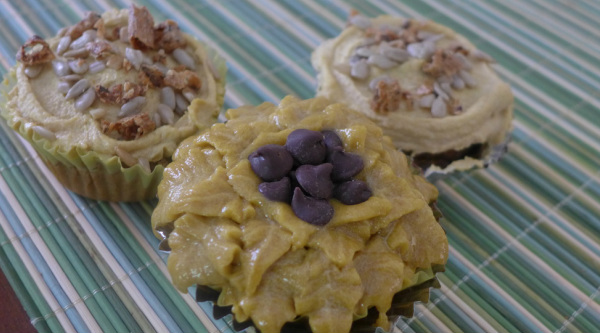
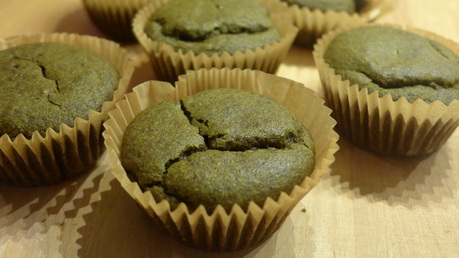
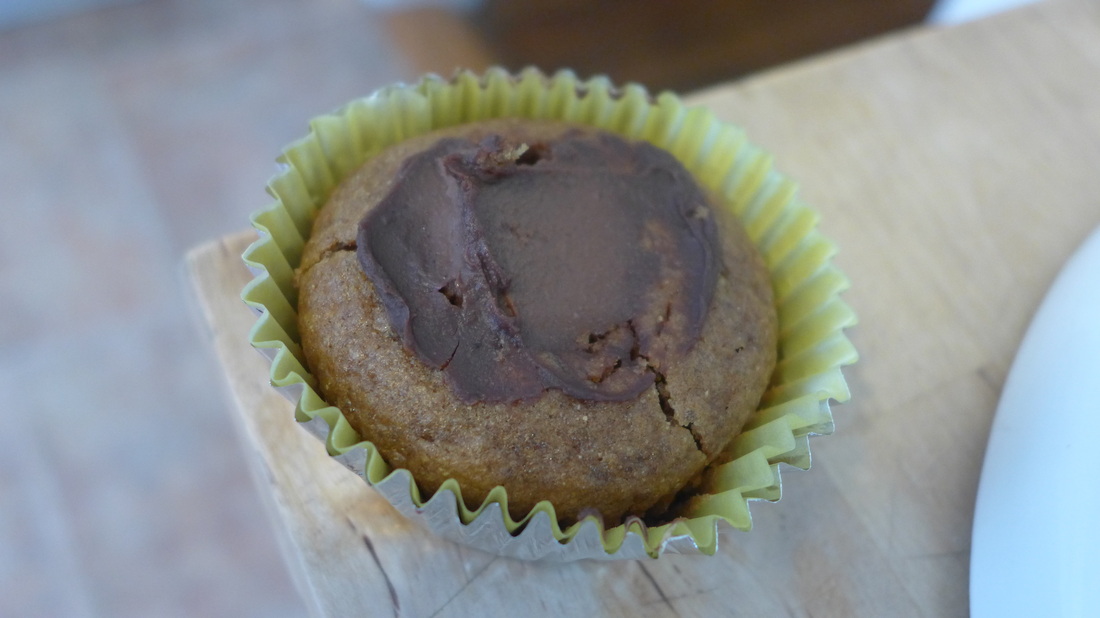
This post will be somewhat personal...I don't think that having a blog would be complete without some personal and slightly emotional content (related to food, of course!). There are many, many reasons why I am vegan today. My dear friend Emily introduced me to the lifestyle in highschool. She was a vegetarian when I met her. She introduced me to wonderful staple foods like hummus and falafel that were quite foreign to me at the time. These are now part of my normal diet and I absolutely could not thank her enough for leading me to them! As I was becoming vegetarian, Em was trying to become vegan. I thought I was having a tough time! I remember she would stash hummus in her purse to smear on bagels. She also switched some clothing and accessories for cruelty-free materials. The hardest part about the transition for her was giving up ice cream. It probably didn't help at all that we both worked at an ice cream shop.... Needless to say, she phased in and out of veganism for a while before quitting. I believe she may have picked it back up after highschool, though. I know it's been a long, long journey for me. I didn't even entertain the idea of veganism until I graduated college and began to read inspirational literature like The Vegan Girl's Guide to Life and Food, Inc.. Over all, I look to this lifestyle as a way of minimizing suffering and maximizing positive vibes (the health benefits and feelings of closeness to the earth are added bonuses!). Emily was still my first exposure to veganism, though. I was always inspired by her interests in activism, animal rights, and conscious living. Another big reason for my adherence to this diet and lifestyle is the preservation of her memory. For reasons still unclear, Emily's life was taken while she was away at college in Gettysburg, PA. This came as a shock to everyone who knew her and to her school community. This tragedy shook us all to the core. We have all tried desperately to keep Em's spirit and memory alive in any way we can. Her family created a memorial fund in her honor; memorial trees, plaques and peace poles were erected in places her life greatly affected. Em's ashes were also scattered around the globe in amazing places that she would have loved to travel to. As one of my dearest friends and greatest role models, Emily will always have a place in the forefront of my mind and heart. I try to do right by her every day in all the ways that I can. As you can see, this effort has manifested into the creation of vegan food. The recipe I'm sharing with you today is based on flavors that Em loved (she had great taste) and her favorite flower. I made these to celebrate her birthday which was yesterday. Every year, I try to either make and/or eat a delicious vegan cupcake for the occasion. I don't think she'd have it any other way. :) So, without further a-do, I present (Emily's) Loaded Sunbutter Cupcakes! These babies are basically a twist on a Take 5 candy bar, which Em was rather fond of. Instead of peanut butter, I used sunflower seed butter to pay homage to one of the most beautiful and dramatic flowers on Earth. Each cupcake is: sunflower seed butter cupcake filled with a dark chocolate mousse and topped with a sunflower seed buttercream frosting. I sprinkled sunflower seeds and gluten-free pretzel crumbs on most of them for garnish. For one, I piped a sunflower and finished the center with chocolate chips. This can be done with plain buttercream and colored yellow, but I wanted the flavor of the sunbutter on mine. Get creative with yours! These are supposed to be fun! :D 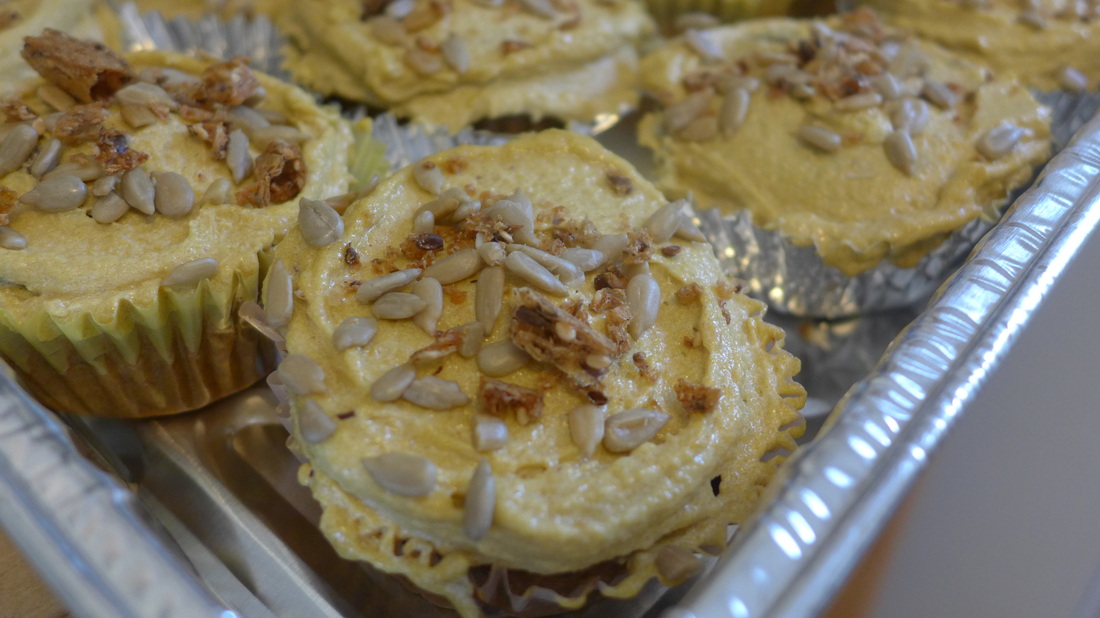
Emily's Loaded Sunbutter Cupcakes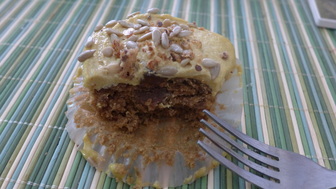 Yield: 15 cupcakes (I used 2 mini ice-cream scoops for each) Adapted from Vegan Cupcakes Take Over the World by Isa Chandra Moskowitz (She's the vegan cupcake GENIUS! If it weren't for this book, I may not be a vegan...maybe....) ;) Ingredients For the cake
Instructions Preheat oven to 350 F.
For the mousse filling Ingredients
Instructions
For the Sunbuttercream **To make this frosting completely natural/clean, sub the processed fats for refined coconut oil/palm fruit oil; Just make sure the frosting stays cool...otherwise, it may be a bit runny.** Ingredients
Instructions
Assembly
Sunflower Tutorial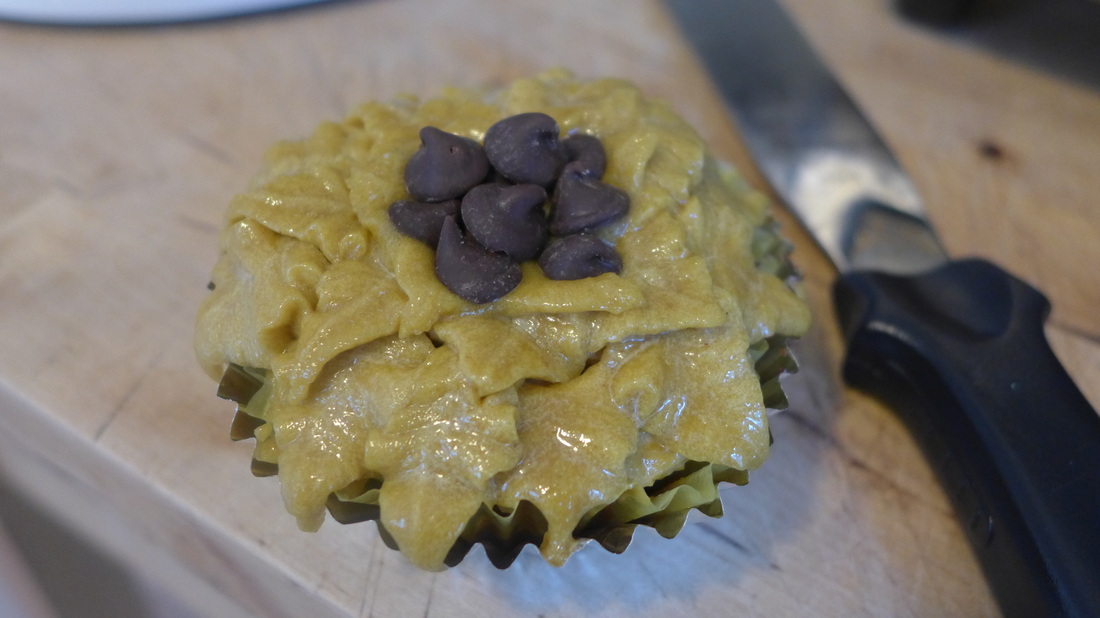
Instructions
I hope you enjoy making these cupcakes as much as I did! They're also fun to eat, too... For more information on my girl Emily, you can visit her memorial fund website. She was truly an amazing soul. I hope I've inspired you like she's inspired me time and time again. Peace, Love, Cupcakes <3 

|
I'm Jess!This is my very first food blog! I post revised conventional recipes of foods that I hold near and dear to my heart. My cooking here is all gluten-free and cruelty-free, but full of flavor and comfort.  


 Archives
December 2017
Categories
All
|
 RSS Feed
