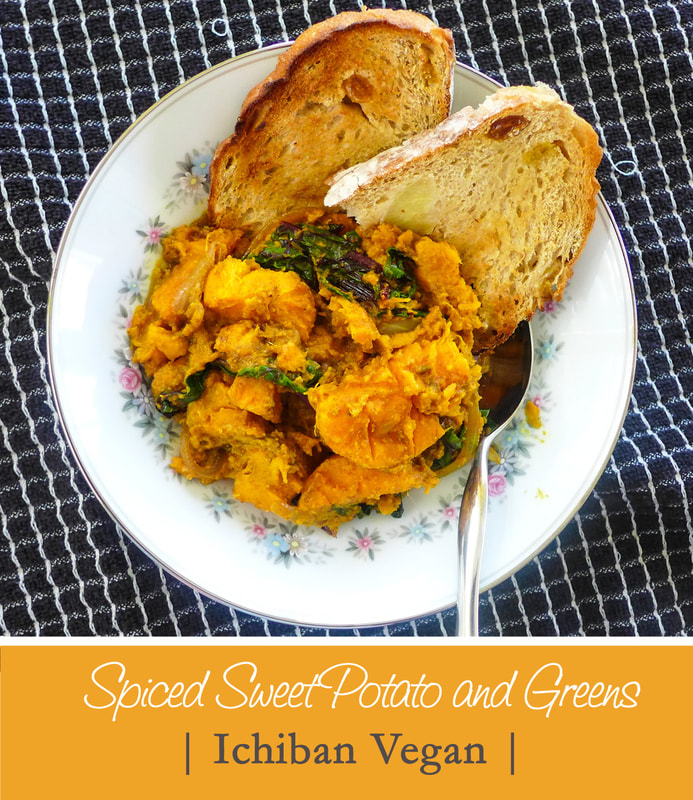
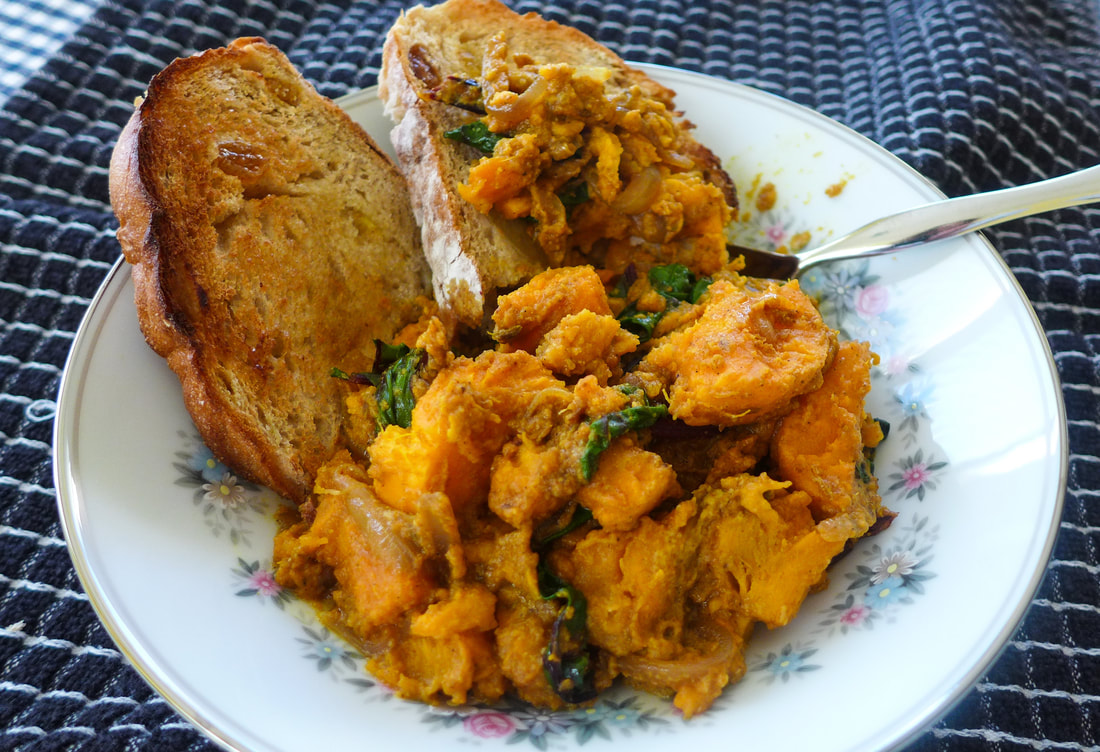
 Today's prompt is everything that I love about this time of year: SPICES!  Not that spice... I love warm spices. They always seem to find their way into my recipes in some form or another. I use cinnamon in almost everything. As I developed a taste for other spices, I discovered that I loved curries and stews with warm spices as well. I think savory applications of spices are my favorite simply because they offer unique depths of flavor. I love how the addition of spices to a simple chili or stew can create so much aromatic flavor. One of my favorite foods in the fall and winter is sweet potato. Sweet potato is always known for its ability to carry sweet spices in desserts. I wanted to add spices to sweet potatoes this time in a more savory way. The blend that I created is nothing extraordinary, but it creates a wonderful combination of smoke, earthiness, and sweetness. The flavors are wonderful when mixed with the mellow sweetness of the potatoes. I added some bitter beet greens and sweet onions into the mixture as well. The simple blend of veggies is a wonderful meal on its own or can be served with a bread or grain of your choice. I didn't create my own garam masala, but definitely do so if you're feeling up to the challenge. One of these days, I'd like to create my own spice blends. I've heard that fresh whole spices ground at home are the best. In addition to these spices tasting great, they also offer some wonderful medicinal properties (especially that turmeric). This mixture would also be a great breakfast to avoid any sugar crash during your day. Also, it would make a fabulous side dish for Thanksgiving. Just throwing that out there (it is next month, after all). Enjoy and feel good about it! 🍁🍂🍃🌰🍠 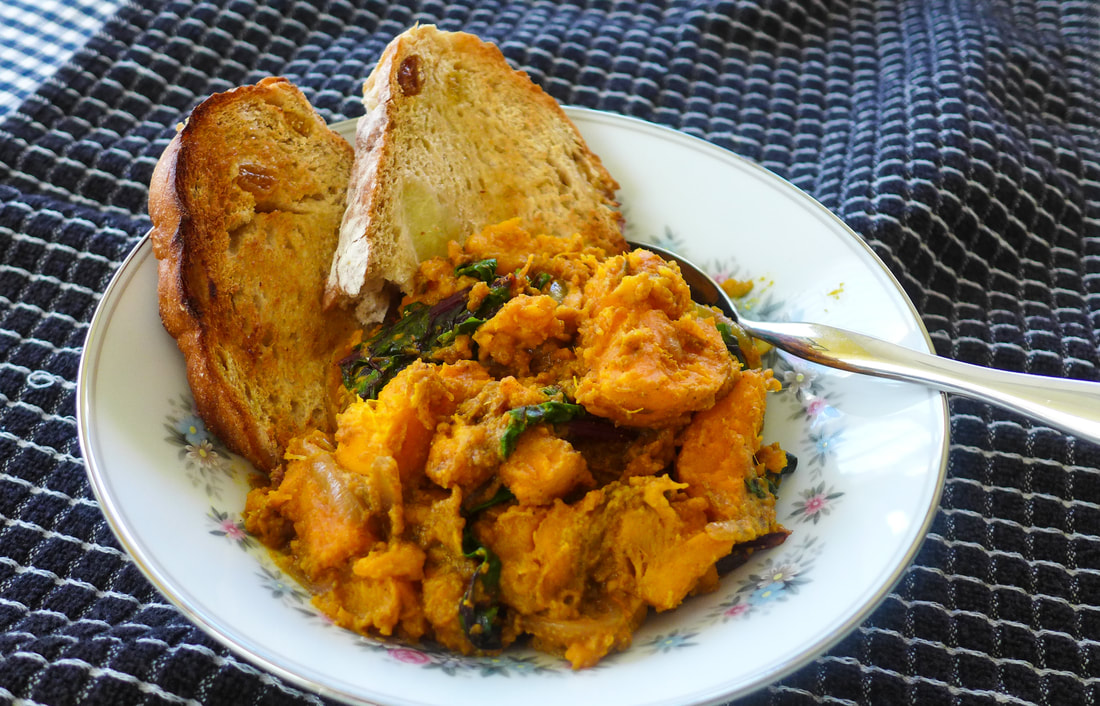 Spiced Sweet Potato and GreensYield: About 4 Servings Free from: Gluten*, Soy, Nuts, Grains Ingredients
Serve with bread or grain of choice, optional Instructions
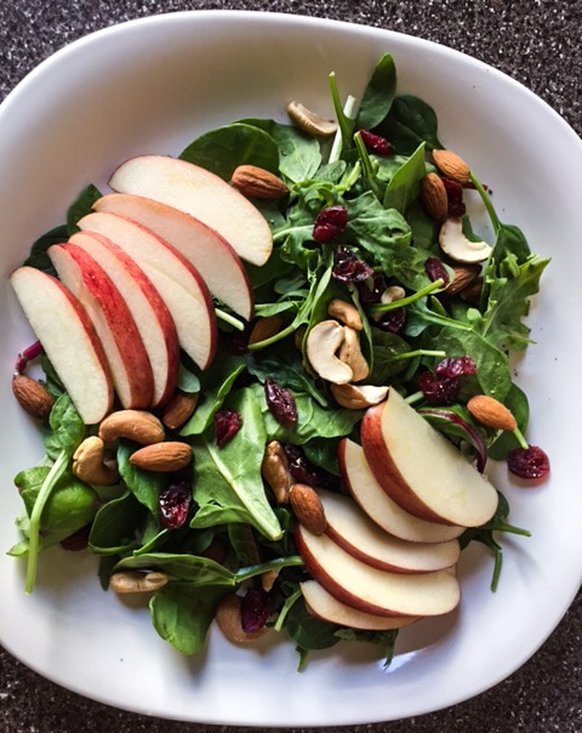
 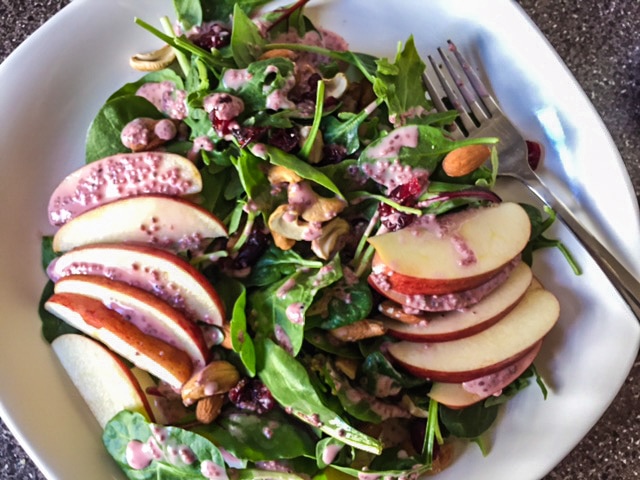 I'm finally back into the blog grind! After the holidays, I needed a break from everything. Although I didn't stop making delicious food, I just didn't have the energy to post. Fortunately, I have some more free time and the will to eat healthy foods for the new year. I always thought of myself as a generally healthy eater, but when the weather gets cold I tend to get lazy. I always fall back on easy, warm meals. Lately, I've been noticing that I've been eating more processed vegan foods than I really want to. Although they're delicious and easy, they aren't a good "all the time" food. So, to remedy my poor choices, I've started eating more whole plant foods. I've been making sure to stock my kitchen with as much produce as I can. In the winter months (it's almost spring, but still pretty chilly here), I usually choose produce that has a longer shelf life. My favorites as of late have been root veggies, onions, apples and pears, and so on. When I buy more delicate vegetables like greens, I try to eat them as quickly as possible so they don't go to waste. Salads for days, in other words. 🥗🥗🥗🥗🥗🥗🥗🥗🥗🥗🥗🥗🥗🥗🥗🥗🥗🥗🥗🥗🥗🥗🥗🥗🥗🥗🥗🥗🥗🥗🥗🥗 Anyway, I've made my own salad dressing for a very long time. For the most part, I always hated buying dressing from the store because it was always too much. Am I every going to really use all of that ranch? No. And now, I don't even like ranch. There were always at least 3 bottles of old, opened salad dressing in my fridge growing up. My mom would buy some when we needed it, and then we would eat salad for a while and it would sit. Forever. When I moved, I swear I threw away 8+ year old dressing. 😷😖 After that, I made a promise to myself that I would just make dressing if I ever needed it. The great thing about salad dressing is that it literally takes 2-3 ingredients to make (plus salt and pepper if you're doing it right). Those ingredients are staples every kitchen should have: fat (oil/nut butter/"mayo"/non-dairy product) + acid (vinegar/citrus juice) + binder (mustard/seeds/nuts/pureed fruit or veg). You can even get away with leaving the binder out. I like it because it thickens the dressing and helps it bind to whatever your putting it over. In this recipe's case, I used chia seeds because they're delicious, healthful, and add some texture to the salad. They helped thicken the dressing really well after sitting for only 10 minutes. If you don't have them, ground up flax would also work. You can also omit them if you want. They're pretty optional. 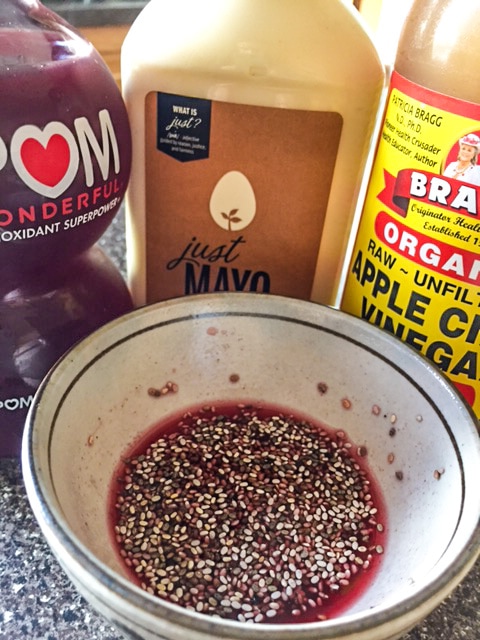 These are the basics of my dressing: apple cider vinegar (which I lovingly refer to as ACV, the miracle liquid), pomegranate juice (you can sub any other juice if you wish), and Just Mayo (or any preferred vegan mayo option/non-dairy yogurt). Then, the chia! If you sub the vegan mayo for non-dairy yogurt, you may want to scale back the vinegar. The vinegar makes this dressing taste like yogurt when it's completed, so if you add the entire amount, it may be too "tangy" for your liking. If you like tang, dump that ACV in there! 💃 I used this dressing for a simple apple salad with mixed organic greens topped with cranberries and nuts. It was perfect for a light lunch. The dressing made it look adorably pink. Feel free to use it on any salad you desire and enjoy! 💝 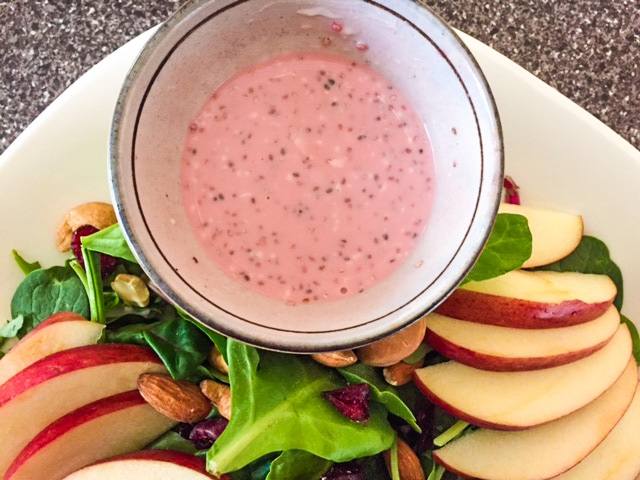 Chia Pomegranate Salad DressingYield: 1 serving Free from: Gluten, Nuts, Refined Sugar, Soy* *Use a soy-free product Ingredients
Instructions
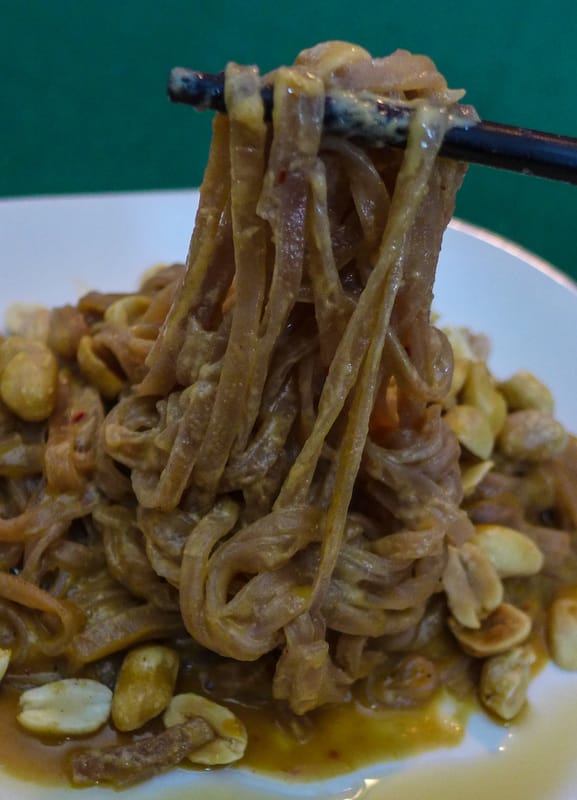
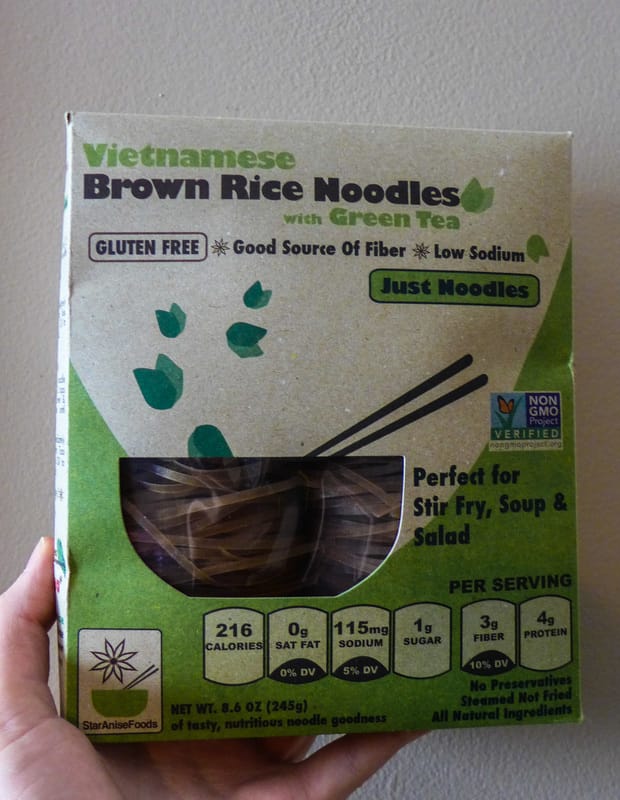
 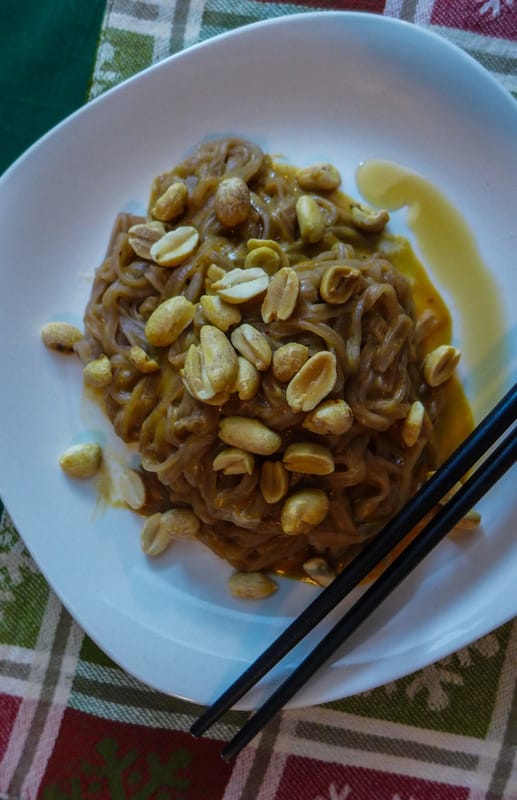 This weekend and upcoming week will surely be hectic for everyone preparing for the holidays. I've been doing some last minute chores today and suddenly realized I had skipped lunch. 💀 Since I knew I couldn't starve in the name of gift wrapping, I whipped up a single serving of peanut noodles and decided to share the recipe with you! It's a quick and easy meal or snack for when you're home alone or just in the mood for some noods. I'm always up for noods. 😁 These noodles are creamy yet light at the same time. They can be oil-free, in fact, if you omit the sesame oil garnish. I love the taste and aroma of sesame oil, so I drizzled a little on my plate after cooking everything. If you wish to make this dish without the oil, the sauce will still be decadent and satisfying while also providing you with protein. For the noodles, I used brown rice with green tea from Star Anise Foods. I love their products. Some of their noodles come with soup base, which I think is genius for a quick weeknight meal. I also love their name...so cute! ☺️
Peanut Noodles for One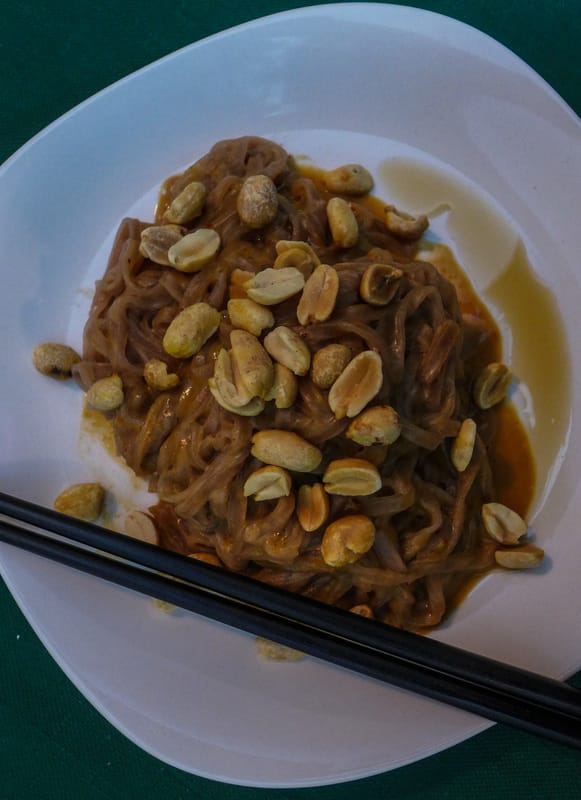 Ingredients Yield: 1 serving Free from: Gluten, Refined Sugar*, Oil-free option
Instructions
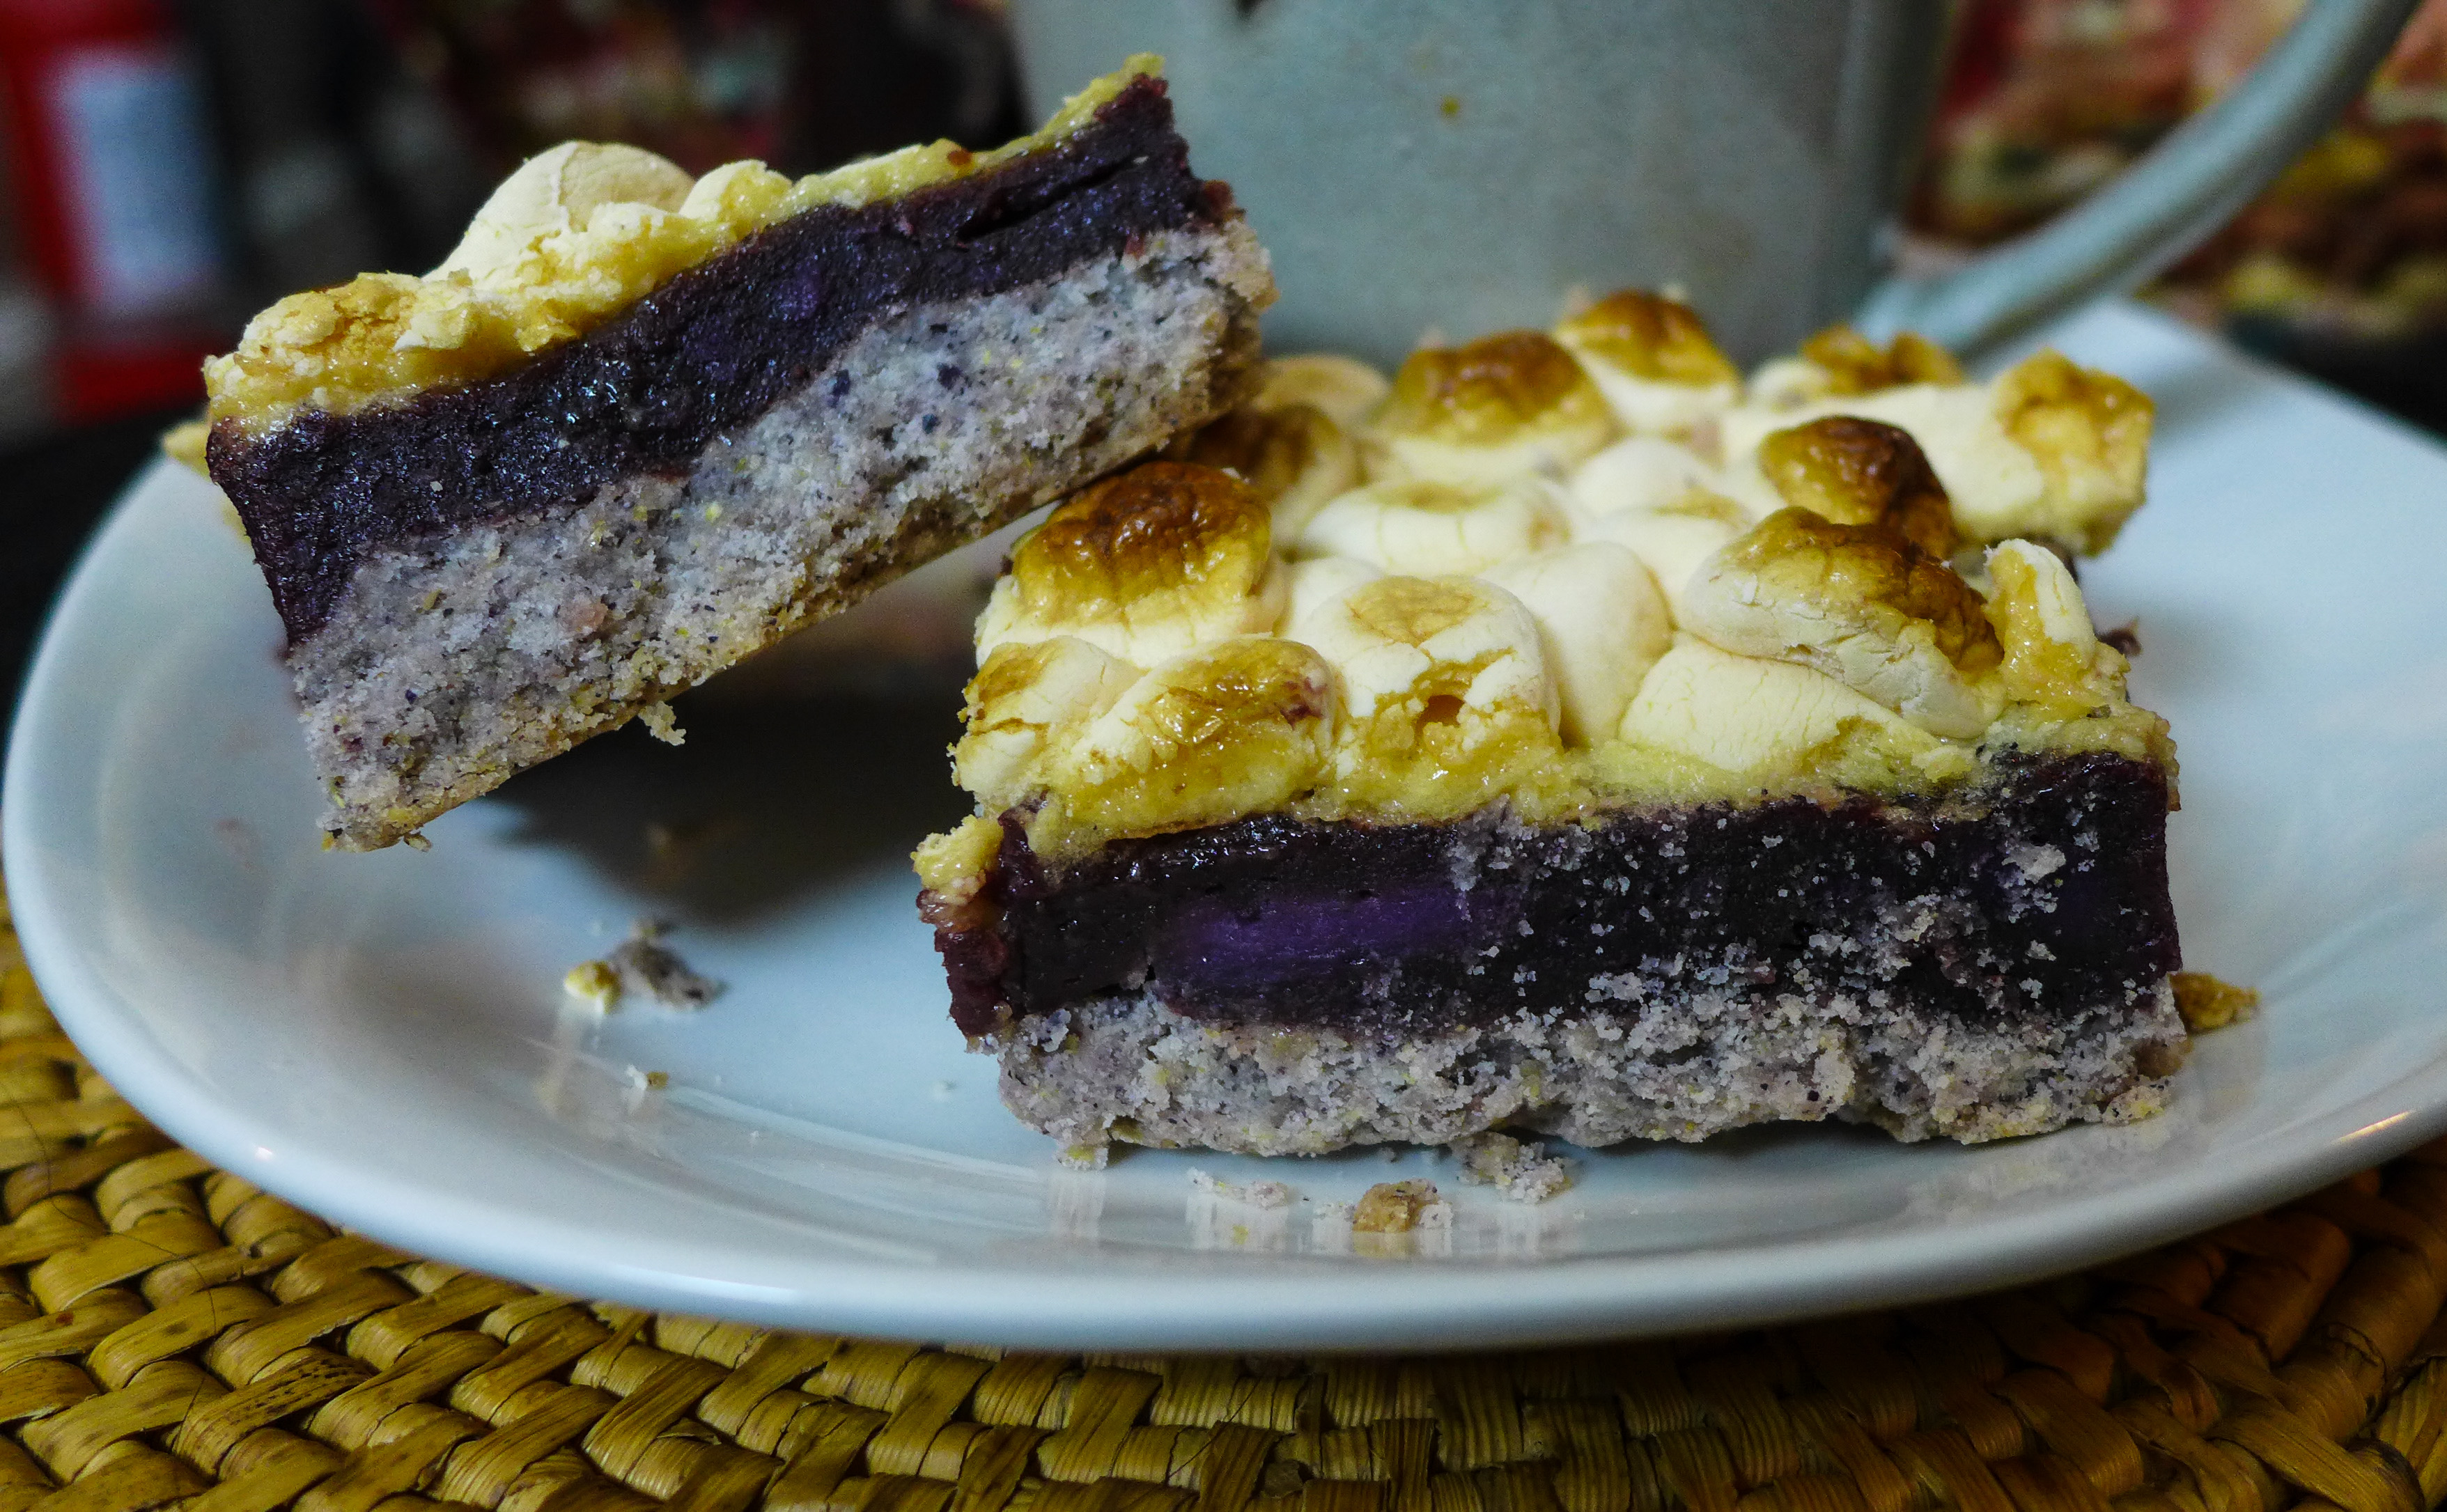
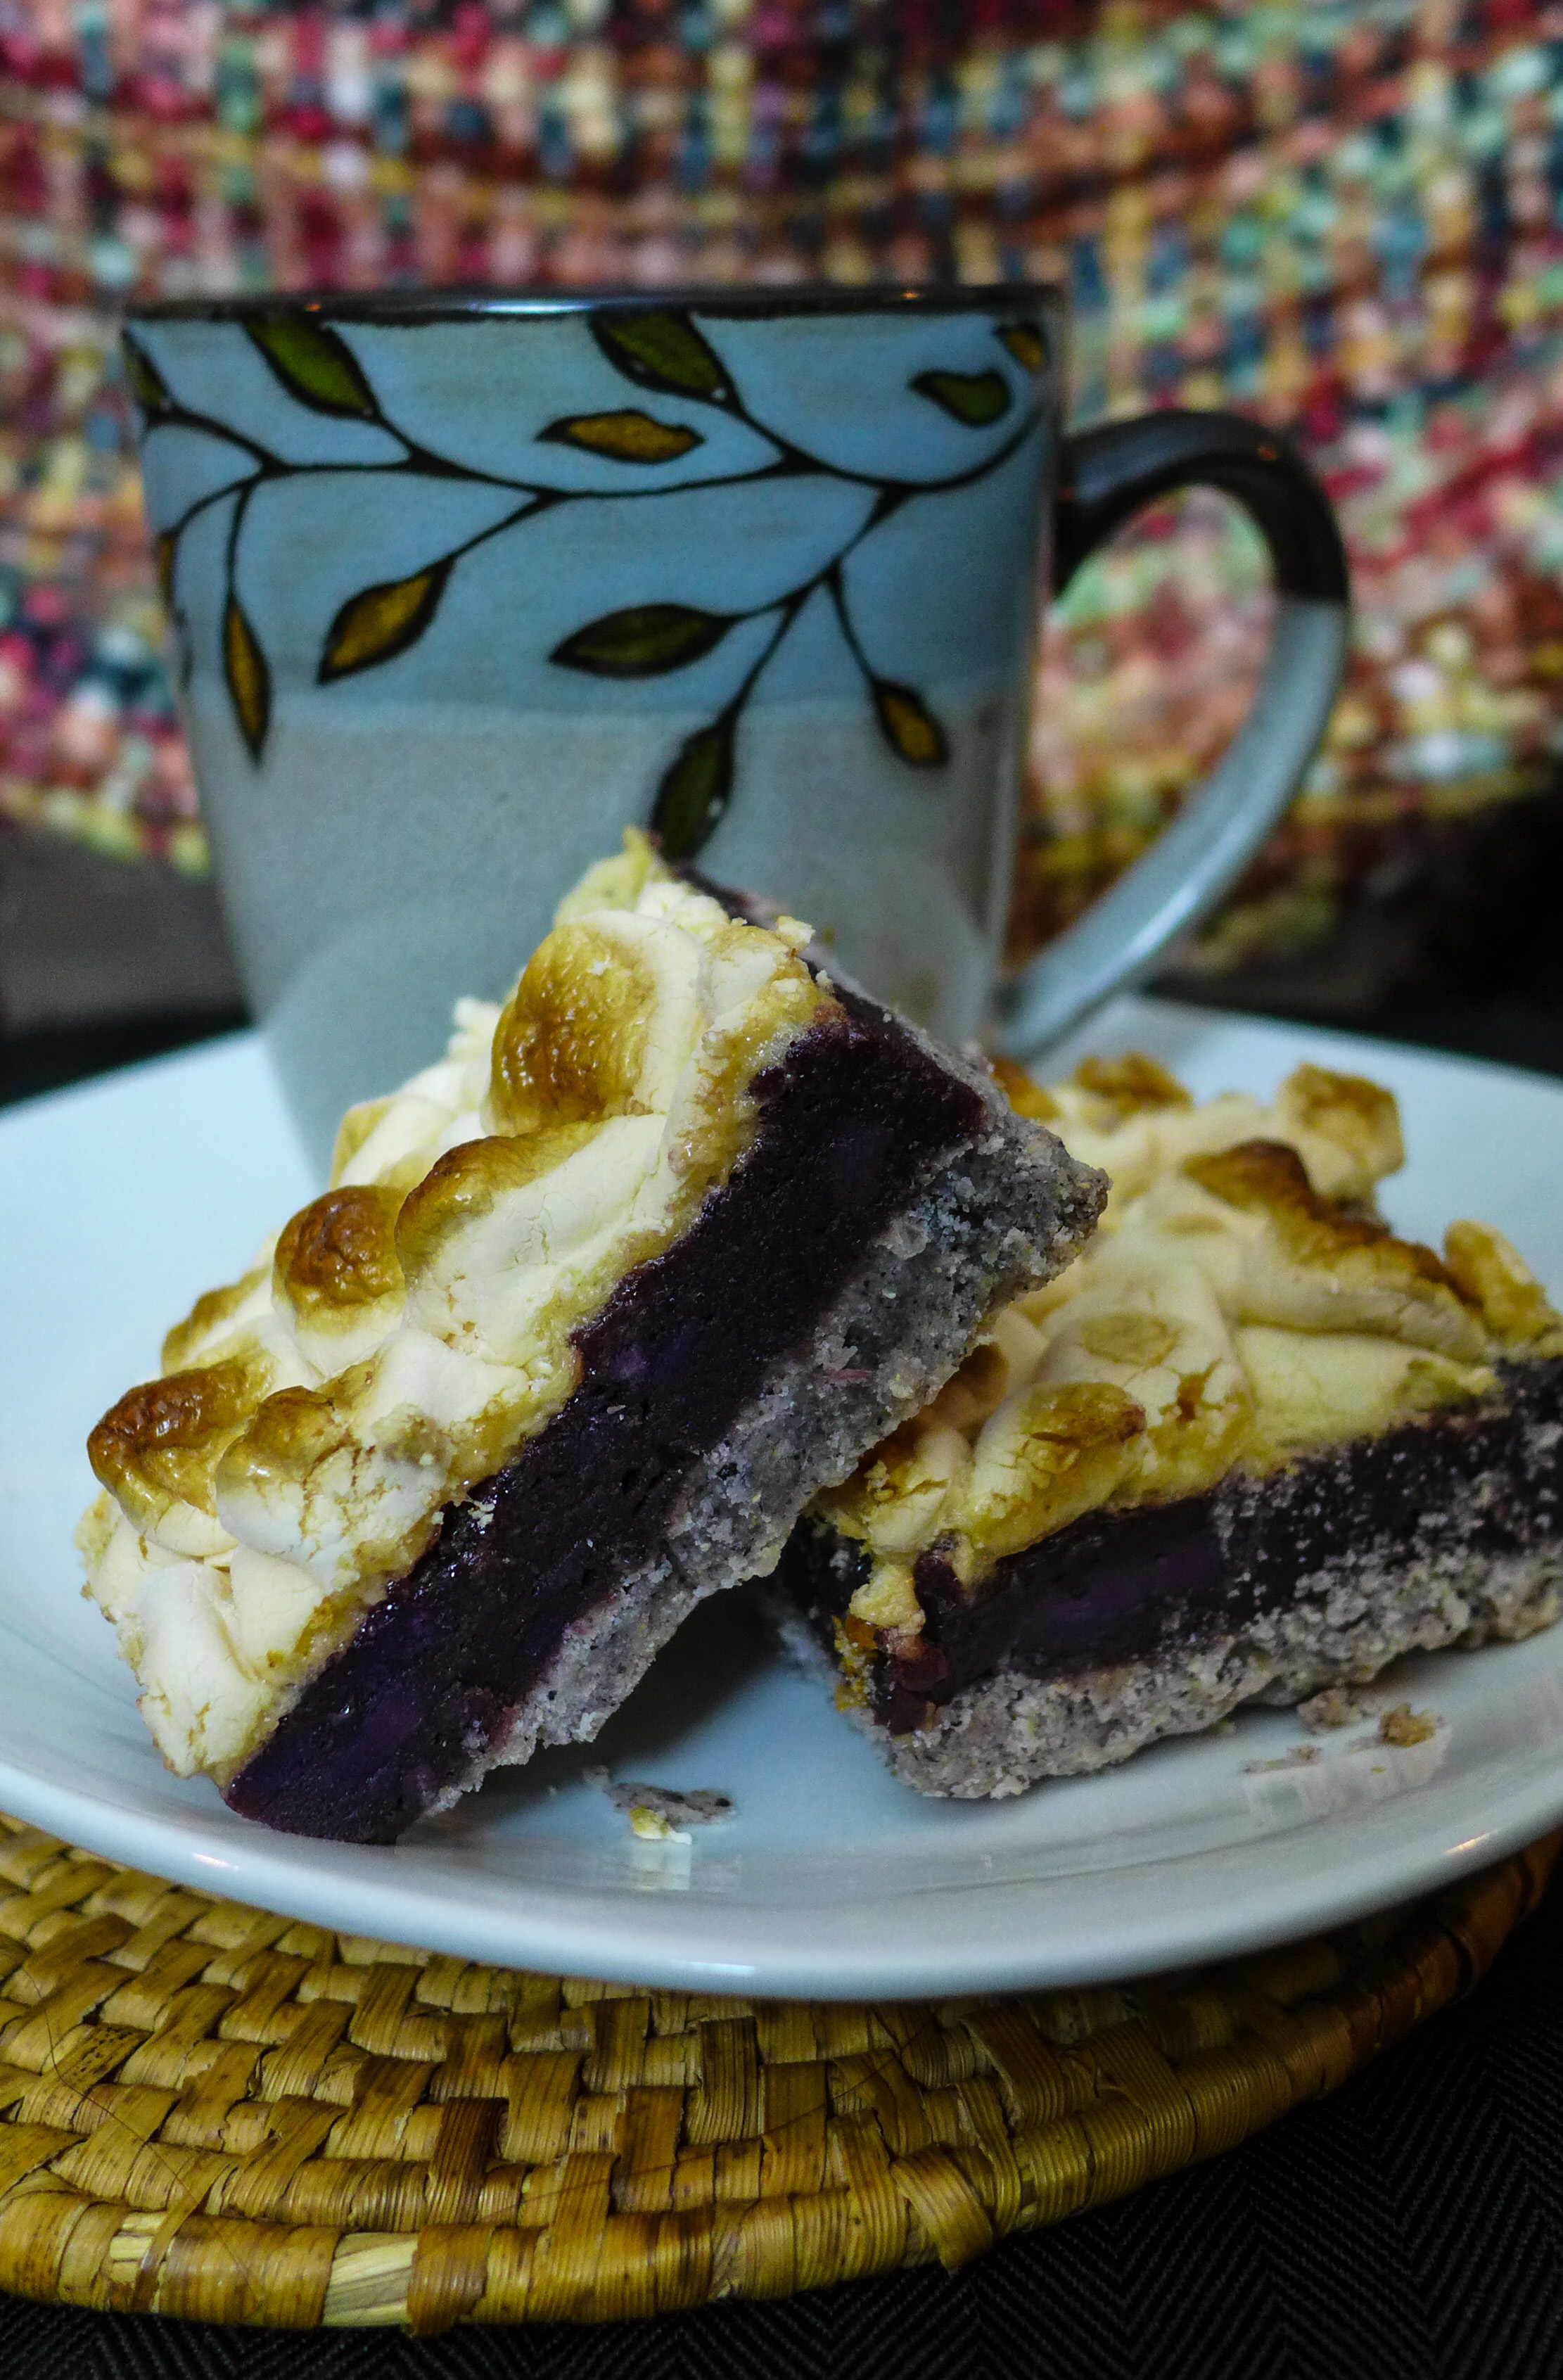
  I'll spare you the anecdotes and get right to the Thanksgiving food porn. I've listed everything I made for my first Thanksgiving dinner here. I will be seeing my immediate family this weekend where a second feast will take place. I'm blessed to have amazing family and friends who allow my boyfriend and I to bring our own food. I'm also grateful for my mom and dad who make sure that all our sides are vegan so that I can eat everything I want! I wish you all a very Happy Thanksgiving and a festive weekend. I hope for those that work, you take a moment for yourself in any way you can. You deserve it. Now, feast your eyes...😳😍🍂🍃🦃🍁🌳💝 Purple Sweet Potato Pie Bars
 Mini Pumpkin Pies
Vegan Green Bean Casserole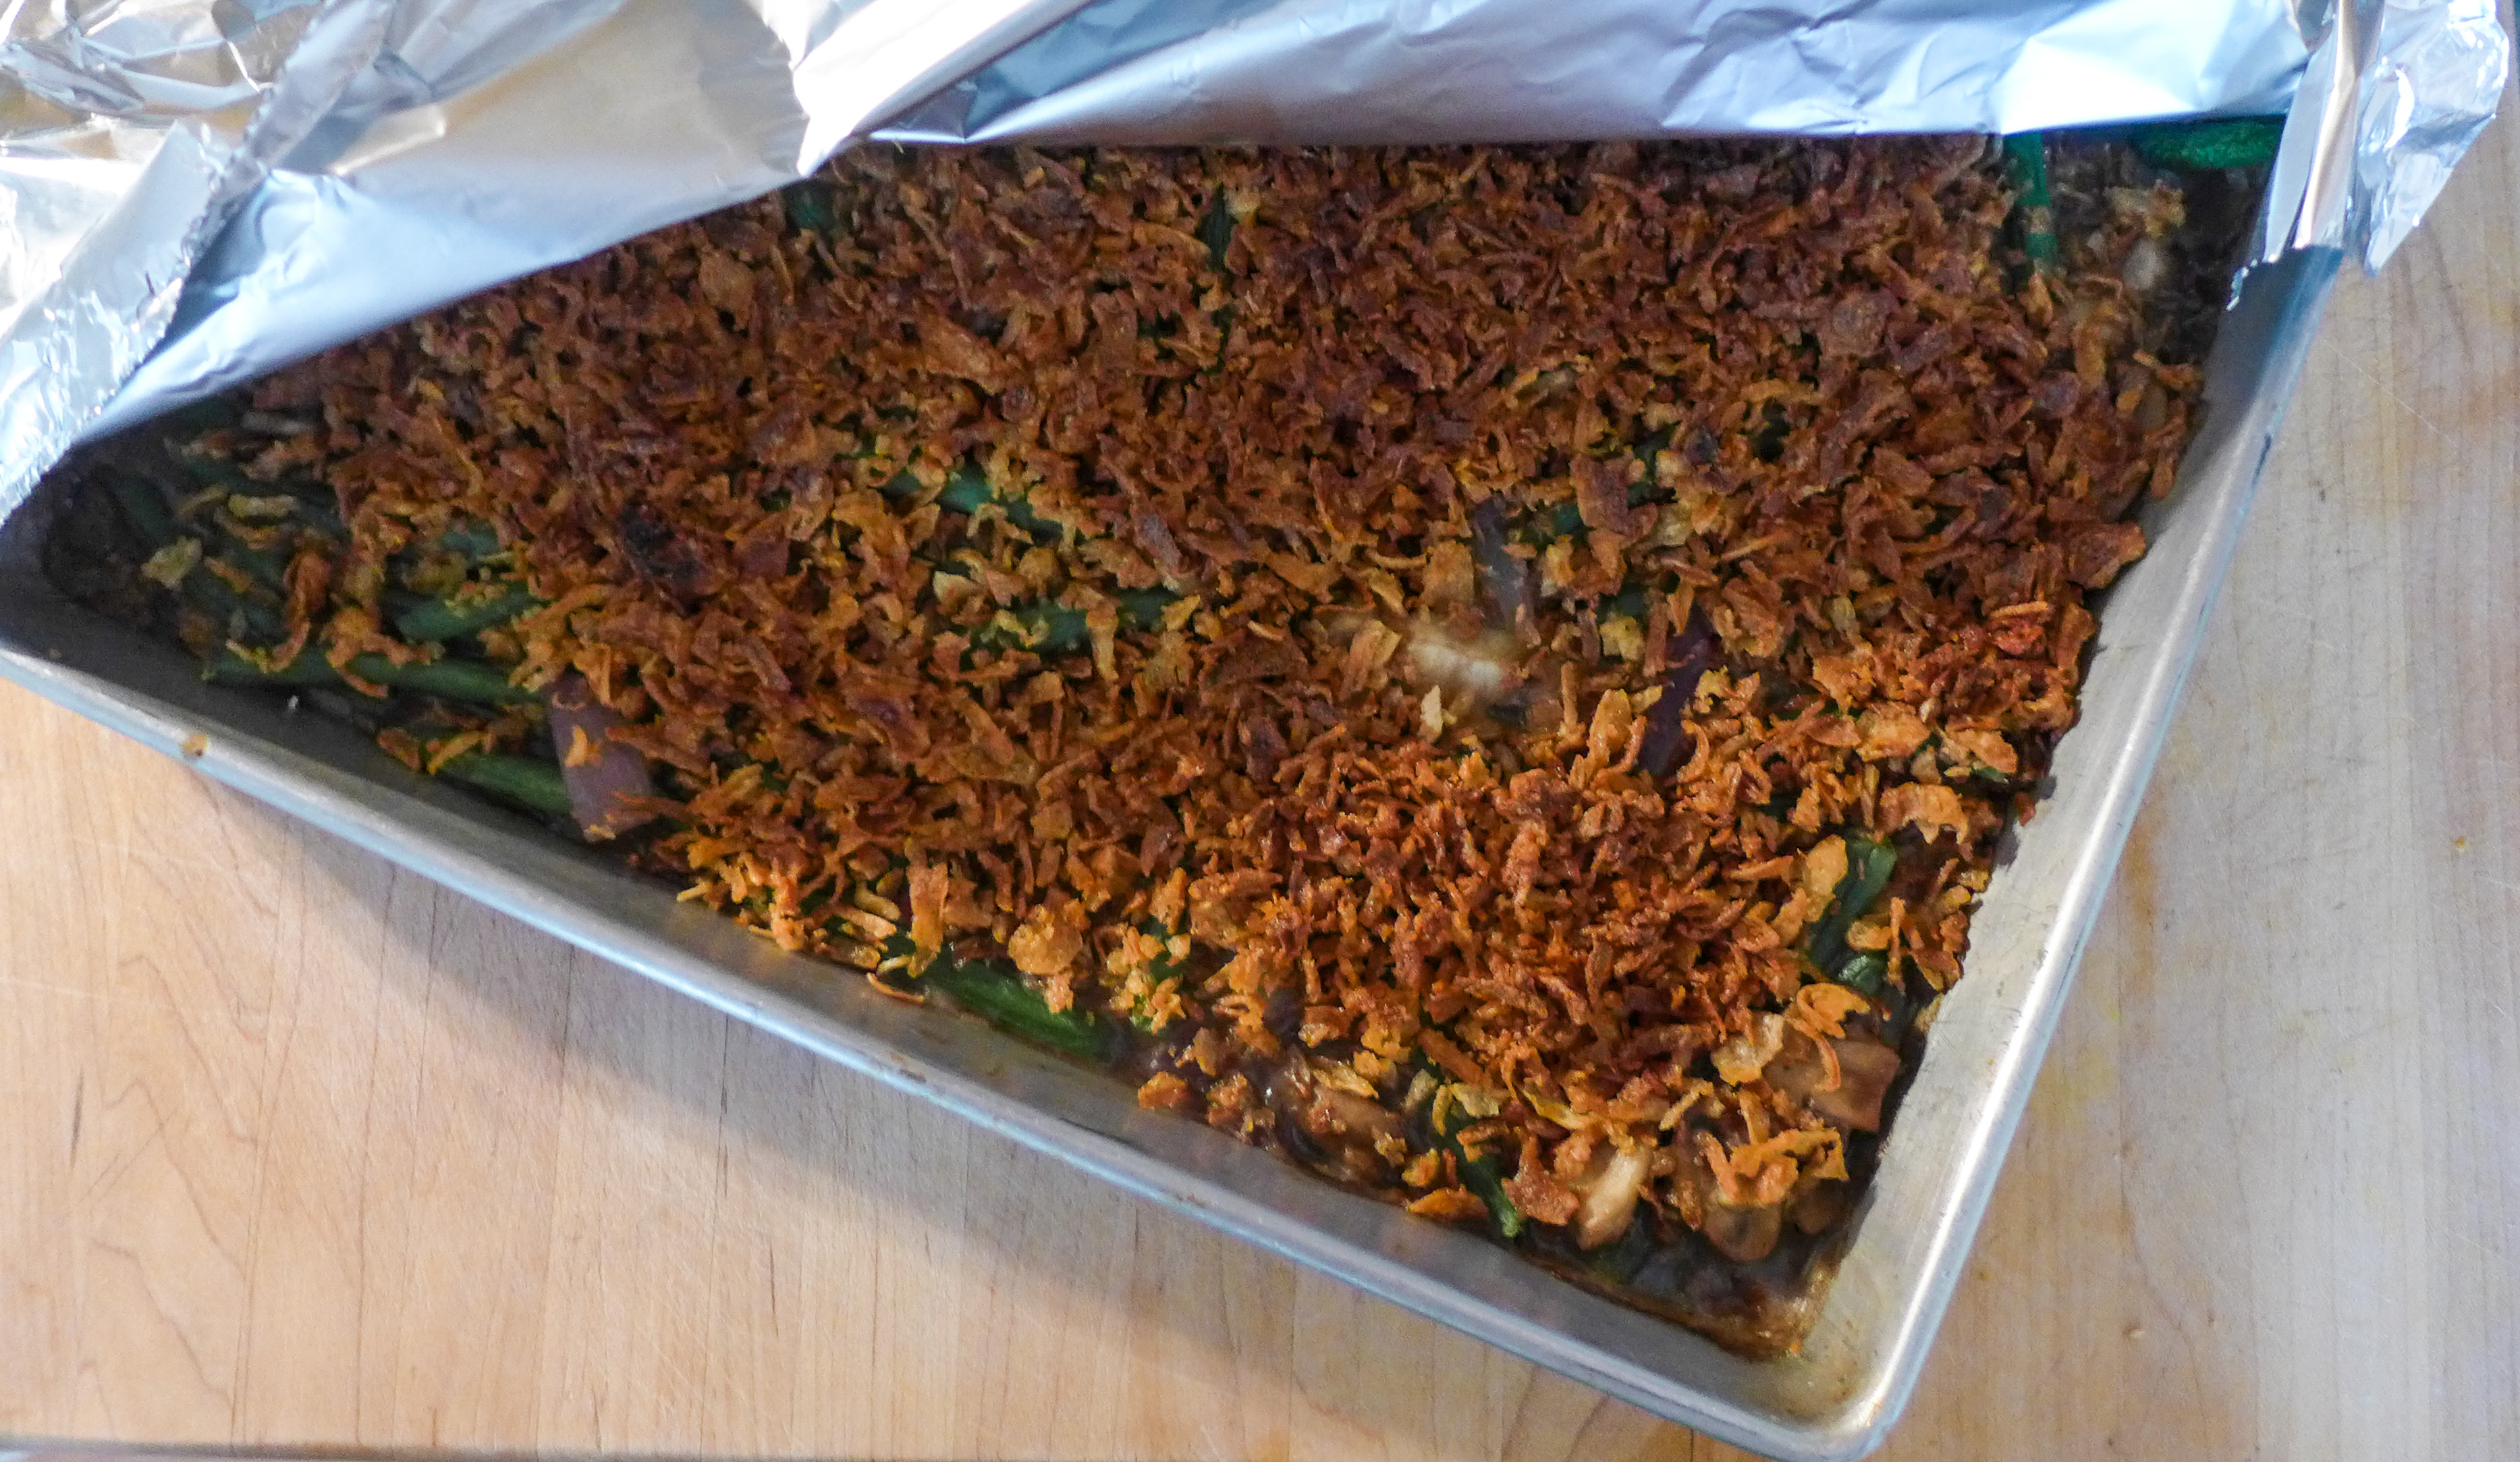 No recipe for this...I literally threw it together. But, if you want a good homemade recipe recommendation, see The Minimalist Baker. We made this version last year and it was delicious. This year, i just approximated everything. It's a very forgiving dish. Also, we used an entire container of fried onions because it's time to feast. Rustic Mashed Red Bliss Potatoes *Gluten free*
Again, no real recipe. I can tell you roughly how I did this:
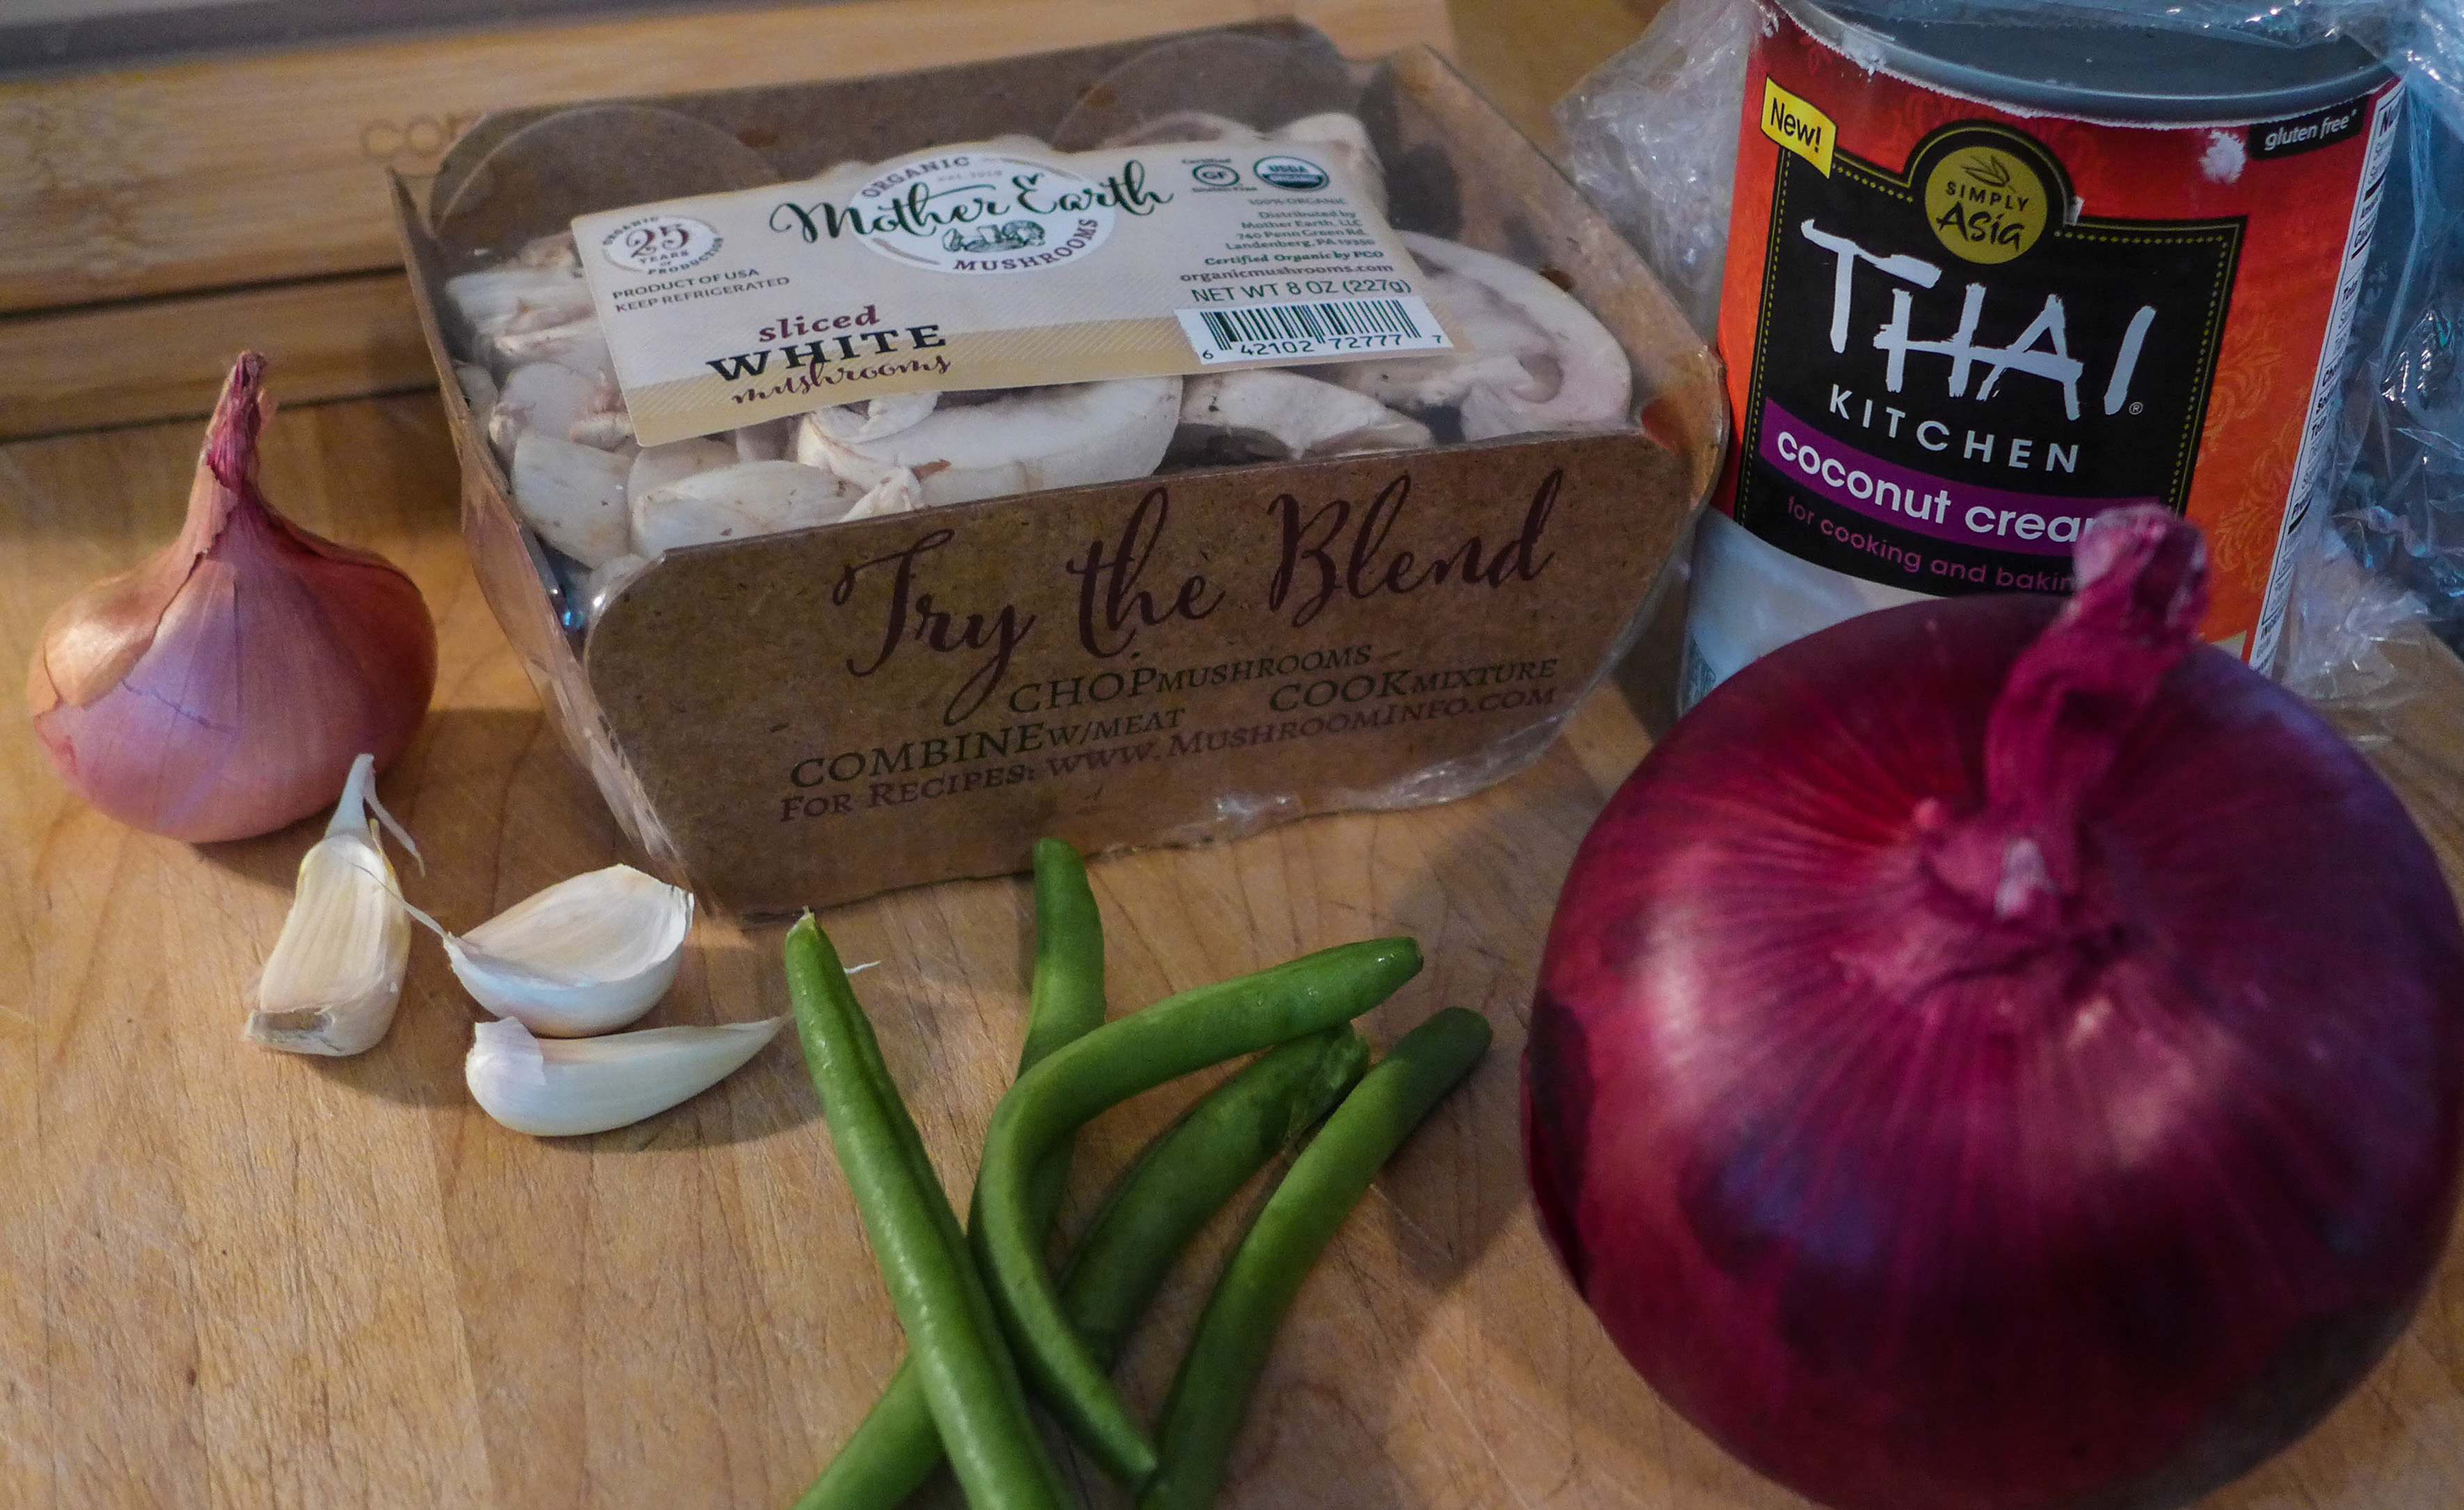
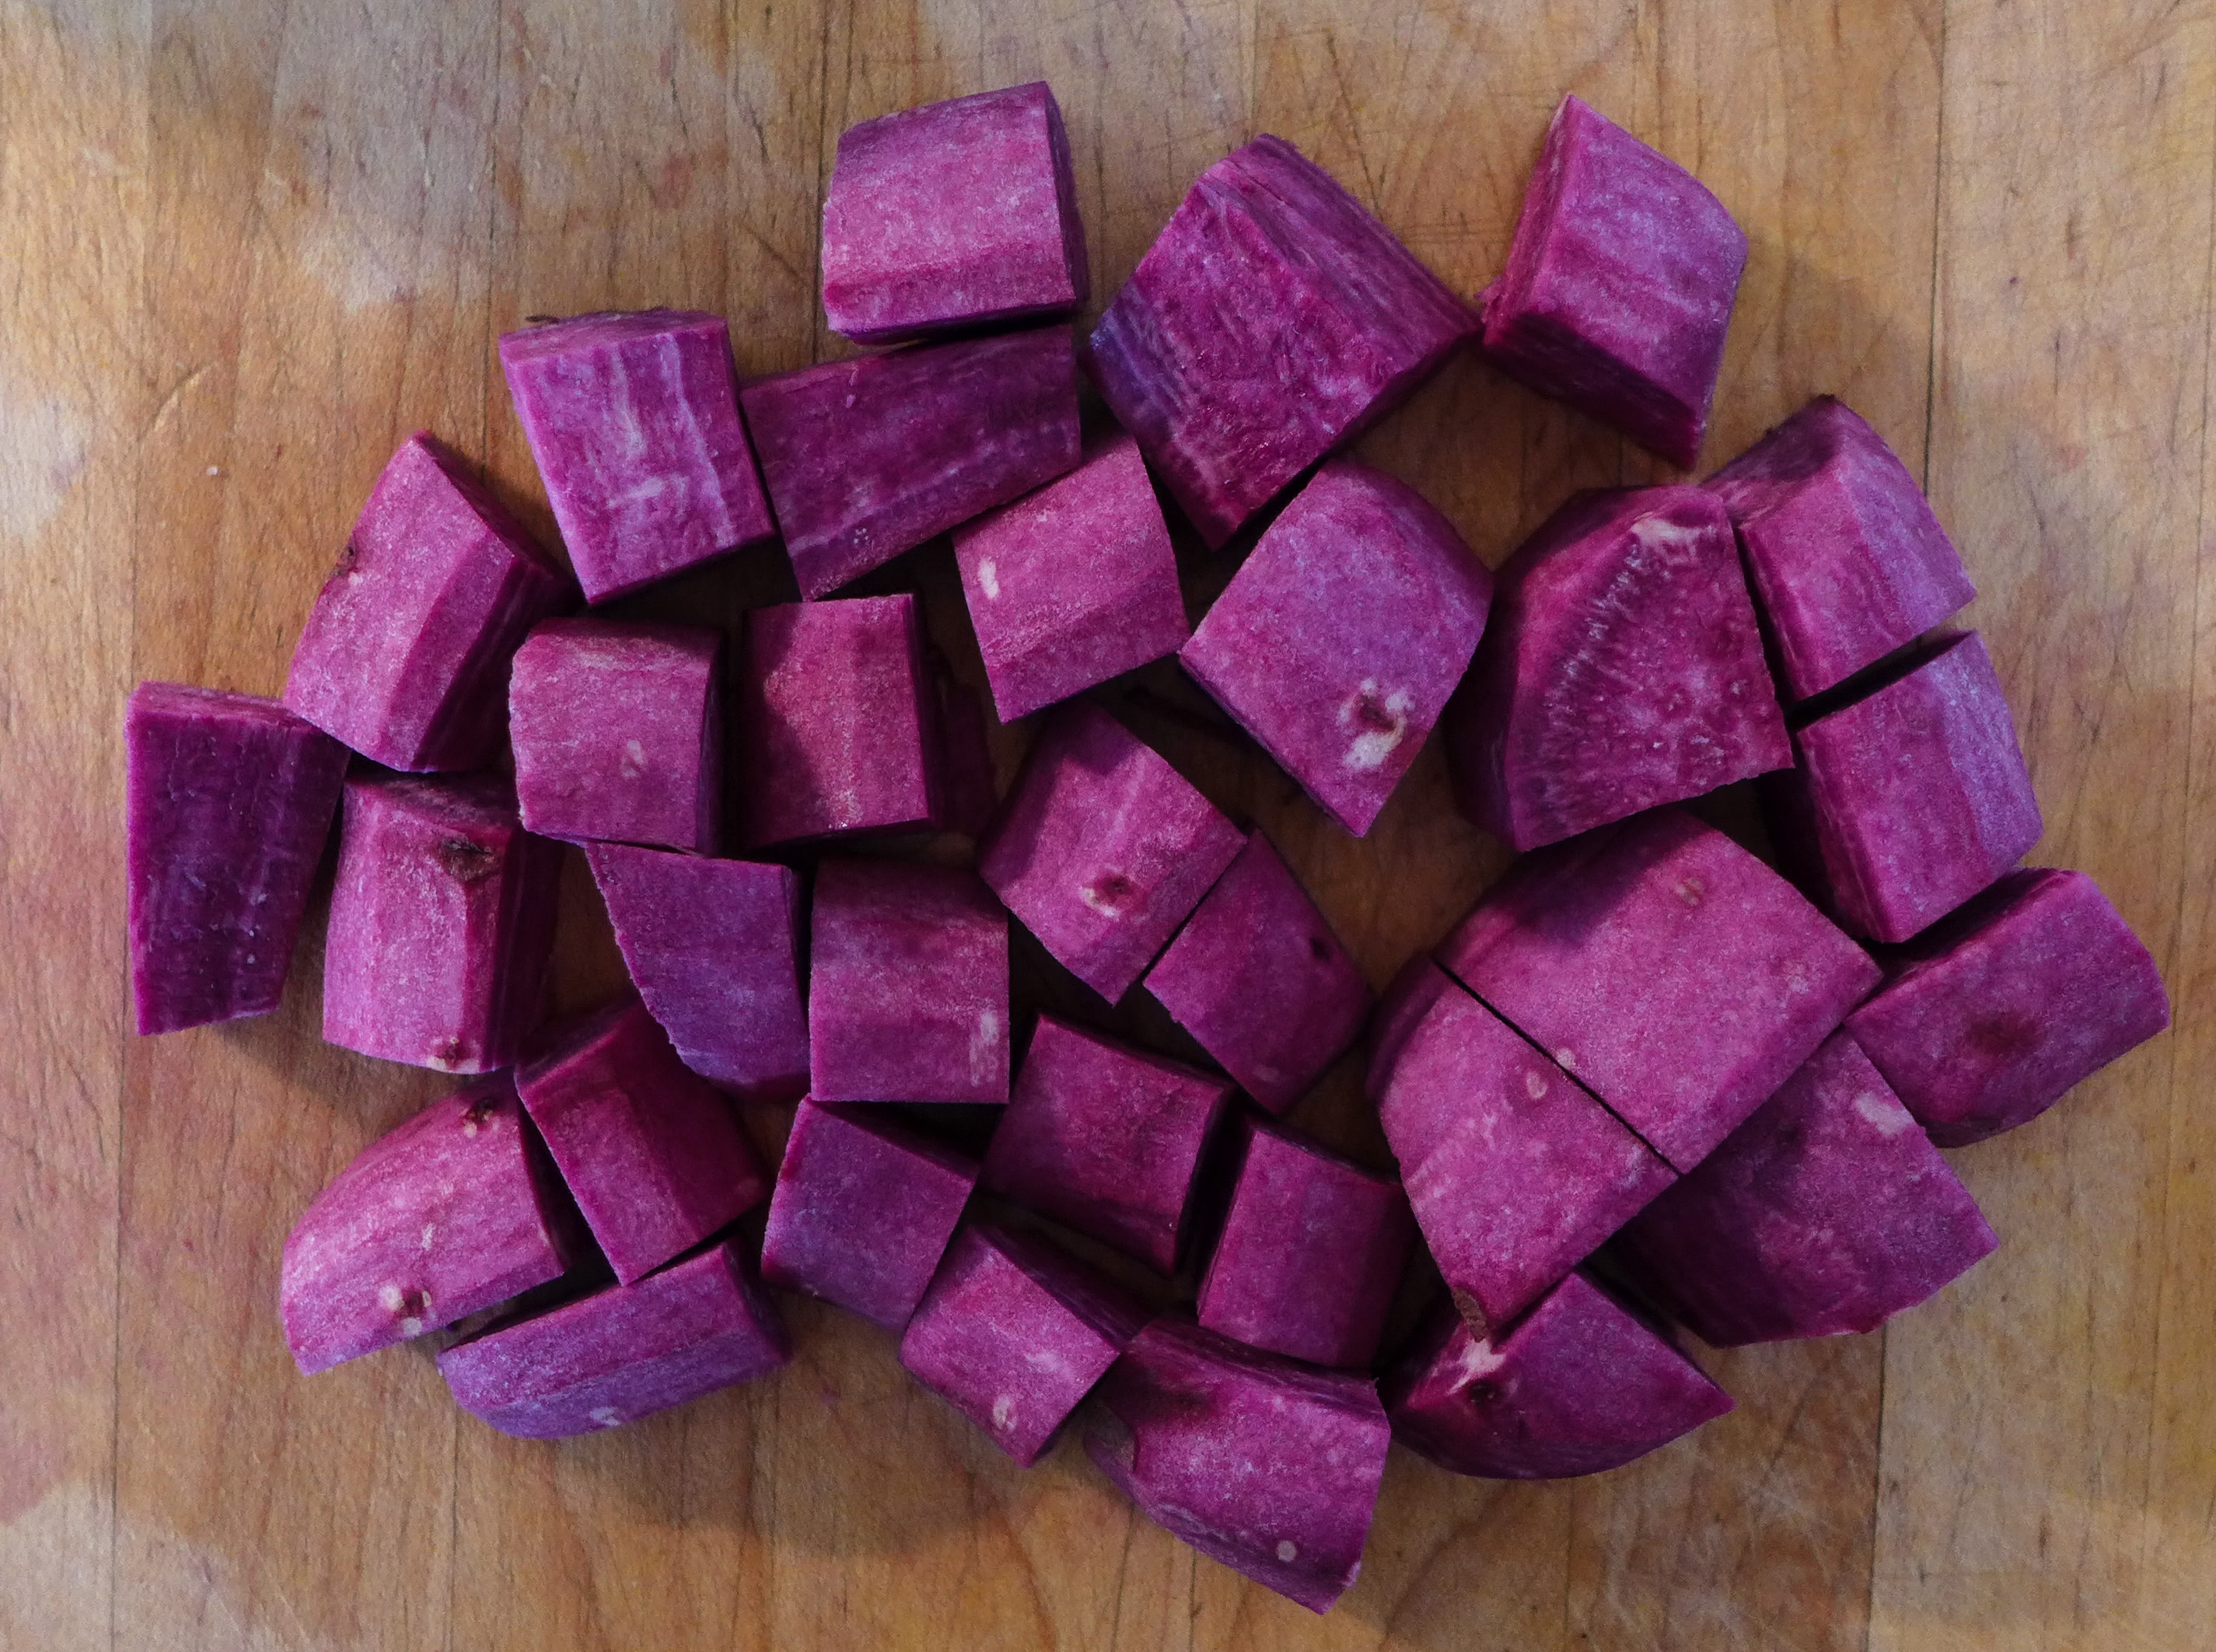
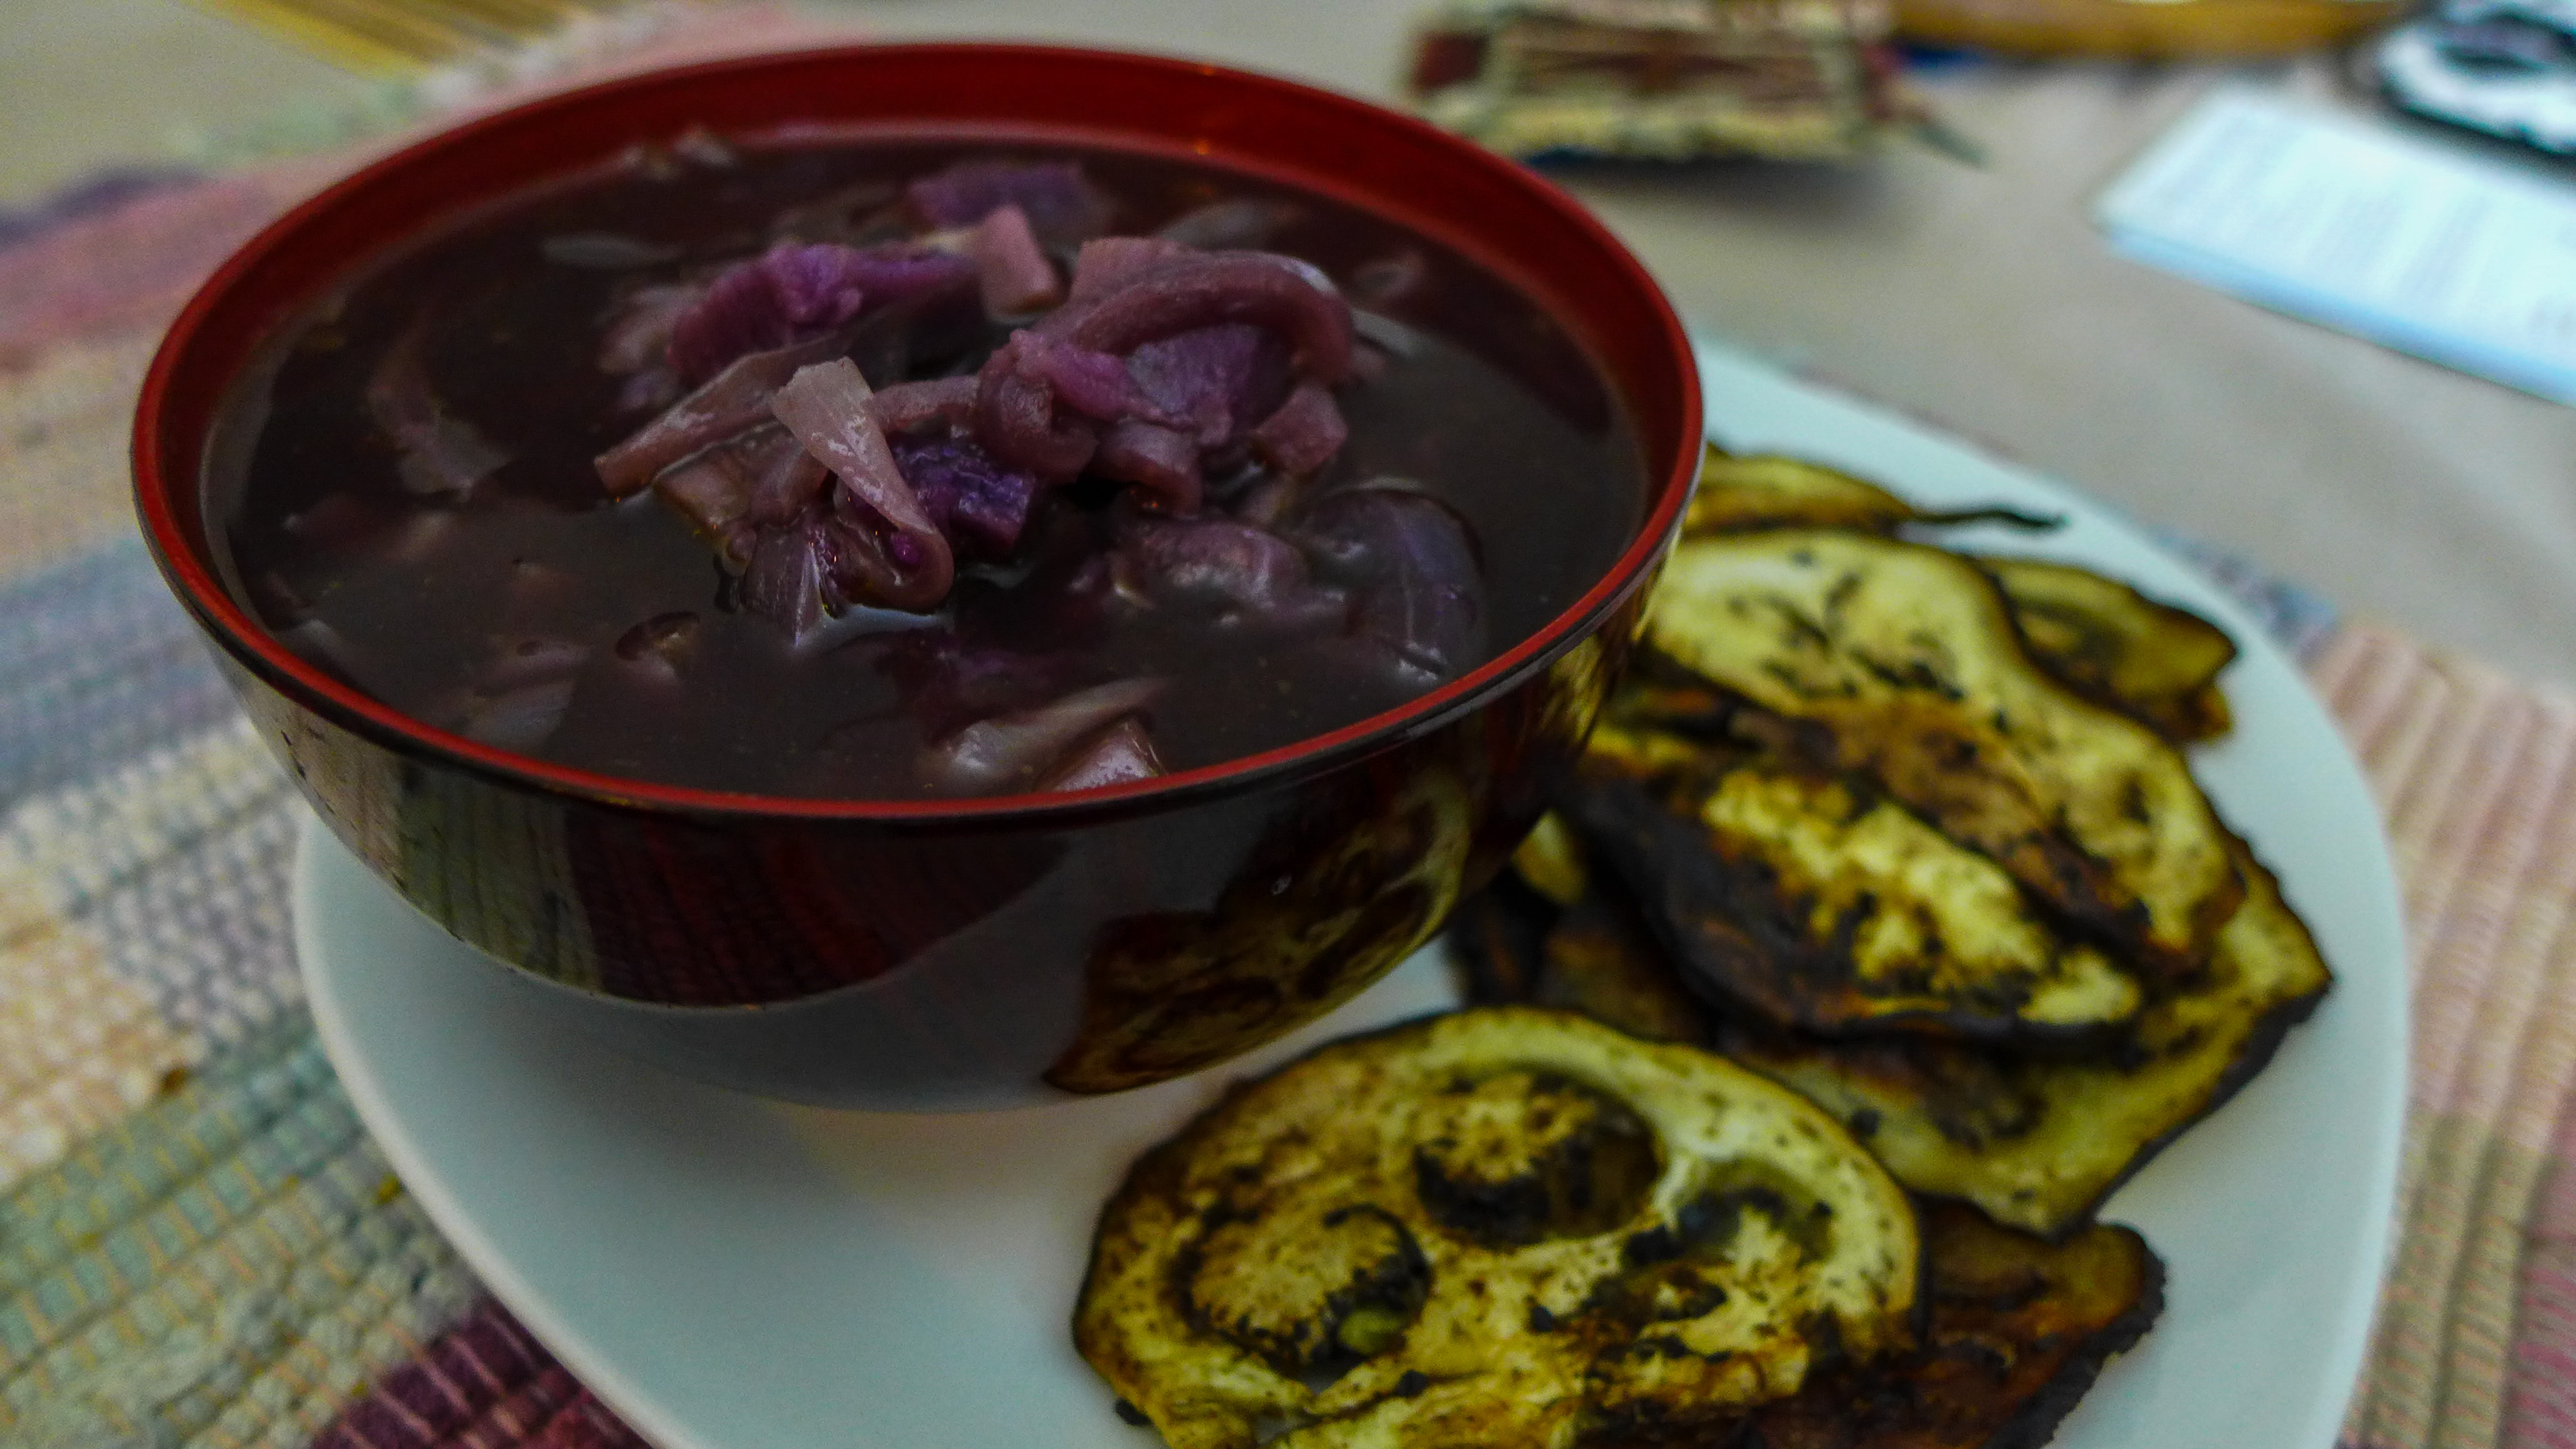
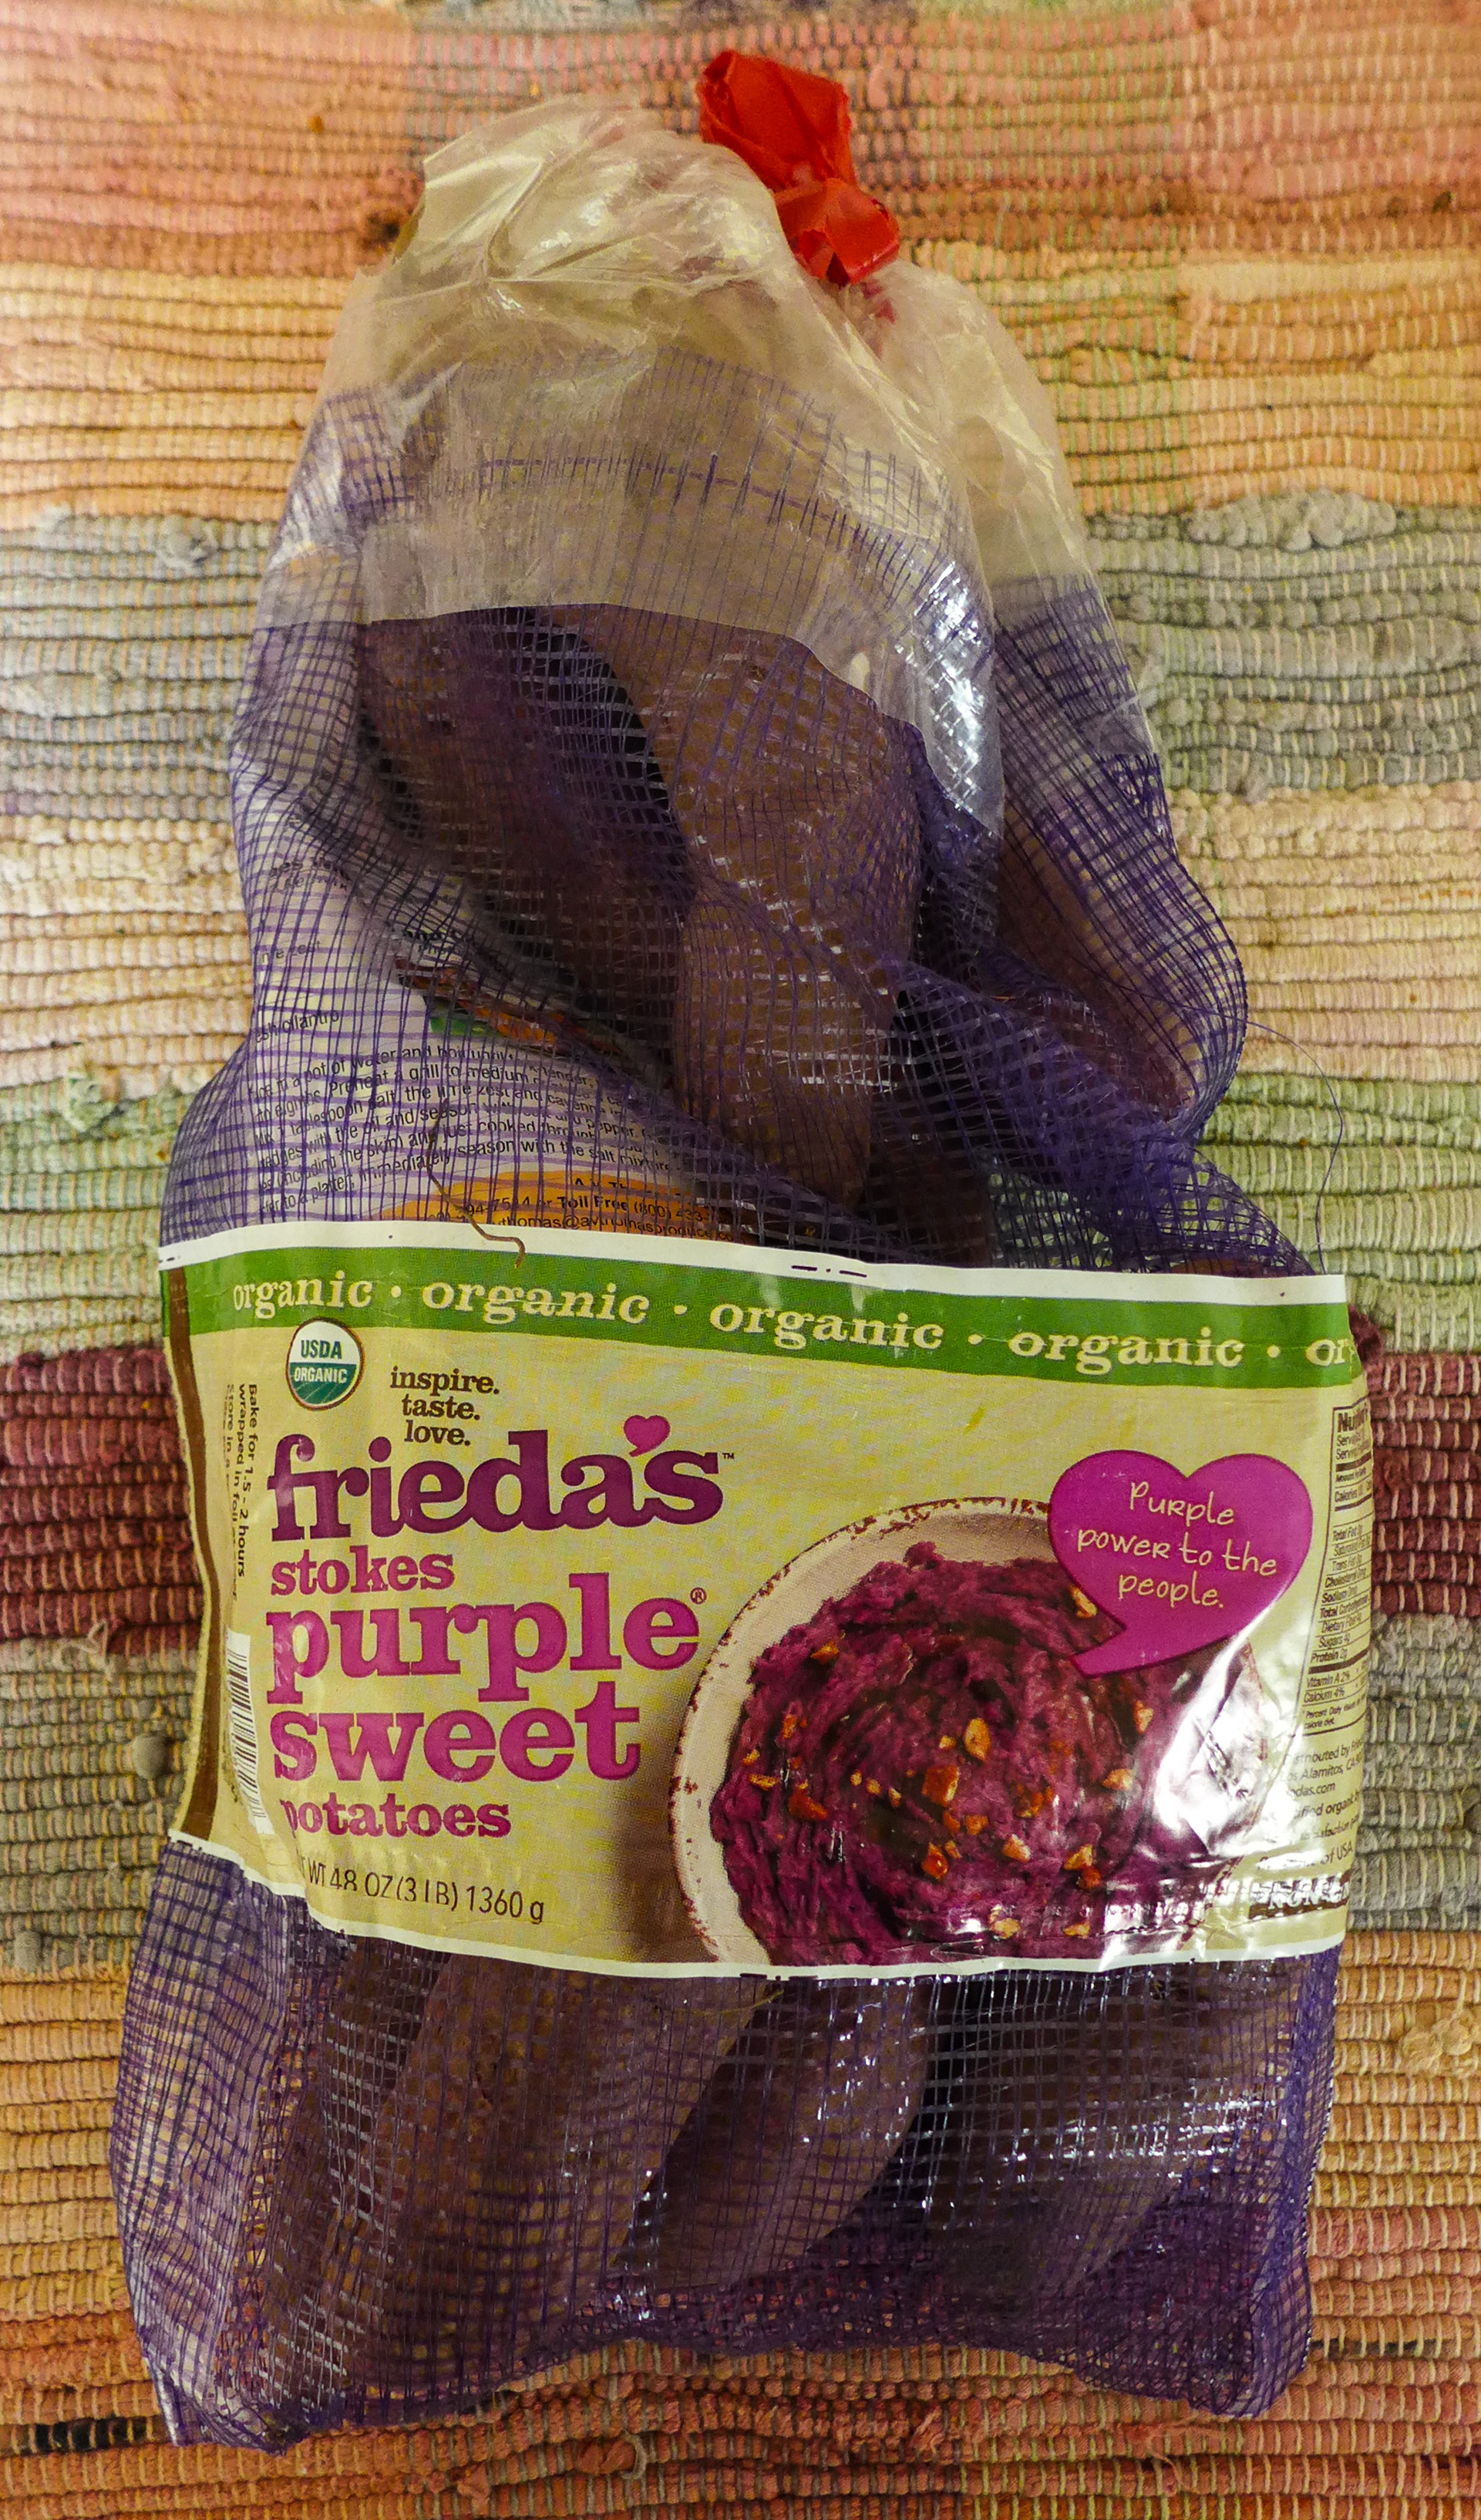
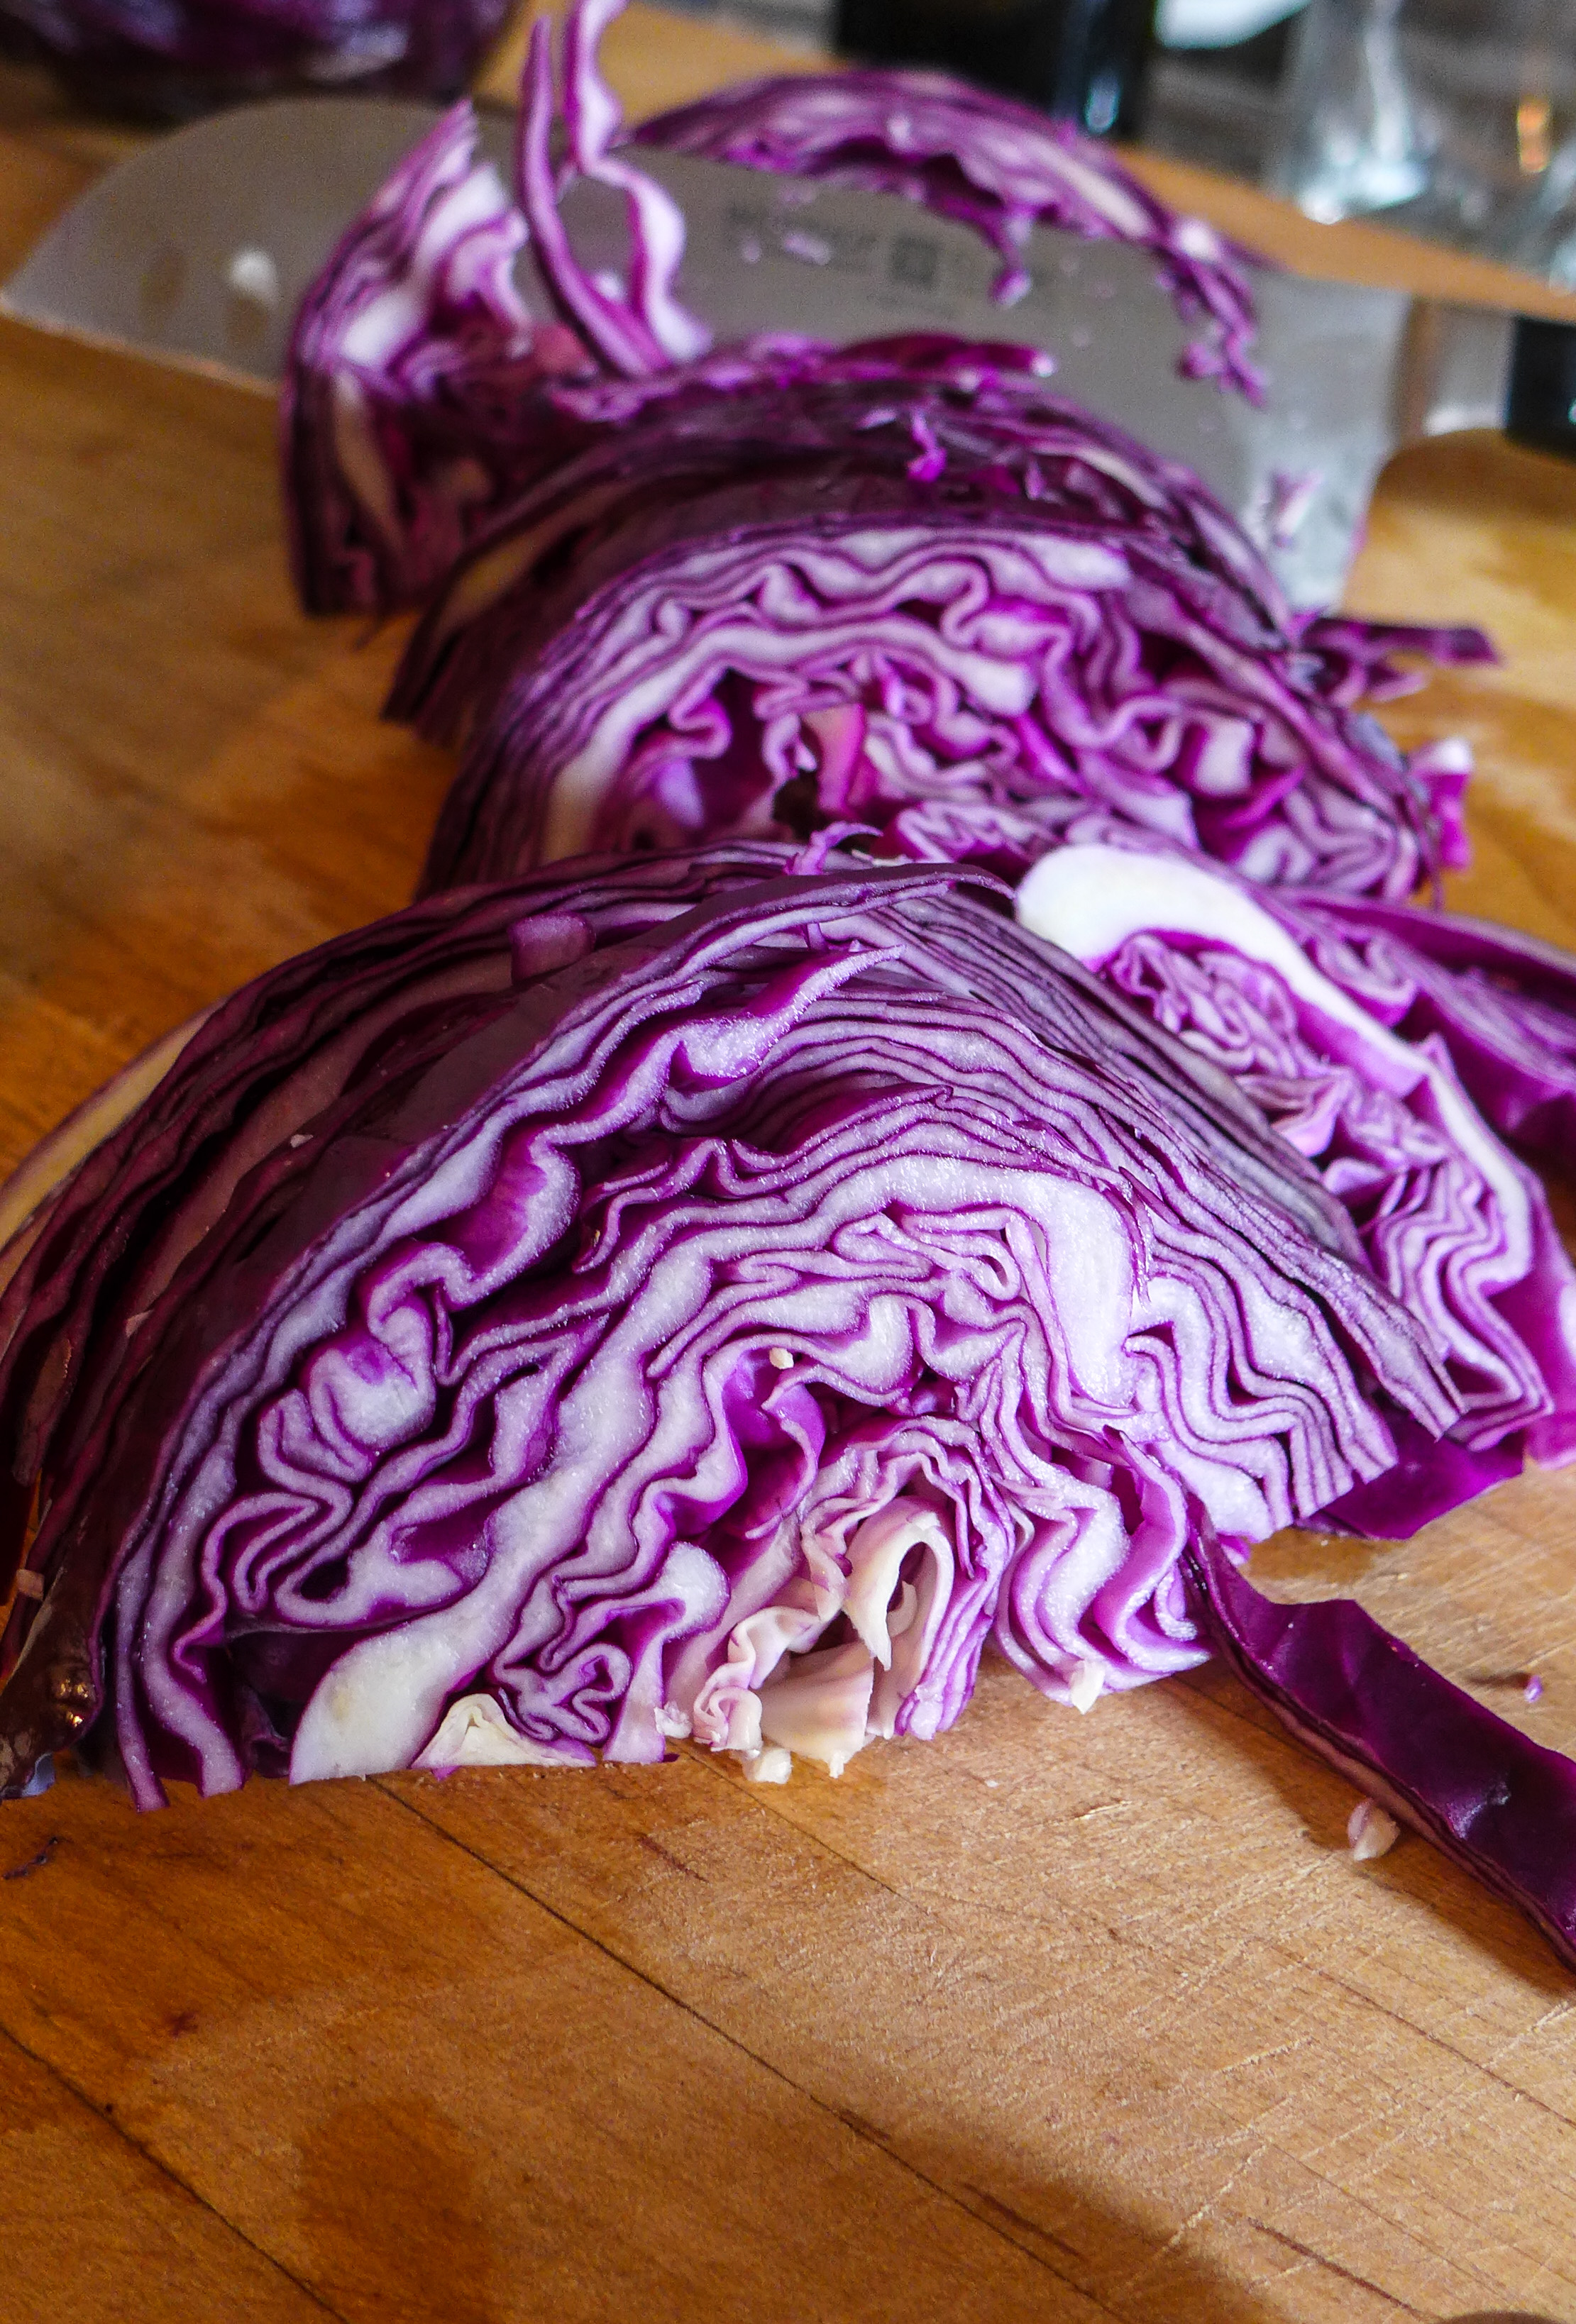
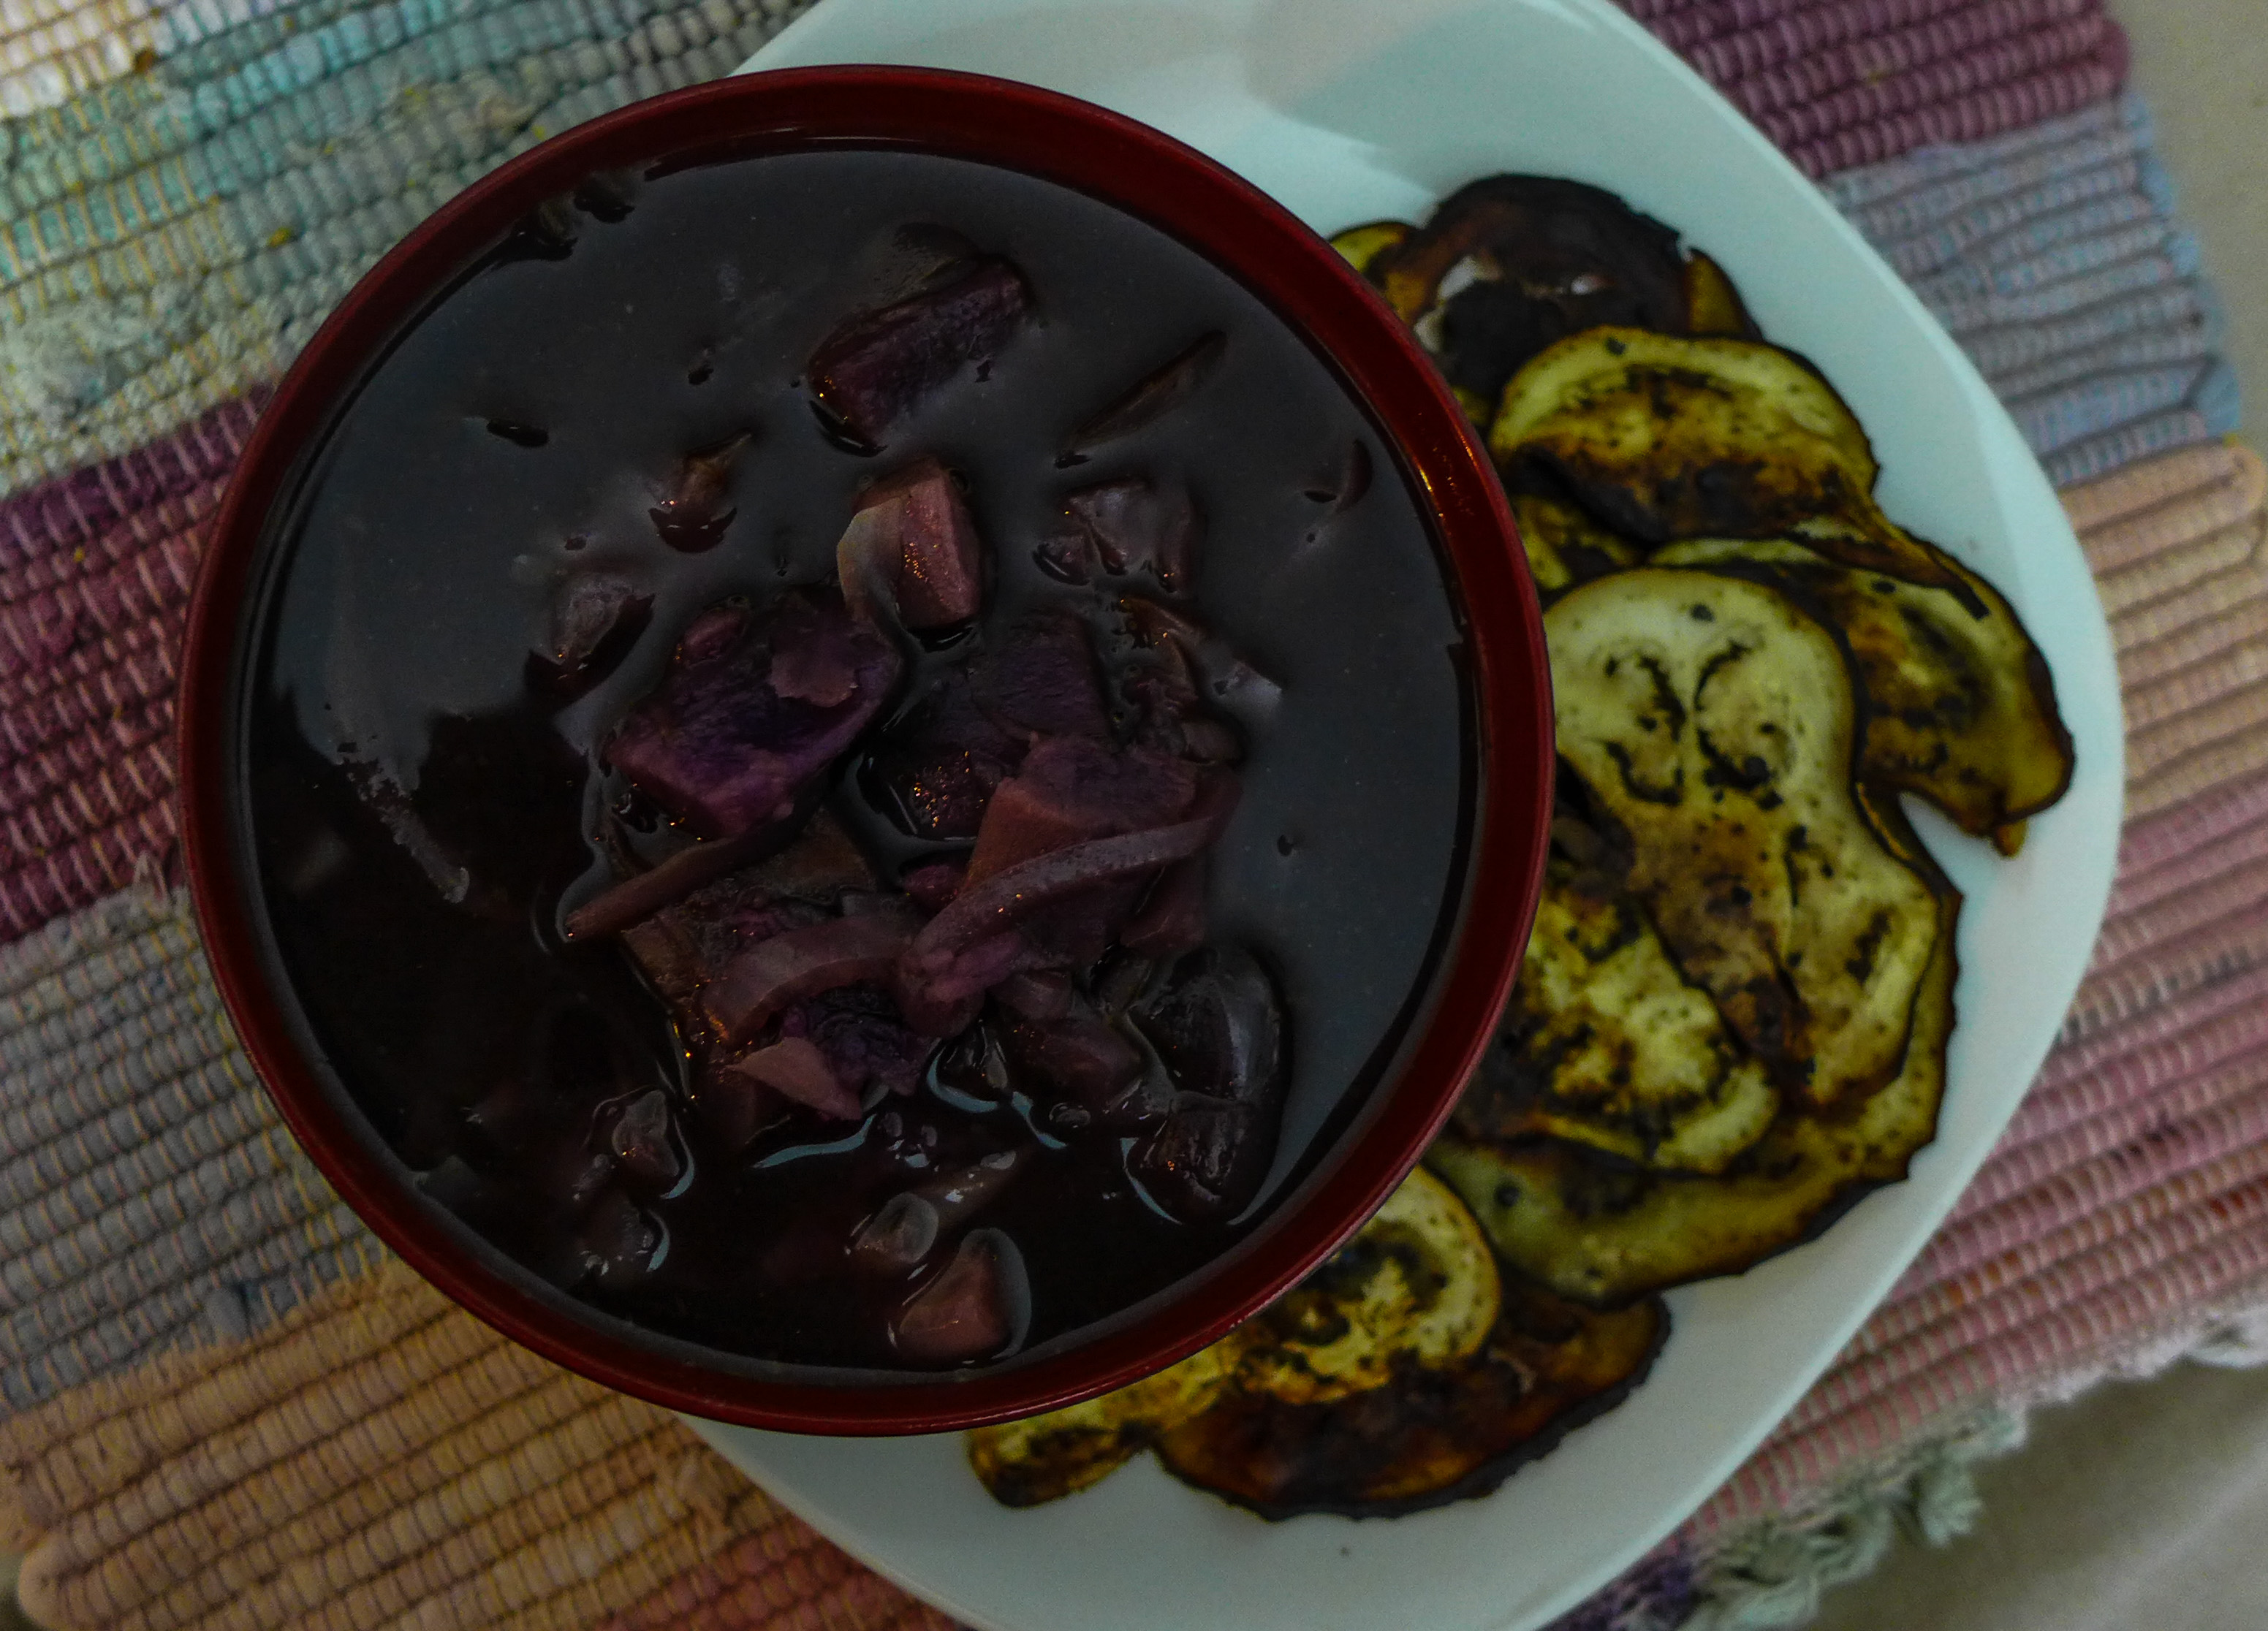 Today's color scheme is "goth" inspired...I went with purple, since I happened to find a bag of organic purple sweet potatoes one day. It was a very exciting find. I've never tried these little guys before...I'm sure I'll love them just as much as their orange and white cousins! Sweet potatoes are a food that I began to love as a vegan moving in a more health conscious direction. To go with my potatoes, I've added other wonderful purple produce: onion (or red, I guess), cabbage and eggplant. My favorite way to eat eggplant is in curry, so I spiced them with garam masala, chili pepper, and black salt. This soup doesn't take very long. You can have it finished in about an hour if you use pre-made stock or bullion cubes. All you need to do is wait for the potatoes to soften and you're good to go! For even more gothic charm, use the optional red wine while you saute the onion and cabbage. 💀🍷🍆🍠🍲 Gothic Purple Soup with Eggplant Chips
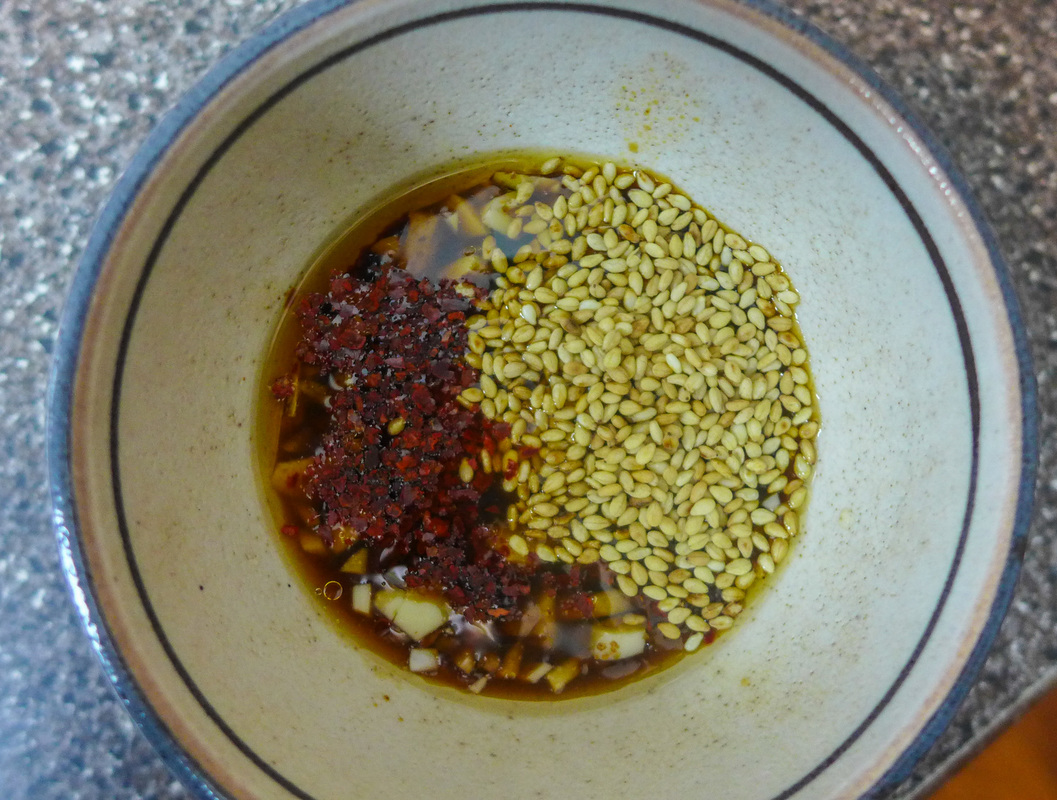
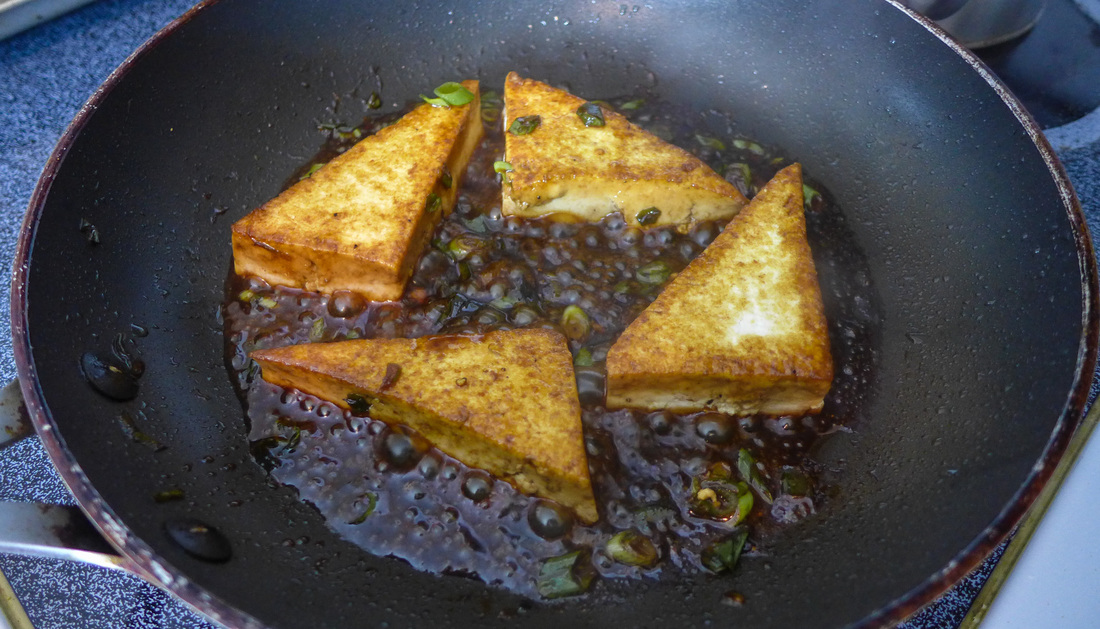
 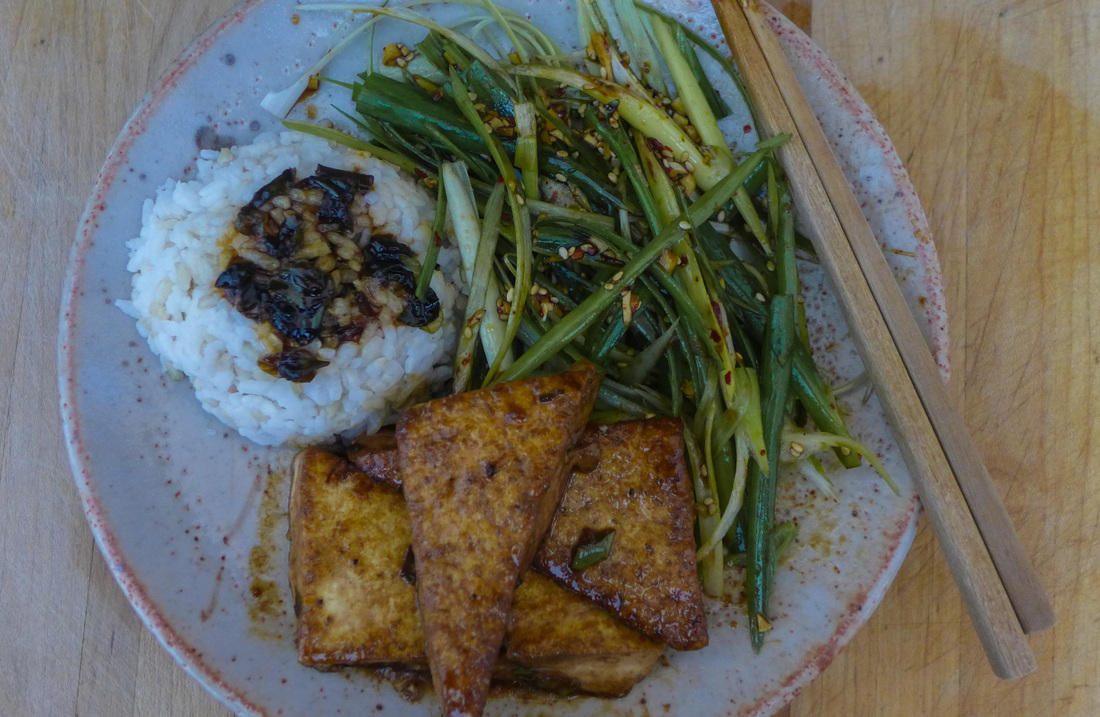 Today's recipe is a simple one that I love. I almost never make Korean inspired food. I also can't really go out to get it since Korean restaurants are typically not vegan friendly. When I was younger, I ate at a few Korean BBQ restaurants with my family. One of those restaurants was in Japan, believe it or not! There was a big beautiful yellow lab parked outside to greet customers. She was their mascot and the inspiration for their name, too. My favorite part about Korean BBQ is the marinade, which is the case for many people, I would assume. For those who eat meat, they may feel differently. I took the simple yet flavorful marinade and slathered it on some tofu for a quick and absolutely delicious meal. No need for meat here. 😉  I served the tofu with some rice and pajeori. Pajeori is a dish I had never heard of before. It's a beautiful salad of julienned scallion and spiced with Korean chili flakes. If you don't have the Korean variety, just substitute regular dried chili flakes. I cooked my tofu in a pan with some coconut oil. You can absolutely bake or grill it for a sightly charred effect. I wish I could grill mine, but it is quite chilly where I live! (Also, no grill. 😅 Any way you cook it, give it a try! Tofu is good any way you cut it, so spice it up next time you need a quick meal. Let's begin a love affair with Korean food together! What d'ya say? 😍🌶🍚 Korean BBQ Tofu with Pajeori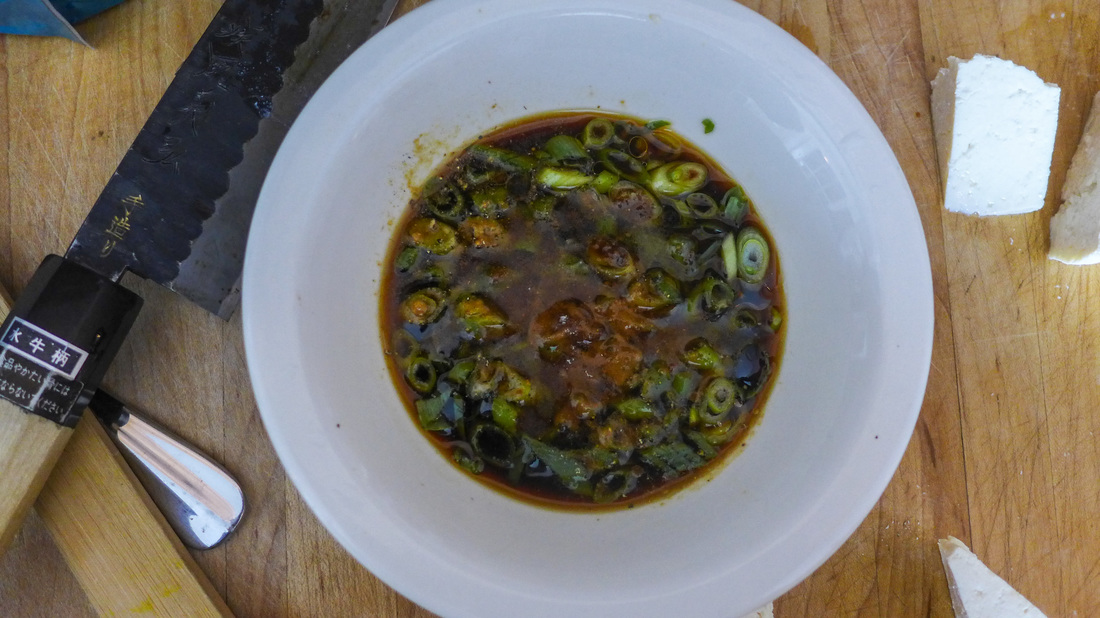 Ingredients Free from: gluten, nuts, refined sugar Yield: about 4 servings
Instructions
 Pajeori Ingredients Adapted from My Korean Kitchen
 Instuctions
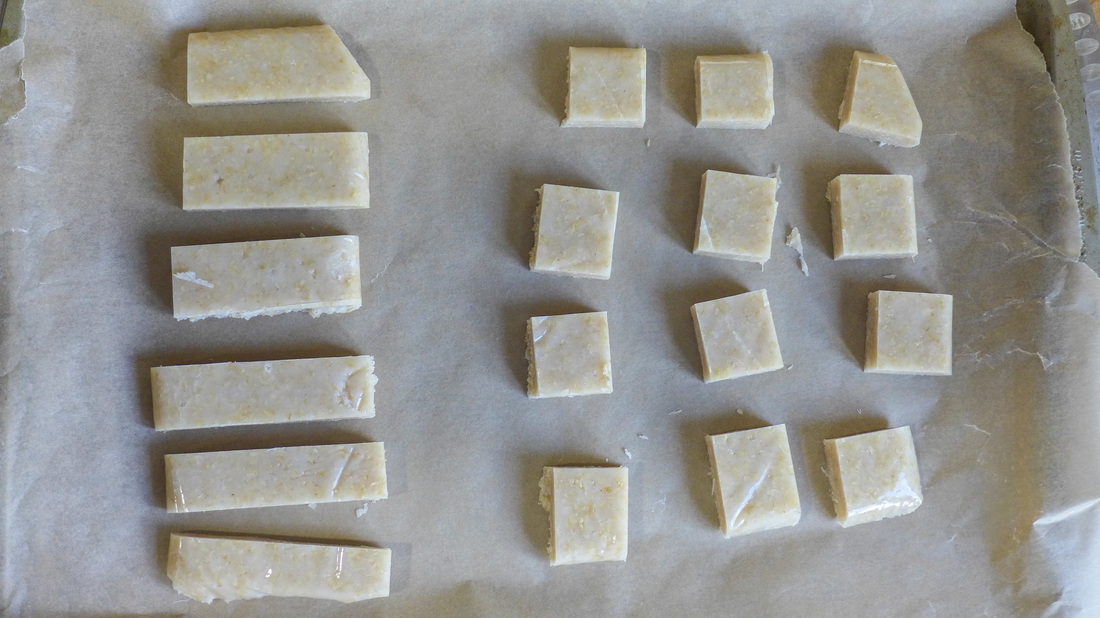
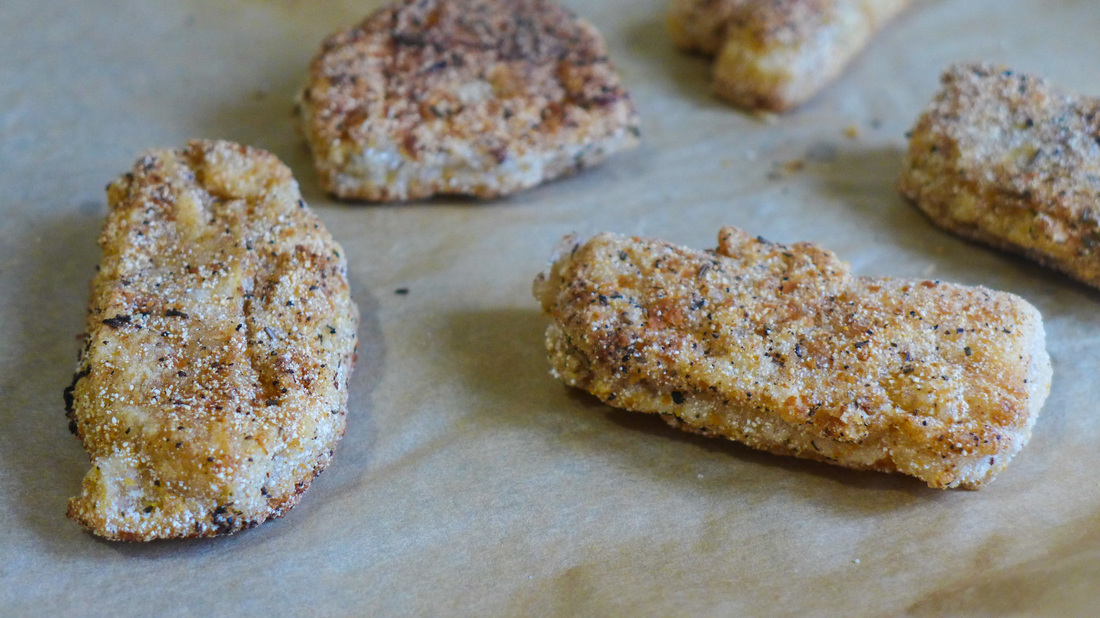
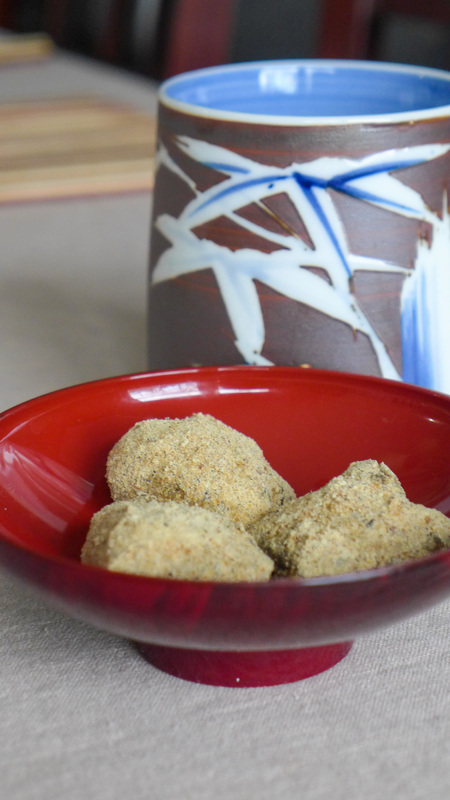
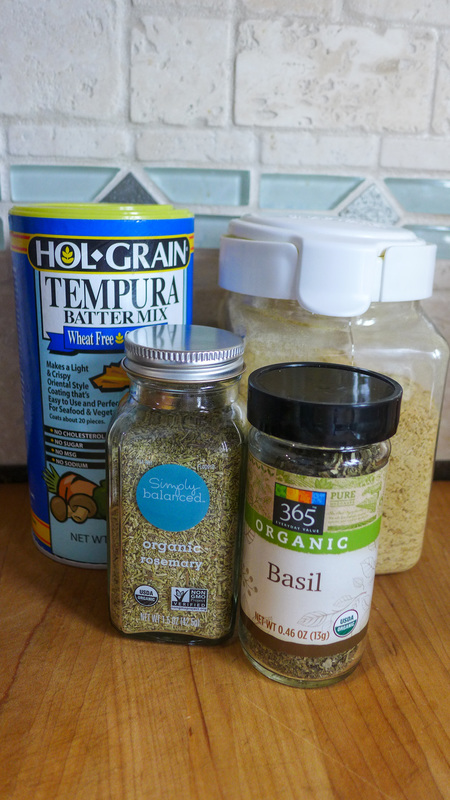
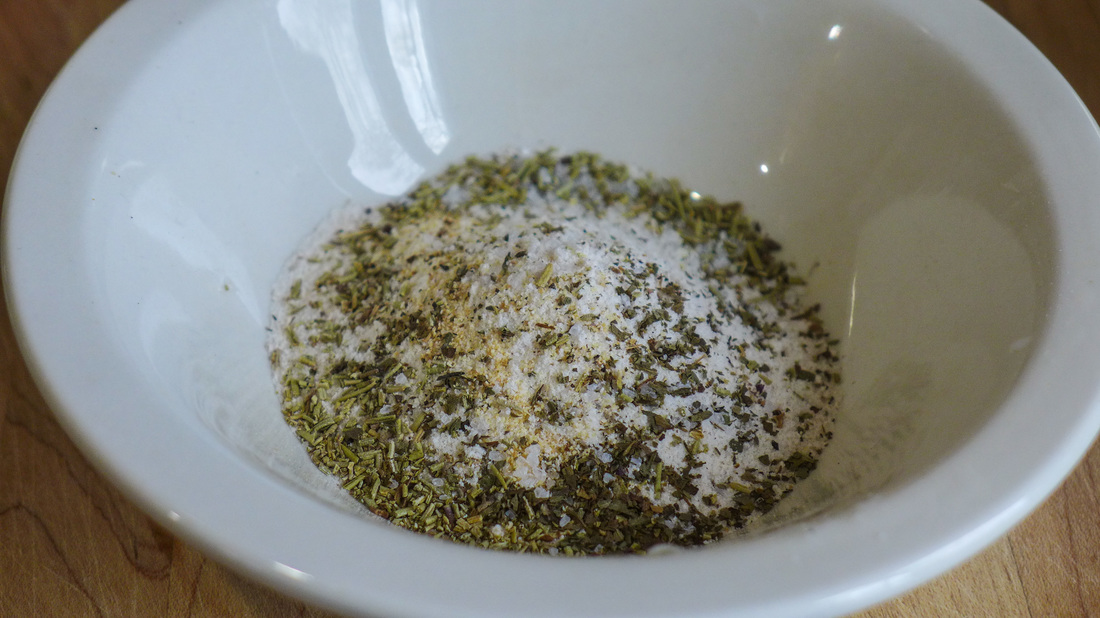
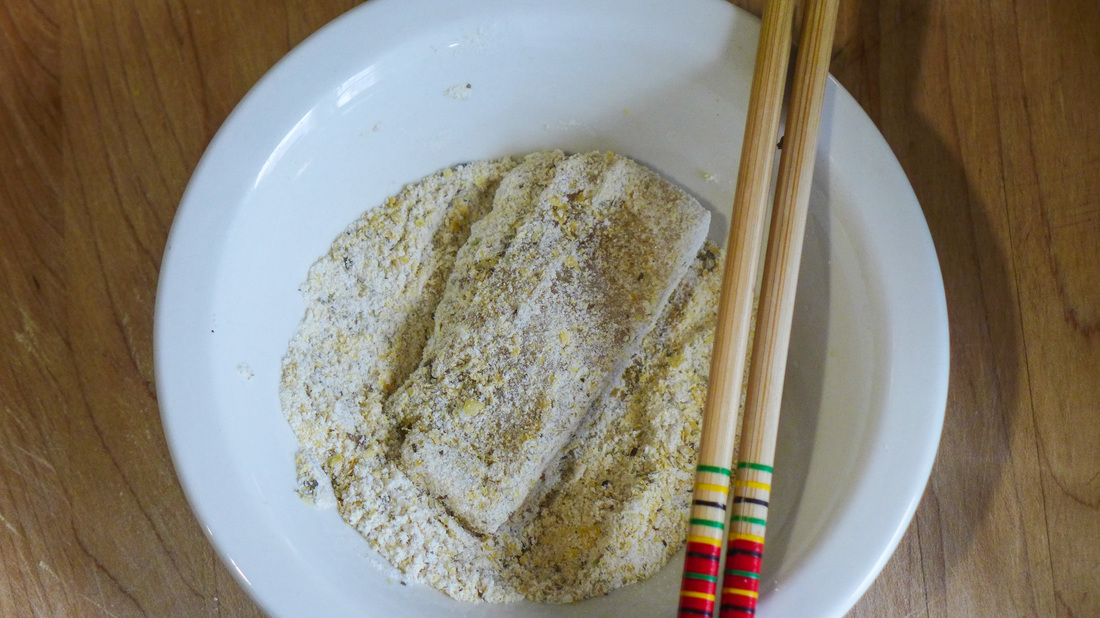
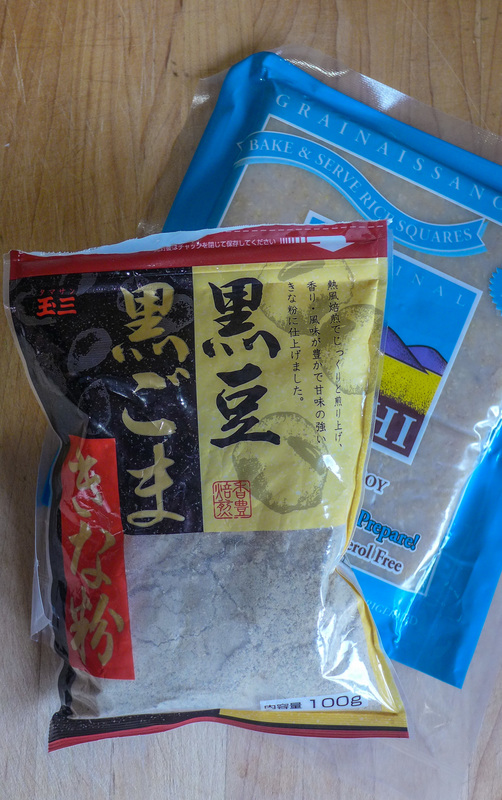
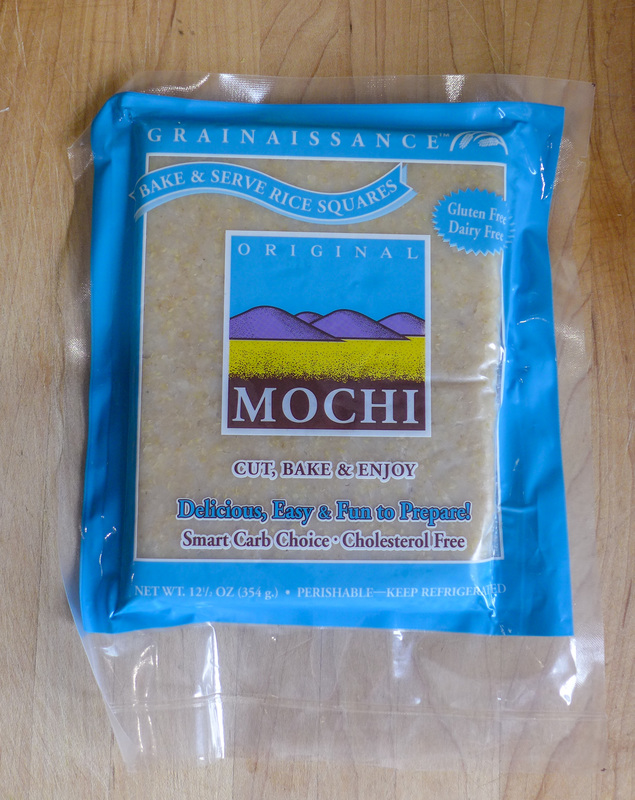 Last year for VeganMoFo, I ventured to make my own mochi from scratch and it was tasty! Sometimes, though, I want mochi for a snack and I'm not able to make it myself. I try not to buy the prepared mochi desserts as they contain a scary amount of sugar! When I was in cooking school, my instructor Christine introduced the class to a great brand called Grainaissance that makes mochi for cooking at home and it's made with wholesome ingredients and brown rice. 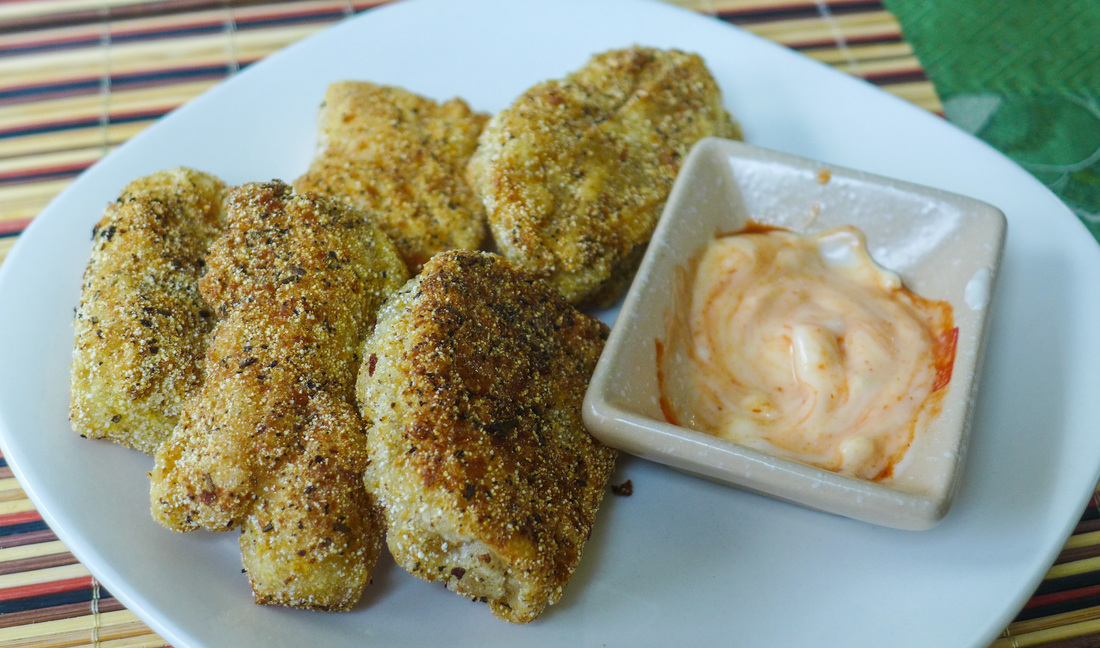 I grabbed a pack one day just to have in case I needed a quick breakfast one morning. What I ended up doing with said pack will amaze you! ;) I cut the block of mochi in half and prepared it 2 ways: one sweet and traditional and one savory and crazy! If you're feeling one resulting mochi over the other, feel free to prepare your entire block that way. I wanted a little of both, as usual, so I went a little nuts. The mochi "chicken" nuggets that I'm highlighting here are surprisingly easy to make. I love that mochi is naturally sticky so all you need to do to get something to stick to it is coat it in a little water. No egg wash needed! ^_^ The breading that I created definitely tastes like the outside of a chicken nugget. The texture of the fried mochi is slightly more firm than a mozzarella stick. So, if you're into mozzarella sticks and/or chicken (or meat-free chicken) nuggets, try this recipe. It's much less processed, contains no soy, has whole grains, fiber and protein and is absolutely delicious. The mochi nuggets came out crunchy on the outside (and I mean, crunchyyy!) and soft and chewy on the inside. It's a great snack for watching football, too (if you're into that). The kinako mochi is very simple to make and is a great accompaniment to tea or coffee. These little bites are slightly sweetened with coconut sugar to highlight the nutty flavor of the kinako. It's a great way to enjoy something sweet without overindulging.  Mochi "Chicken" Nuggets
 Instructions
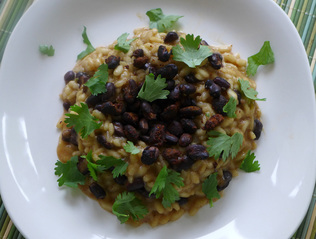
 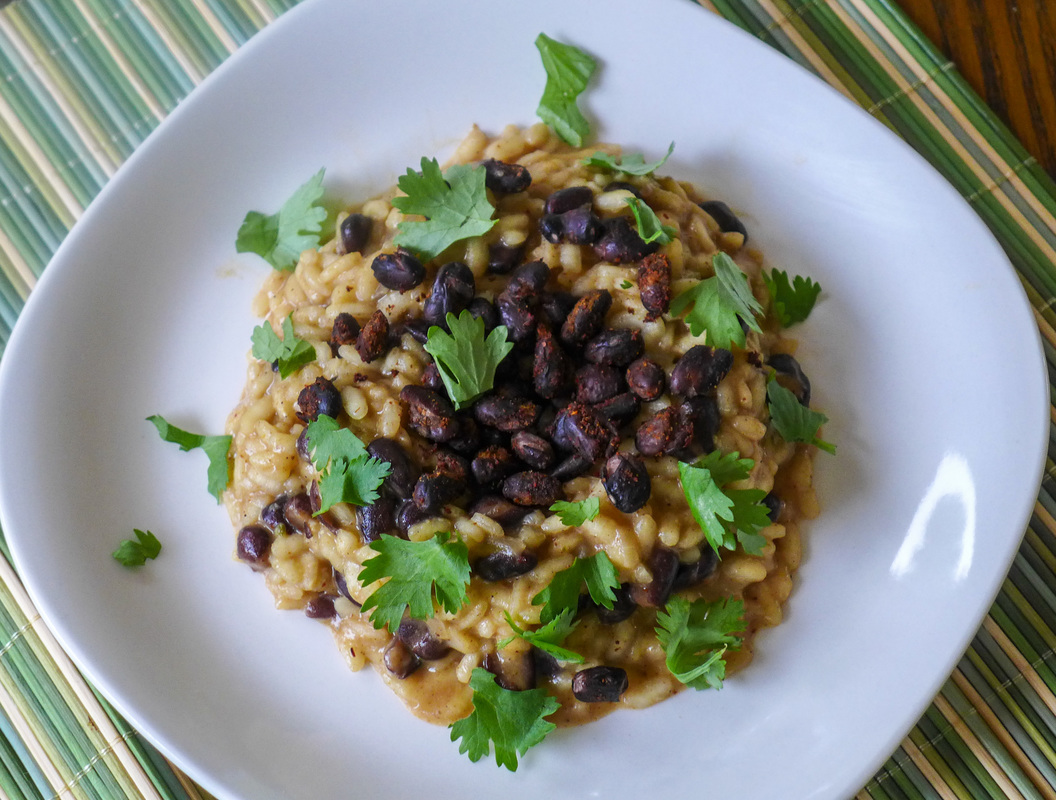 It's the last day of VeganMoFo 2015!!!! ='( I'm very sad to see this month come to an end. Even though I faced a bit of a challenge making sure I posted every day while working full time, I managed to pull it off! Phew! Although it was tiring, it was the most fun I've had in the kitchen in a very long time. I loved being able to come up with creative ideas (sometimes on the fly...eheh) and see them come to life. Tasting them wasn't bad, either. ;) Best of all, I got to share my dishes with all the vegan blogging community! I've never felt so supported and humbled at the same time. I think everyone did an amazing job and I want to commend all those who participated! My final dish for you this month is my answer to the Fusion Challenge: Chipotle Risotto & Beans! It took everything I had to not make a Japanese fusion dish, but I'm glad I didn't. I have to credit by boyfriend for this idea. He helped me when I was second guessing what to make and he suggested this dish. What an amazing thing. 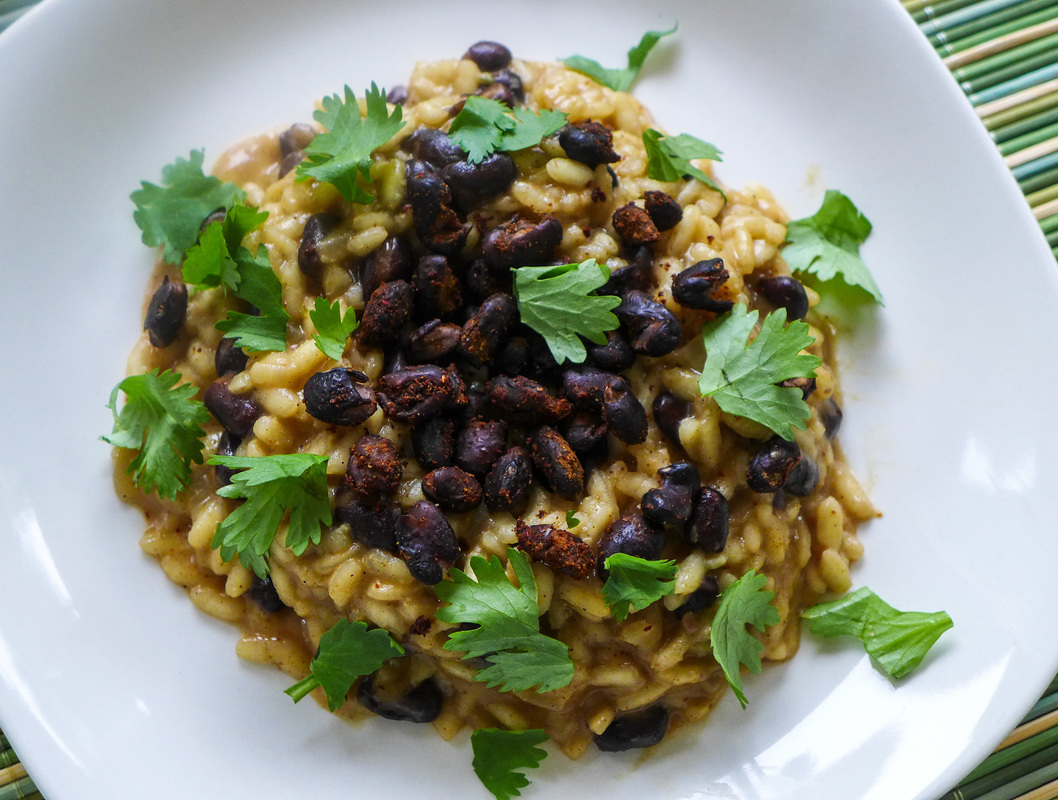 What I love about risotto is that it's very easy to customize once you know how to cook it correctly. The first time I made risotto, I did it right but it took forever! I didn't prep adequately so I spent forever gathering all my ingredients. Now, I feel that simple is better. This risotto may look complicated, but it really isn't. I basically took a "rice and beans" approach to this with regards to flavor. I coated back beans in chorizo-type spices and roasted them to give them a little bit of texture. The beans pair nicely with the creamy risotto. The risotto is a tad spicy and buttery, while the beans are warm and smokey. I garnished everything with some bright cilantro and my goodness it was perfection! The smell of this dish is great just by itself. Serve this risotto in small portions for an appetizer or larger ones for an entree. You can also make them into arancini. I won't stop you. ^_^ Thanks for reading, everyone! I'm stoked for next year's MoFo already. Keep reading for my rocky adventure into the holiday season! ;) Chipotle Risotto & Beans
Instructions
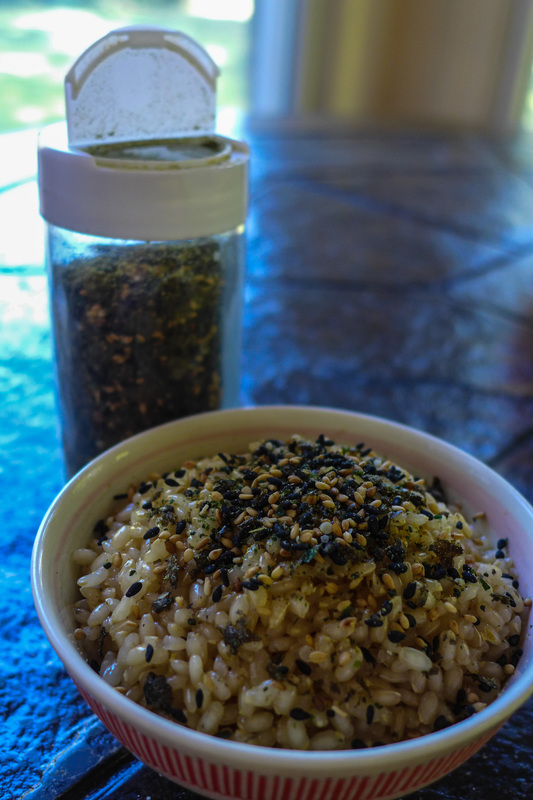 Furrycake? Okay, so furikake is Japanese rice seasoning! (pronounced fu-ree-kah-kay) ^_^' The MoFo prompt for today is to focus on a specific nutrient. I decided to go with one that not many people think about on a daily basis: Iodine. Iodine is an essential nutrient found in seaweed, fish, potato and iodized salts. It is essential for proper thyroid function. I always take vitamin supplements, but I also try to consume nutrients from natural sources as much as possible. Seaweed is not only delicious, but rich in iodine so you will never have to worry! Furikake is a mixture of dried food that you sprinkle over rice or anything bland to give it flavor. When I was a kid, I used to eat a fish flavored furikake. Most conventional seasoning blends have fish or egg in them. I've found a flavor blend that is vegan and it's great, but I've always wanted to make my own with ingredients that I prefer. Making furikake was way more simple than I thought. All I had to do was blend all the dry ingredients that I wanted together in my Vitamix. I think a food processor would have worked well too. I tried to make my seasoning blend a little more unique and healthful by adding dehydrated raw kale and raw hemp seeds, among other tasty things! Essential ingredients for furikake are generally: salt, sugar, sesame seed (black and/or white), and nori (toasted seaweed). This alone is quite delicious, but I like to complicate things! ;) Here is my recipe for furikake. It will last quite a while. Add a sprinkle a day on your rice, salad, sandwich, pasta, or whatever you like to give yourself a daily dose of iodine and other tasty nutrients! Also, enjoy the fact that this doesn't contain any MSG, animal products, or preservatives. <3 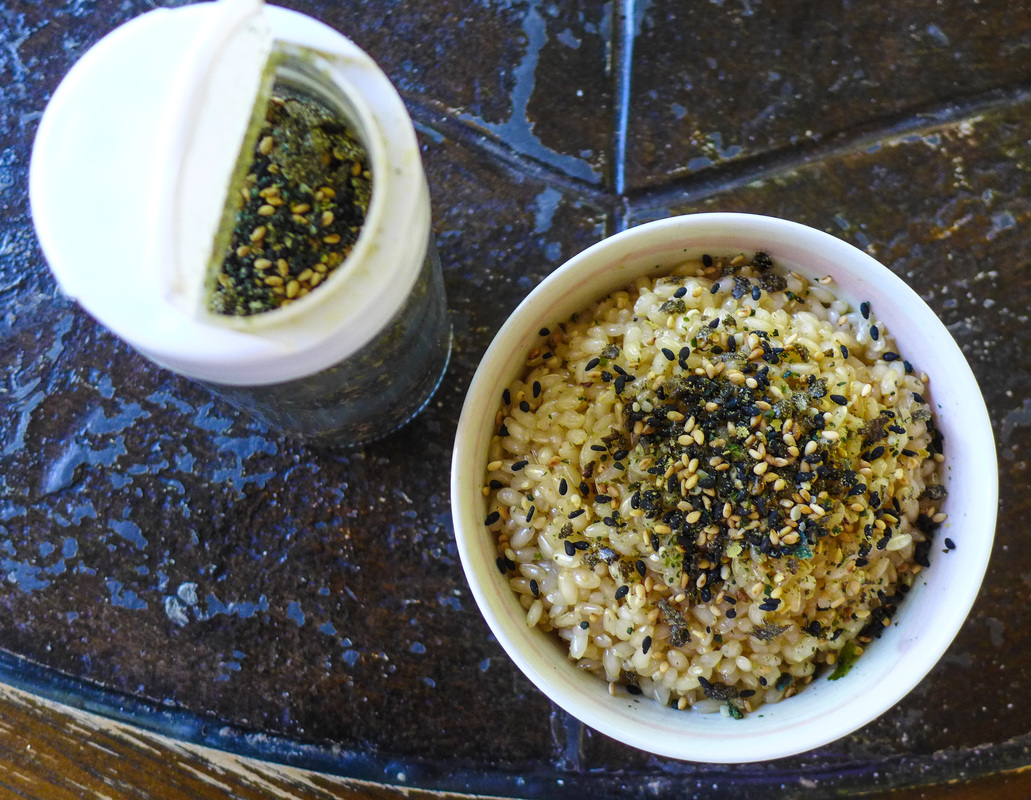 Homemade Vegan Furikake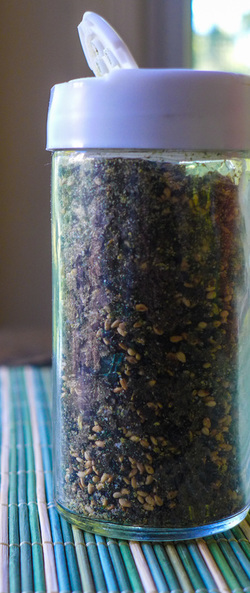 Yield: about 3.5 oz Free of: Nuts, Gluten, Refined Sugar Ingredients
Instructions
 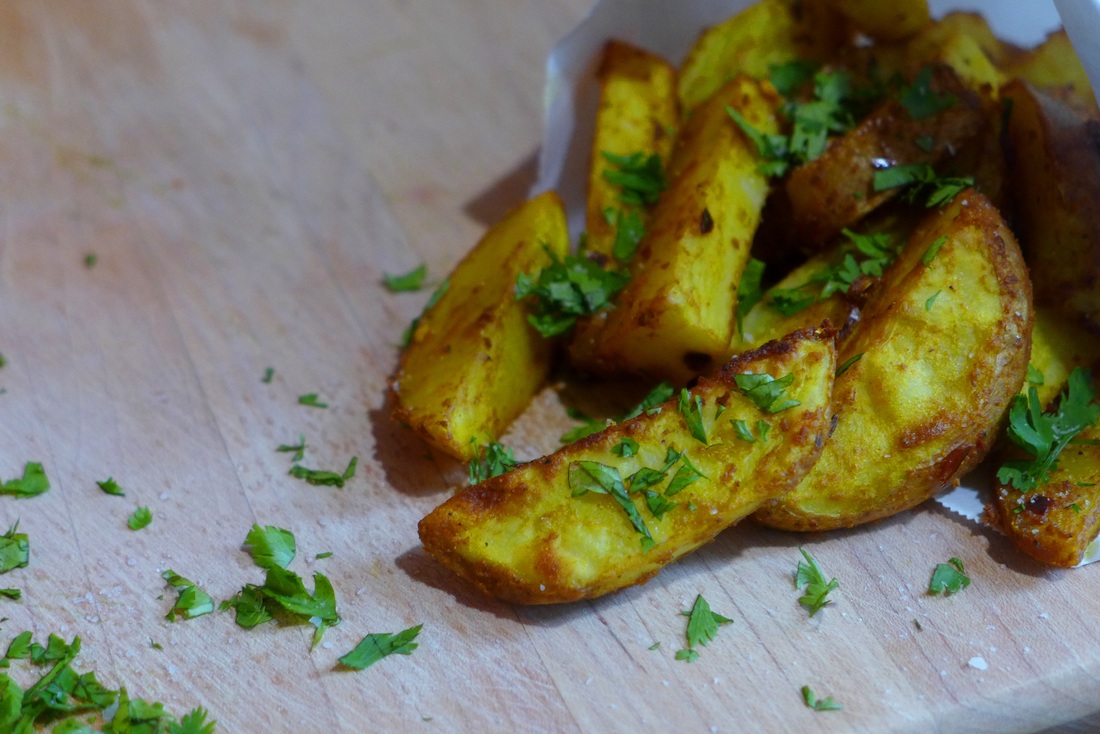 Yes, I am that lunatic who uses the oven in the summer. I love everything that the oven does for my food for the most part (unless I'm having an unlucky day). I tend to use it less as the weather gets warmer for the sake of my well being. However, when I found myself with an abundance of red potatoes that needed to be cooked, I decided to take one for the team and fire up the oven. Because, fries. I do love a deep fried potato every once and a while, but usually not at home. I would always rather bake something than fry it at home because of a couple of reasons. I don't like to add any more excess oil than I need for cooking purposes. I do like oil, but I cannot eat anything that is too oily. It ruins the texture and mouth feel of the food you are eating. Also, I hate cleaning oil. When you deep fry, there's always that smelly left-over oil in your pan that you've got to dispose of and then wash off. Not for me, thanks! The last time I did all of that craziness I made it worth my while:  Yeah, an oozing mountain of doughnuts is definitely worth the clean up. ;) But, for now, I think I'll stick to my trusty oven to crisp my food for me! I sliced my potatoes into wedges and doused them with flavorful spices to give them an amazing aroma. Man, they were delicious. These curry fries are easy to make, easy to customize, and super easy to pop in your mouth hole. They're great as a snack or with a wonderful main dish for dinner (veggie burger, anyone? Check Hilary's out! She's got great ones). Summer's not over just yet, so make your picnic foods while they're still trendy! =P 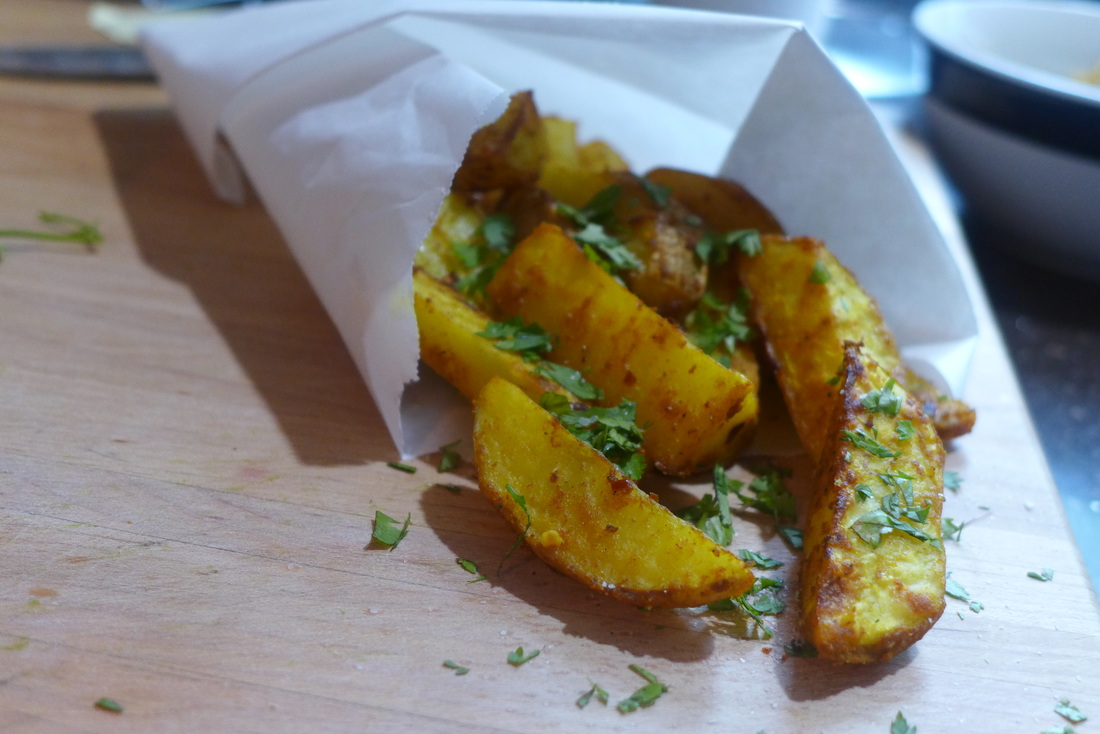 Curry Oven Fries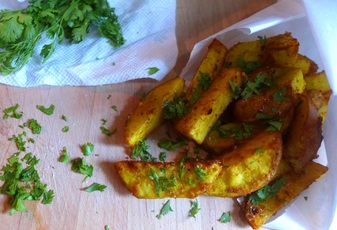 Yield: 4-6 servings
Oven: 375 F Ingredients
Instructions
Happy end of summer, everyone! Maybe make some of these babies for Labor Day? ^_^ |
I'm Jess!This is my very first food blog! I post revised conventional recipes of foods that I hold near and dear to my heart. My cooking here is all gluten-free and cruelty-free, but full of flavor and comfort.  


 Archives
December 2017
Categories
All
|


 RSS Feed
