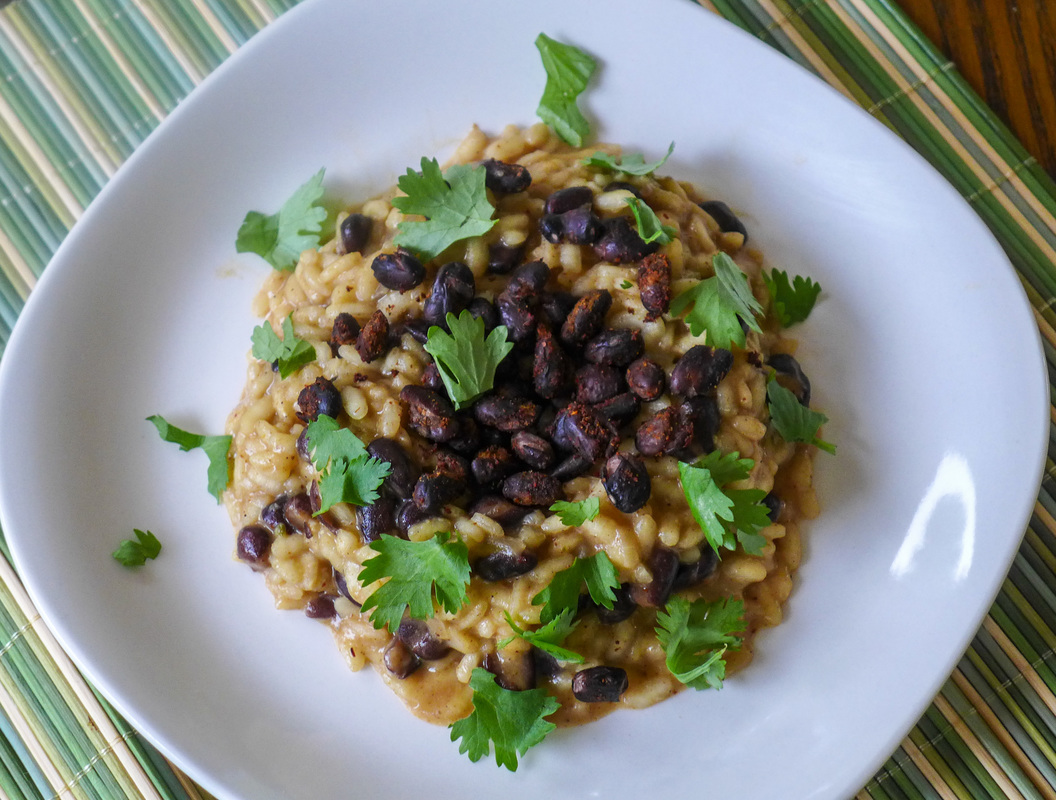
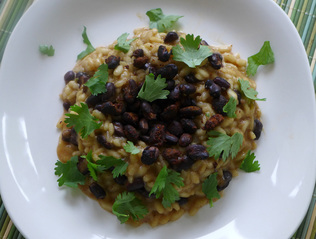
 It's the last day of VeganMoFo 2015!!!! ='( I'm very sad to see this month come to an end. Even though I faced a bit of a challenge making sure I posted every day while working full time, I managed to pull it off! Phew! Although it was tiring, it was the most fun I've had in the kitchen in a very long time. I loved being able to come up with creative ideas (sometimes on the fly...eheh) and see them come to life. Tasting them wasn't bad, either. ;) Best of all, I got to share my dishes with all the vegan blogging community! I've never felt so supported and humbled at the same time. I think everyone did an amazing job and I want to commend all those who participated! My final dish for you this month is my answer to the Fusion Challenge: Chipotle Risotto & Beans! It took everything I had to not make a Japanese fusion dish, but I'm glad I didn't. I have to credit by boyfriend for this idea. He helped me when I was second guessing what to make and he suggested this dish. What an amazing thing. 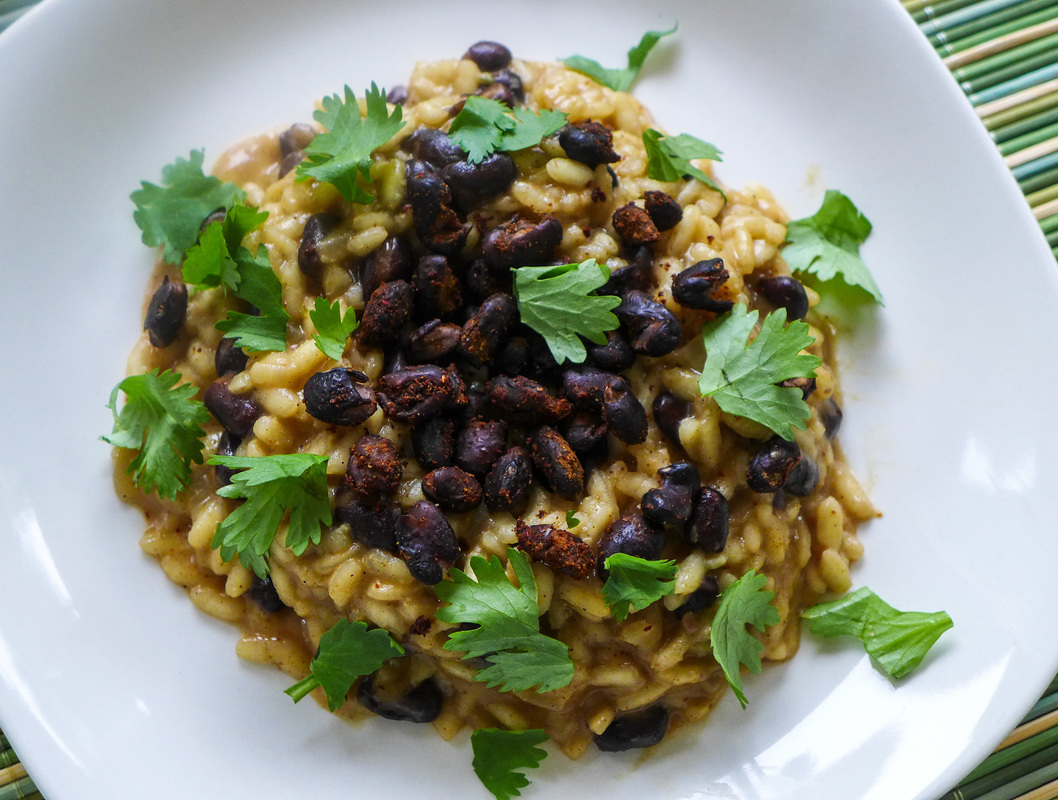 What I love about risotto is that it's very easy to customize once you know how to cook it correctly. The first time I made risotto, I did it right but it took forever! I didn't prep adequately so I spent forever gathering all my ingredients. Now, I feel that simple is better. This risotto may look complicated, but it really isn't. I basically took a "rice and beans" approach to this with regards to flavor. I coated back beans in chorizo-type spices and roasted them to give them a little bit of texture. The beans pair nicely with the creamy risotto. The risotto is a tad spicy and buttery, while the beans are warm and smokey. I garnished everything with some bright cilantro and my goodness it was perfection! The smell of this dish is great just by itself. Serve this risotto in small portions for an appetizer or larger ones for an entree. You can also make them into arancini. I won't stop you. ^_^ Thanks for reading, everyone! I'm stoked for next year's MoFo already. Keep reading for my rocky adventure into the holiday season! ;) Chipotle Risotto & Beans
Instructions
 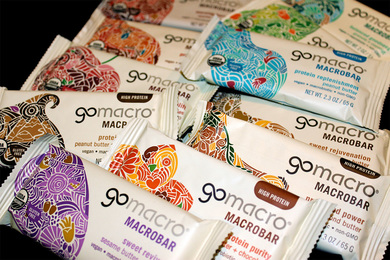 What would I take on a vegan road trip? Easy. Macro Bars! Macro Bars are my absolute favorite of all vegan packaged energy bars. Believe me. I've tried almost all of them. I've also had my phase with some of the best quality ones out there for the price. A little more than a year ago, I finally decided to commit myself to Macro Bars. I had tried them in the past and loved them, but always found them to be a bit too pricey for me. However, after buying other brands that barely filled me up or left me with a sugar crash, I decided that paying the extra however many cents was totally worth investing in Macro Bars. These babies are not only delicious, but they're filling! For a vegan on the go, this is an important quality in a bar. If you can't fill up on one of these in between meals, you will be miserable and starving. I've managed to run 8+ hours on just one of these bars alone. They really are a meal replacement, especially if they contain protein. I decided to try to create my own Macro Bar at home. The ingredient list is pretty short and simple, which is another reason why I love them. They don't have any artificial fillers, soy isolate, or any preservatives. They're very easy to digest and they come in many different flavors to suit your mood and palate. They even have nut-free flavors for those with allergies! ^_^  These, however, have TONS of nuts!!! Whether you're in the car for short or long periods of time, I think having these in your back seat will be a good comfort. Instead of having to stop at a fast food place and order questionable french fries, you can munch on one of these and be totally satisfied for hours! Plus, they're delicious and kind of taste like a peanut butter cup! I chose one of my favorite flavors to recreate (and their most popular): Protein Pleasure (peanut butter chocolate chip). It's abolutely delicious, rich and decadent without being too sweet. Sounds like a winner to me! If you have a peanut allergy, definitely sub the peanut butter/peanuts with sunflower butter/seeds. That sounds like it would be just as delicious. You can go ahead and save me one, too. ;) Homemade Macro Bars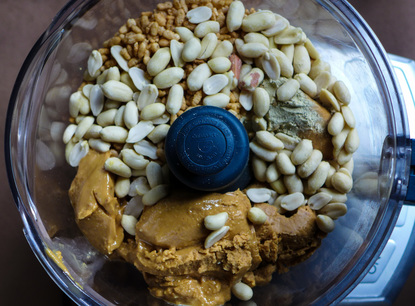 Yield: about 8-10 bars (depending how you cut them) Free of: Soy*, Gluten, Nut* *Sub soy-free chocolate chips and seeds/seed butter Ingredients
Instructions
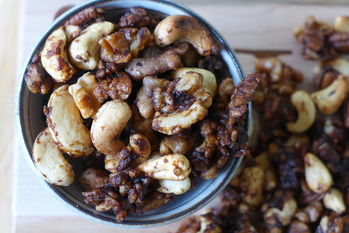
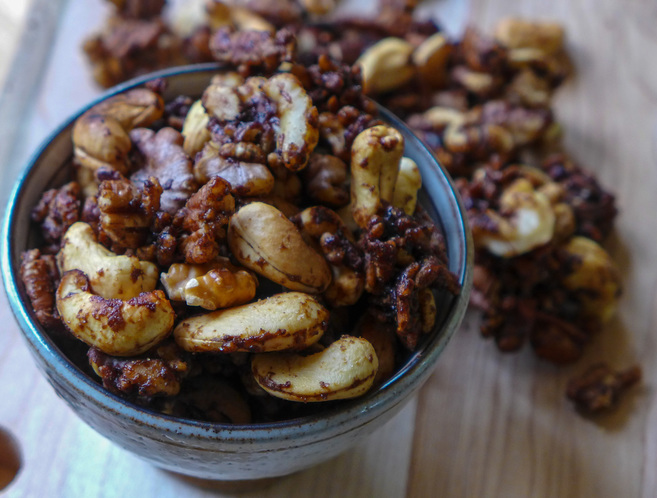
 Today's Vegan MoFo prompt intersects with another promotion I'm contributing to: Nuts.com is featuring healthy tailgating snacks! This recipe is a big of flavor with a combination of my favorite spices and low sugar, gluten-free, healthy fats that will be your best friend when you need something healthy on the go. I know how frustrating it is being stuck anywhere without something healthy to eat that's readily available. I always try to travel with trail mix or other whole food snacks to satiate my hunger until the next meal. Why not add some amazing fall spices in while you're at it? ;) 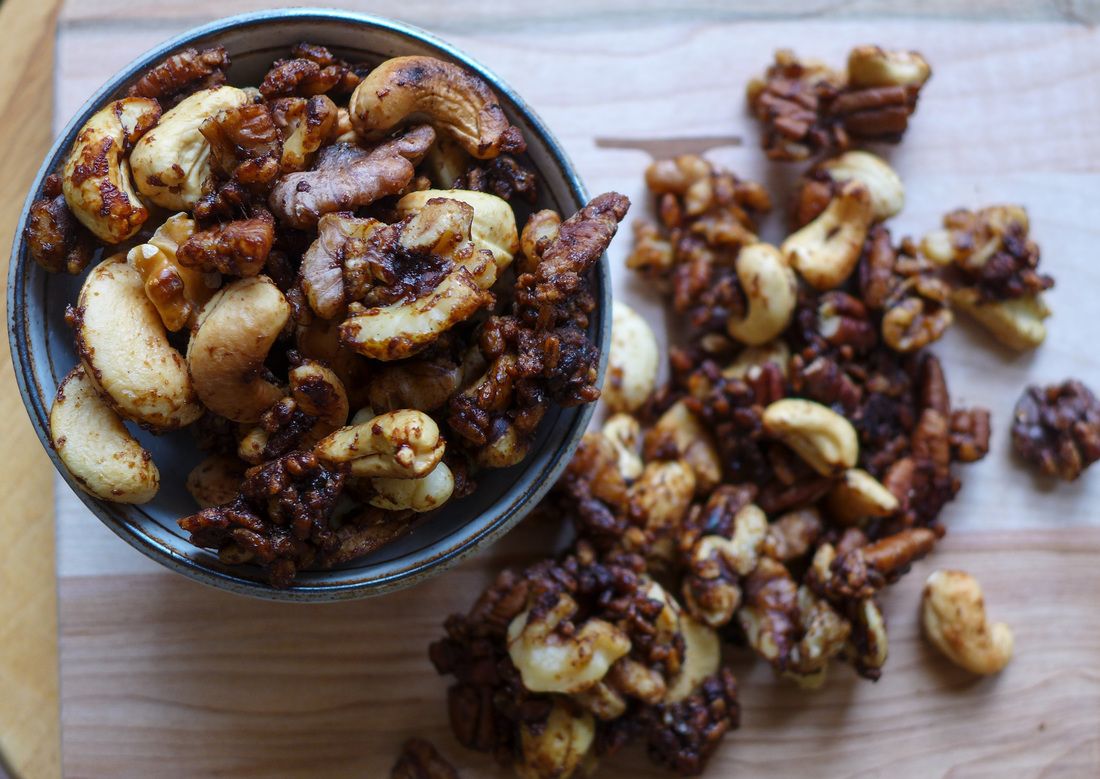 The spices I'm featuring today are: caradamom, cinnamon, allspice, cloves and ginger. These spices are always in my pantry at the ready for use in baking, cooking, sprinkling, you name it. I'd probably say that cinnamon is my absolute favorite spice of them all. But, since I've been making a lot of things with just cinnamon in them, I wanted to mix it up a little! I mixed all the spices that I like from masala chai with the addition of allspice, which I love! I like to use allspice in savory dishes sometimes as well, especially in chili, curry, and sometimes pho broth. When I mixed all the spices together and toasted them in the oven, they gave off an amazingly warm aroma that reminded me of the holidays. What a great thing to look forward to! ^_^ I guarantee if you whip these rice and nut clusters out at a game, bring them to a get-together, or give them to a friend as a gift, everyone will be blown away by how amazing they smell. Go ahead and share them with everybody. Spread the healthy love! <3 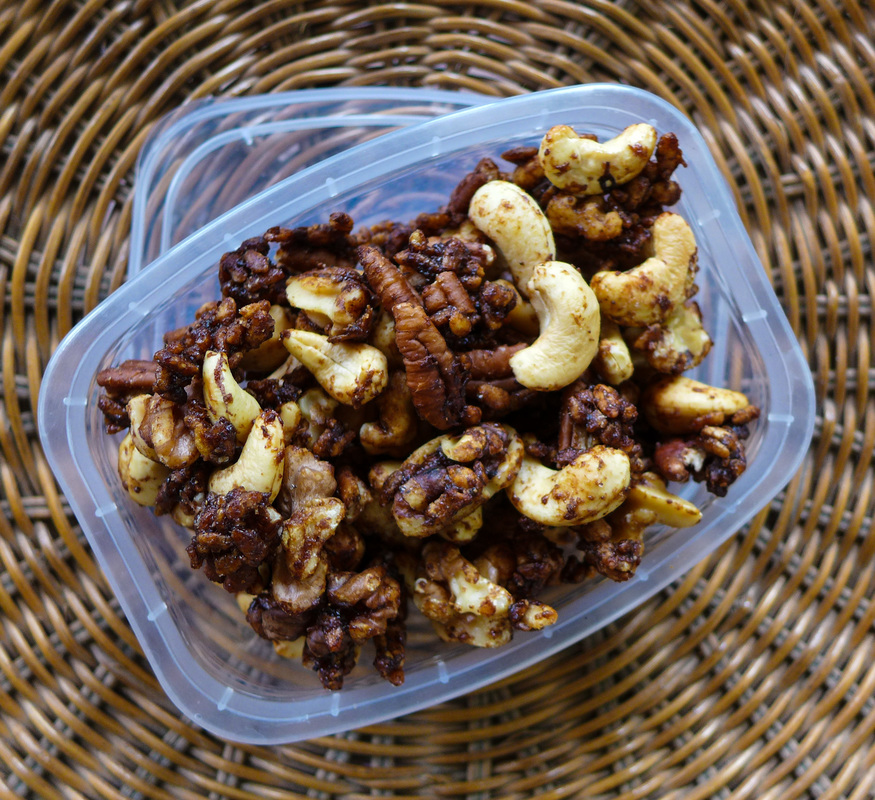 Pack 'em and take 'em! They're wonderful travel companions! =P Spiced Rice & Nut ClustersYield: 3-4 cups Free of: Gluten, Refined Sugar, Soy (You can substitute mixed seeds for the nuts if you need to! It will be just as delicious!) Ingredients
 Instructions
 To see Nuts.com's awesome variety of healthy snacks (and some specifically vegan), click here! They're also a great source of bulk items from candy to nuts, seeds and fruit. Definitely worth checking out! ^_^
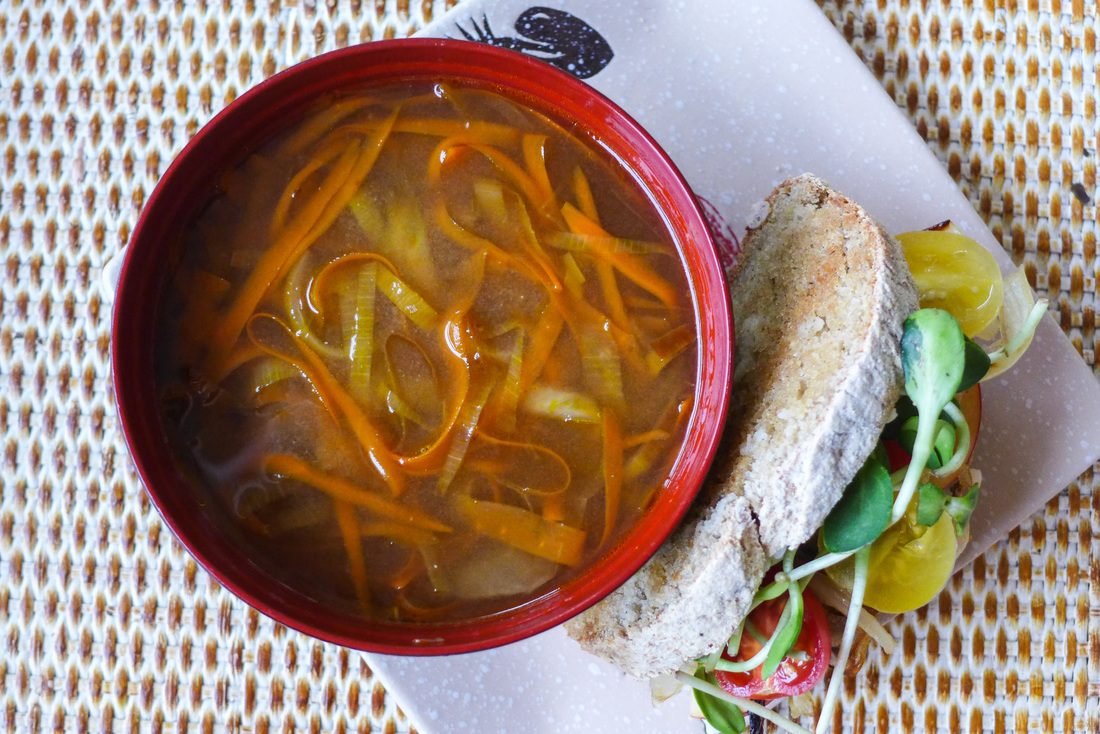
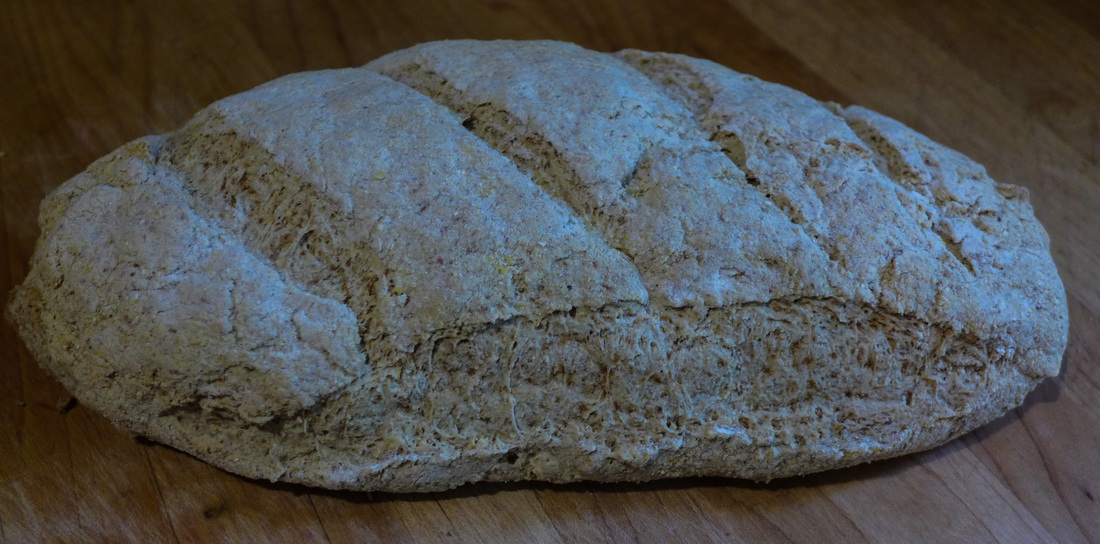
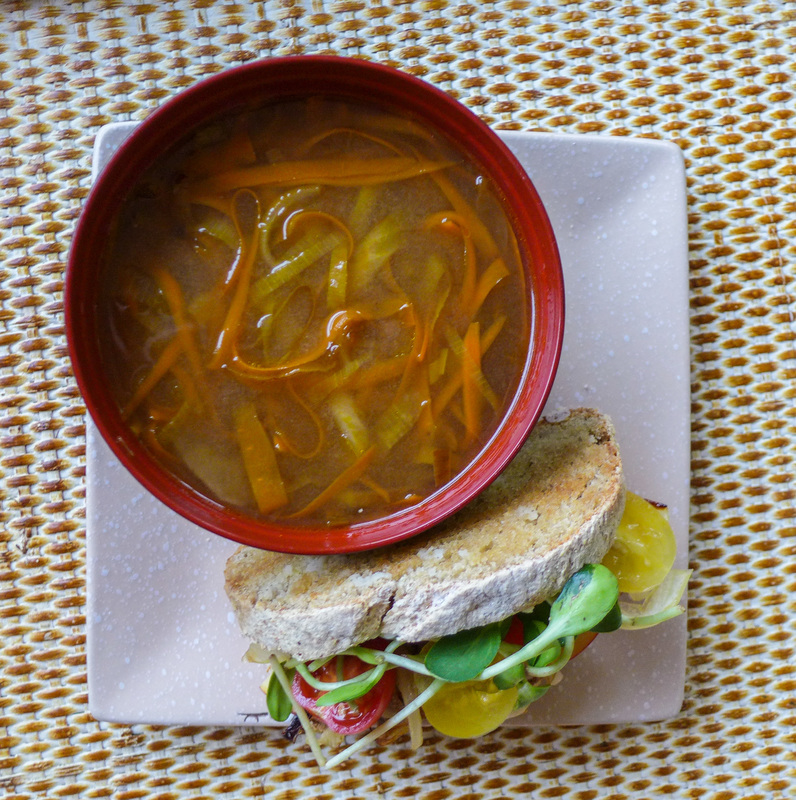 For my rainy/snowy/generally dreary day meal, I'm going to make some broth and put stuff in it. I love soups of all types, all year round. The best time for soup, though is the fall and winter for me. I love coming inside from the cold to a bowl (or sometimes cup!) of piping hot liquid with deliciously seasoned veggies in it. Soup is always great, too because its flavors become more concentrated as time goes by. I love to eat soups the day after I make them, when the ingredients have had time to marinate and become more rich. There's nothing better to make you feel at home! I also love to eat sandwiches and soup together. I like sandwiches by themselves, too, but much more if they're next to a bowl of soup. There's something about eating bread and soup together...it's such a classic combination. I'm going to throw together a sandwich from ingredients that I have on hand, so definitely do the same if you're into the idea! I didn't include a recipe for the sandwich because I think it's a fun thing to play with depending on the ingredients you have at your house and what's in season near you. For me, it's early Autumn and I decided to go a little sweet and savory with sliced apple, caramelized onion (reserved from the soup!) and vegan cheese. You need to indulge every now and then, people! ;) This prompt was interesting because I really had to think about what ingredients I had in my house already. I always keep certain things in my fridge, like miso, onions, etc. I figured miso soup would be a great thing to make since I almost always have the ability to make it! I tried to make my miso soup a tad different than the normal scallion and tofu combo. My grandma taught me to make miso with whatever I had to put in it. If you have daikon, put that in it. Potato? Put that in. Onion? Yup! So, I figured, what's something cool I can do with onion? Uh, caramelize them! And leeks too? Why not?! =D This soup recipe is meant to feed approximately 4 people. You can make it stretch if you serve everyone a smaller portion. For a small crowd, though, I'd double the recipe. Plus, leftovers!! ^_^ 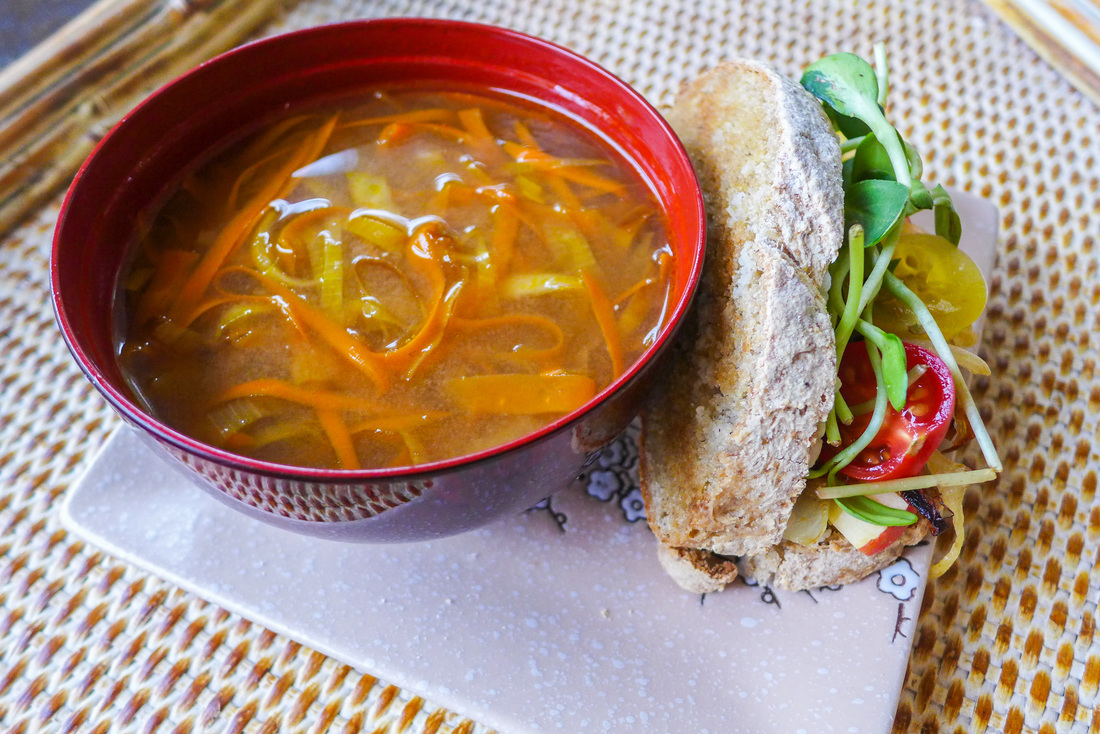 Caramelized Leek & Onion Miso SoupYield: About 4 servings Free of: Gluten, Nuts, Sugar Ingredients
Instructions
My sandwich was:
  If my blog's name didn't tip you off, my favorite cuisine is definitely Japanese! It was also my theme for last year's VeganMoFo...so, yeah, I like it a lot! I don't just like Japanese food, I identify with it. It's also in my blood! I don't consider myself a master of Japanese cooking methods by any stretch. I do, however, aspire to be an expert on Japanese food culture as it pertains to plant-based cooking. When I went to Natural Kitchen Cooking School, I learned some methods of macrobiotic cooking. Macrobiotic cooking and diets are products of Japan and its emphasis on healthy, seasonal dishes made entirely from scratch (for the most part). I like macrobiotic cooking because it aims to heal the body through food and the preparation of food. For certain ailments, specific cooking methods are used and avoided in order to let the body rest and absorb as many nutrients as possible. I find that many of the principals behind macrobiotic cooking make complete sense to me and I try to abide by them as much as possible. There are some instances when I just must have vegan junk food, though. ;)
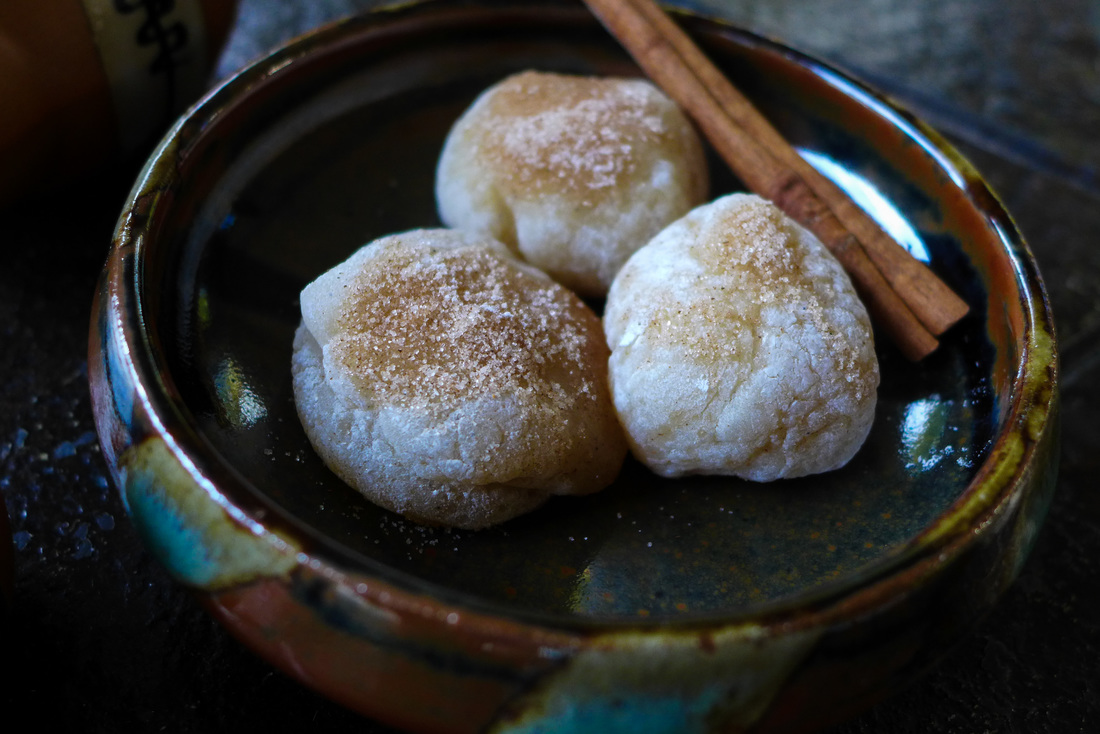
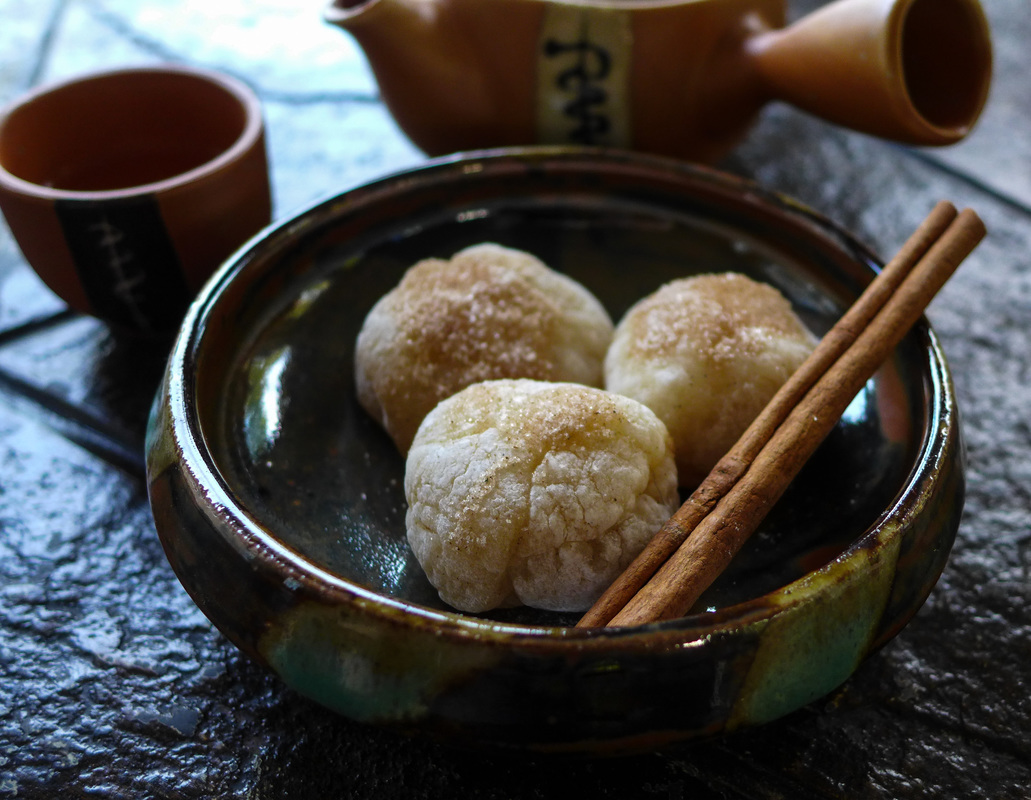
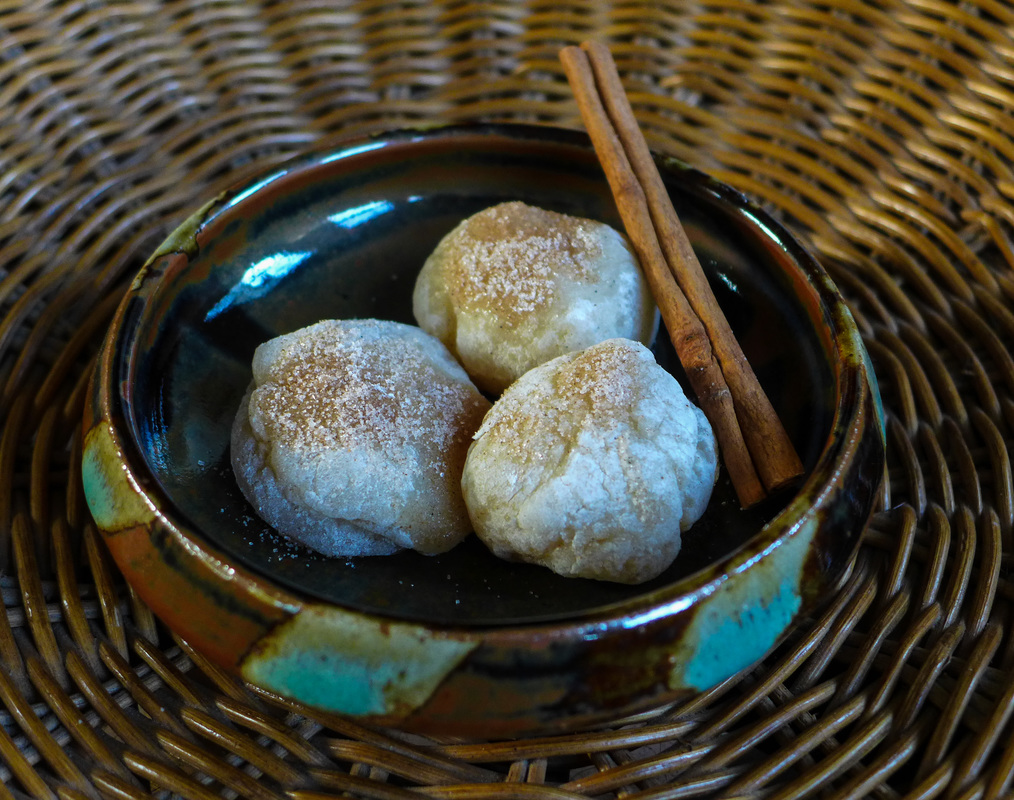
 Click on this picture for my recipe! Click on this picture for my recipe! This recipe is very quick, but also quite messy! The messiest part of making the mochi is rolling it into shape. I used tapioca starch to dust my cutting board and it literally went everywhere. I definitely don't recommend you skipping that step, though. The mochi dough is quite sticky and hard to handle without the starch. You also have to handle the dough while it's still warm so it doesn't stiffen up too much. Some mochi sweets are stuffed with red bean paste or other fillings. I have my recipe for red bean jam here if you'd like to try stuffing yours. I left mine alone since I wasn't sure what the texture would be like. This was my first time making mochi! Instead of filling it, I flavored my mochi dough with vanilla paste and rolled it in cinnamon and sugar (like a snickerdoodle!). I thoroughly enjoyed the subtle sweetness and warmth of the cinnamon. It brought depth to an otherwise bland food. Mochi is great for flavoring, though, because it takes on whatever you put into it. Try different extracts in your dough next time and different fillings if you wish. You can really go all-out and make your mochi amazing! ^_^ Cinnamon Sugar Mochi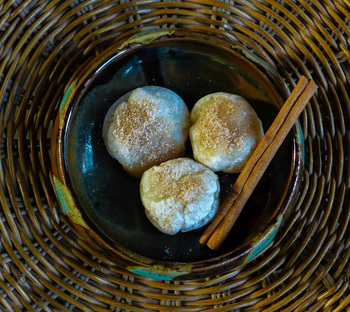 Yield: About 4-6 servings, depending on how large you make each piece Adapted from: Daifuku Mochi by Hell Yeah It's Vegan (great name, BTW!) Free of: Gluten, Soy, Nuts Ingredients
Instructions
  So, my post for today is featuring a dish that I think Rachael Ray would love if she were to eat a vegan meal. Why I chose Rachael, you ask? Well, for one, I love her. She has been a very influential person for me with regards to how I've learned about food preparation and technique. My parents and I began watching 30 Minute Meals probably 10 years ago by now. That show alone inspired my mom to cook more from-scratch meals since she saw that it didn't take very long. From that point, we made the transition from semi-homemade meals to full scratch-cooking for dinner! What a treat. After that, we started to use products like extra virgin olive oil (or EVOO as Rachael calls it) and fresh garlic almost every day. Don't get me wrong, my mom did cook from scratch before that point, but it wasn't every day. Normally, she would save scratch meals for certain dishes or special occasions. I don't blame her. Raising kids is hard and time consuming. But, as my sister and I got a little older, we gave my mom more time to spend thinking about our family meals. At a certain point, I started to help my mom cook. That's where my story as a cook began! So, as you can imagine, choosing a person to make a vegan meal for today was a pretty easy choice. Rachael Ray has always been someone I've followed. I also love that she embraces food trends as they evolve. She's recognized allergen-free cooking and vegan cuisine on her shows before, which I love. She also offers meatless options for many of her dishes on her cooking shows. She also loves Veganaise, so that's awesome! =D
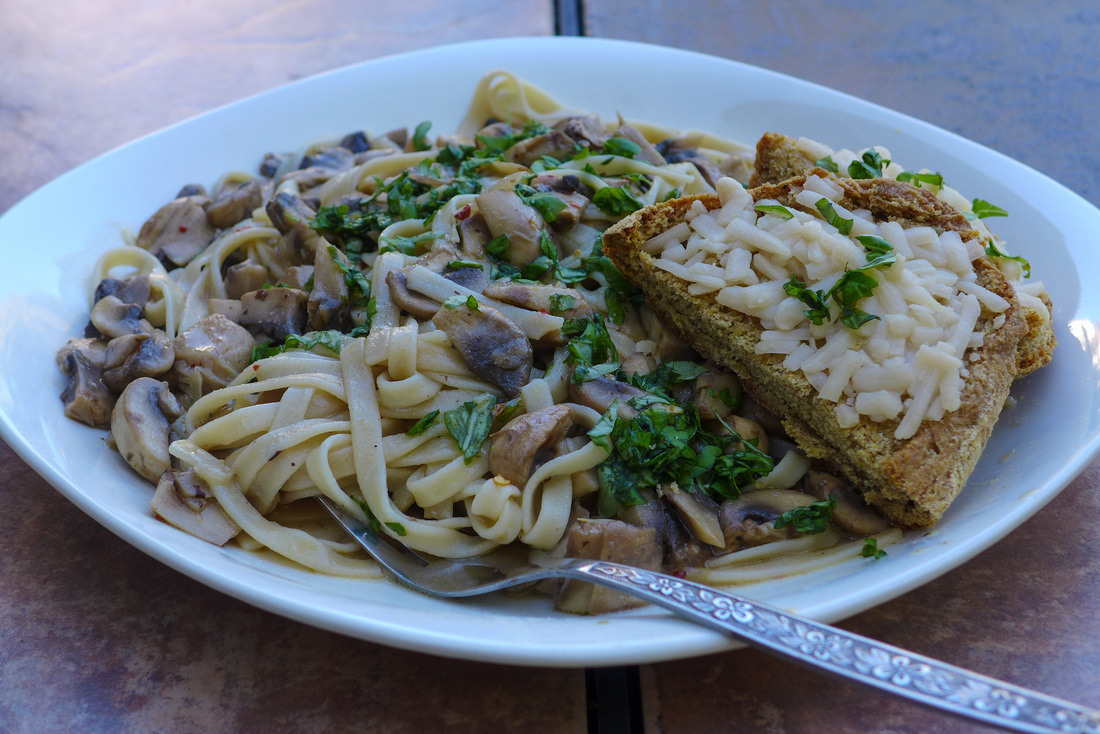
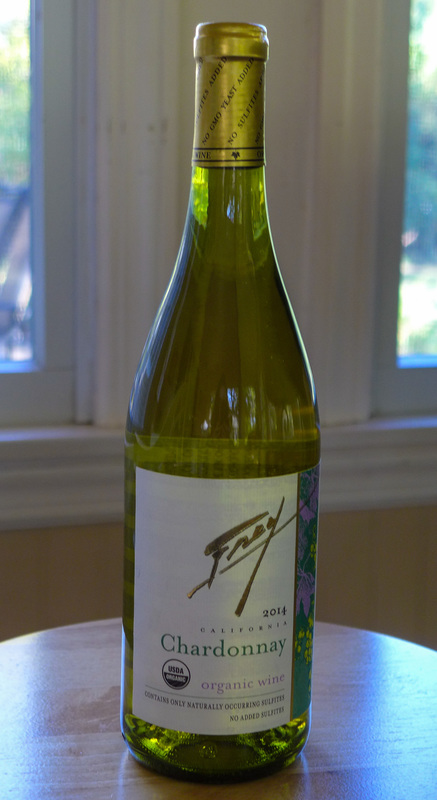
 Oh, yeah, and I hit it with a little organic white wine and made a side of gluten-free garlic bread. ;) SOLD! 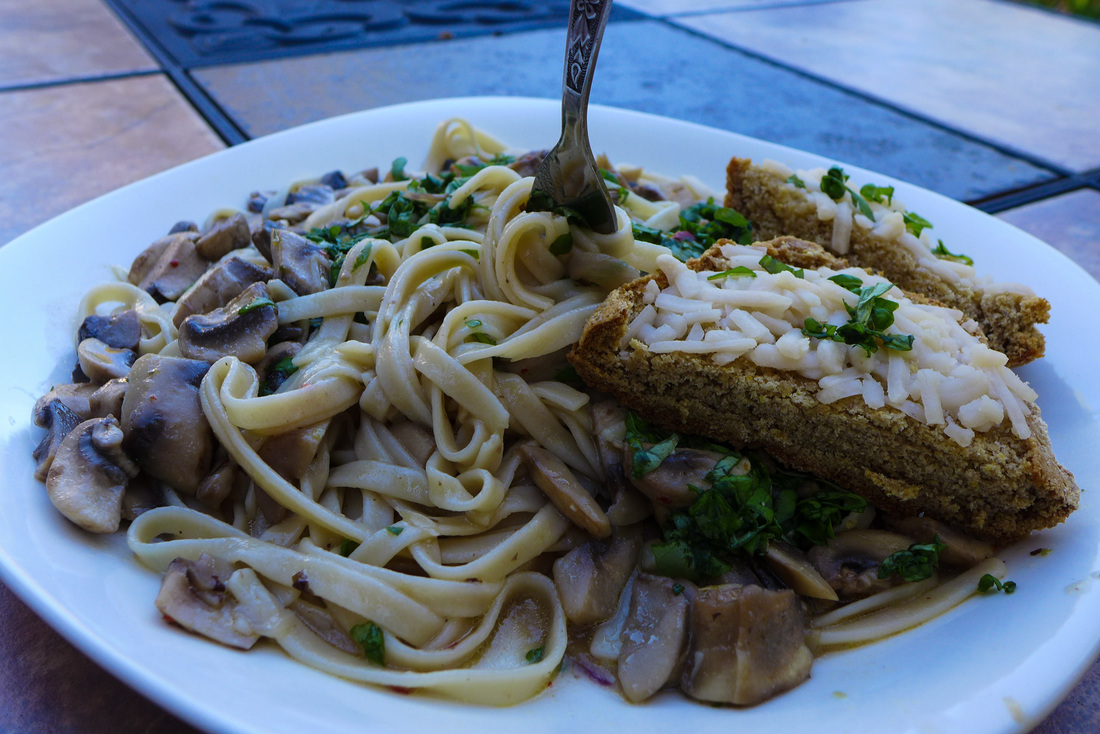 Vegan Fettuccine with "Clam" SauceYield: Approx. 2-3 servings Adapted from Linguine with Clam Sauce by Rachael Ray Ingredients
*Recipe below Instructions
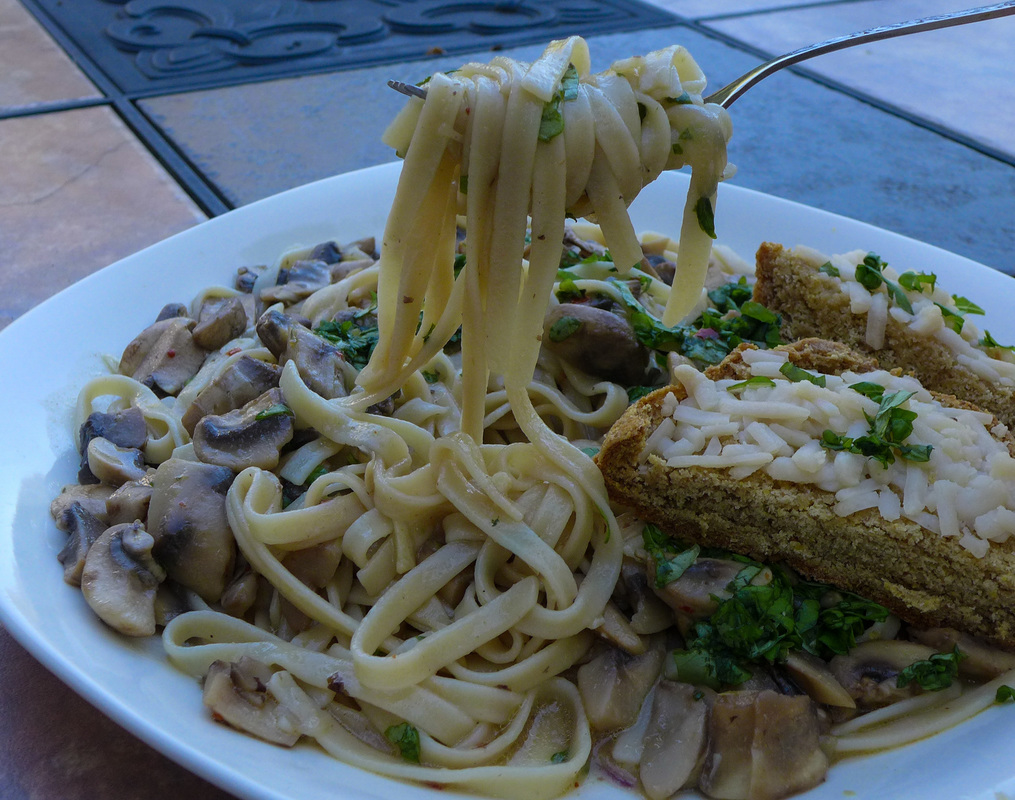 Garlic Bread
Spread 1/2 Tb of vegan butter/coconut oil on each slice of bread. Sprinkle each one with some garlic powder, to taste. Top them with vegan cheese, if desired. Pop your bread slices into a 350 F degree oven for about 12 minutes, or until they are toasted and the cheese is slightly melted. Enjoy with some pasta and maybe a little wine. ;) 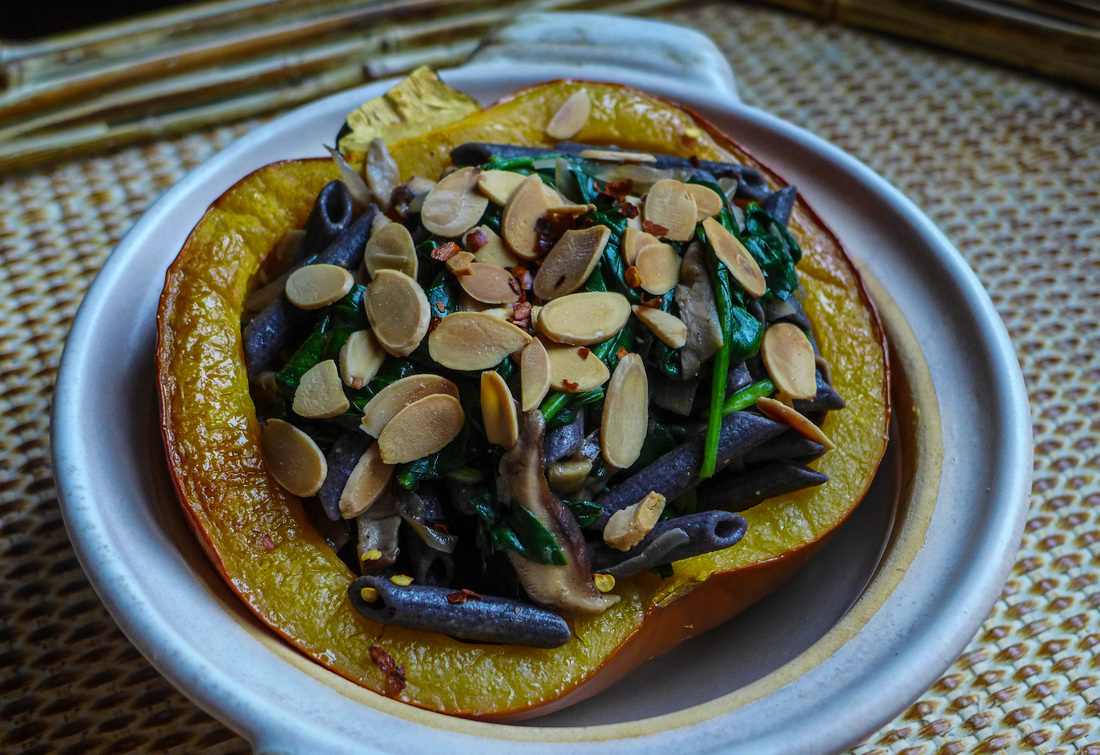 It's not even October and I want Thanksgiving already. So, to celebrate the Autumnal Equinox, I've decided to go full throttle Halloween-Thanksgiving theme. Not only is my dish black, orange and green, but it's hearty and savory enough for a celebratory entree. I'd love to serve this at Thanksgiving...what a departure from my normal formula of making a bunch of vegan side dishes. I mean, I don't mind making a meal out of salad, stuffing, potatoes and pie. Not at all! However, it is nice to sit down to a special and festive entree that will satisfy any stomach. This pumpkin is just that. Not only is it totally adorable and seasonally festive, it's delicious and nutritious. It adds wonderful soft and creamy texture to the toothsome pasta filling. It's quite wonderful, if I do say so. I may have eaten an entire half by myself. Maybe. ;)  This pumpkin looks huge in my photo, but it wasn't much larger than my hand (and I have small hands, I swear). I would recommend a 3 pound pumpkin for this recipe. It will serve 2-4 people. Roasting the pumpkin was actually a breeze. I cut my pumpkin in half length-wise like any other winter squash being used for stuffing, rather than cutting a hole in the top like you would for carving. The pumpkin cooked in only a little over a half hour and was perfectly caramelized and fork tender. Mmmm! ^_^ I decided to stuff my pumpkin with a sautee of shiitake mushrooms, garlic, shallots and baby spinach, all dressed simply in olive oil, salt and pepper. Nothing too crazy here. I didn't want to overwhelm the delicate sweetness of the pumpkin. Also, I decided to use black bean penne pasta because it has a gorgeous black color and it's a great gluten-free and protein-rich product that I had never used before. It cooked very well and didn't disappoint in texture! Oh, and for a toasty, crunchy treat, I topped it all with toasted sliced almonds. Delicious. Welcome, Fall. It's been a year and I've missed you so! <3 (Please last longer this year before you give way to the bitter cold, plz & thnx.) 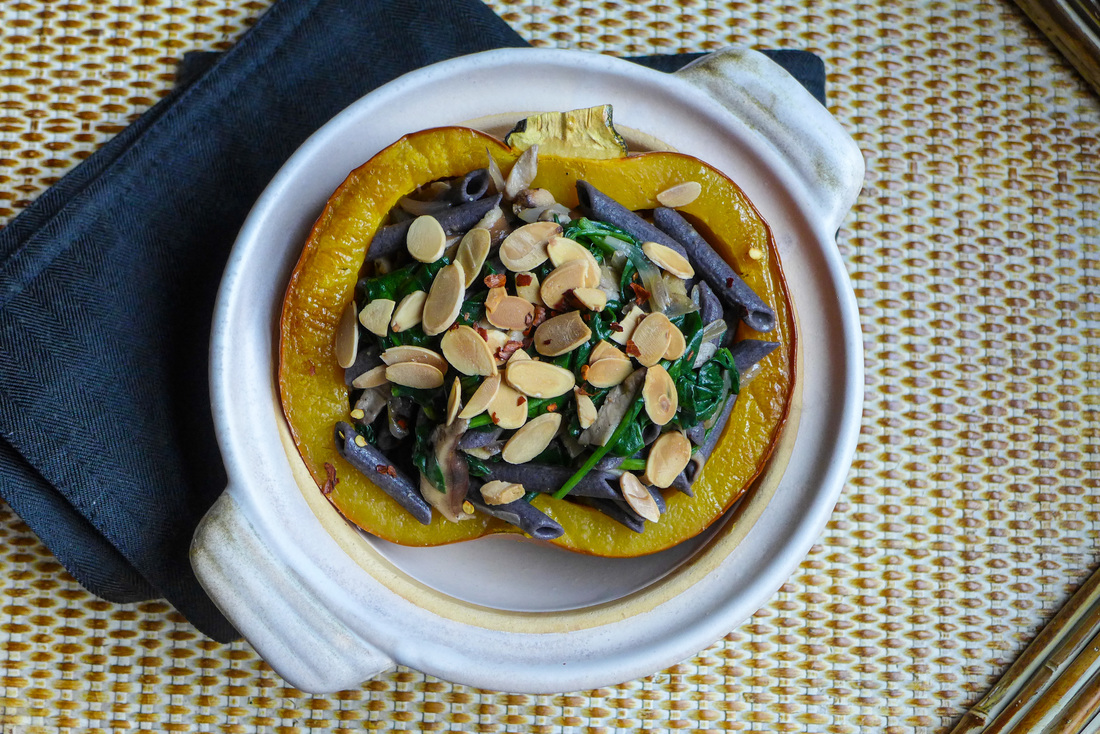 Pasta Stuffed Sugar PumpkinYield: 2-4 servings (2 stuffed halves of the pumpkin) Free of: Soy, Gluten, *Nuts, optional Ingredients
Instructions Preheat oven 350 F.
Oh, and for dessert, I indulged in a tiny piece of chocolate heaven that I happened upon this afternoon. It was a Fall miracle and I'm so happy I know about this wonderful company that makes amazing vegan chocolate. Yes, that's vegan rice milk chocolate surrounding pumpkin spice caramel on the inside.
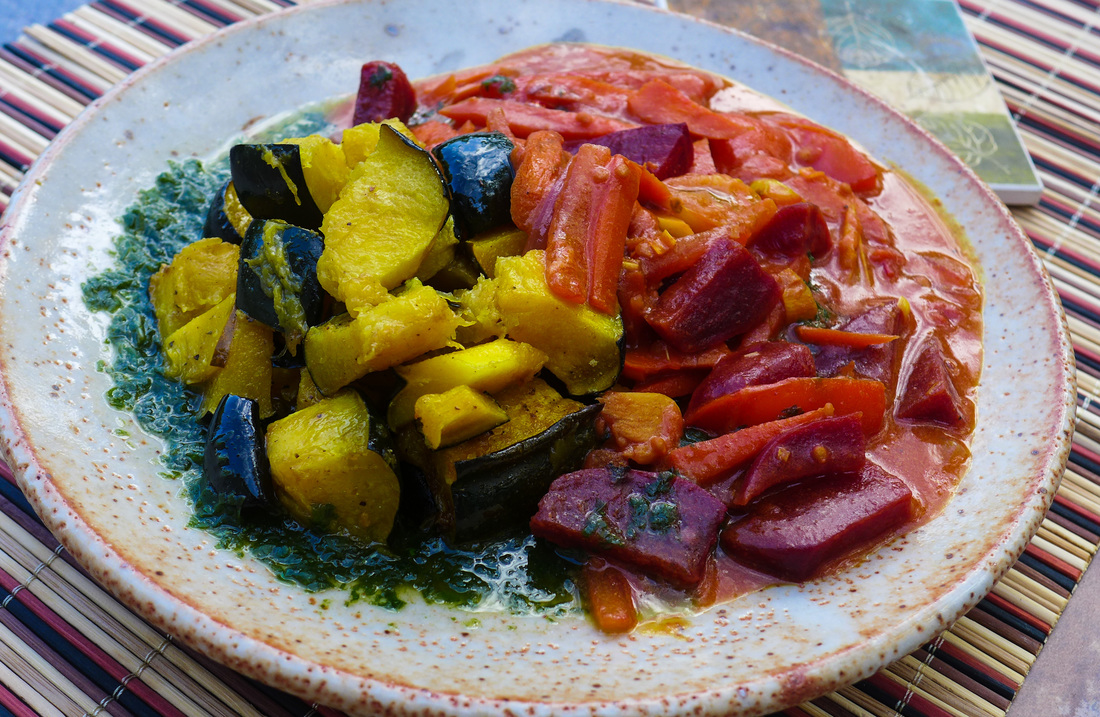
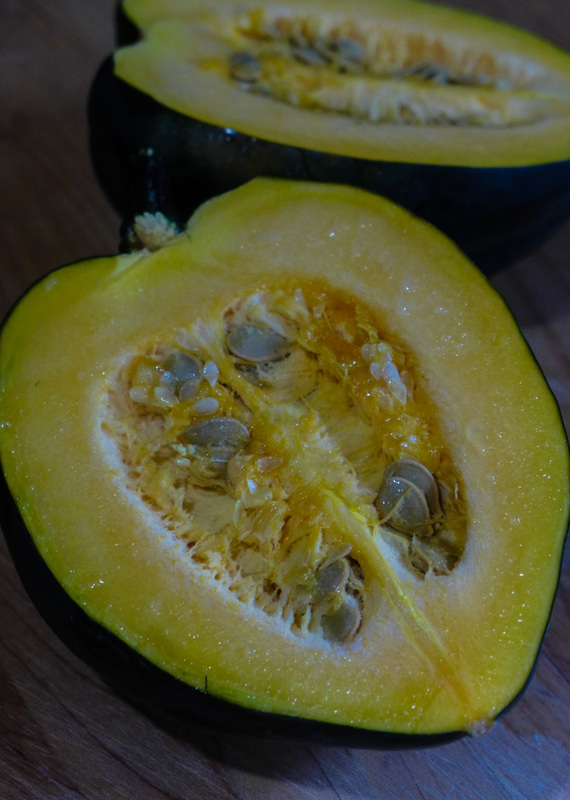
You're welcome. ;D 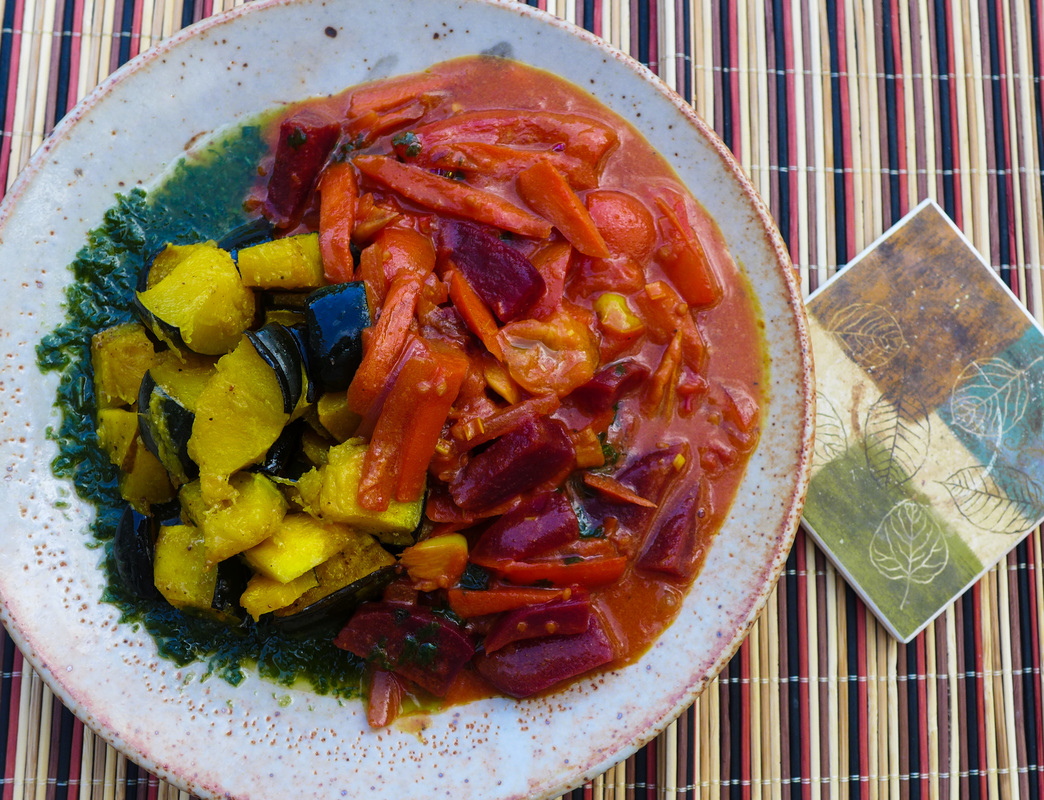 I'm fortunate enough to live in the Garden State. Many think of New Jersey as a bunch of factories and a boardwalk here and there. Throughout the state, however, there are so many amazing farms, vineyards and farmers markets. There are so many farms right near my house and they have all been operating for generations. It's an amazing thing to see. I was excited to go out looking for late summer/early fall veggies today. I had some idea in mind of what I wanted to cook, but I wasn't sure how to tie all my ingredients together. I knew that root vegetables would be available as well as the late harvest of nightshades like tomatoes and peppers. I found some delights that I just had to grab. I also got to pet a cute dog. So, I win. 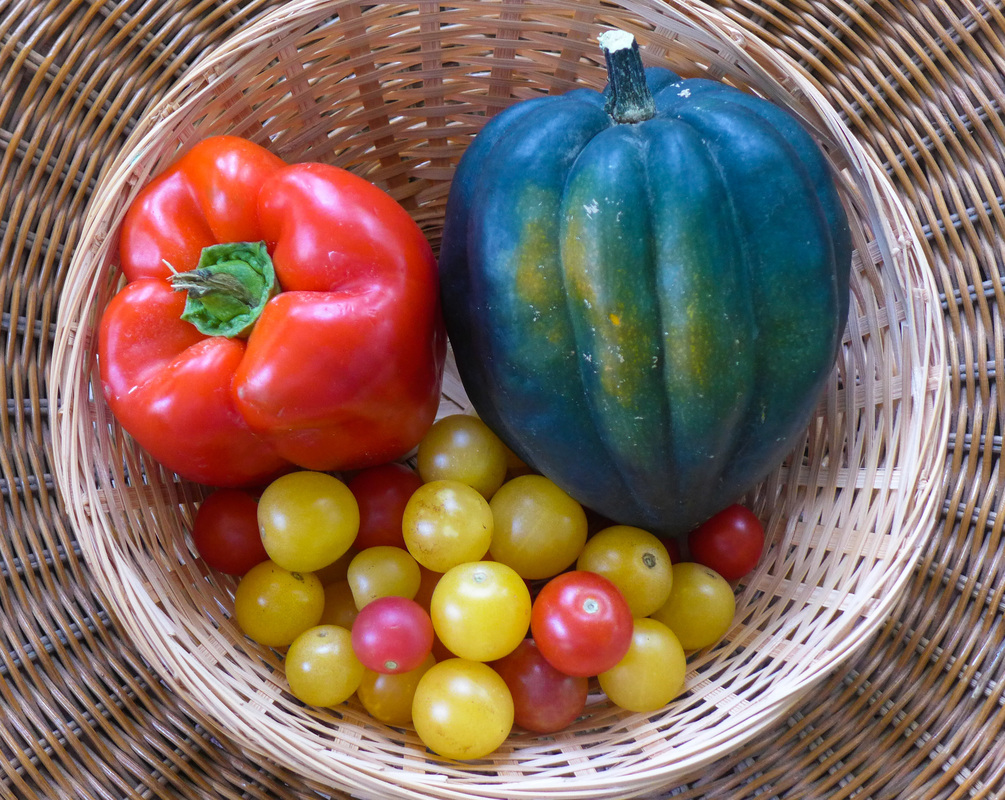 So, my haul today: a huge red pepper, cute little grape heirloom tomatoes and a beautiful acorn squash. I absolutely love their colors. It says everything about September that I love: light yet filling stews with sweet, vibrant flavor. I had to make a stew. No, I had to make curry! I have made Indian style curry before, but never Thai. I have eaten some Thai coconut curry at restaurants and absolutely loved them, but I never ventured to make them at home. Today had to be the day. The resulting dish had to be different, though. Something with a local flare and a seasonal spin. So, I took delicious and hearty root veggies and roasted them (including the acorn squash) to bring out their sweetness. Then, I made a sautee of the tomatoes, peppers, onion, garlic and spices. Then, I drenched all the veggies with coconut milk (I'm drooling). The result was a velvety, sweet, earthy, slightly spicy stew that was filling without being overly heavy. I also garnished with some freshly made basil oil. Why not?! The flavors were so bright and balanced. What a treat! Thanks, VeganMoFo for the inspiration. I was just gonna have leftovers for dinner. ;) 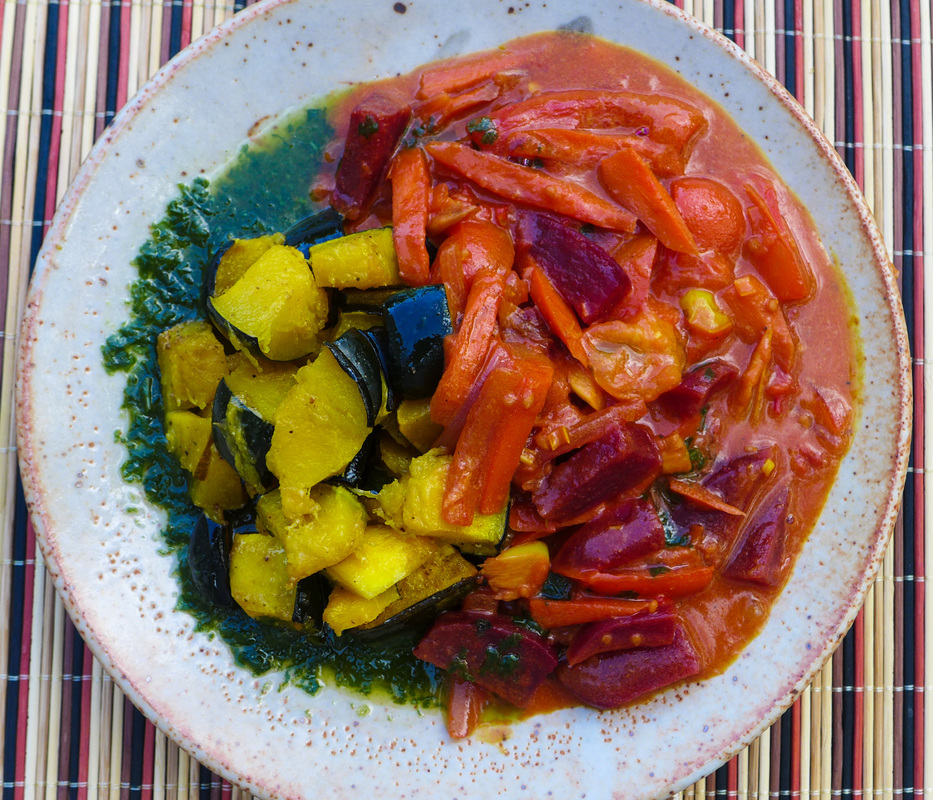 Seasonal Coconut Curry with Acorn Squash
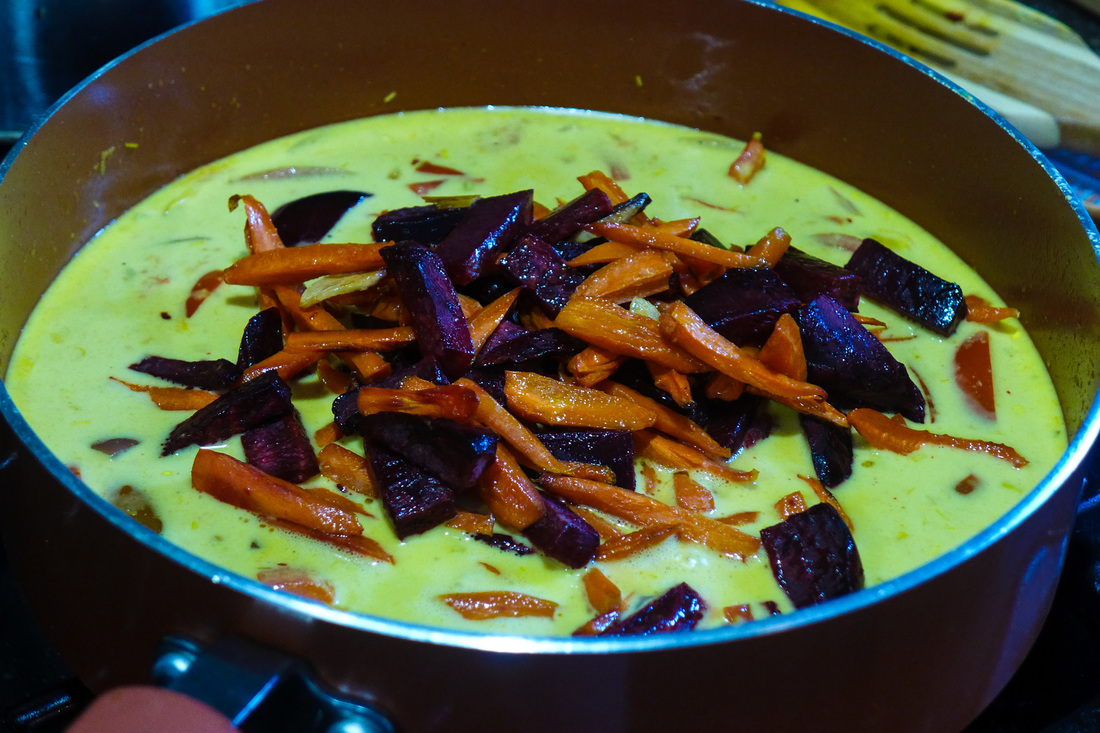 It looks like fall in a pan! Curry Ingredients
Instructions
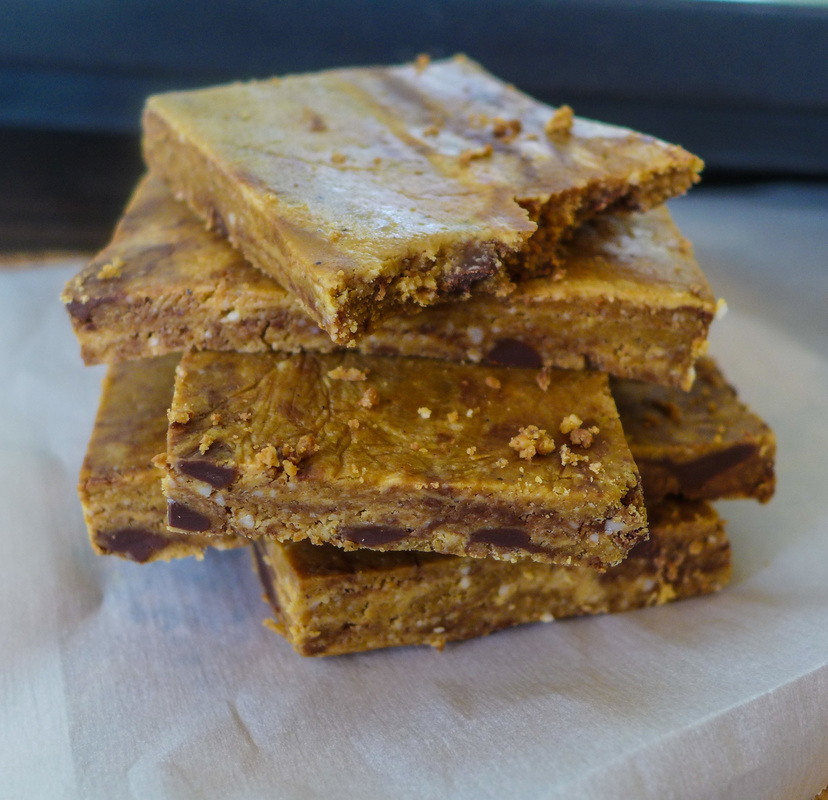
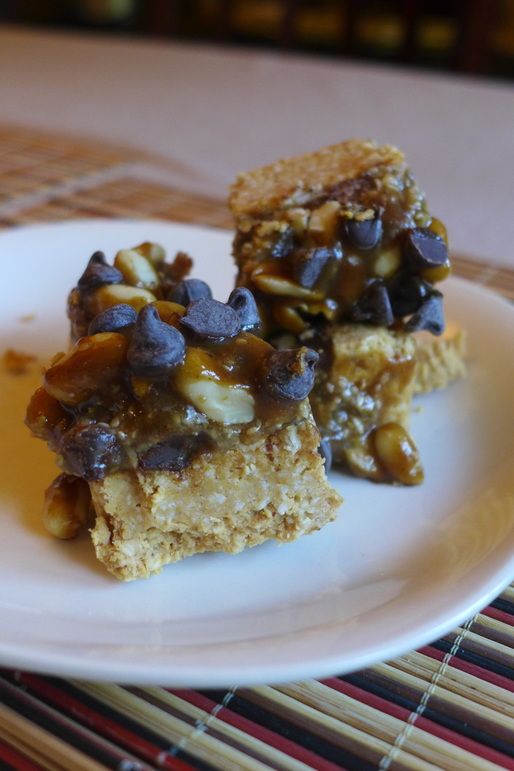
 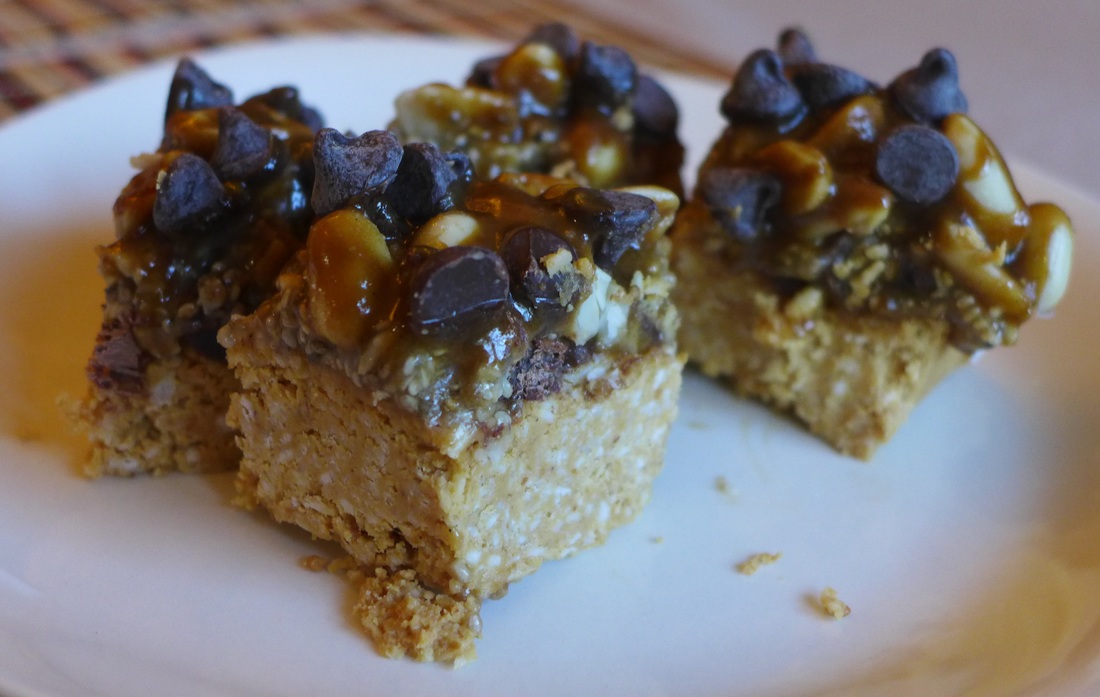 Today, I'm revising an old recipe from my grandma's (maternal) recipe box that she gifted to me about a year or so ago. She's been a big influence on my baking style ever since I was little. She has celiac disease, so she hasn't baked much lately. She continued to bake when I was younger. She would also bake things gluten-free sometimes. Usually though, she would still make things with regular flour for special occasions. She was always great with entertaining. One cookie that I absolutely love to make during the holidays is a 7 layer bar cookie. I'm sure this isn't an alien dessert for many people: graham cracker crust, layers of chocolate and butterscotch chips with a gooey texture and deliciously sickeningly sweet taste. Ring a bell? =P Since going vegan, I haven't really attempted to make these cookies. The original recipe calls for sweetened condensed milk, which binds the bar together and gives it a tooth-decaying sweetness. This cookie isn't actually made from scratch. The recipe basically tells you to layer store-bought ingredients and then bake them together (Sandra Lee style, if you will). 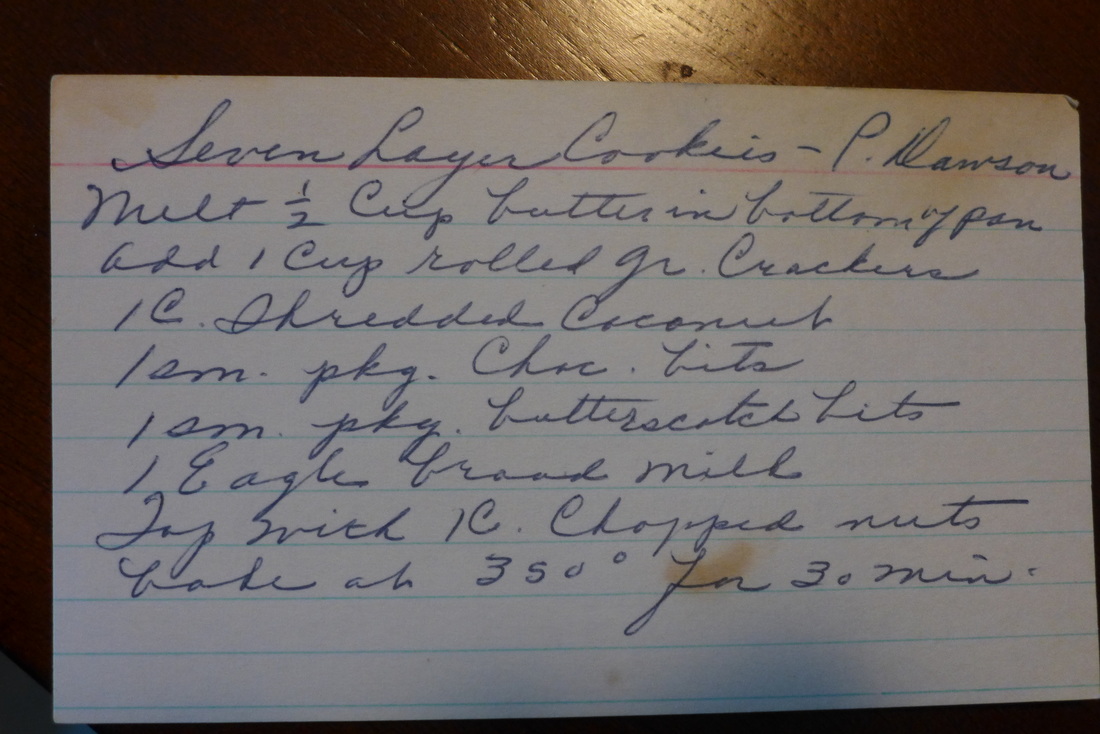 I decided that, as appealing as these cookies are originally, they deserve a modern and healthy make-over. I looked at every layer and thought, "That could be healthier." I basically made a no-bake bar cookie that took about 30 minutes to put together and an hour to set in the freezer. It may not be as quick as pouring and baking would be, but it's certainly worth it for the health benefits and lower processed food content. Everything in this cookie can be substituted for any allergies. All ingredients are minimally processed. I also used strictly coconut sugar so as to lower the sugar crash effect of the original recipe. Feel free to use any type of nut/nut butter if you don't like peanuts. This kind of tastes like a healthy snickers bar, if you're into that. I certainly am. ;) 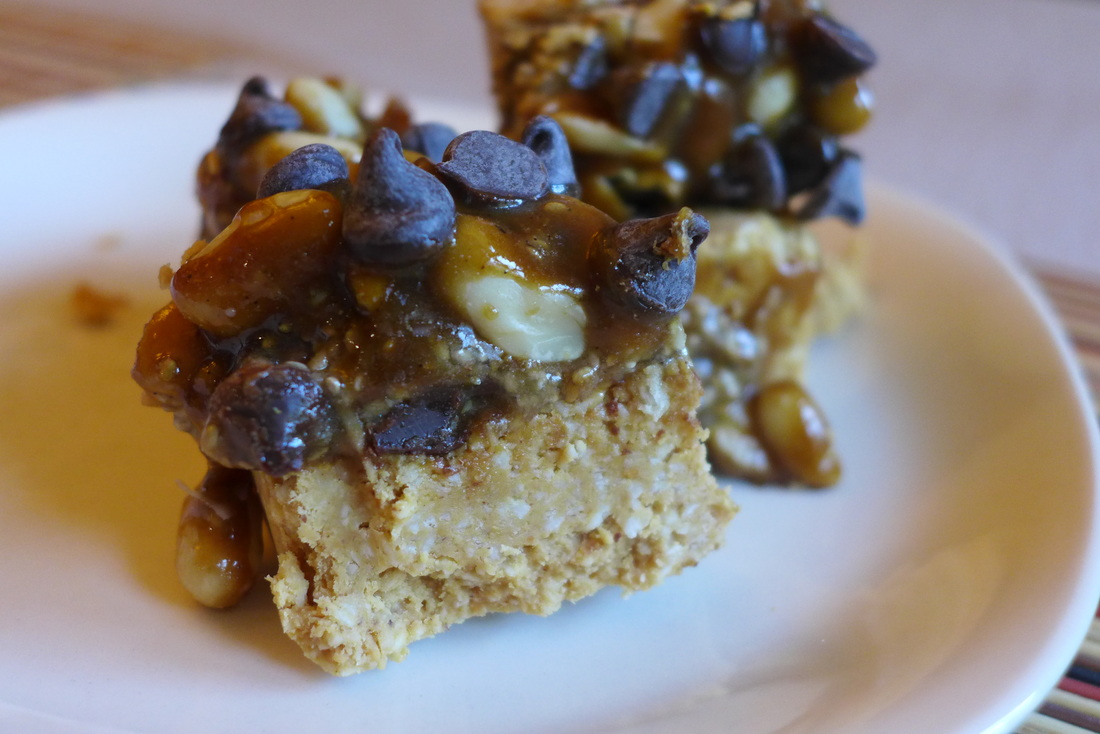 Healthy No Bake 7 Layer BarsYield: 1 9x5 loaf pan Free of: Gluten (*Can be nut/soy free with substitutions) Ingredients
Vegan Butterscotch Sauce
Instructions
  Don't mind if I do! My post for today is brief: simple & sweet. When I eat fresh produce at the end of the summer, I like to keep my recipes uncomplicated. I like to use the late summer fruits and vegetables as quickly as I can. This way, my dishes stay fresh and flavorful and nutritious. The chill of autumn is already in air where I live, so I'm glad I could savor a little bit of summer before I transition into more hearty cooking methods. This stacked salad that I made is just a hodge podge of fresh ingredients that I found: local organic heirloom tomatoes (they're wonderful!), olive oil marinated baby kale, raw red onion and raw garlic all nestled in between layers of the easiest chickpea salad I've ever made. Chickpea salad is one of those recipes that vegans love to bring to summer barbeques or picnics because it's easy, fast and totally versatile! It's also an easy sell to those who aren't vegan: it's chickpeas in a may-like dressing with some diced veggies! Who could say no? Well, people who don't like chickpeas, I guess... 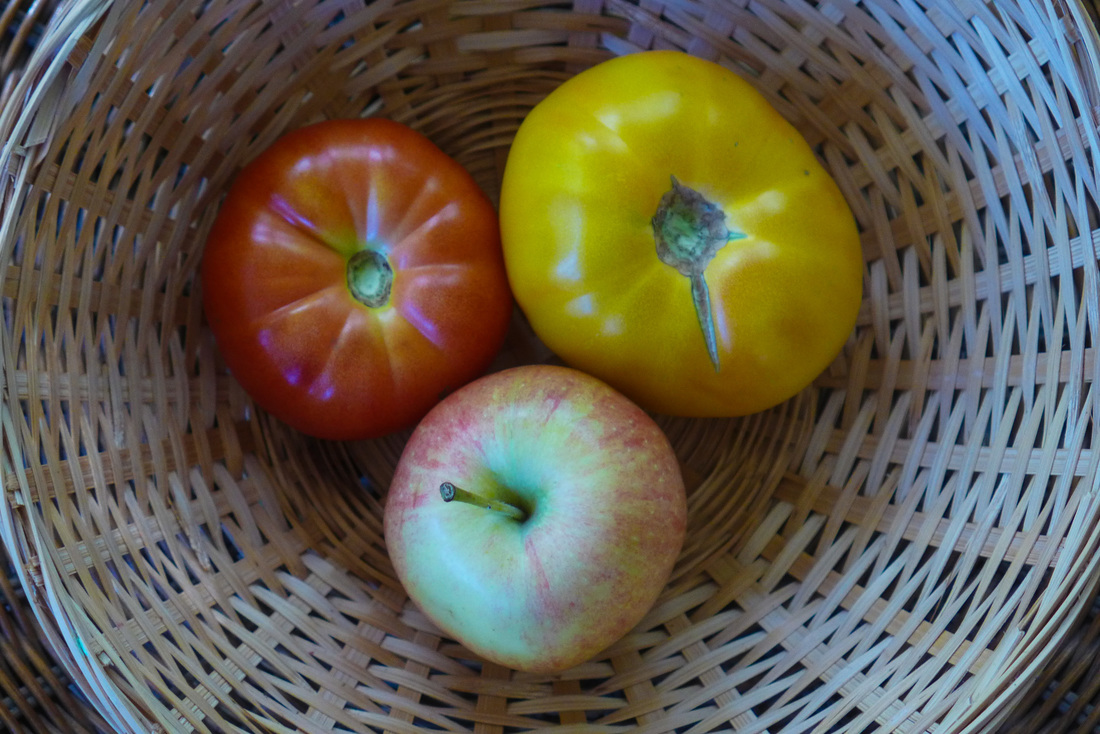 One of these things is not like the other... My chickpea salad is only 4 ingredients! Well, it's technically 5 if you count water. This recipe calls for no super-processed ingredients and is very healthy! It's also oil-free but still super creamy. I love the base dressing. I first learned how to make it from binge watching Naturally Delicious by Ann Gentry when I first became vegan. I found her show on television one day and was so stoked that I had "discovered" a vegan cooking show. Little did I know, Ann Gentry is a huge deal. I did learn quite a bit from her instructions. This recipe is my top take-away! It's a bit of a "dressing hack", if I can say those two words together without sounding too dorky. ^_^' 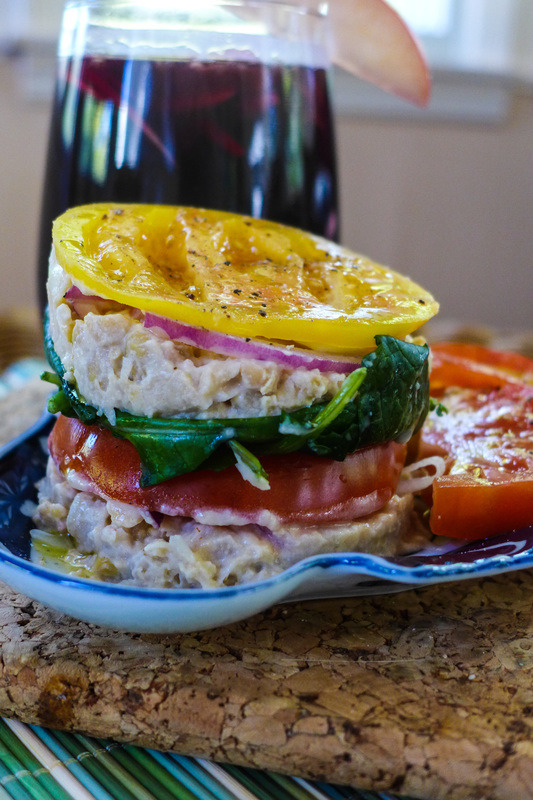 Easy Chickpea SaladServes: approx 4-6 people Free of: nuts, sugar, oil, gluten, soy* *Use chickpea miso if you need! The more chickpea, the better, right? Ingredients:
Instructions
 Now, on to the booze! Late Summer SangriaYield: Approx. 5 cups *NOT alcohol-free!* You may sub the red wine for an alcohol-free wine, grape juice, or other juice of your choice! Feel free to mix up the fruits, too! Ingredients
Instructions:
|
I'm Jess!This is my very first food blog! I post revised conventional recipes of foods that I hold near and dear to my heart. My cooking here is all gluten-free and cruelty-free, but full of flavor and comfort.  


 Archives
December 2017
Categories
All
|
 RSS Feed
