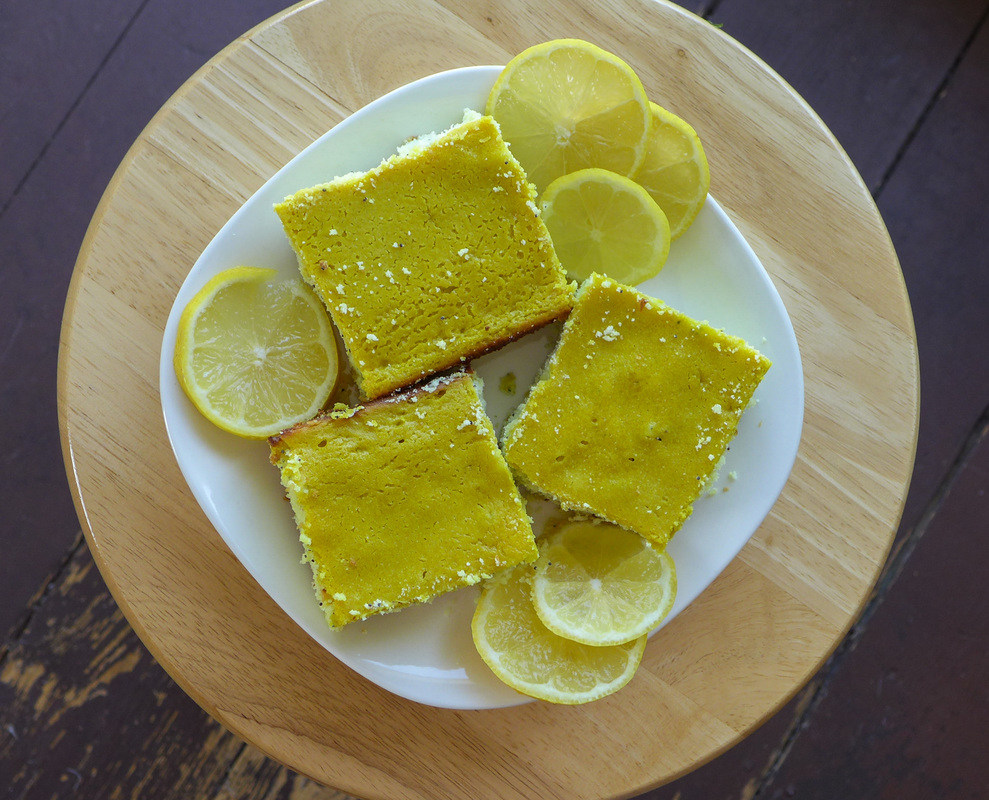
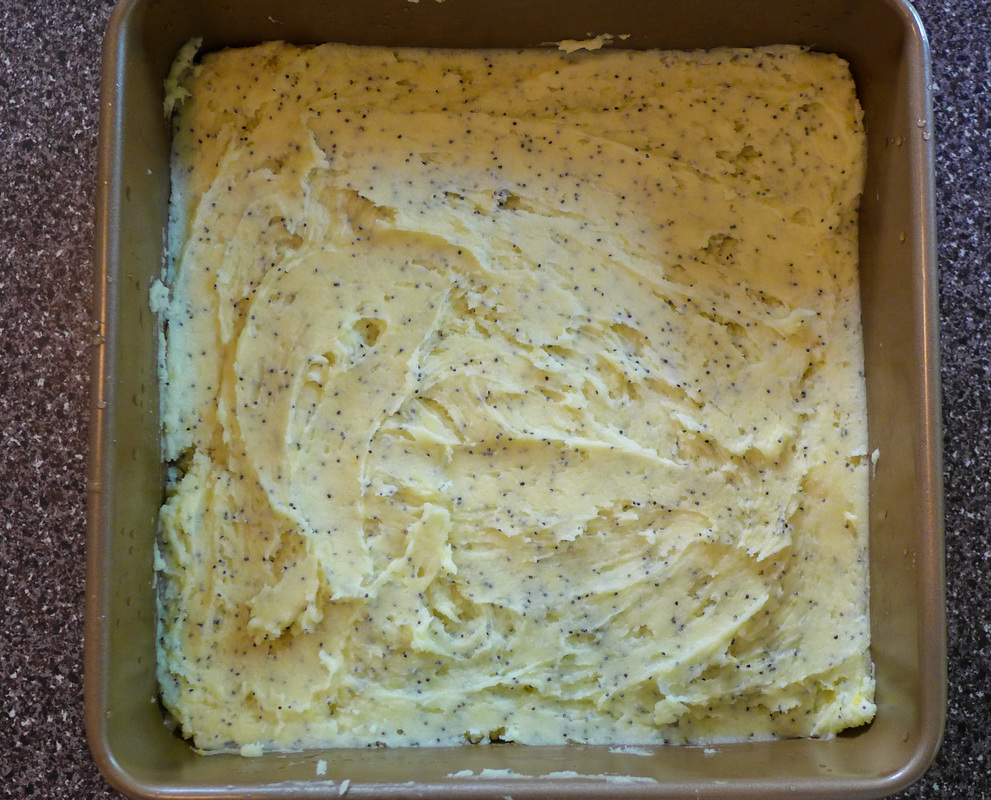
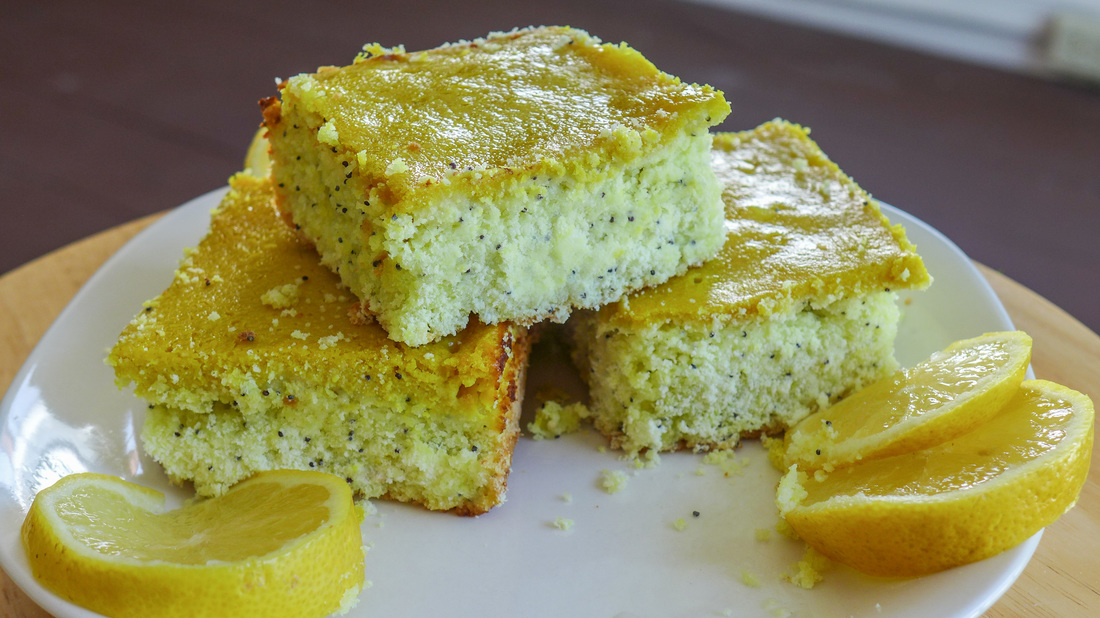
 So, I recently made my very first batch of lemon bars. I know. I'm just one of those people who doesn't particularly favor lemon desserts. I love adding lemon as an accent to a savory dish. Nothing beats a fresh pop of lemon juice in sauces and marinades. I also add lemon to my water and tea when I'm feeling congested. It does wonders! I guess my main issue with lemon desserts was always that they tasted too extreme for me. I never cared for the intense taste of sour and sweet together. This combination always made me think of Sour Patch Kids or Warheads. My teeth hurt just thinking about it! However, this past mother's day I decided to put my differences with lemon aside for my grandma. She loves lemon desserts. One of her favorite things is lemon meringue pie, which is definitely not something I care for. I wanted to try to make her something that I could enjoy too. What a challenge! 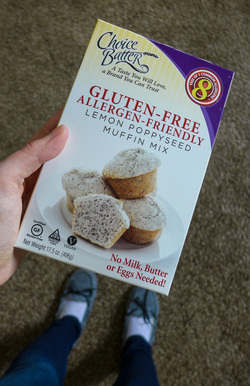 Yes, those are my slippers. I like to be cozy in the kitchen! Yes, those are my slippers. I like to be cozy in the kitchen! Luckily, I found a simple and seemingly delicious recipe from the one and only Minimalist Baker blog. I use Dana's recipes all the time if I need to make a quick batch of something for an impromptu meal (biscuits, pancakes, cupcakes, you name it). I love her recipes for their simplicity, short lists of ingredients, and quick prep times. I figured that she would have a trustworthy lemon bar recipe in her archives. I was definitely right in choosing this one (link below). The texture of these bars is similar to cheesecake, amazingly creamy and refreshing. I used a shortbread recipe for the crust, but I followed the filling recipe as it was. The result was incredible. The lemon flavor wasn't overpowering at all. I also love how the maple syrup provides a mellow and rich sweetness that does not shock your taste buds. Needless to say, the bars were a hit! And now, for the twist. When I looked in the pantry the other day, I noticed I had a box of Choice Batter muffin mix. I brought this mix home with the thought of, "Well, I'll keep this on hand in case of emergency." In my mind, muffin crisis is always just around the corner. You need to be prepared. I also wanted to give Choice Batter a try since I've seen their products many times. Their bake mixes are allergen-free, which means gluten-free, egg-free, and dairy-free! The recipe on the box also calls for just oil and water, which keeps the muffins vegan. Then I got to thinking, "What if these muffins had cheesecake on top of them?" Well, that was when I channeled my inner Sandra Lee and whipped up a "semi-homemade" lemon bar concoction. I changed the ratio of liquids in the boxed muffin recipe to make them more dense and I added some more lemony essence with the help of freshly squeezed and zested organic lemons. Then, I made some of Dana's lemon bar filling and poured it right over the muffin batter in a brownie pan. The rest is self explanatory. The finished product is a delicious square of lemon poppy seed and cheesecake goodness. The cheesecake layer is thin so it does not provide a gunky mouth feel, which cheesecake sometimes can in large amounts. The bars are satisfying, bright, slightly sweet, and creamy. These little squares are great for baking ahead and bringing to your weekend get together or BBQ (hint hint, Memorial Day)! They are also free of many allergens (except cashews!) so they will be a safe treat for almost everyone to enjoy. Also, you technically made these at home, so you can have bragging rights. No one needs to know that Choice Batter gave you a head start. ;) Or, maybe they do! Thank you, Choice Batter! ^_^ Have a great weekend, everyone! Enjoy the sun and the lemons! 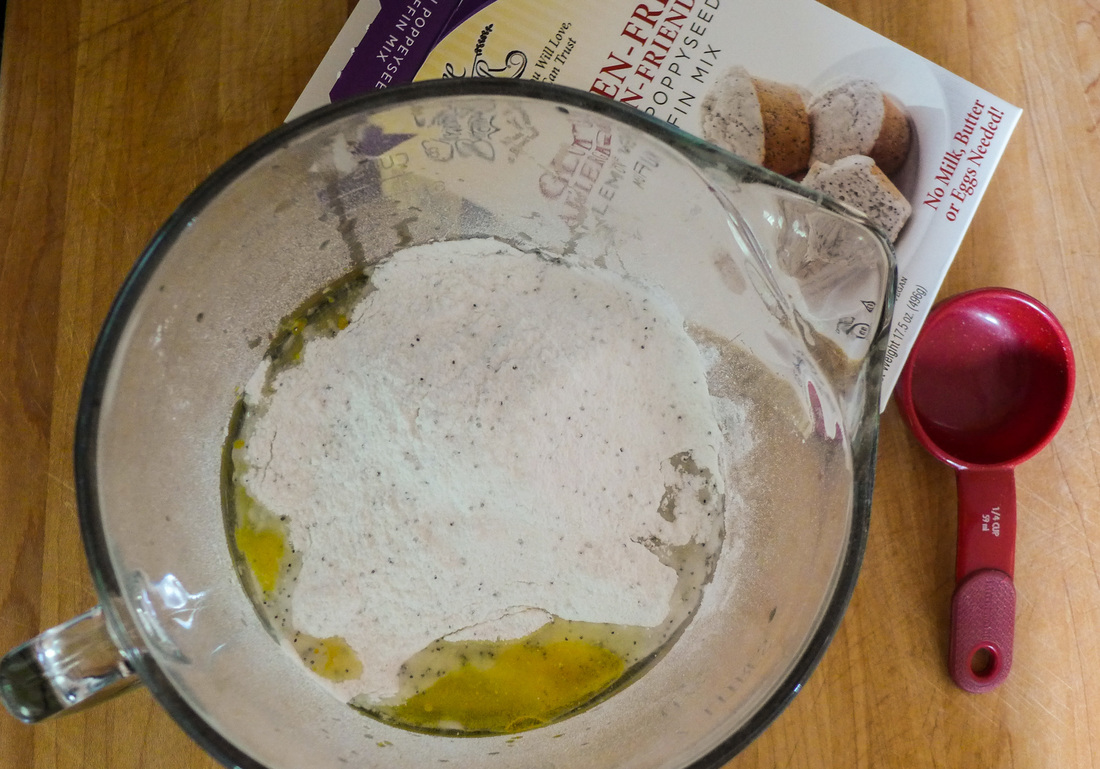 Lemon Poppy Seed Cheesecake BarsIngredients Free from: Gluten, Soy* Yield: about 9 servings Cheesecake topping recipe adapted from Minimalist Baker Lemon Bars Blondies
Cheesecake Topping
 Instructions
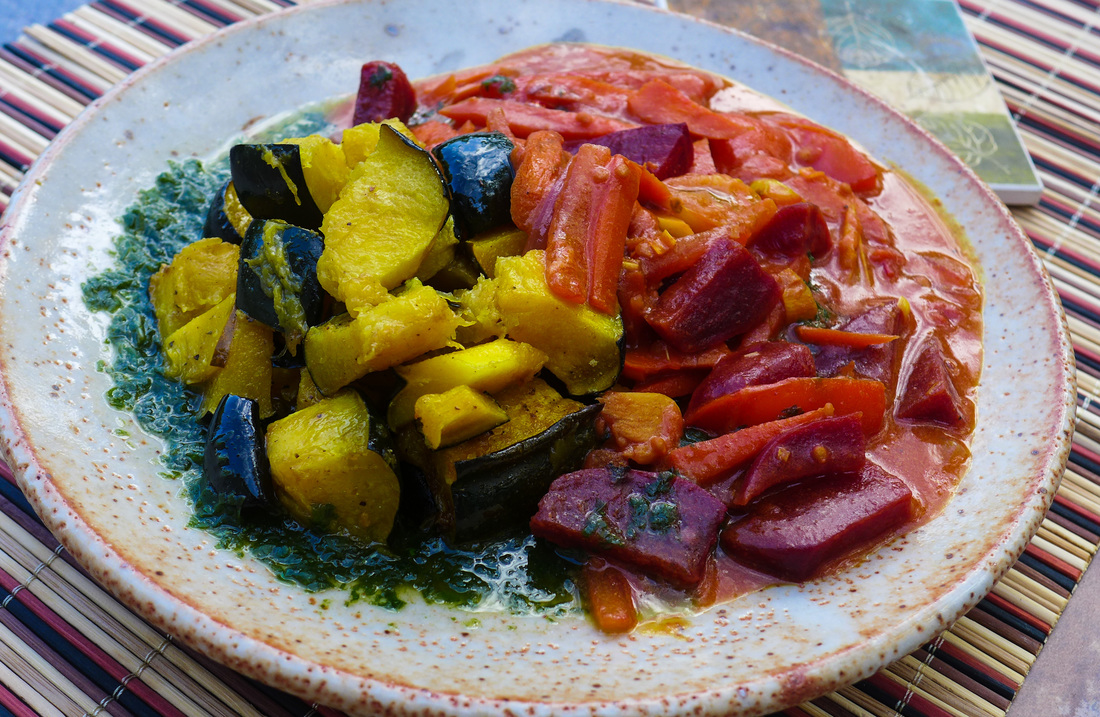
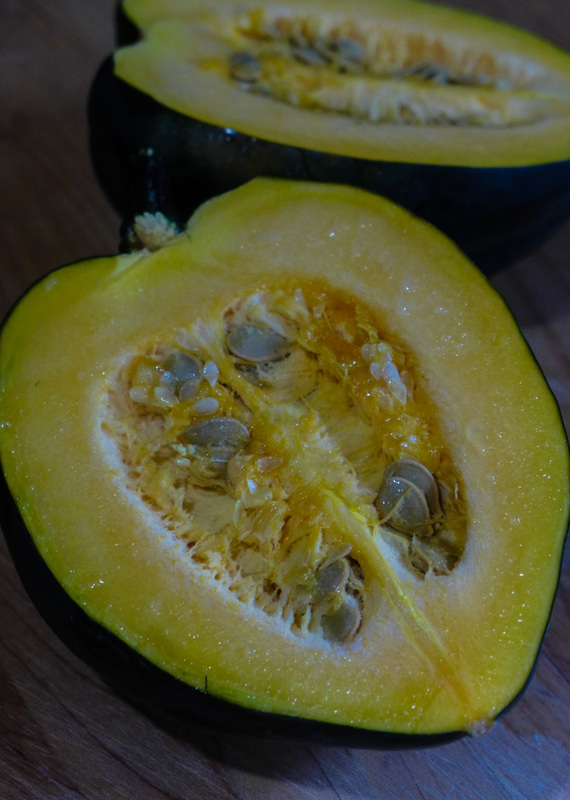
 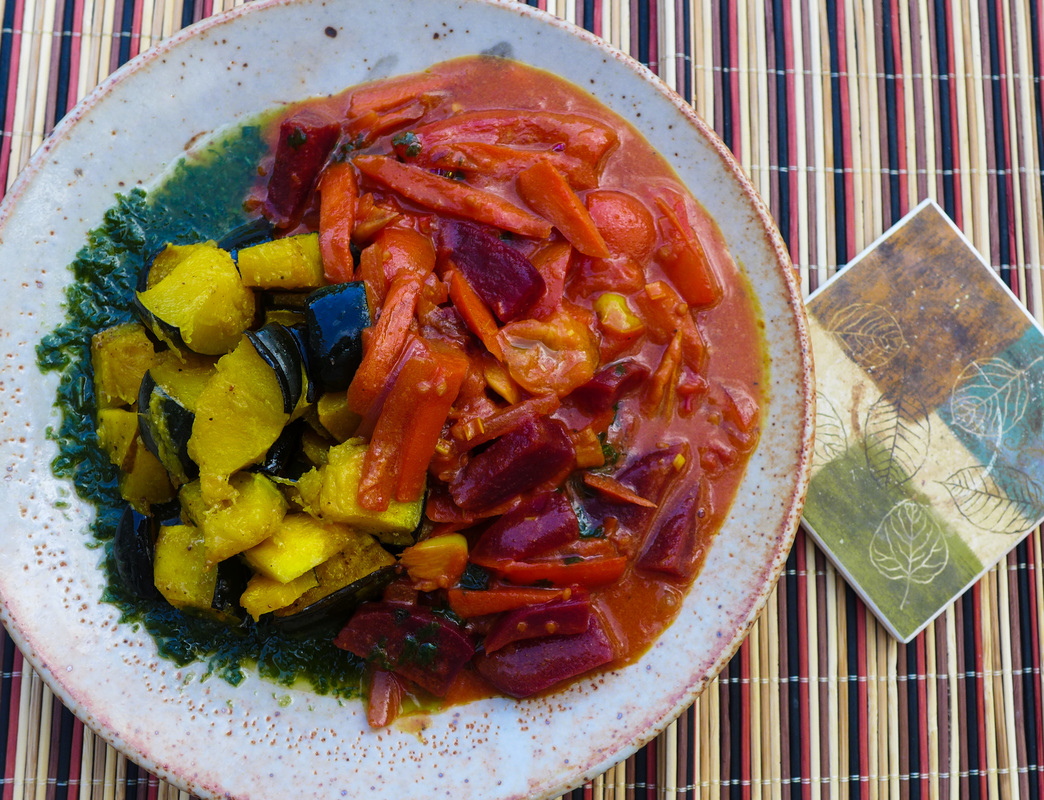 I'm fortunate enough to live in the Garden State. Many think of New Jersey as a bunch of factories and a boardwalk here and there. Throughout the state, however, there are so many amazing farms, vineyards and farmers markets. There are so many farms right near my house and they have all been operating for generations. It's an amazing thing to see. I was excited to go out looking for late summer/early fall veggies today. I had some idea in mind of what I wanted to cook, but I wasn't sure how to tie all my ingredients together. I knew that root vegetables would be available as well as the late harvest of nightshades like tomatoes and peppers. I found some delights that I just had to grab. I also got to pet a cute dog. So, I win. 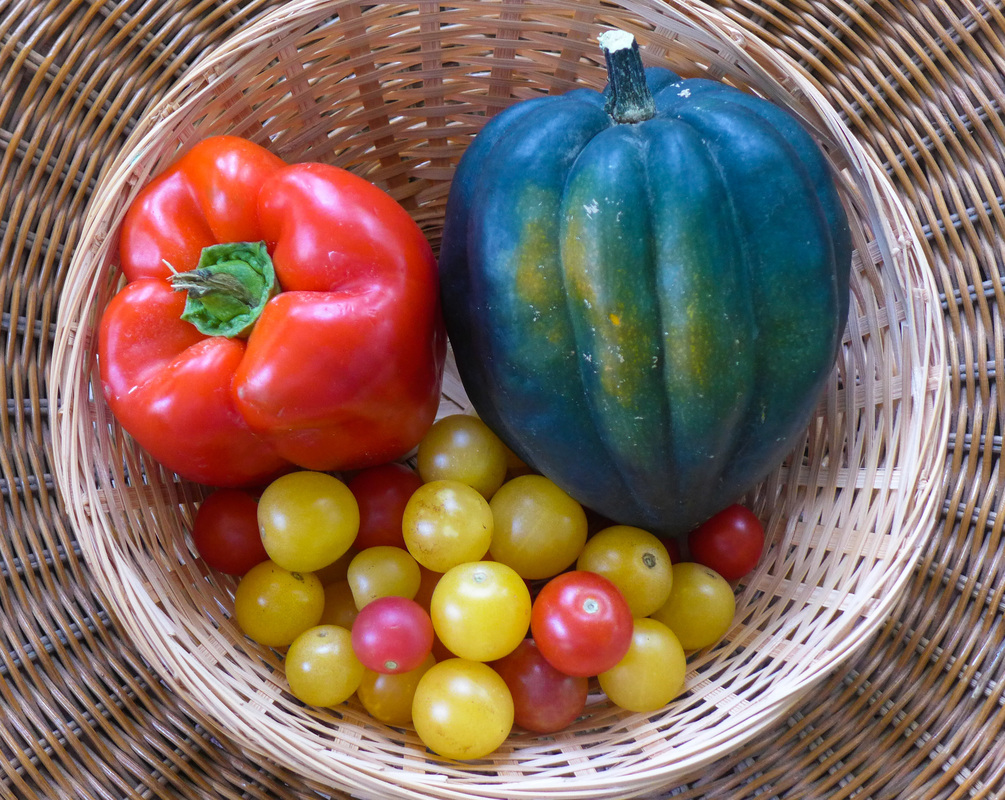 So, my haul today: a huge red pepper, cute little grape heirloom tomatoes and a beautiful acorn squash. I absolutely love their colors. It says everything about September that I love: light yet filling stews with sweet, vibrant flavor. I had to make a stew. No, I had to make curry! I have made Indian style curry before, but never Thai. I have eaten some Thai coconut curry at restaurants and absolutely loved them, but I never ventured to make them at home. Today had to be the day. The resulting dish had to be different, though. Something with a local flare and a seasonal spin. So, I took delicious and hearty root veggies and roasted them (including the acorn squash) to bring out their sweetness. Then, I made a sautee of the tomatoes, peppers, onion, garlic and spices. Then, I drenched all the veggies with coconut milk (I'm drooling). The result was a velvety, sweet, earthy, slightly spicy stew that was filling without being overly heavy. I also garnished with some freshly made basil oil. Why not?! The flavors were so bright and balanced. What a treat! Thanks, VeganMoFo for the inspiration. I was just gonna have leftovers for dinner. ;) 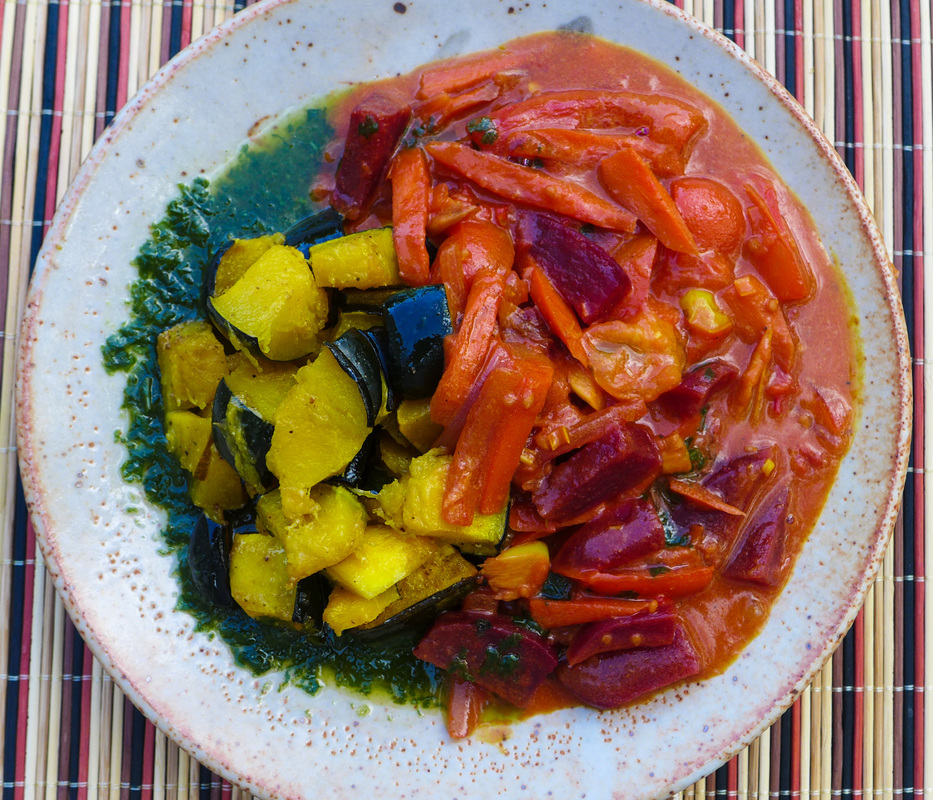 Seasonal Coconut Curry with Acorn Squash
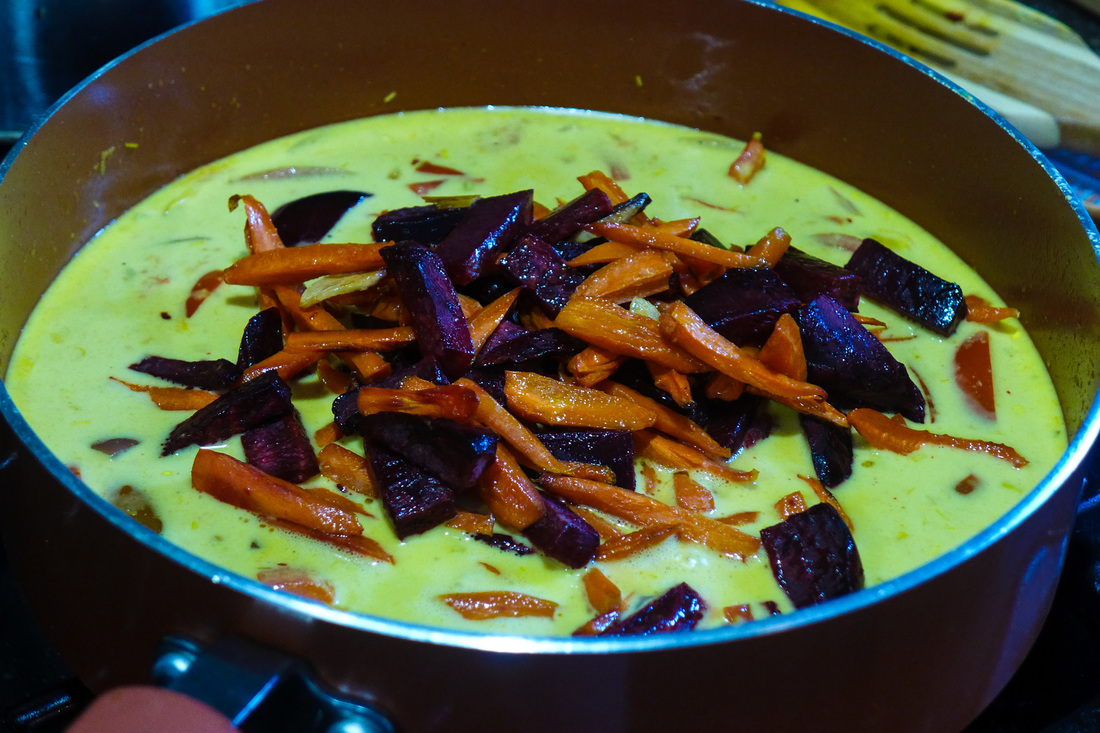 It looks like fall in a pan! Curry Ingredients
Instructions
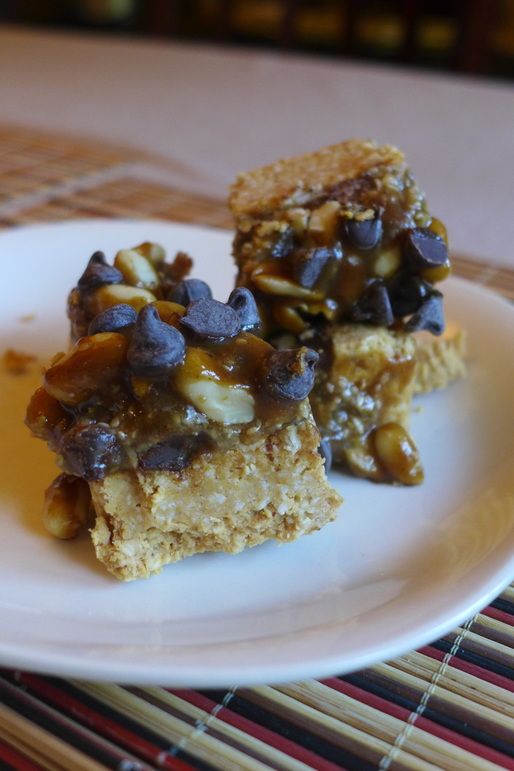
 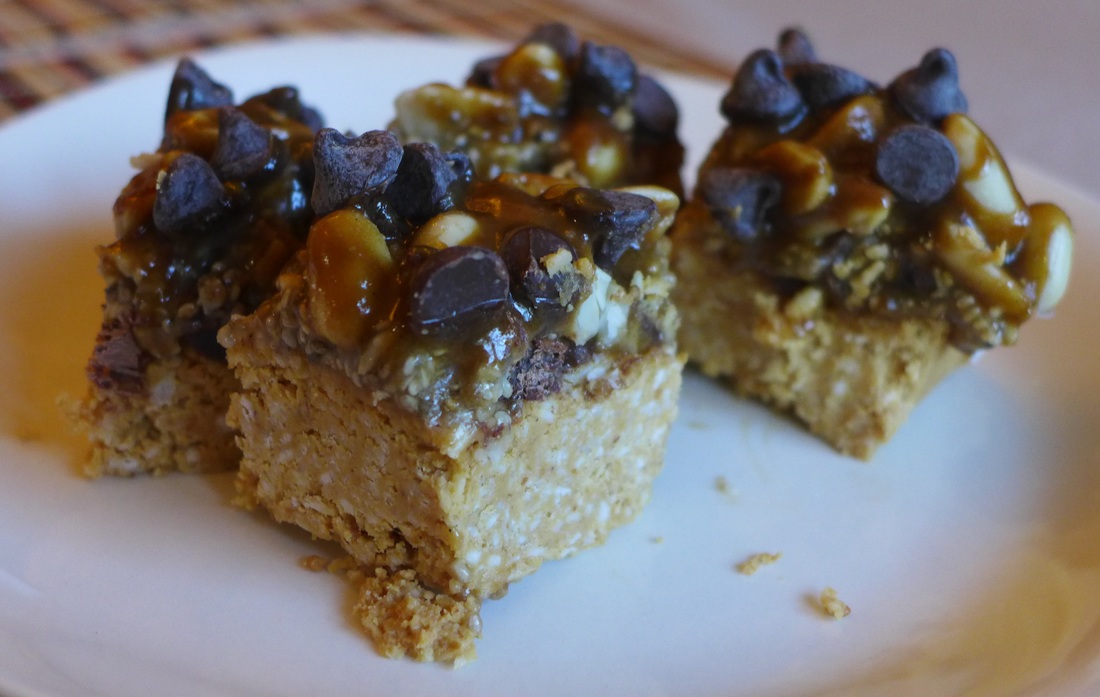 Today, I'm revising an old recipe from my grandma's (maternal) recipe box that she gifted to me about a year or so ago. She's been a big influence on my baking style ever since I was little. She has celiac disease, so she hasn't baked much lately. She continued to bake when I was younger. She would also bake things gluten-free sometimes. Usually though, she would still make things with regular flour for special occasions. She was always great with entertaining. One cookie that I absolutely love to make during the holidays is a 7 layer bar cookie. I'm sure this isn't an alien dessert for many people: graham cracker crust, layers of chocolate and butterscotch chips with a gooey texture and deliciously sickeningly sweet taste. Ring a bell? =P Since going vegan, I haven't really attempted to make these cookies. The original recipe calls for sweetened condensed milk, which binds the bar together and gives it a tooth-decaying sweetness. This cookie isn't actually made from scratch. The recipe basically tells you to layer store-bought ingredients and then bake them together (Sandra Lee style, if you will). 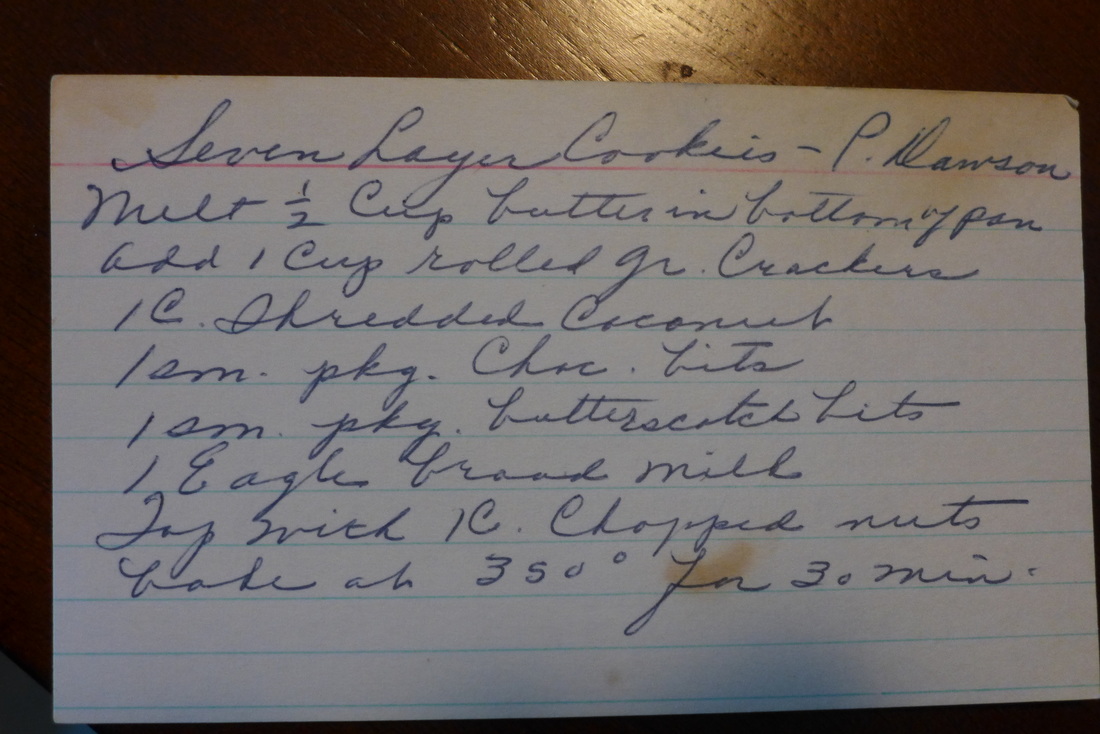 I decided that, as appealing as these cookies are originally, they deserve a modern and healthy make-over. I looked at every layer and thought, "That could be healthier." I basically made a no-bake bar cookie that took about 30 minutes to put together and an hour to set in the freezer. It may not be as quick as pouring and baking would be, but it's certainly worth it for the health benefits and lower processed food content. Everything in this cookie can be substituted for any allergies. All ingredients are minimally processed. I also used strictly coconut sugar so as to lower the sugar crash effect of the original recipe. Feel free to use any type of nut/nut butter if you don't like peanuts. This kind of tastes like a healthy snickers bar, if you're into that. I certainly am. ;) 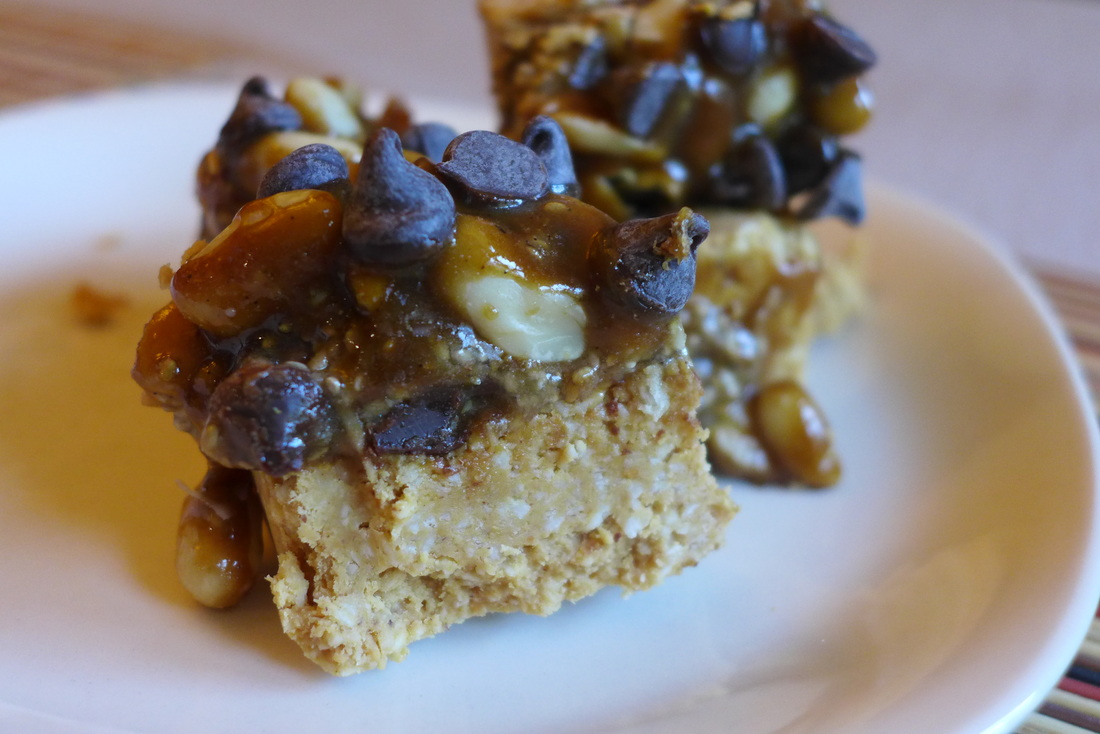 Healthy No Bake 7 Layer BarsYield: 1 9x5 loaf pan Free of: Gluten (*Can be nut/soy free with substitutions) Ingredients
Vegan Butterscotch Sauce
Instructions
  Don't mind if I do! My post for today is brief: simple & sweet. When I eat fresh produce at the end of the summer, I like to keep my recipes uncomplicated. I like to use the late summer fruits and vegetables as quickly as I can. This way, my dishes stay fresh and flavorful and nutritious. The chill of autumn is already in air where I live, so I'm glad I could savor a little bit of summer before I transition into more hearty cooking methods. This stacked salad that I made is just a hodge podge of fresh ingredients that I found: local organic heirloom tomatoes (they're wonderful!), olive oil marinated baby kale, raw red onion and raw garlic all nestled in between layers of the easiest chickpea salad I've ever made. Chickpea salad is one of those recipes that vegans love to bring to summer barbeques or picnics because it's easy, fast and totally versatile! It's also an easy sell to those who aren't vegan: it's chickpeas in a may-like dressing with some diced veggies! Who could say no? Well, people who don't like chickpeas, I guess... 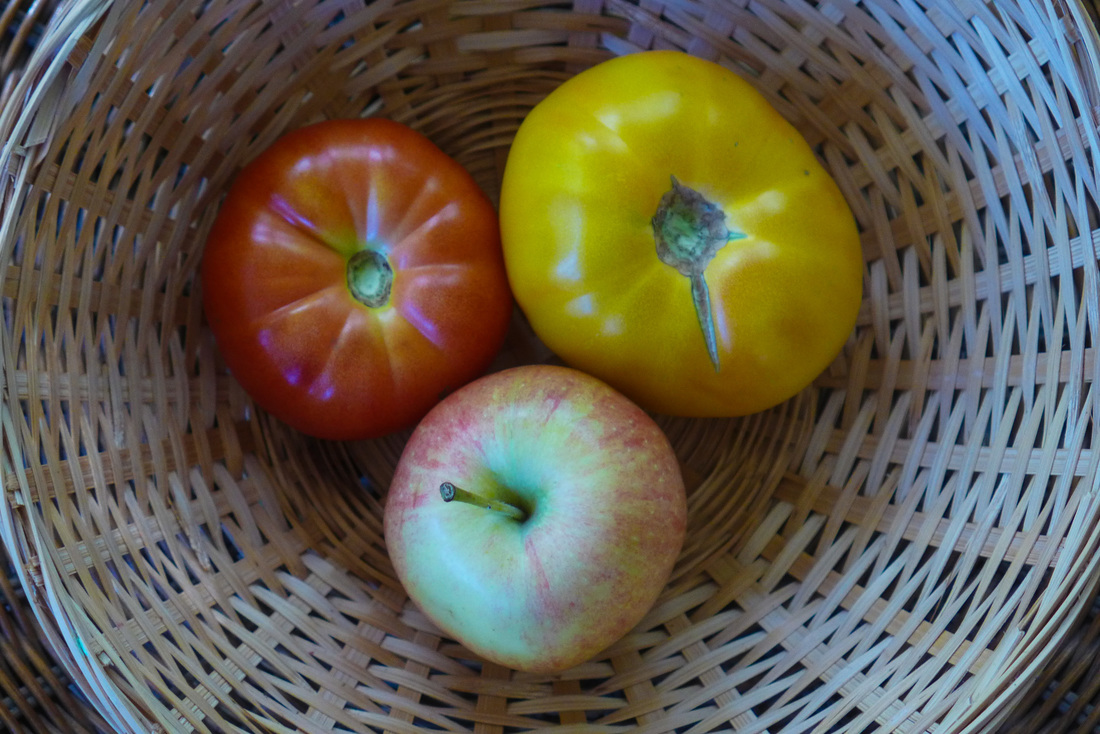 One of these things is not like the other... My chickpea salad is only 4 ingredients! Well, it's technically 5 if you count water. This recipe calls for no super-processed ingredients and is very healthy! It's also oil-free but still super creamy. I love the base dressing. I first learned how to make it from binge watching Naturally Delicious by Ann Gentry when I first became vegan. I found her show on television one day and was so stoked that I had "discovered" a vegan cooking show. Little did I know, Ann Gentry is a huge deal. I did learn quite a bit from her instructions. This recipe is my top take-away! It's a bit of a "dressing hack", if I can say those two words together without sounding too dorky. ^_^' 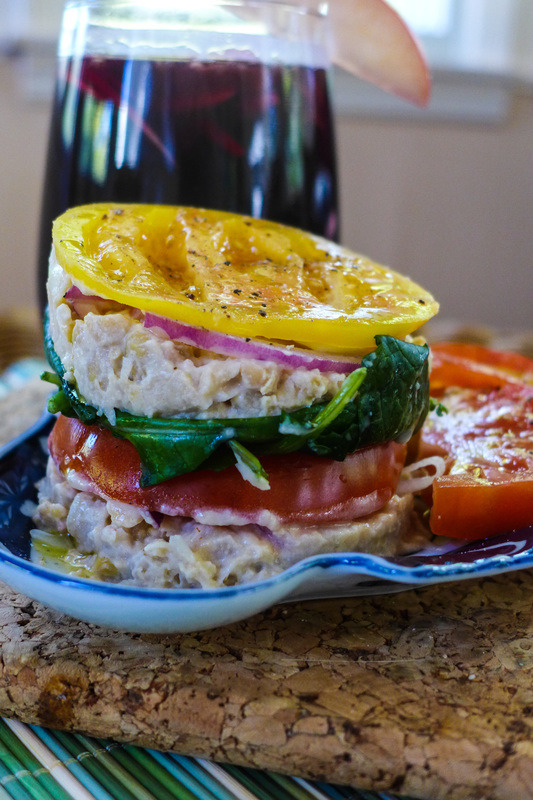 Easy Chickpea SaladServes: approx 4-6 people Free of: nuts, sugar, oil, gluten, soy* *Use chickpea miso if you need! The more chickpea, the better, right? Ingredients:
Instructions
 Now, on to the booze! Late Summer SangriaYield: Approx. 5 cups *NOT alcohol-free!* You may sub the red wine for an alcohol-free wine, grape juice, or other juice of your choice! Feel free to mix up the fruits, too! Ingredients
Instructions:
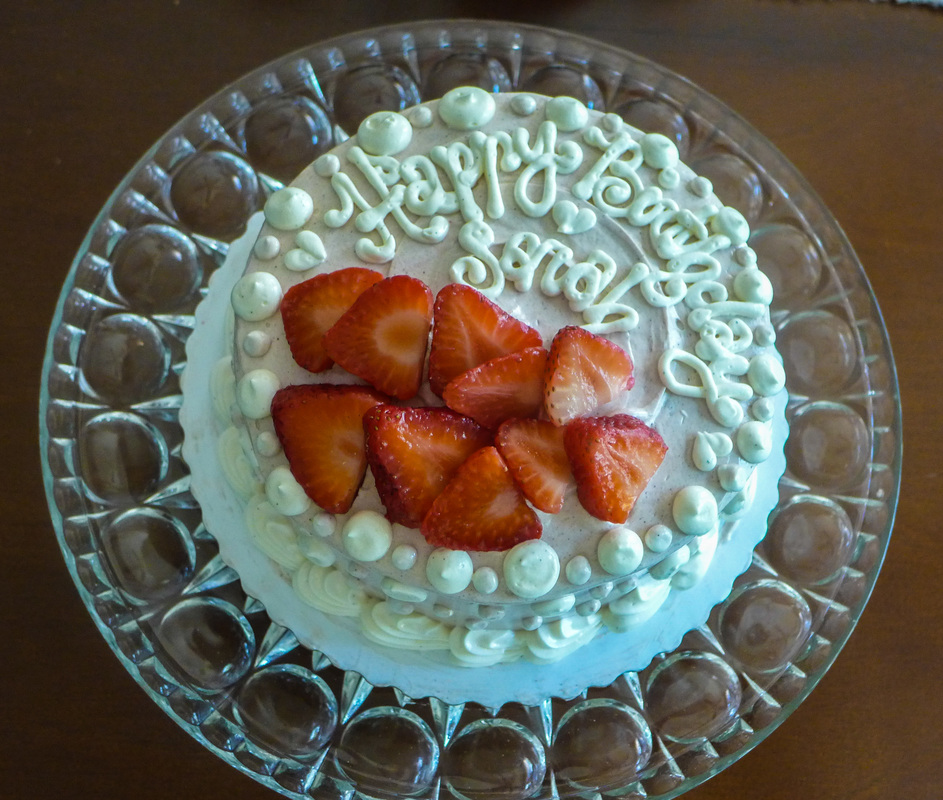
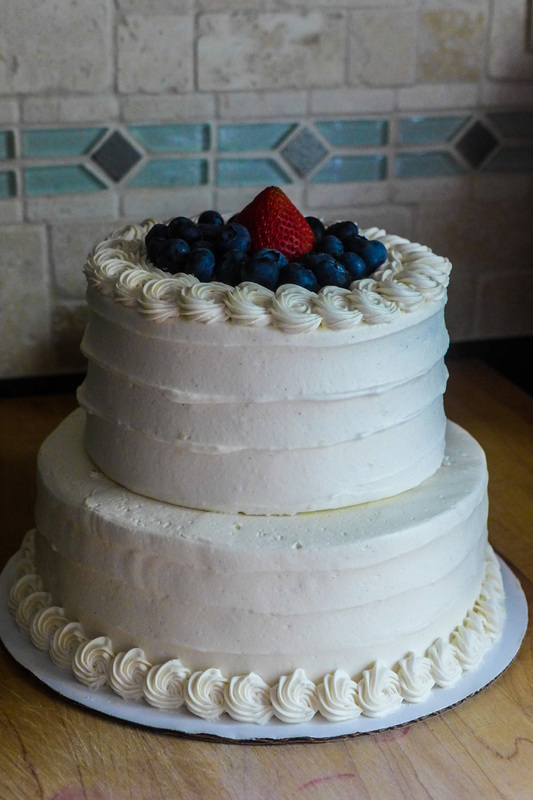 When I first became enamored with baking cakes and cupcakes, I struggled to match them with a good icing recipe. Even as a non-vegan hobby baker, I had a pretty strong dislike for most icing that I could make. The standard American buttercream (usually a mixture between shortening and/or butter and powdered sugar with some milk and vanilla added) always seemed too sweet for me. Also, what a pain it is to make! So much of each ingredient needed to go into the recipe in order to do anything with it. I usually use a ratio of equal parts powdered sugar and shortening/butter (or Earth Balance) divided, so it would be for example: 1 cup shortening 1 cup butter/non-dairy substitute 2 cups powdered sugar milk vanilla This is a lot of each ingredient to yield enough icing to ice a cake or some cupcakes...Also, look at the amount of fat and sugar goes into it! A bit much, I think. I prefer things to be slightly sweet and more rounded in flavor when it comes to desserts...I've mentioned this many times in my posts! But, when it comes to icing, it seems almost impossible to balance flavor in an icing that has a stable texture for decorating...well, until now!! ;) 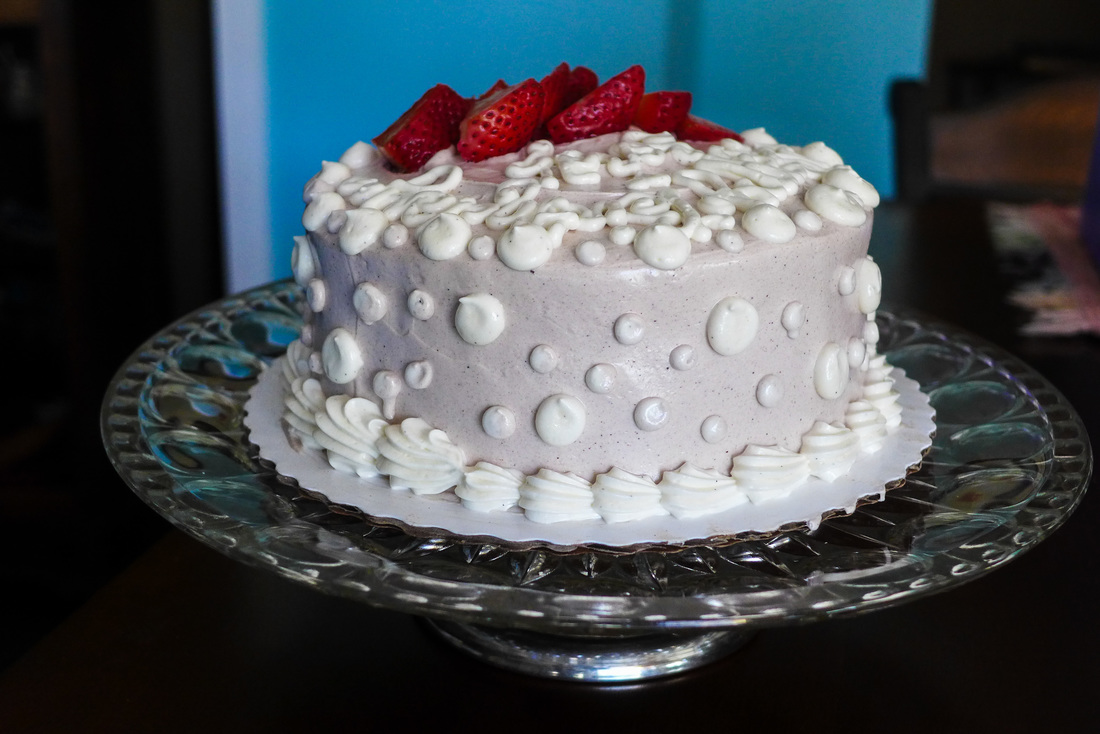 With the amazing discovery of aquafaba, I have learned how to create amazing Swiss Meringue-style buttercream that is free of eggs or dairy! I have worked with this type of buttercream for years now at my job and I love working with it because it is always smooth and easy to work with for decorating cakes. It also hardens when it's cold so your cakes are more stable once they have set in the fridge for a while. The only issue with it is that it is an egg white-based recipe. I learned to make this type of buttercream by cooking granulated sugar and egg whites, whipping them and then adding a ton of butter to them until the entire mixture emulsifies and becomes soft, smooth buttercream. The process is quite long, especially if you are making a large batch. This batch that I've created is a small one, ideal for a 6 inch round cake or 12 cupcakes. It is ideal for the home kitchen because it is quick, does not require any cooking, and is only reliant on 1 cup of non-dairy butter substitute. The amount of sugar is dependent on your taste, as well! I believe that you might be able to substitute the sweetener if you choose, but make sure you are ready to experiment a little with the ratios of the other ingredients as it may change the texture. The goal is for this buttercream to firm up enough to pipe and ice, so make sure there is still some structure there. I love that I managed to make this buttercream work! I like the way it looks compared to other vegan icings I've used. A veganized American buttercream can sometimes be bubbly if it is over-whipped. This buttercream is always smooth and silky, ideal for piping roses/flowers, borders, etc. on your cake or cupcakes! I'm so happy I've found a way to make this recipe and I'm so excited to share it with all of you! Feel free to sub the non-dairy butter with coconut oi. I've tried this and it works beautifully. As long as you refrigerate your cake prior to serving, the icing will stay in its proper place! Leaving it out of the fridge, as long as it is in a cool environment for a couple hours is fine, too. Here are a couple of cakes I've used this buttercream for (one was for yesterday's VeganMoFo post!) I hope they inspire you to do your own homemade cakes or cupcakes! =) Happy icing! Vegan Swiss Meringue Buttercream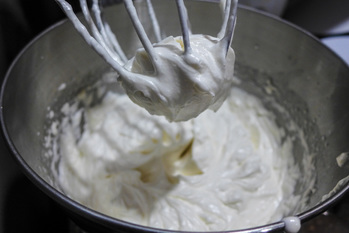 Yeild: About 4 cups, finished Enough to ice: 1-6" cake/12 cupcakes Free of: Gluten, Soy*, Nuts *Depending on your non-dairy butter Ingredients
Instructions
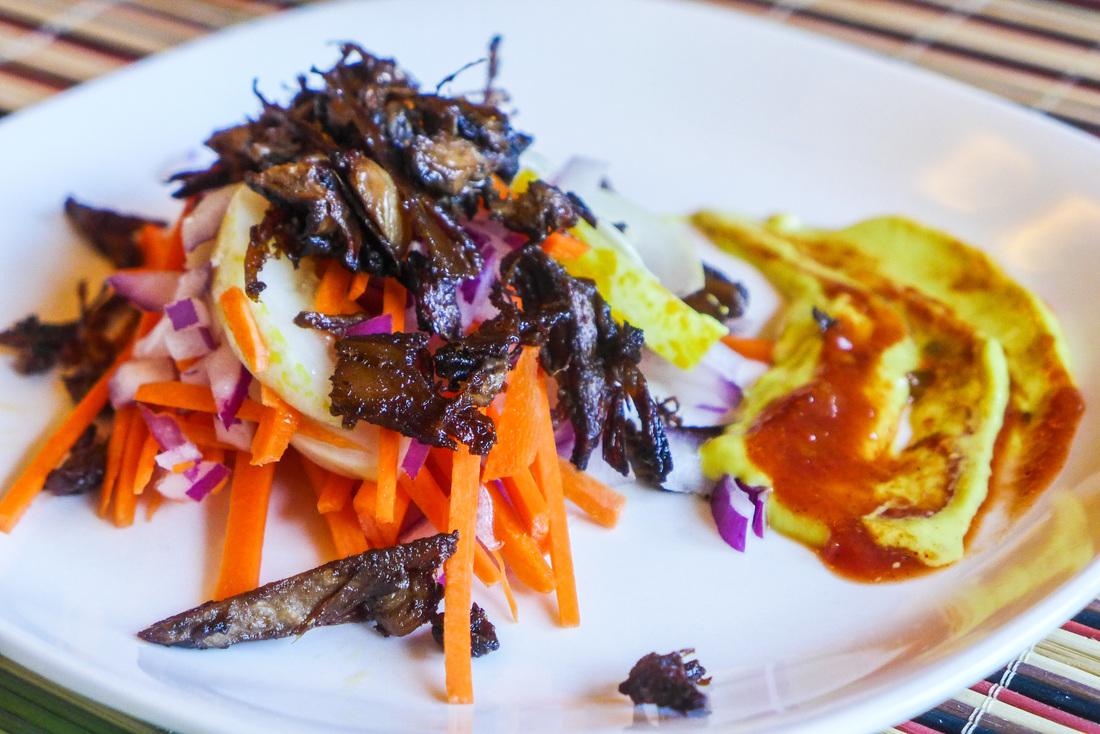
 Pssst! That cake has booze in it! =P 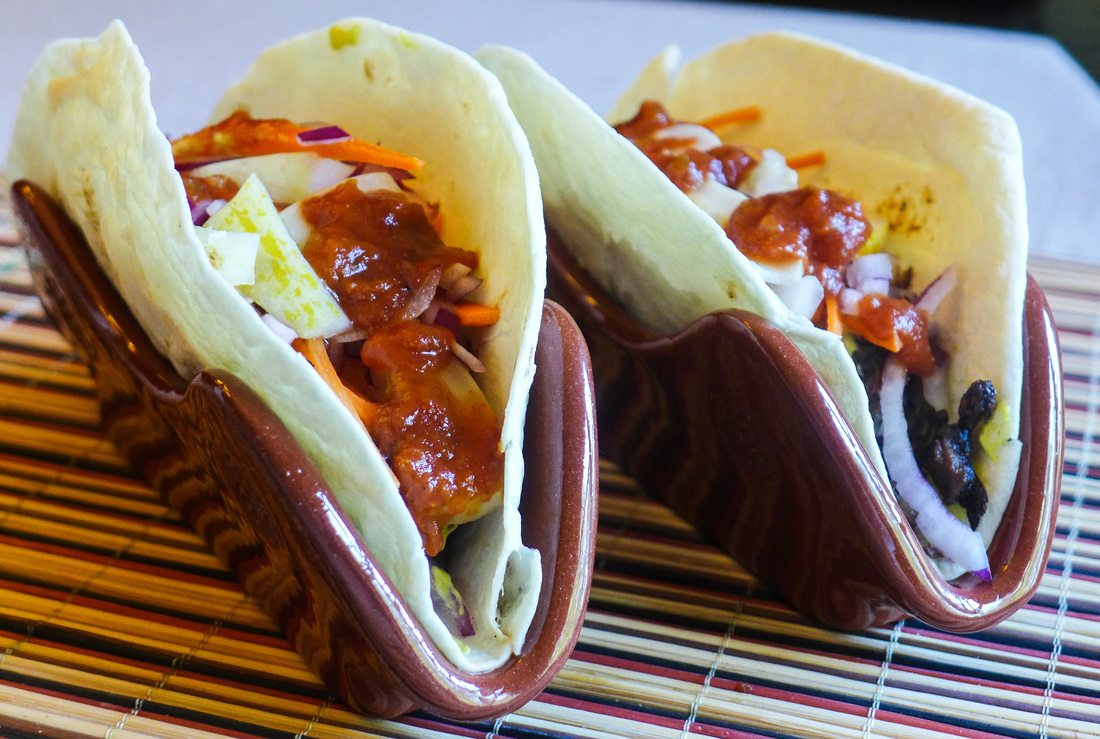 This calls for fancy taco stoneware! If President Obama came over for a meal, I'd like to think I'd keep it real. (Sorry, didn't mean to rhyme!) ^_^' I voted for the guy twice, I think he's a rad dude, and he seems pretty down to Earth. I also think he has a cool family and some cute dogs. =P Political opinions aside, you have to see what I'm talking about right? I don't think President Obama would be one to expect some fancy five-course meal from me. Well, if he did, he would have to say so. ;) I came up with a dish that the adults and kids would enjoy. I also wanted to create a flavorful dish that was also healthy, since Michelle seems to promote healthy eating awareness. I thought a nice jackfruit dish would be nice...it's something not a whole lot of people have heard of/eaten in this country and it would be nice to introduce to such an influential family something different yet fairly accessible. 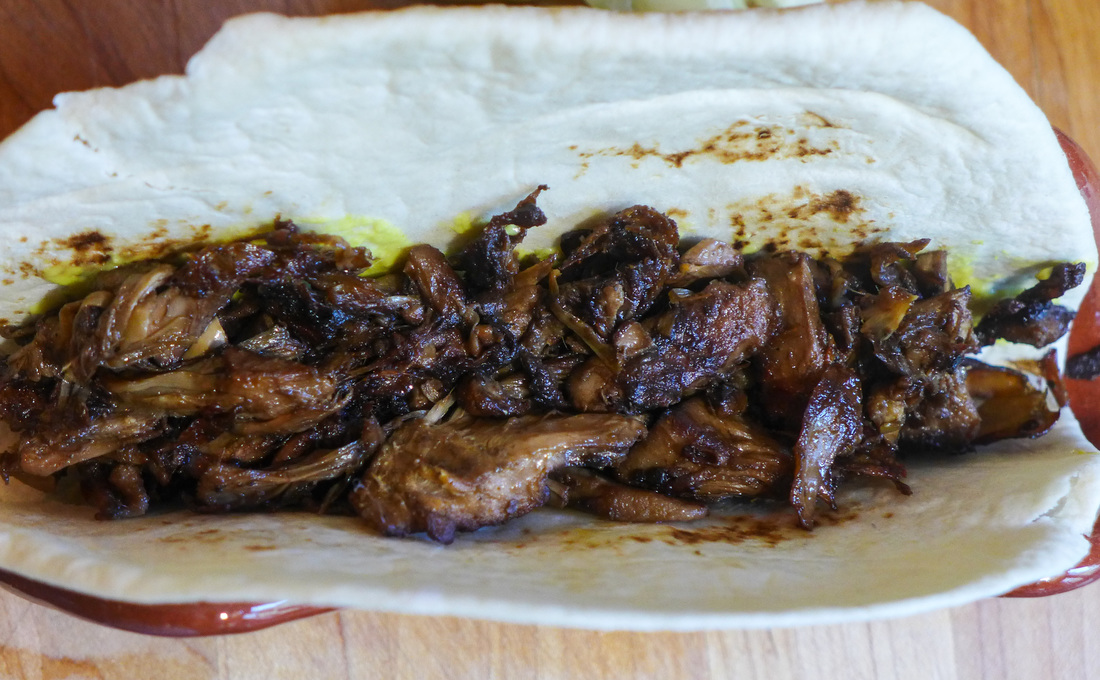 Cooked Jackfruit "meat" up close. Weird, right? I had never heard of jackfruit being used in vegan cooking until I saw the Seabirds food truck on the Food Network a few years ago. They were serving jackfruit in tacos at the time and I was thinking, "Fruit?! WHAT?". Then, I finally found out how jackfruit can be prepared to be used as a pulled meat substitute when I attended cooking school. The jackfruit itself is best used from a can, as it is already soft and easy to work with. I found some at my local Asian market, and I'm sure you would be able to purchase it online. Right out of the can, jackfruit seems pretty bland. However, once you chop it up, season it with spices and cook it, it's pretty delicious! The result is a somewhat light but meaty texture that resembles pulled meat. I like that it isn't very heavy like tempeh or seitan. That way, you can garnish it with all the veggies, non-dairy cheese or beans you want and it isn't overwhelmingly filling! Well, unless you want it to be. ;) Look out, Mr. President! I've got some jacked up tacos for you! ^_^' 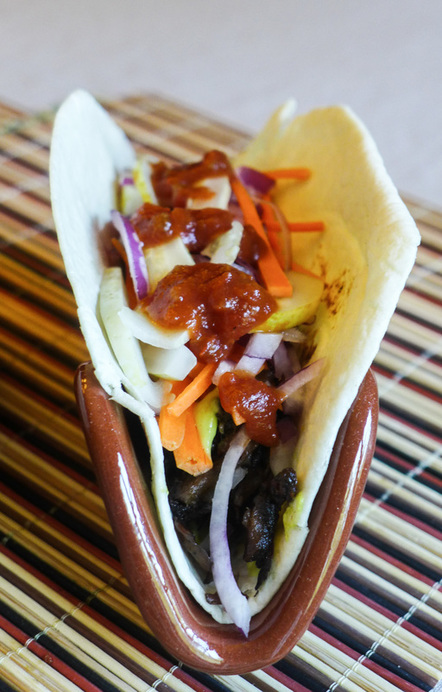 Pulled Jackfruit TacosIngredients Yield: 2 large soft tacos Pulled Jackfruit
Marinade
Garnishes:
*Recipe Below Instructions Jackfruit
Cashew Queso Ingredients
Instructions
Assembly
 Surprise! My favorite cookbook is NOT vegan! I absolutely love love love my mom's Better Homes & Gardens cookbook from the late 80's-early 90's. It's the cookbook that I grew up using for all my baked goods, especially around the holidays. This cookbook has a chapter for everything and separates foods by categories that make sense (cake, pies, candy, etc.). I've used this cookbook for my foundations for baking just about anything. They have recipes for everything you could want (or not want!) to bake. I love that they take a from-scratch approach to most of their recipes. Some recipes are simplified for the busy cook, but most are left as complicated or uncomplicated as they should be.
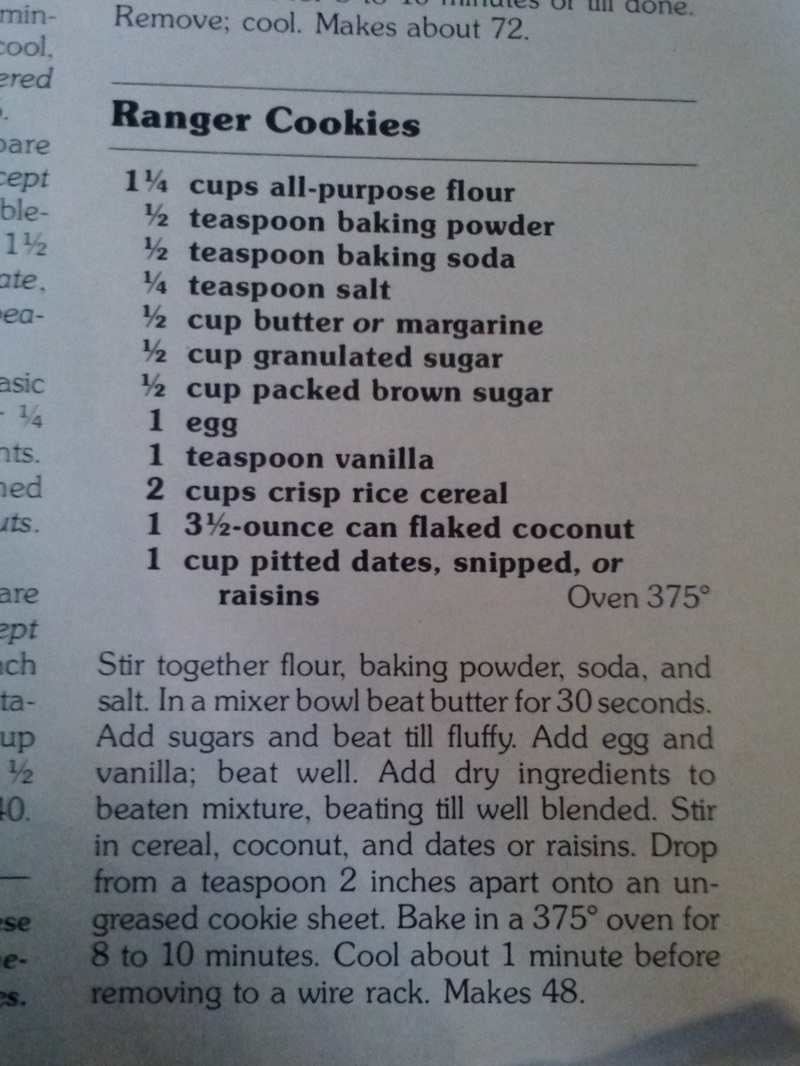
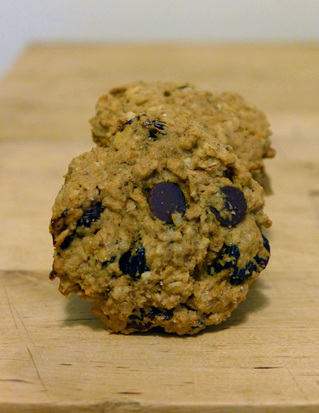
The recipe that I used for my shortbread cookies came from this book! It's such a simple, foolproof recipe! Ever since I've gone vegan, I've managed to get frustrated with this book because of recipes that are not easy to veganize. On the flip side of that, however, I love the challenge! Making any of the cookies in this book is nostalgic for me and brings me right back to my childhood. My favorite recipe from here is the snickerdoodle recipe. I've attempted to recreate them here in my first ever blog post. 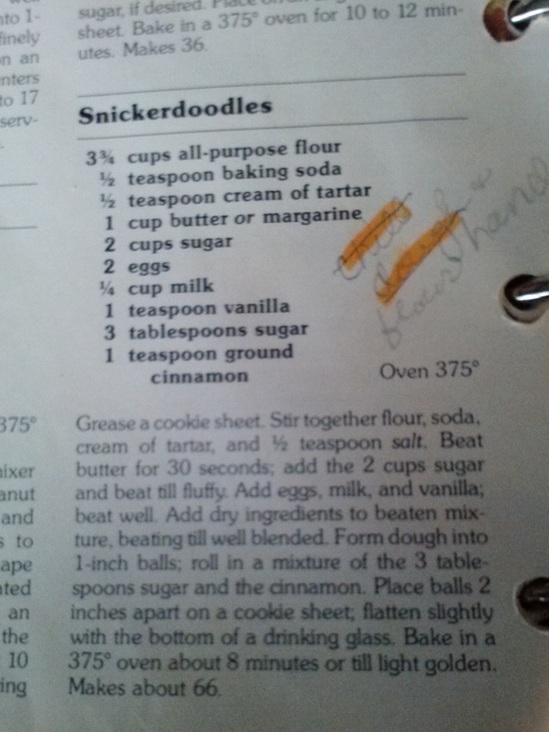 Recipe notes are what I live for. They make me cry every time! There's also that other post from last year that features another BHG recipe: ranger cookies! I remade them to be semi-healthy for Father's Day. I absolutely love the recipes in this cookbook. They are all meant to share with your favorite people...that's the entire reason that I love food! (Well, eating it is pretty rad, too...but I wouldn't enjoy it nearly as much if I had to eat it alone!) =)
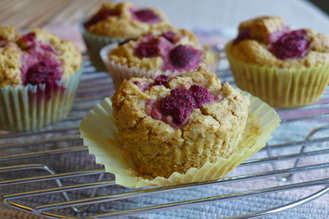
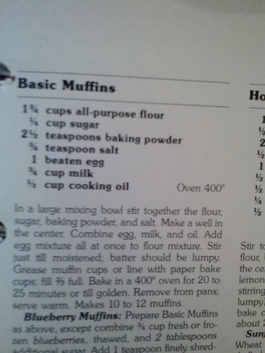
For this cookbook celebration, I made one of the easiest and most simple recipes of all: muffins! These muffins come out more like a cross between a scone and muffin rather than a breakfast cake like most would eat nowadays. These muffins are dry and crunchy on top, which is quite satisfying. They are less sweet than commercial muffins and I made them with raspberries studded on top for tartness. I never underestimate our power as cooks to be able to transform any recipe into whatever we want to. I don't like to confine myself to just vegan cookbooks or vegan recipes. Vegan is a parameter for cooking that should be factored in just as dietary restrictions should. Sometimes, I still want a simple baked good from my childhood and this cookbook still holds solid recipes for me to use. With a few tweaks, I can still enjoy food that I love, just in a different way. ;) <3 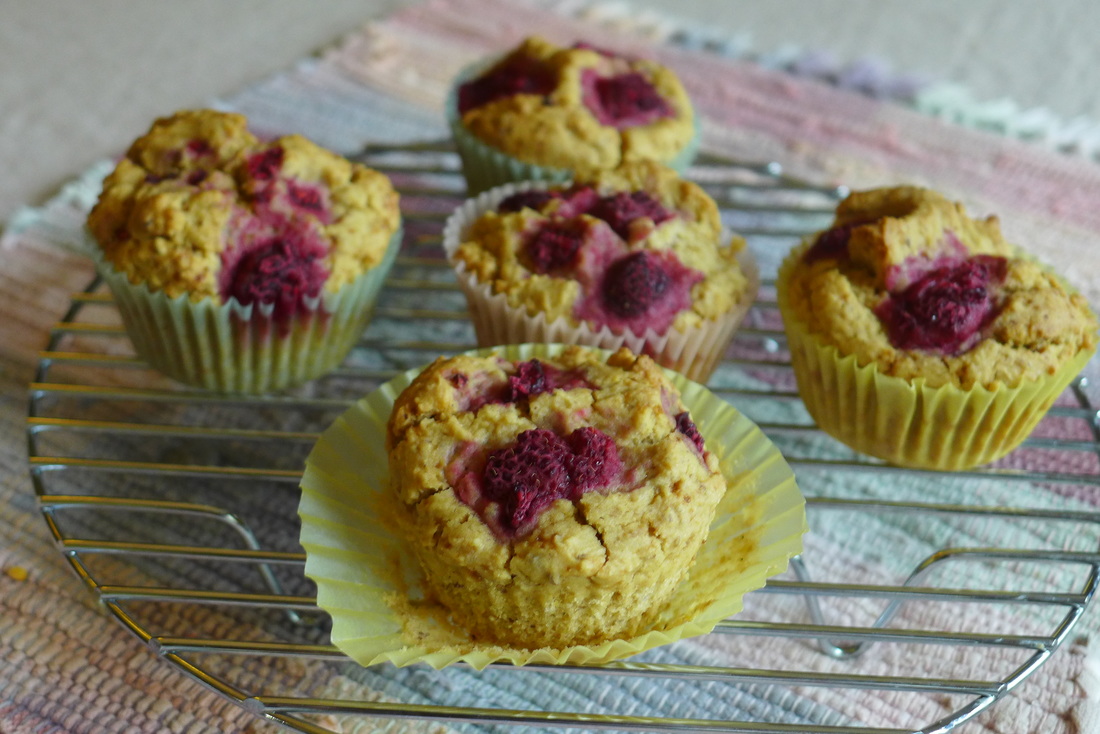 Basic Raspberry MuffinsYield: 6 Muffins
Free of: Gluten, Nuts Adapted from: Better Homes & Gardens Cookbook Ingredients
Instructions Preheat oven 400 F.
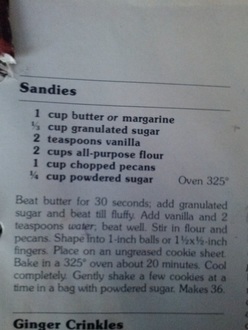
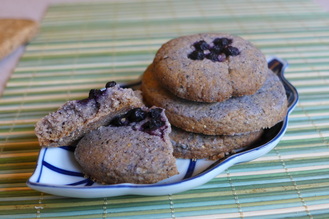
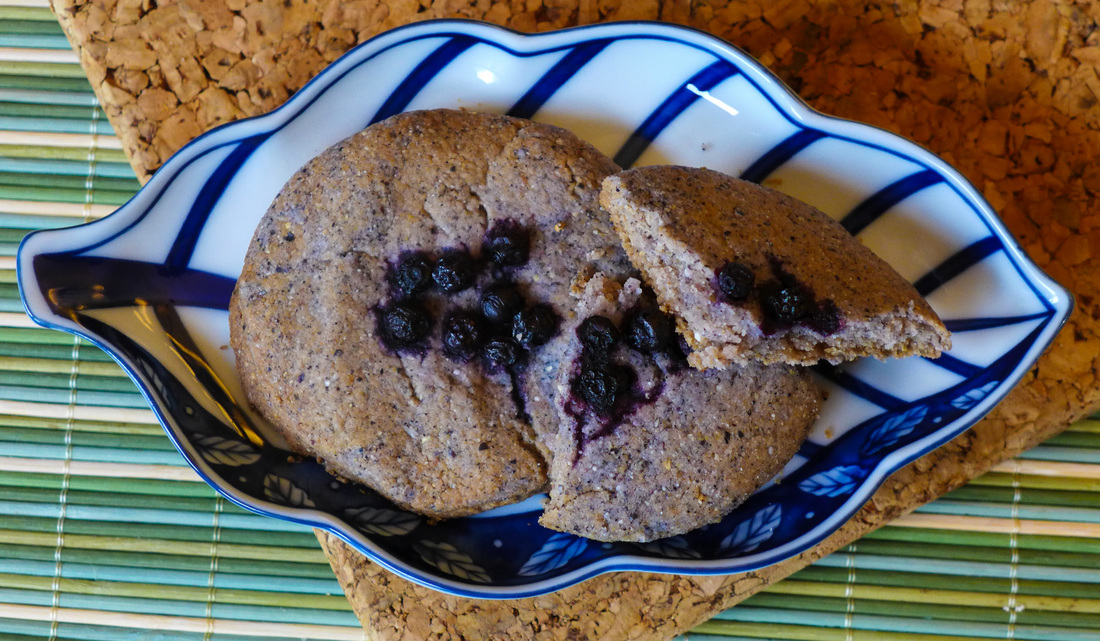 Today's prompt is "something blue"! What a perfect day for blue shortbread cookies...it's been raining all day by me! I knew I wanted to use blue cornmeal again for this recipe. I made some cornbread with it last year and loved it. There's something fun about the color blue when it comes to natural cooking, because blue is so rare in fruits and vegetables. I took the only other accessible blue food I could get, blueberries, and paired them with both my cornbread and my cookies. I love berries and corn together, so it really works out! Blueberries are also a nice fruit to bake with. I almost prefer them baked or cooked sometimes. Their flavor develops nicely and they create a wonderful syrup all by themselves. They're also very healthy for you! If yesterday's cookie post was oil-free, this one is its antithesis. This recipe makes only about 12-15 round shortbread cookies and it has an entire cup of oil in it! Before you shake your head though, give me some credit for using only unrefined coconut oil! I actually love that the coconut oil gives a very subtle flavor to these cookies because I didn't want to overwhelm them with butter flavor from a vegan butter substitute. Don't get me wrong, I still use Earth Balance and Melt sometimes, but I like to use them sparingly. For certain things, butter flavor isn't necessary. I think these cookies really have a wonderful flavor. If you change up your sweetener, you will be able to taste the different facets of flavor each one has to offer. I used Bee Free Honee in mine because it has a mild apple flavor that I love. The consistency of the vegan honee also helps to keep these shortbreads moist but not overly oily. The recipe is very easy and you can use only one bowl for it! You don't have to roll out the dough if you don't want to get all messy. You can always do hand-rolled cookies (roll the dough into about 1 Tb amounts between your palms and flatten onto your cookie sheet). Have fun with this recipe! Change up the berry you put on top, use jam instead, add citrus zest to the dough, make an icing for them, add nuts, whatever you feel! For a serving tip: pair with a nice fruity black coffee. I did just that and it was sublime! 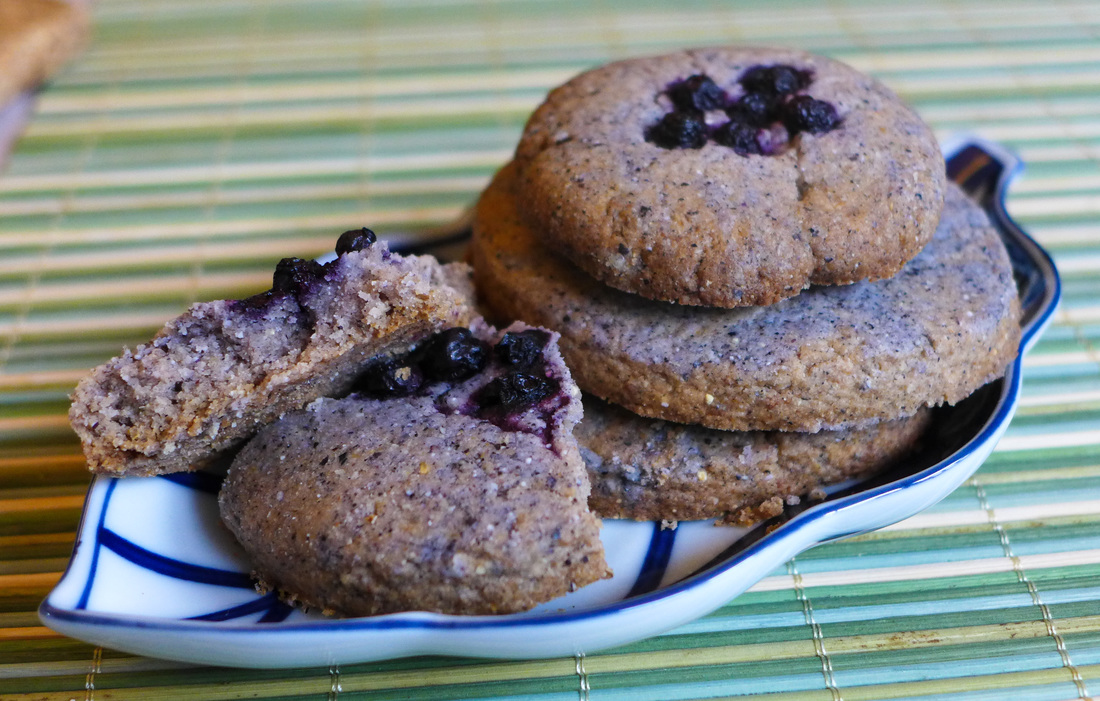 Blue Corn SandiesYield: about 12-15 round cookies Free of: gluten, nuts, refined sugar Ingredients
Instructions Preheat oven 325 F.
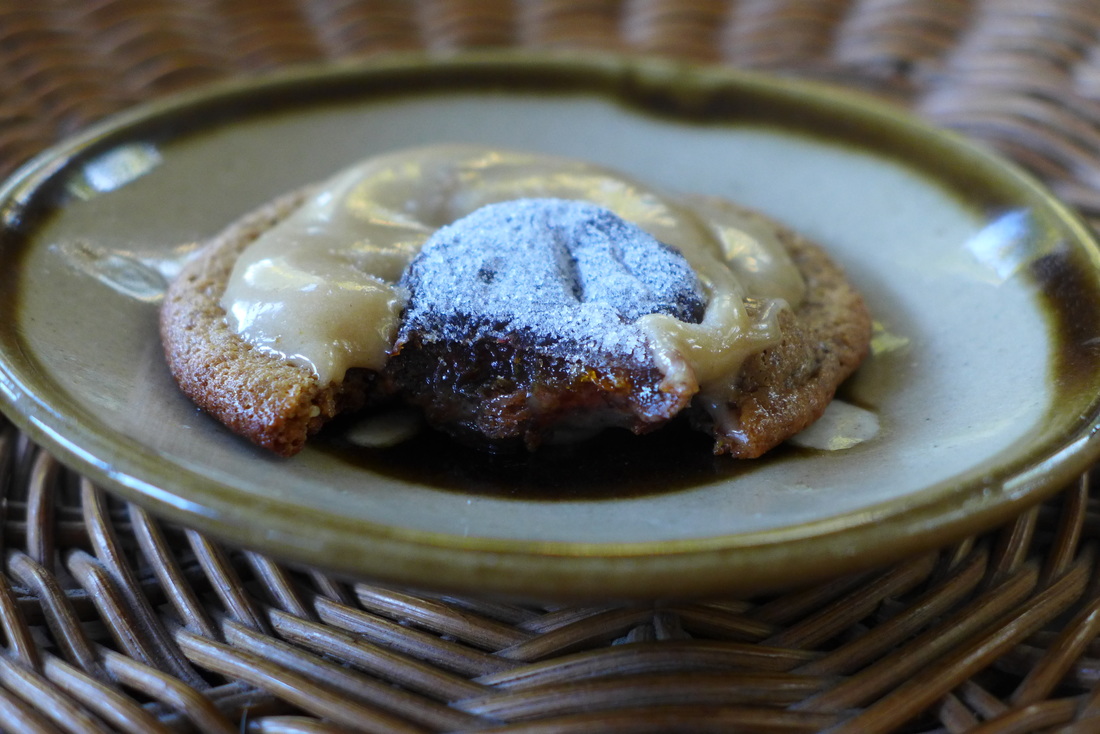
 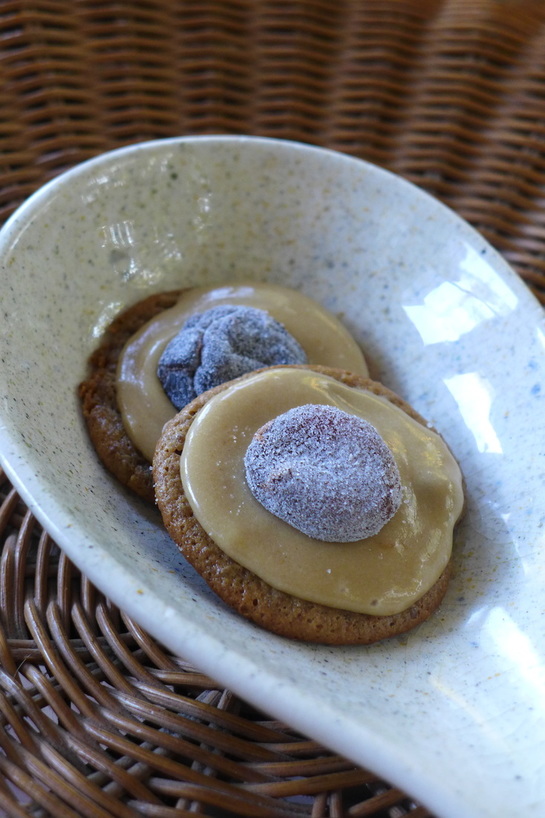 This retro recipe is inspired by a few things for me. I wanted to pick a recipe that reminded me of my grandparents. I picked halva because it is one of my grandpa's favorite treats and I always thought it was weird as a kid (and it's also a totally ancient recipe...now that's retro!). The only memory I have of it is seeing it in the Joyva package while thinking, "What is that?". Only till I became vegan and discovered all the wonderful things you could do with tahini did I realize that sweetening it was genius. Tahini is just the sesame seed version of peanut butter, right? ;) So, deciding that I wanted to make a tahini confection, I decided on grain-free cookies. I took inspiration from a traditional pignoli cookie recipe which is just almond meal, egg and sugar. When she first started eating a gluten-free diet, my mom requested these cookies at Christmas time. She isn't a big fan of sweets, so this came as a surprise to me. Pignoli cookies have a different character than a regular cookie, though. They are crispy, chewy, light but full of flavor. They're moist too! Moisture without butter or oil...what a wonder! 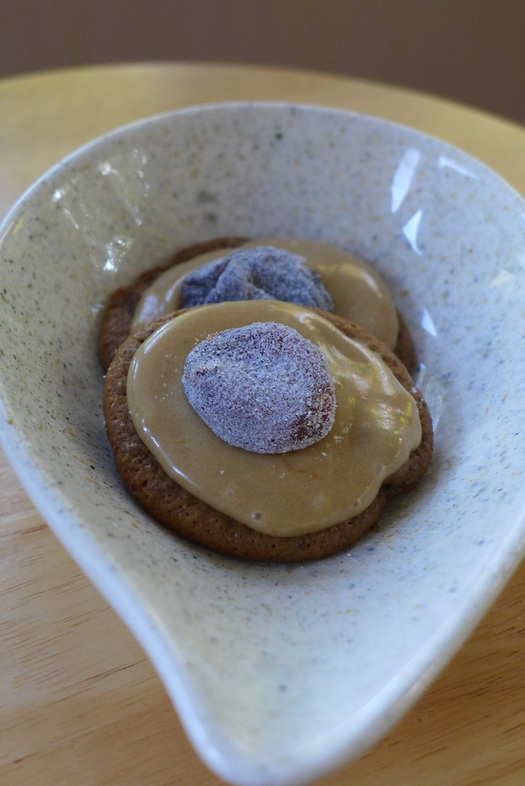 I decided that in order for my cookie to taste like tahini first and foremost, it must be grain-free. I added some things to the cookie dough for texture and sweetness, but not overly so. I think this cookie is wonderful as a snack because it satisfies a sweet craving but also offers some nutrition without a ton of processed fats included. The only fats in this recipe are from seeds (flax and sesame), so it is suitable for those who are allergic to nuts! I added in a pop of acidity and flavor with chopped dried apricots and apricot jam in the icing. There's also a candied apricot on top because, why not? ;D Apricot Halva Cookies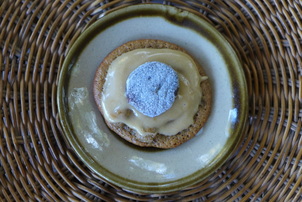 Yield: Approx 15 cookies Free of: Nuts, Gluten, Refined Sugar (excluding icing) Ingredients Cookies
Icing
Instructions Preheat oven to 350 F.
 Mmmm, bite pic!  I'm not a huge fan of sandwiches. I always like the idea of sandwiches, of course, but I find that I get really full from the bread before I can enjoy any of the goodies on the inside. Sometimes I like to take all the stuff out of the sandwich, eat it, and then have dessert to fill my stomach. That method has worked for me countless times. ;) However, I went to college in New Brunswick, NJ and I did have a brief affair with sandwiches at that time. Eating as a vegetarian in college left me with few options for food that wasn't salad or pretzels. I always had something to eat at the dining hall, but it was rarely healthy. Did that stop me? Of course not. One of the foods that my friends and I would grab routinely after every semester as a celebration would be the infamous fat sandwiches from the grease trucks. These bad boys are sandwiches with everything you could ever want (or not want) to eat on them. Protein? Yes. Veggies? Yes. Sauce? Of course. French fries? Duh. I always got one of three sandwiches there. One had a veggie burger on it, one had some mozzarella sticks and the other had falafel. The last one I ever ate had falafel on it. ::drool:: I decided that if I was going to make a vegan sandwich for Vegan MoFo this year I had to go all-out. So, I went the extra mile and made from-scratch rolls and fried up some cauliflower. This sandwich is going to be the most complete sandwich experience of your life. And you won't need to eat another. Ever. Enjoy! ^_^ 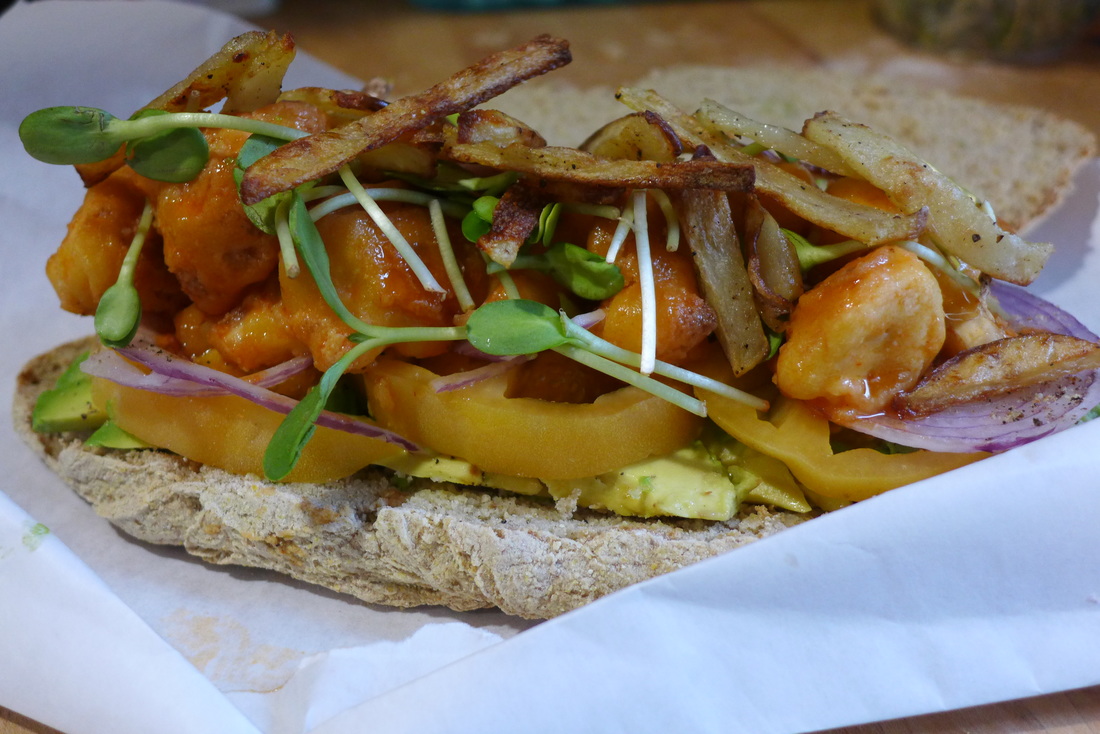 Ingredients Makes 3 large sandwiches. You can always make less and save the fillings for salads or snacking later!
Instructions Preheat oven to 375 F.
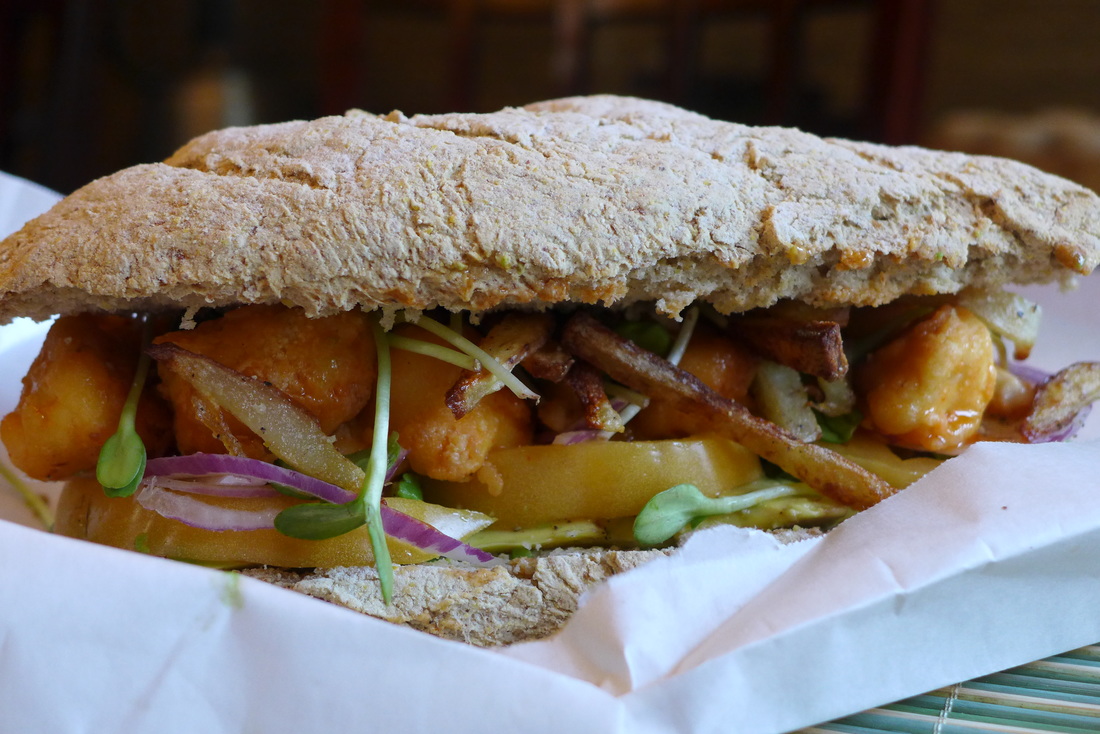 Mmmmm, get in there. |
I'm Jess!This is my very first food blog! I post revised conventional recipes of foods that I hold near and dear to my heart. My cooking here is all gluten-free and cruelty-free, but full of flavor and comfort.  


 Archives
December 2017
Categories
All
|
 RSS Feed
