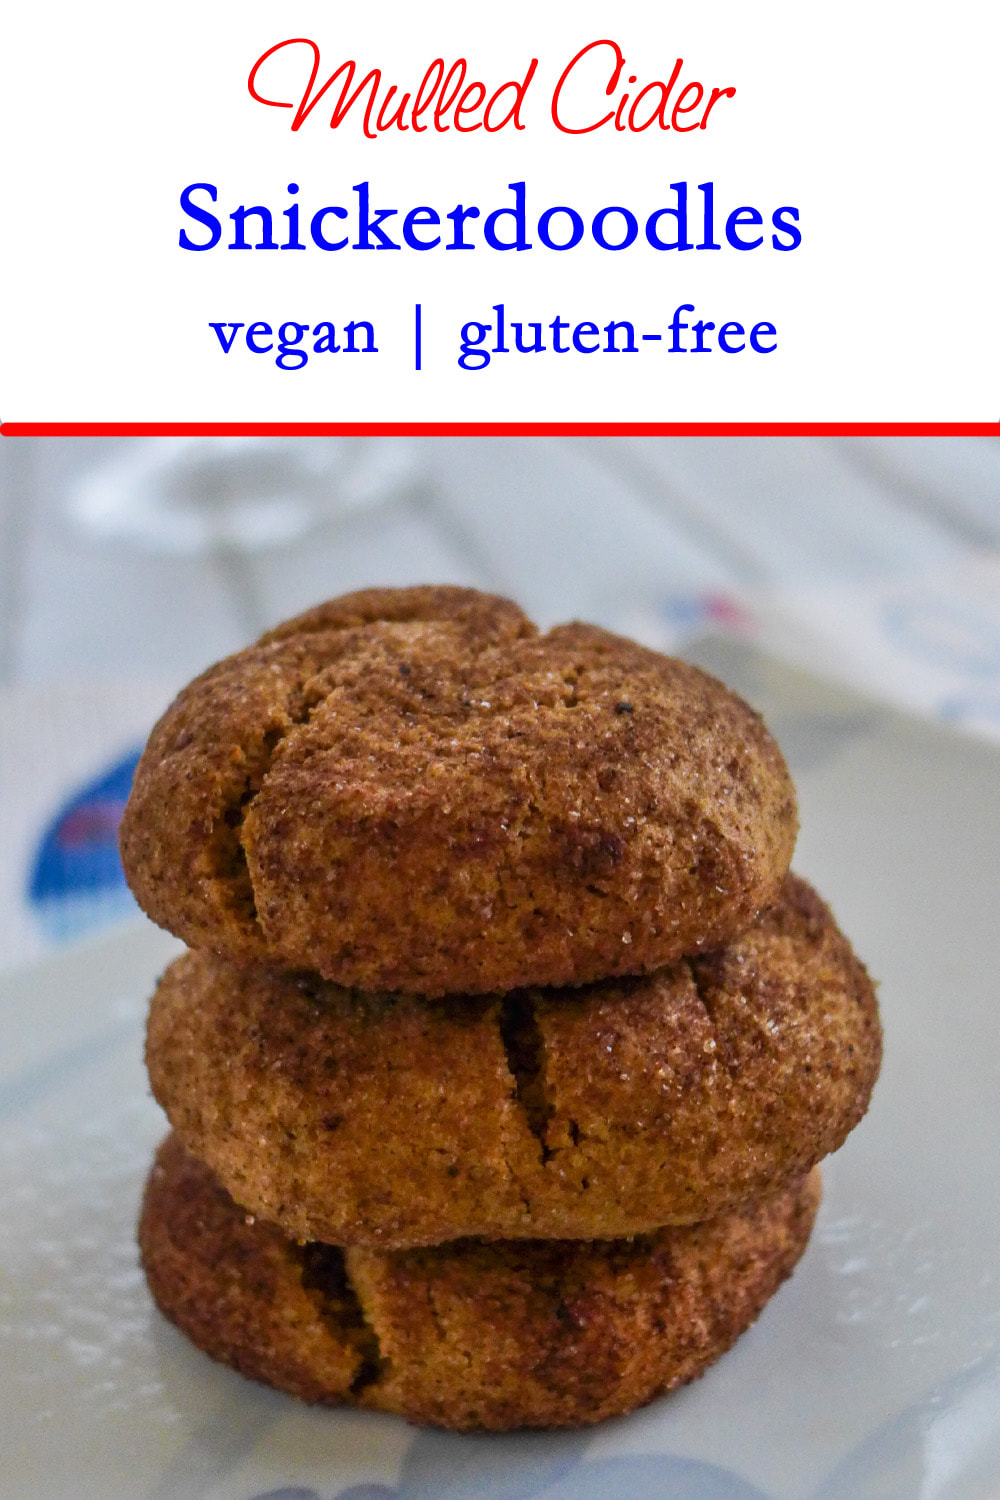
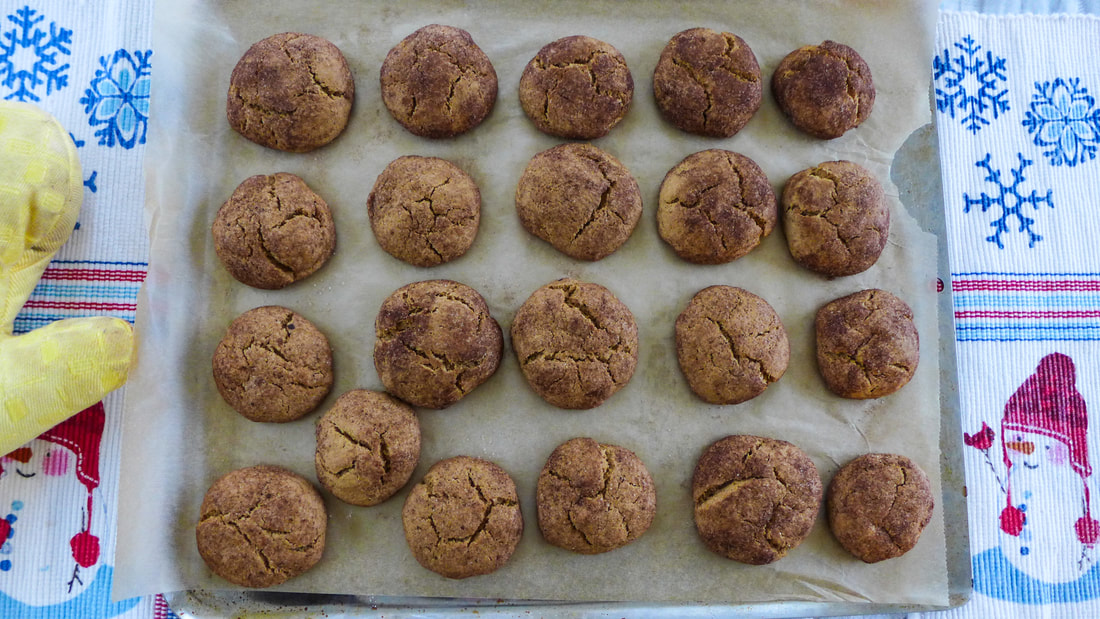
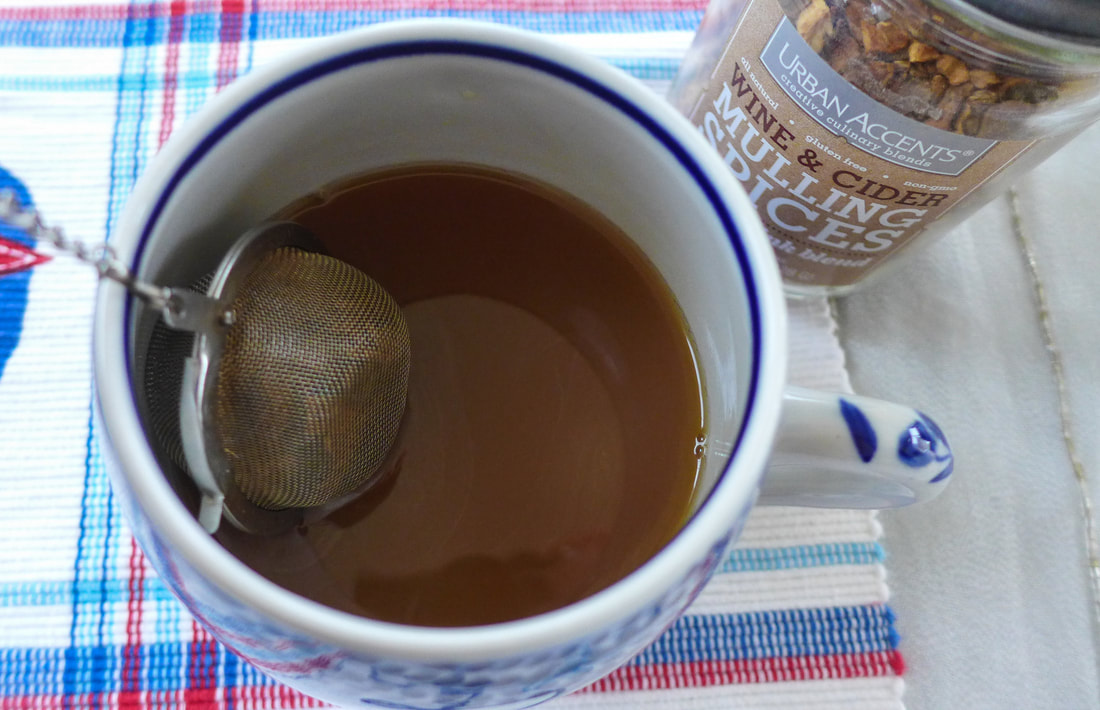
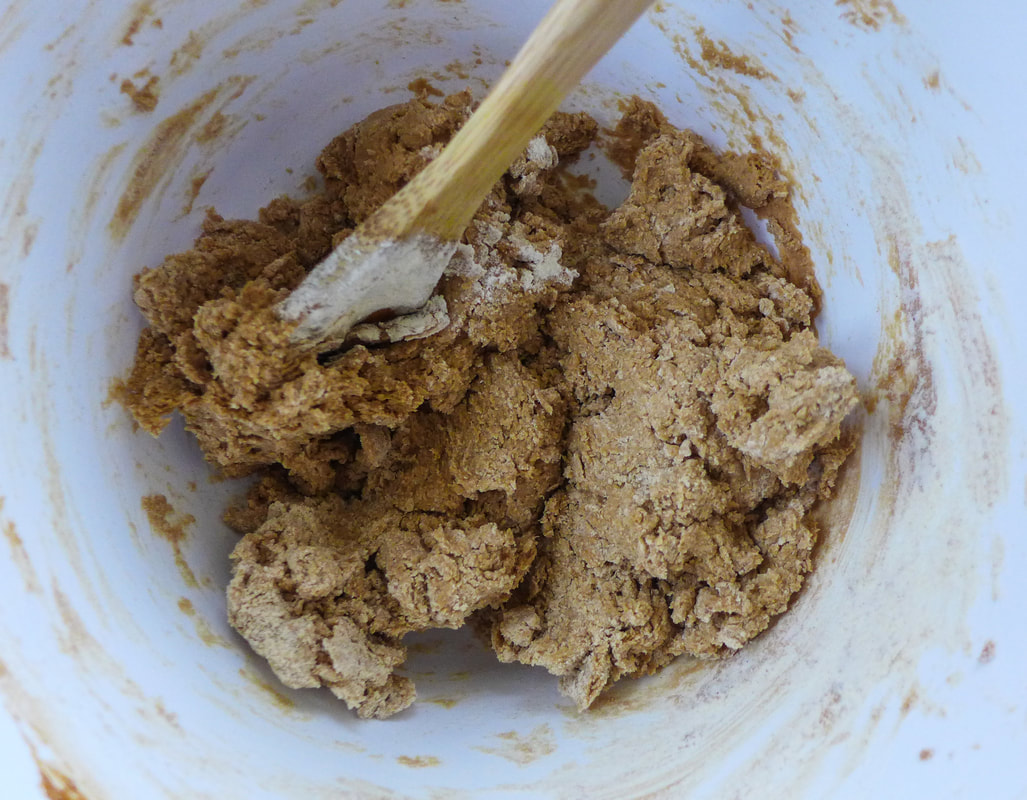
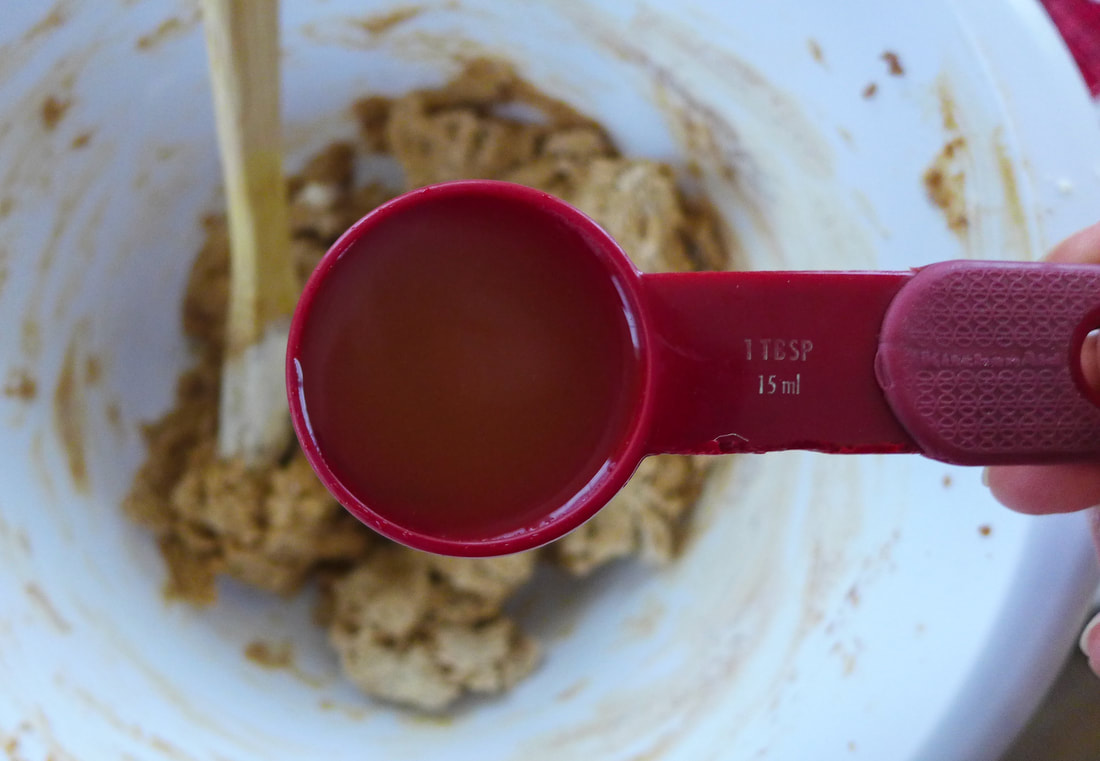
 It's been awhile, I know... It's been forever it seems since my last post (Halloween, anyone?!). I have been finding it difficult to juggle photography with my work schedule since it now gets dark around 4:30 PM. Not the best situation for light quality! I haven't stopped cooking or baking, though. I've already made many batches of Christmas cookies for various events. It's great that I get to try recipes out beforehand. There are many more I'm going to try before the month is out too! This recipe that I'm sharing with you today is a riff on my staple snickerdoodle recipe. I love snickerdoodles. They're my favorite cookie. I've said this many times. So, you can imagine, i am quite particular with their taste. I love a simple coating of cinnamon and sugar. Nothing beats it. Nothing, except, maybe chai snickerdoodles? Chocolate snickerdoodles? MULLED CIDER SNICKERDOODLES?! Nevermind. I'm not that particular. As long as they taste wonderful. And let me tell you: these "doods" taste wonderful. That is now their official nickname. These cookies have only a couple, albeit important modifications. Instead of the original recipe's addition of non-dairy milk to the dough, I added two tablespoons of mulled (spiced) apple cider. You can buy spiced cider at the store now, which is a nice time saver. If you don't want to purchase it, you can make it at home much like a cup of tea. I put some whole mulling spices in a tea ball and steeped them in a mug of hot cider until the liquid cooled. Since you only need two tablespoons (if that), you can drink the rest. You deserve it. As for the coating of the cookies, I added the same spices that I used for the cider. My blend included anise, cloves, cinnamon, and allspice. A wonderful and aromatic combo that makes the whole kitchen smell like the holidays. That's really all you need to do to these to change them from their base form to totally festive AF. The texture can change quickly if you add too much liquid to the dough, however. Be careful to evaluate the dough for its moisture content before adding the second tablespoon of cider at the end. You may not need it! Mulled Cider Snickerdoodles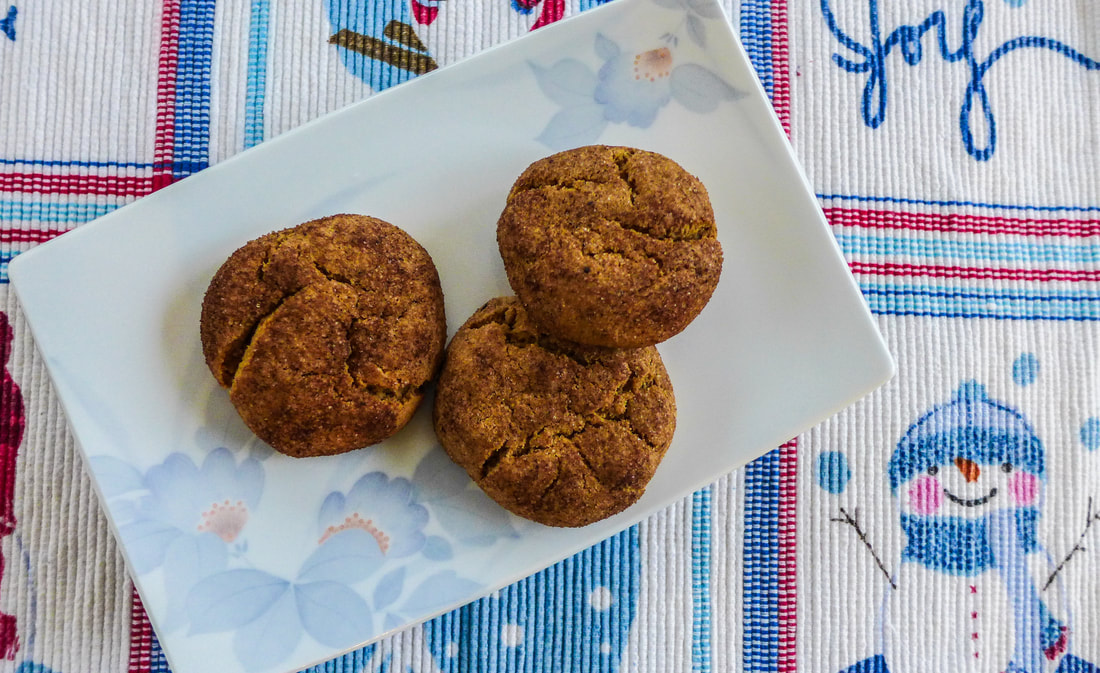
Instructions Oven set to 375 F.
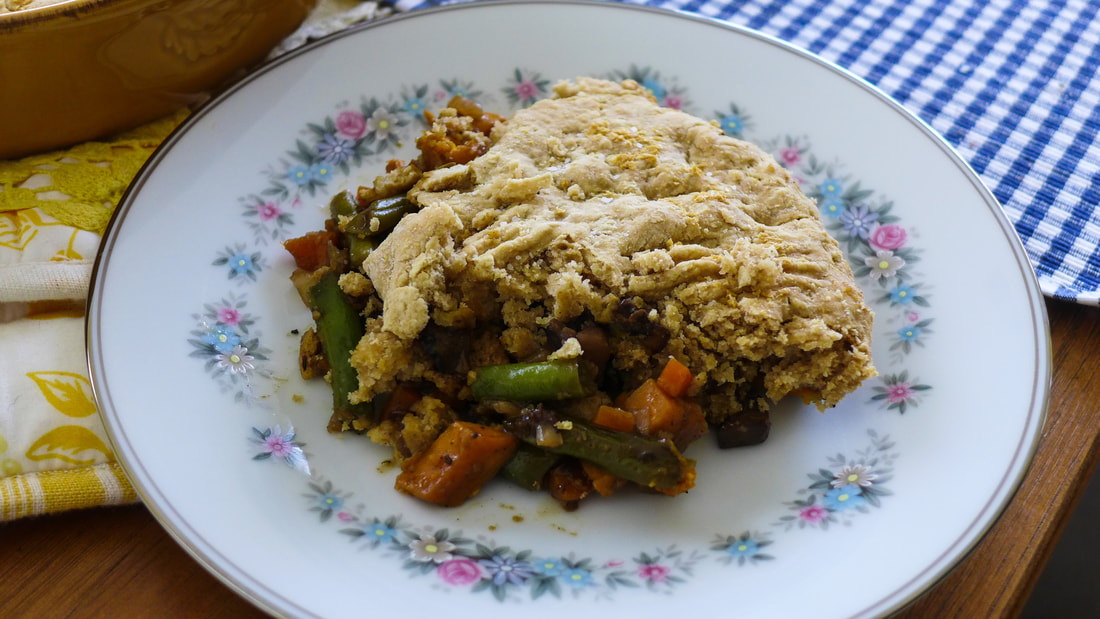
 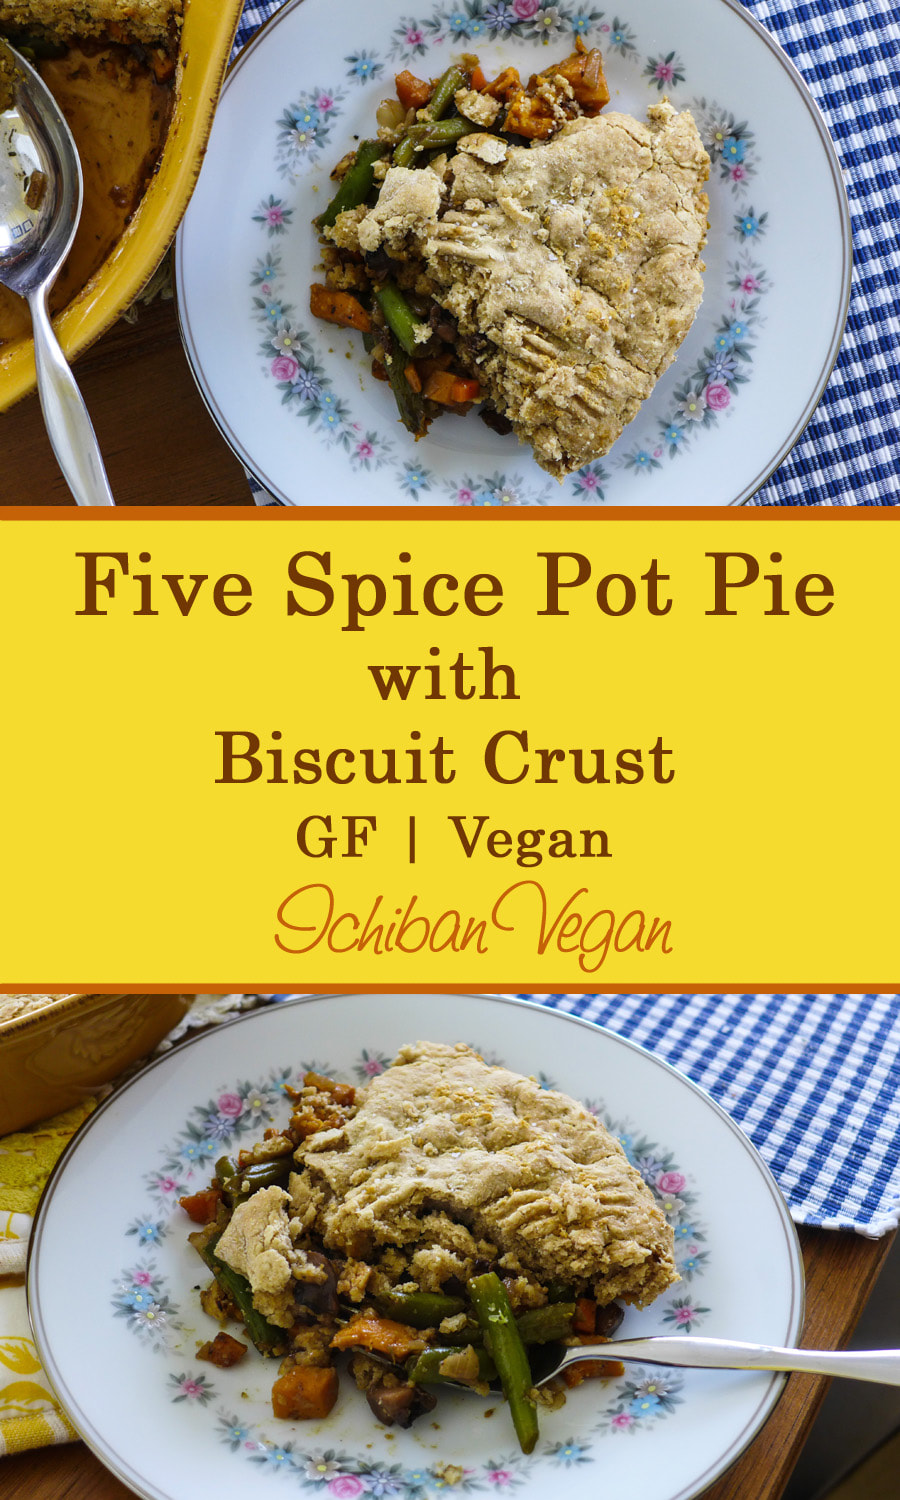 Five Spice Pot PieIngredients Yield: 1 pie, about 5 servings Free from: Gluten*, Nuts *Use appropriate ingredients
Instructions Preheat oven 350 F.
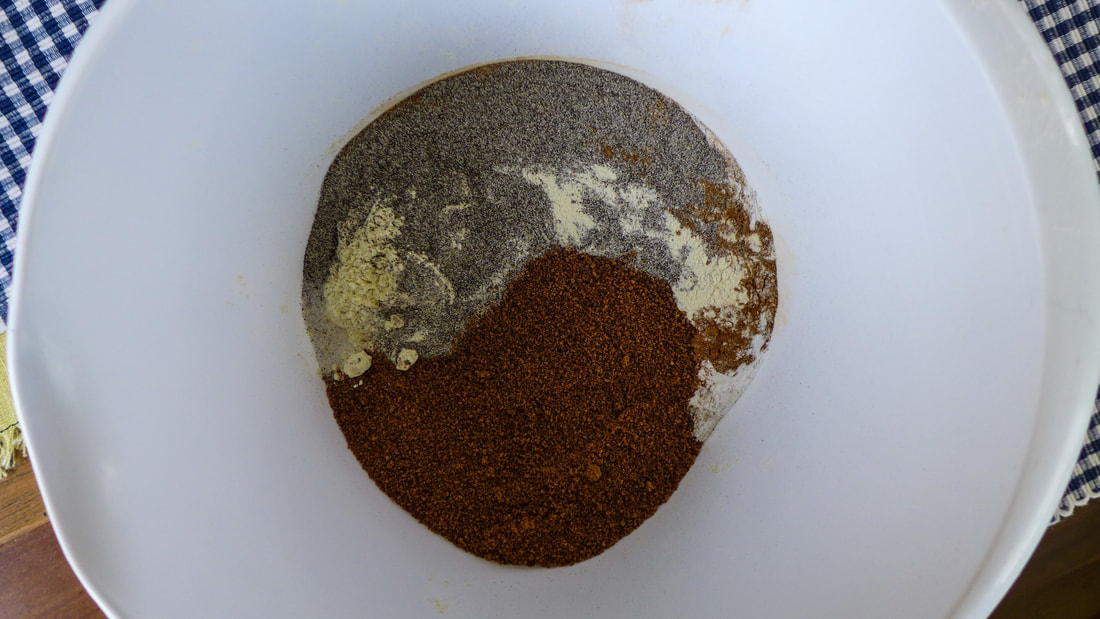
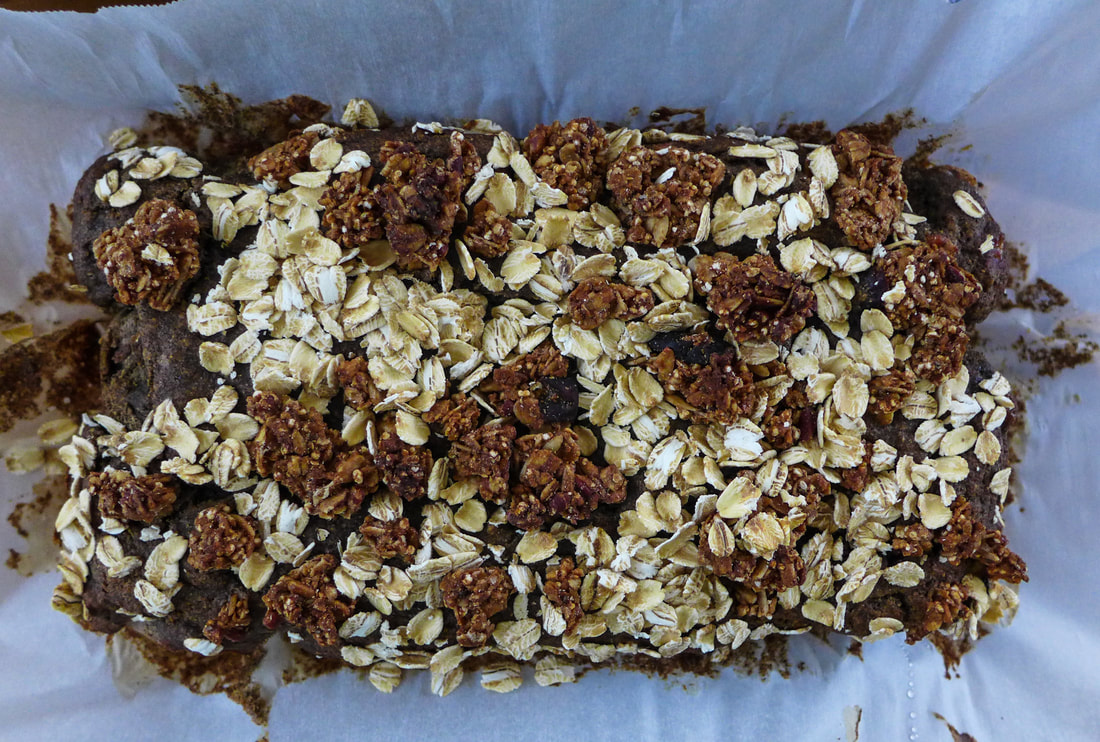
 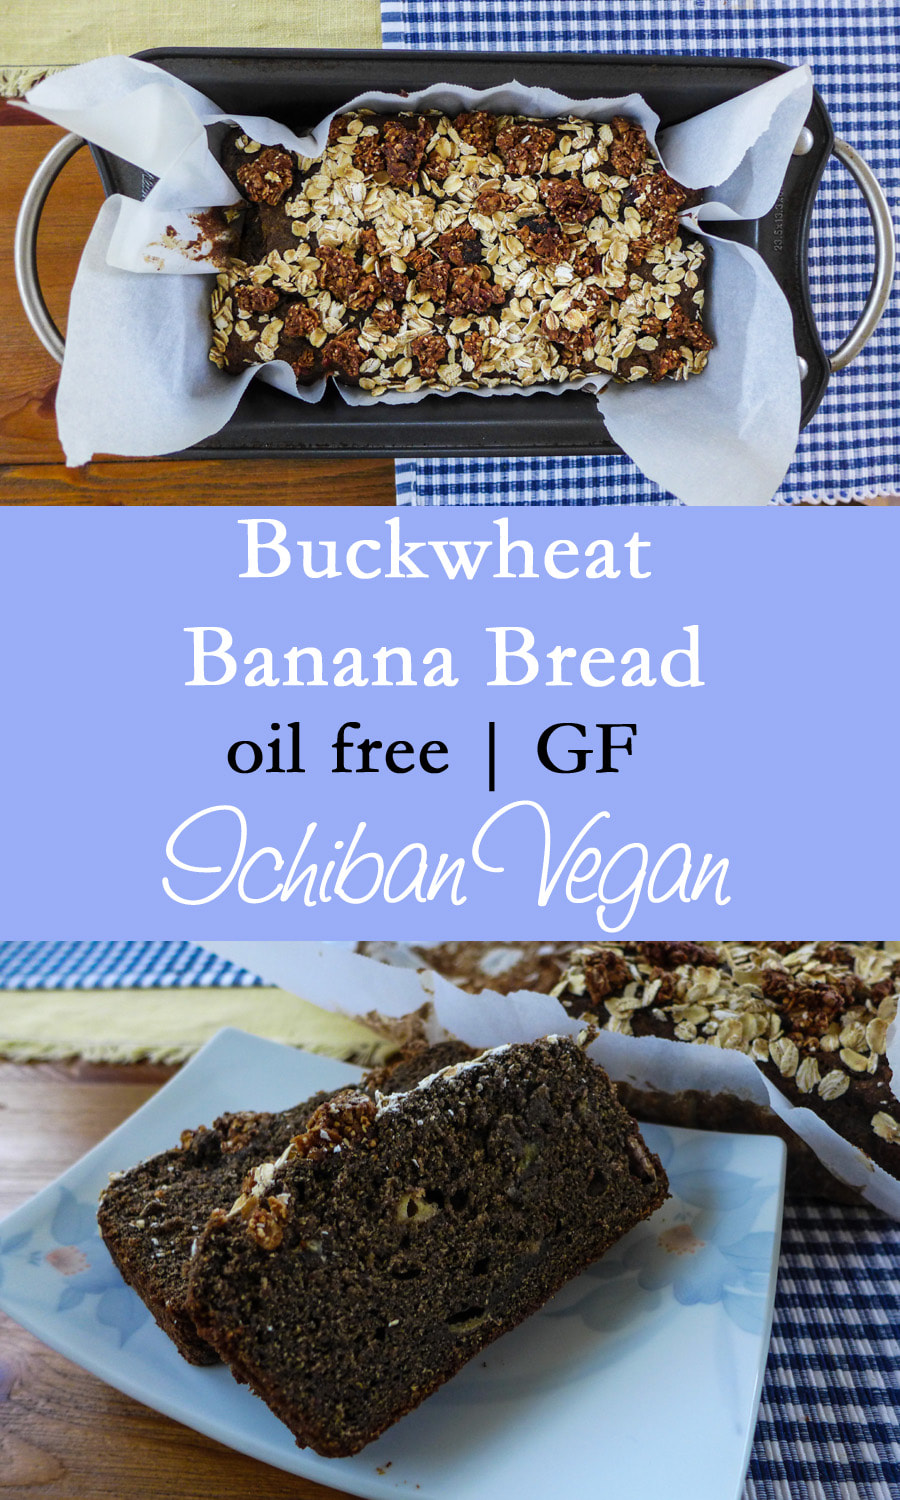 This is my response to the "unconventional grains" prompt! I love to bake with different grain flours often since most of my baking is gluten-free. I've experimented with all types of grain flours and some grain-free as well. I find that there is no "one" magical flour that can be substituted for wheat flour in a baking recipe. Gluten-free flours must be combined in order to achieve an optimal texture, fat content and taste for different applications. I find that my favorite "all purpose" gluten-free flour blend is good old Bob's Red Mill. I like to combine this all purpose blend with other grain flours for awesome texture. This flour is also good as a 1 to 1 substitute for my purposes, I find. I make roux with it, dust surfaces, and use it alone for simple baked goods like biscuits. I've never found another flour blend that does it quite like this one for me. I also really love the flavor, which some people might not be partial to because it contains chickpea flour. Some people say it makes whatever you cook taste like falafel. I'm not in this camp but it's all a matter of taste, I suppose. This recipe came to me one day when I was using leftover bananas to make banana bread. The original version was made with quinoa flour instead of buckwheat. Upon my second time using this recipe, I found that I actually like the buckwheat flour much more! The banana bread is wonderfully moist, sticks together, is dense but rises nicely, and has a depth of flavor that transcends just "banana and sugar". I also love the nutrition that the buckwheat flour brings to this recipe! It's got a good amount of protein and fiber! The only downside that I can possibly see with this recipe is its darker color. You can't really see the banana in there unless you look closely. I don't mind this too much. It's dang tasty and that's all I really care about. I took the liberty of sprinkling some granola and trail mix on top of my banana bread. You can do this if you want some more texture and crunch as well. Alternatively, whip up some streusel and sprinkle that on top! How can that be bad? Feel free to spread some of your favorite nut or seed butter on top of a slice of this for a hearty breakfast. Since there's no added oils or fats in this bread, you can control the type and amount of fats you add to it for a well-rounded meal! Enjoy! 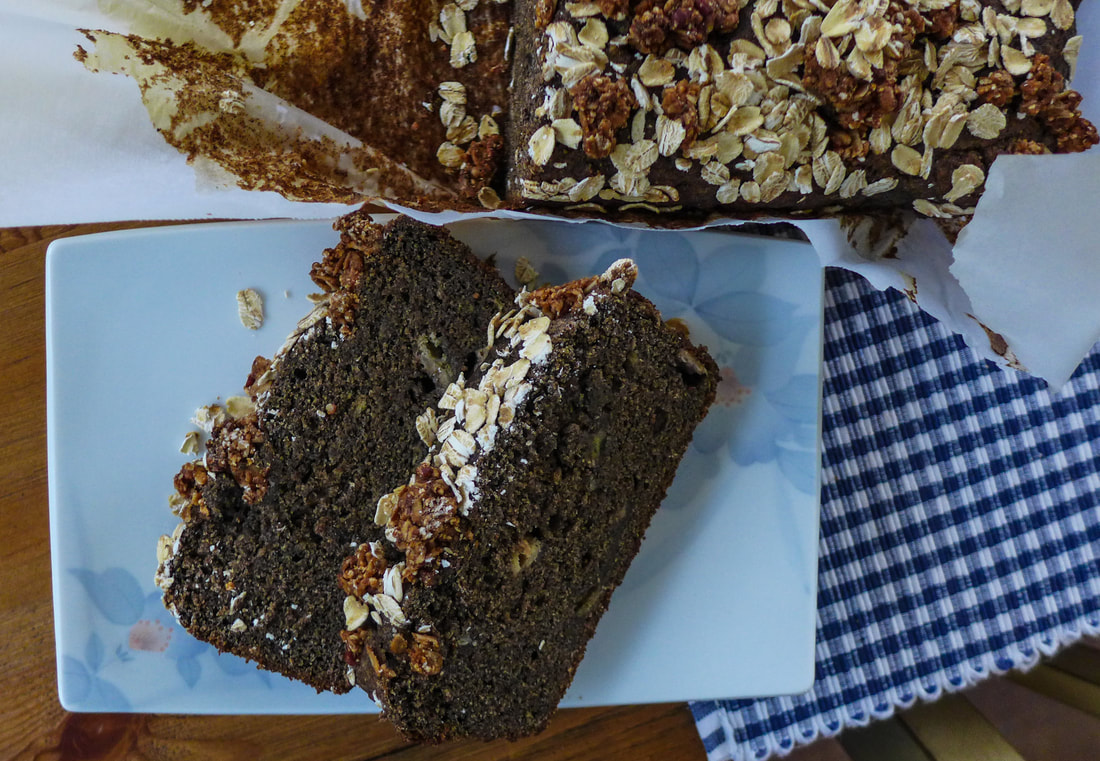 🍌🍌🍌🍌🍌🍌🍌 Buckwheat Banana Bread (Oil Free)Ingredients Yield: 1 loaf (9x5 pan) Free from: Gluten, Soy*, Oil*
 Instructions Preheat oven to 350 F.
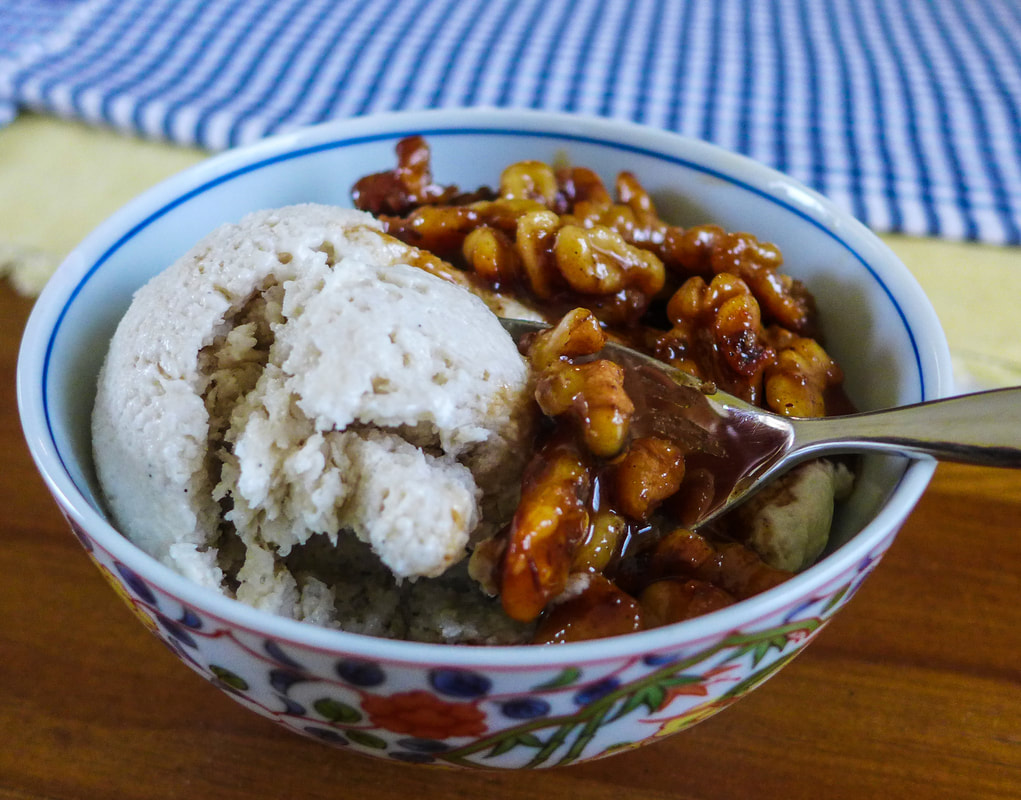
 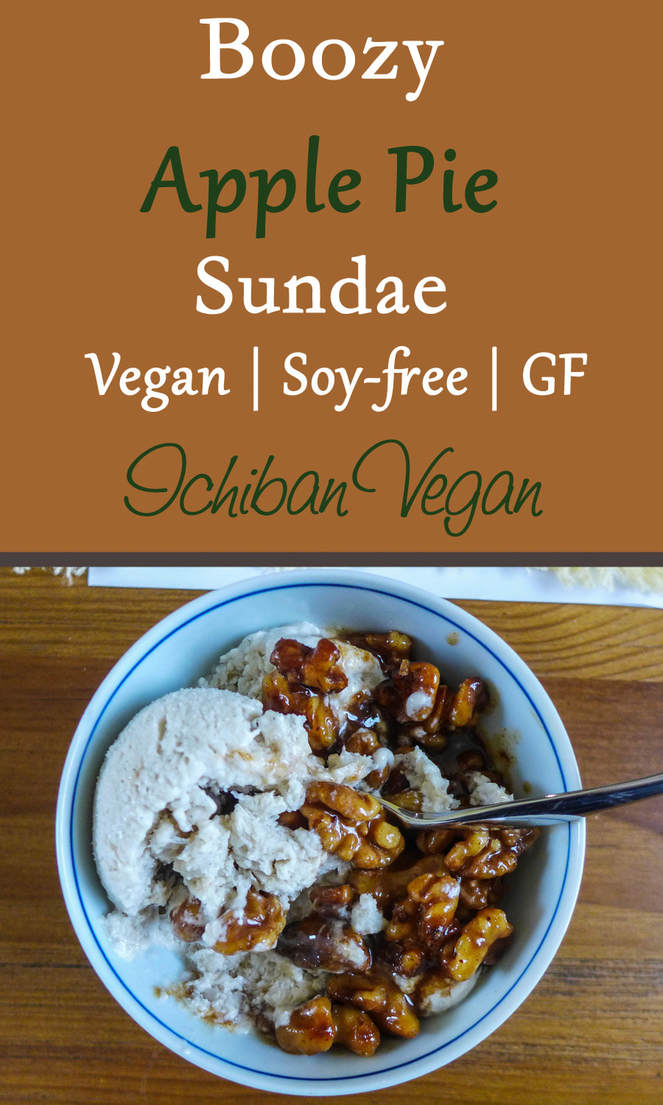 Today's post doesn't require much of an explanation. I love wet walnuts. I first encountered them at Dairy Queen (I worked there in high school). A lot of our customers loved them and I never understood why since they looked a little unappetizing. I tried the topping at one point and thought it tasted okay, but not fabulous. Later in life, I learned that I loved nuts in ice cream A LOT. One of my favorite flavors to this day is butter pecan. I also love rocky road, moose tracks, etc. The wet walnuts I made for this simple (yet boozy) sundae are infused with the tart bite of hard apple cider, sweet maple syrup, and apple pie spices. There isn't anything more "fall" than the smell of apple pie on your ice cream. The ice cream I made is a simple vanilla bean flavor (with bourbon, though). Again, I've always loved simple ice cream flavors. Vanilla is as basic as you can get with ice cream, but it's the base for EVERY FLAVOR. Any and all flavors of ice cream need to have vanilla extract in them (if they're sweet, of course). The vanilla gives the ice cream the essence that it needs to be rich and creamy and fragrant. I loved the fresh vanilla bean taste in this recipe. Using vanilla paste will give you a similar effect. ' The combination of the bourbon and cider is also very "fall". There's a great cocktail that calls for bourbon and apple cider. Not sure if it has a name, actually... Either way, it's pretty delicious hot or iced. The wet walnuts I made were chilled when I served them over the ice cream. If you're not opposed to your ice cream melting a bit, heat the walnuts up slightly for a gooey treat! I also included a link below to a recipe for raw apple pie filling, which would be a wonderful addition to this sundae. There's already a delicious apple bite from the walnuts, but why not accentuate it?! Enjoy and don't sundae and drive. ;) Boozy Apple Pie Sundae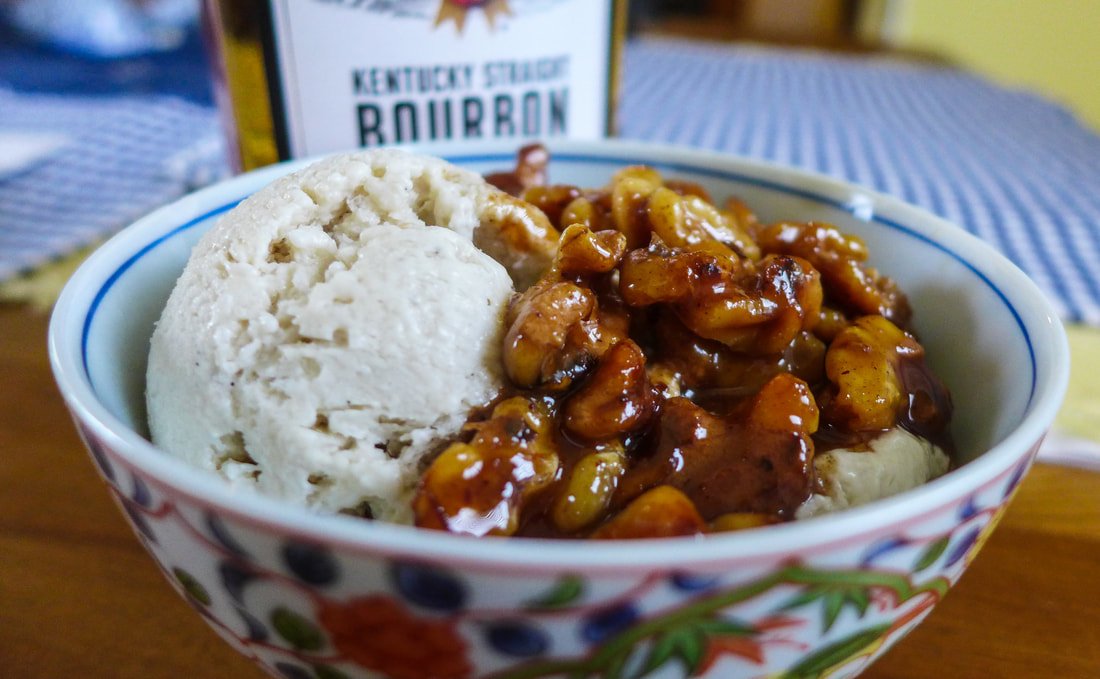 Ingredients Yield: about 6 servings Free from: Soy*, Gluten *Use appropriate ingredients for this option Bourbon Vanilla Ice Cream
Hard Cider Wet Walnuts
Toppings of choice (here's my raw apple pie filling) 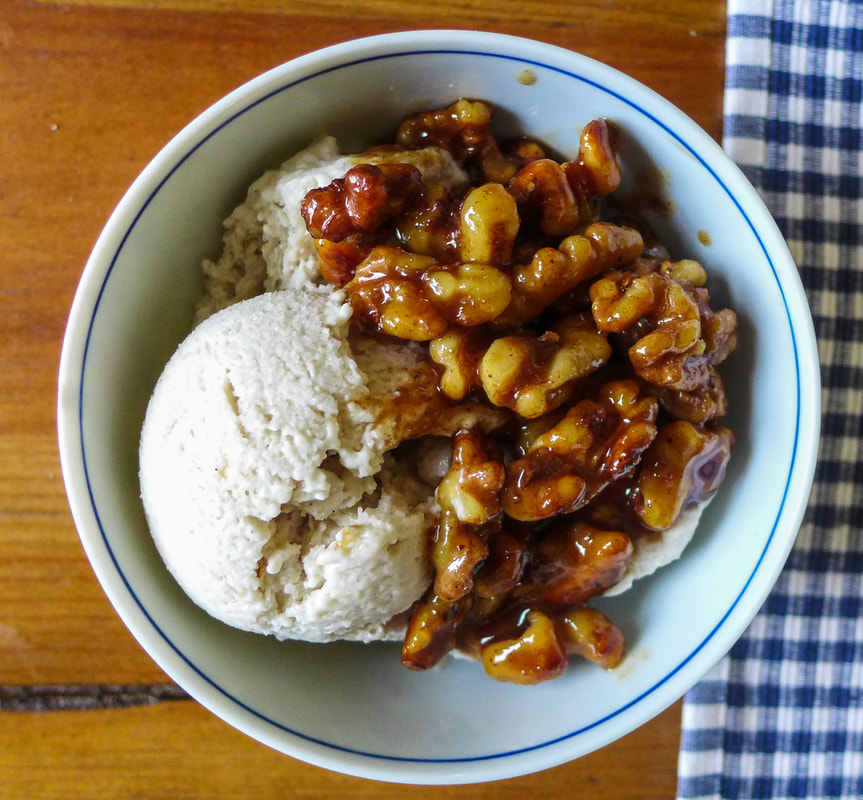 Instructions
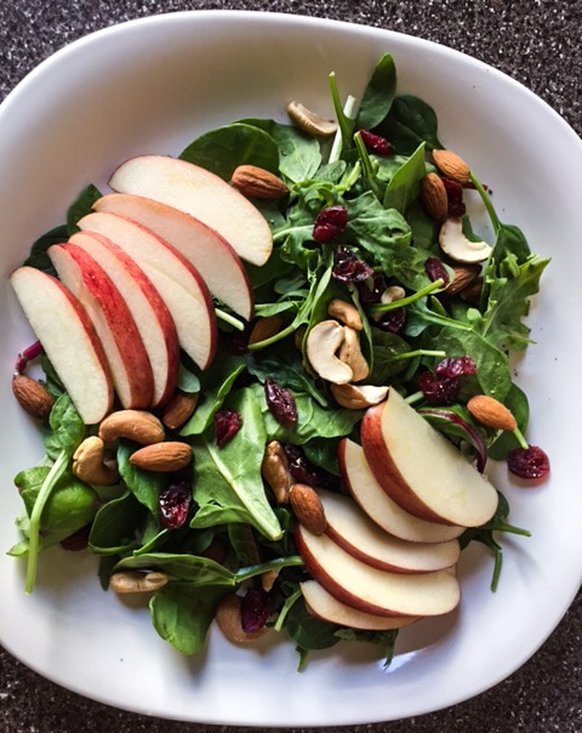
 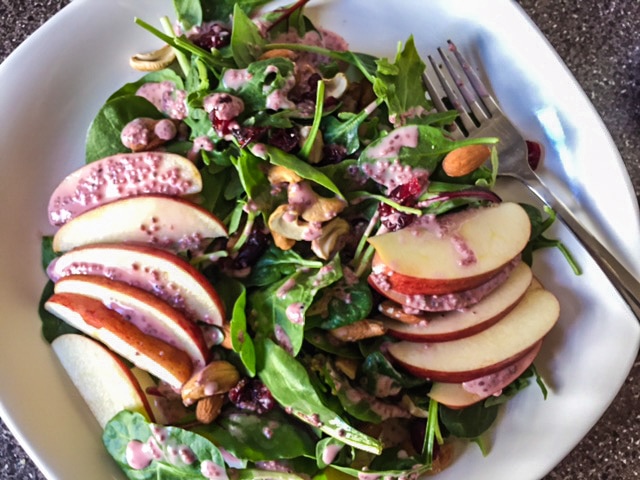 I'm finally back into the blog grind! After the holidays, I needed a break from everything. Although I didn't stop making delicious food, I just didn't have the energy to post. Fortunately, I have some more free time and the will to eat healthy foods for the new year. I always thought of myself as a generally healthy eater, but when the weather gets cold I tend to get lazy. I always fall back on easy, warm meals. Lately, I've been noticing that I've been eating more processed vegan foods than I really want to. Although they're delicious and easy, they aren't a good "all the time" food. So, to remedy my poor choices, I've started eating more whole plant foods. I've been making sure to stock my kitchen with as much produce as I can. In the winter months (it's almost spring, but still pretty chilly here), I usually choose produce that has a longer shelf life. My favorites as of late have been root veggies, onions, apples and pears, and so on. When I buy more delicate vegetables like greens, I try to eat them as quickly as possible so they don't go to waste. Salads for days, in other words. 🥗🥗🥗🥗🥗🥗🥗🥗🥗🥗🥗🥗🥗🥗🥗🥗🥗🥗🥗🥗🥗🥗🥗🥗🥗🥗🥗🥗🥗🥗🥗🥗 Anyway, I've made my own salad dressing for a very long time. For the most part, I always hated buying dressing from the store because it was always too much. Am I every going to really use all of that ranch? No. And now, I don't even like ranch. There were always at least 3 bottles of old, opened salad dressing in my fridge growing up. My mom would buy some when we needed it, and then we would eat salad for a while and it would sit. Forever. When I moved, I swear I threw away 8+ year old dressing. 😷😖 After that, I made a promise to myself that I would just make dressing if I ever needed it. The great thing about salad dressing is that it literally takes 2-3 ingredients to make (plus salt and pepper if you're doing it right). Those ingredients are staples every kitchen should have: fat (oil/nut butter/"mayo"/non-dairy product) + acid (vinegar/citrus juice) + binder (mustard/seeds/nuts/pureed fruit or veg). You can even get away with leaving the binder out. I like it because it thickens the dressing and helps it bind to whatever your putting it over. In this recipe's case, I used chia seeds because they're delicious, healthful, and add some texture to the salad. They helped thicken the dressing really well after sitting for only 10 minutes. If you don't have them, ground up flax would also work. You can also omit them if you want. They're pretty optional. 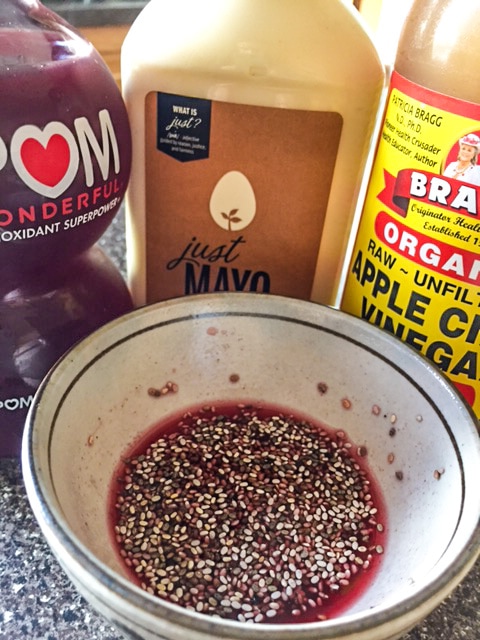 These are the basics of my dressing: apple cider vinegar (which I lovingly refer to as ACV, the miracle liquid), pomegranate juice (you can sub any other juice if you wish), and Just Mayo (or any preferred vegan mayo option/non-dairy yogurt). Then, the chia! If you sub the vegan mayo for non-dairy yogurt, you may want to scale back the vinegar. The vinegar makes this dressing taste like yogurt when it's completed, so if you add the entire amount, it may be too "tangy" for your liking. If you like tang, dump that ACV in there! 💃 I used this dressing for a simple apple salad with mixed organic greens topped with cranberries and nuts. It was perfect for a light lunch. The dressing made it look adorably pink. Feel free to use it on any salad you desire and enjoy! 💝 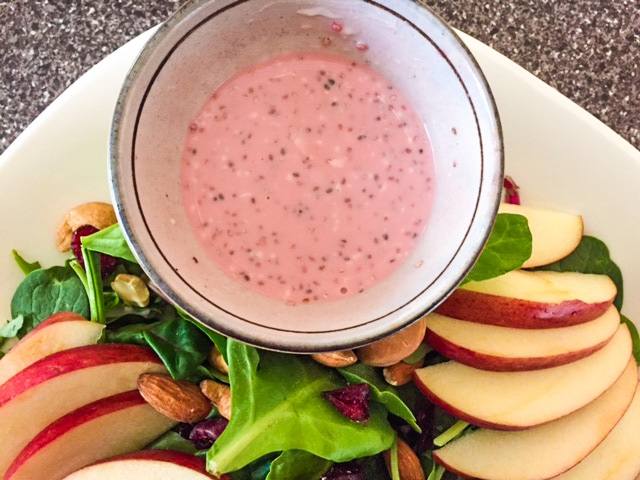 Chia Pomegranate Salad DressingYield: 1 serving Free from: Gluten, Nuts, Refined Sugar, Soy* *Use a soy-free product Ingredients
Instructions
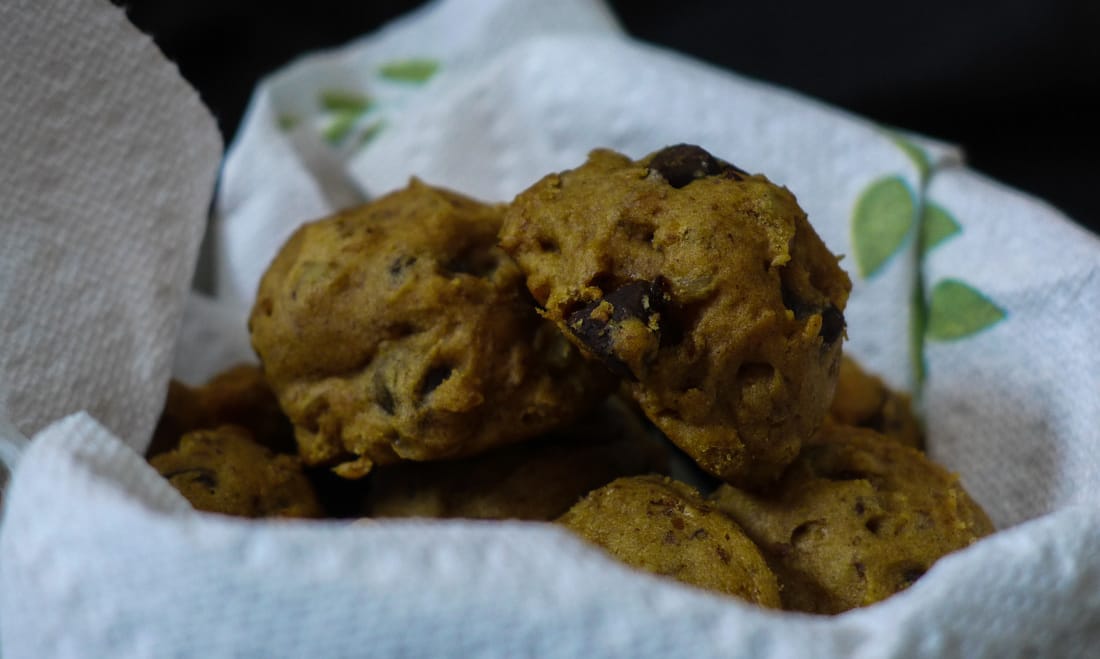
 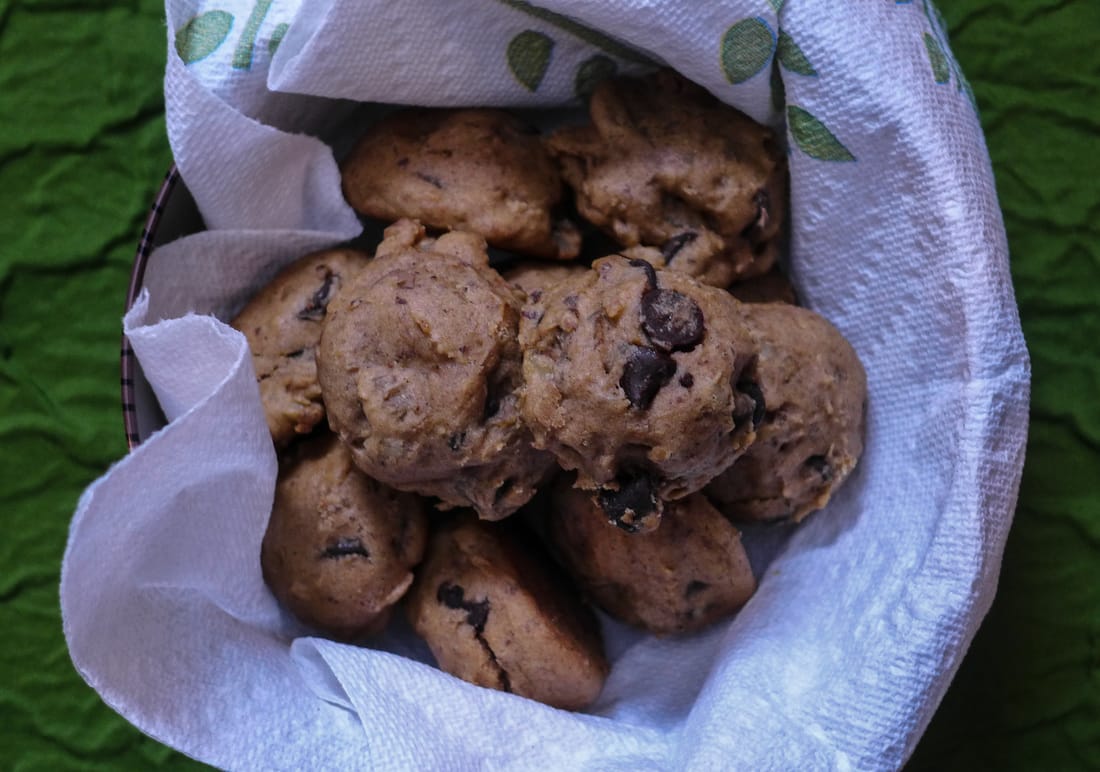 This cookie recipe is one from my BHG archives. My mom and I always used their "New Cookbook" (published in the early 90's I believe) for our Christmas cookie recipes back in the day. This cookbook has any type of cookie you could possibly desire with easy and simple to follow recipes. Making their baking recipes into vegan versions isn't so difficult anymore, especially if you use aquafaba. 😋 These cookies are as low maintenance as you can get: one bowl, use your mixer for easy clean up and easy mixing, and no rolling required! As cute as cutout cookies are, they are time consuming and temperamental. This dough comes together quickly with the help of a mixer and paddle attachment, if you have one. Once it's done, chill it for about 20 minutes while you heat up your oven and then use a mini ice cream scoop or teaspoon to portion out cookie drops. The original recipe (linked at the beginning of the ingredient section) calls for banana butter icing. Instead of going through the trouble of making icing, I decided to make these cookies interesting by transforming them into "chunky monkey" cookies. There are chocolate chips and walnut pieces inside each little cookie, which offer crunch and richness. If you prefer to keep these cookies more simple, you can omit the chocolate and nuts. Also, these are great to make for a last minute cookie swap or holiday get together if you have a spare banana lying around like I usually do. 😅 Enjoy and grab one for yourself. 💝 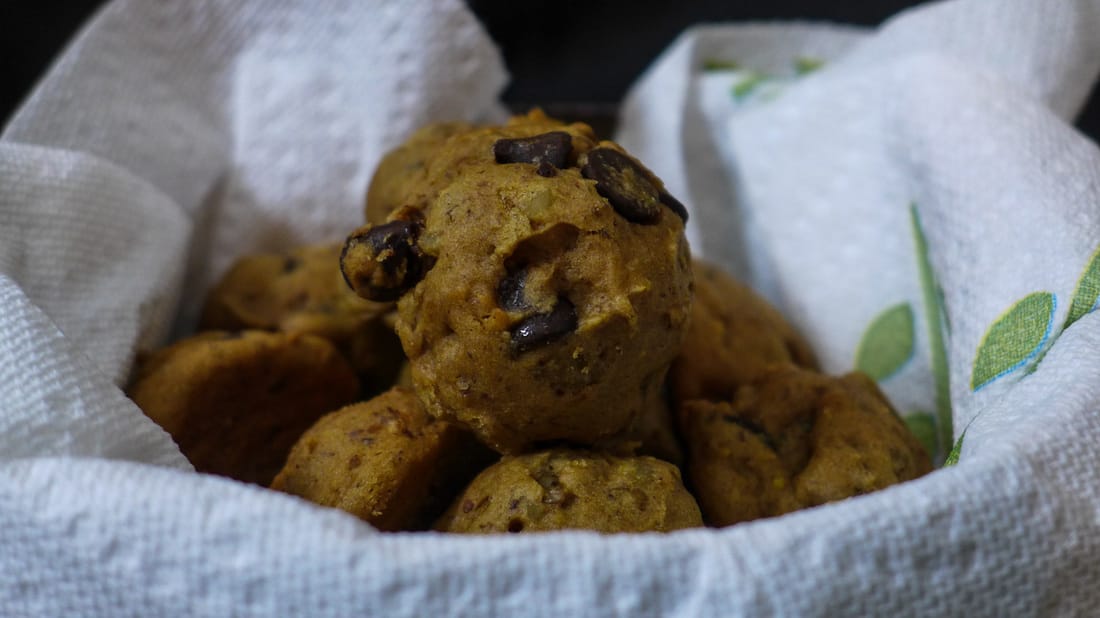 Ingredients Yield: About 24 Cookies Adapted from: Better Homes and Gardens Banana Drop Cookies
Instructions
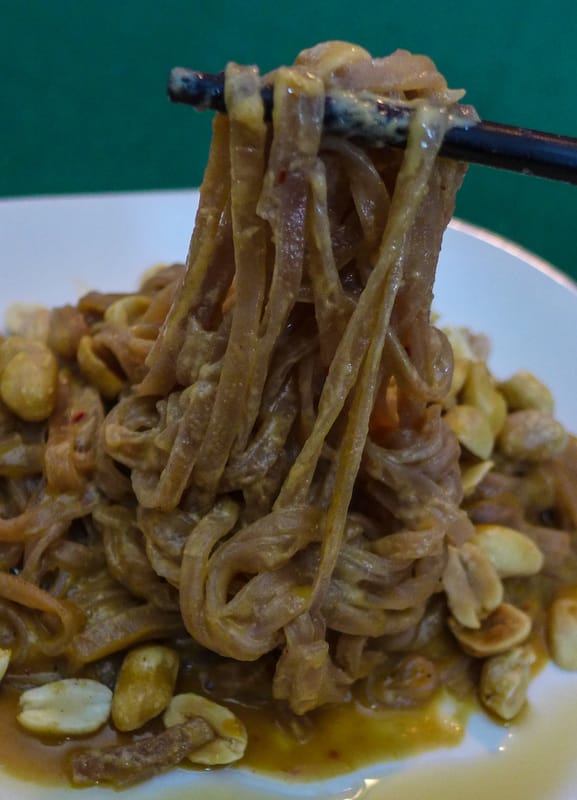
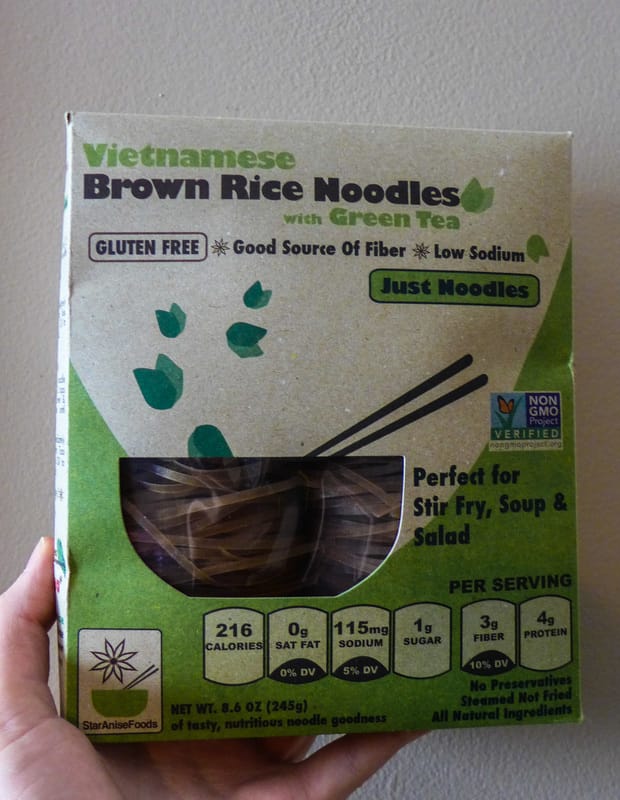
 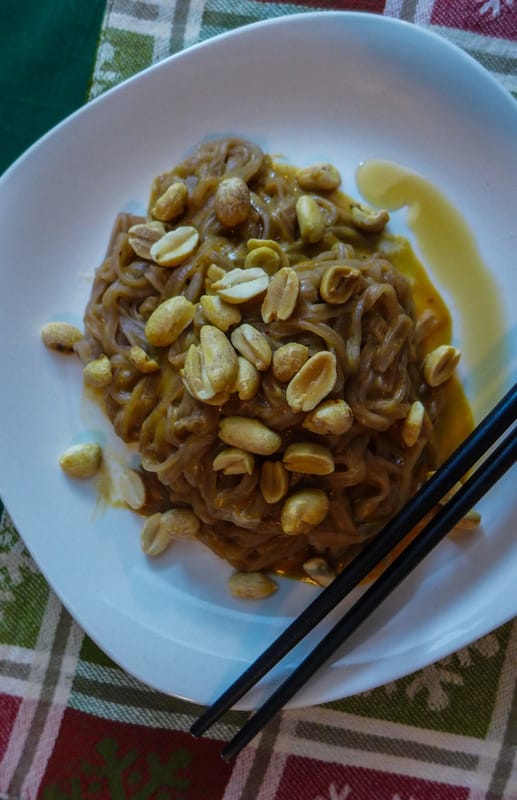 This weekend and upcoming week will surely be hectic for everyone preparing for the holidays. I've been doing some last minute chores today and suddenly realized I had skipped lunch. 💀 Since I knew I couldn't starve in the name of gift wrapping, I whipped up a single serving of peanut noodles and decided to share the recipe with you! It's a quick and easy meal or snack for when you're home alone or just in the mood for some noods. I'm always up for noods. 😁 These noodles are creamy yet light at the same time. They can be oil-free, in fact, if you omit the sesame oil garnish. I love the taste and aroma of sesame oil, so I drizzled a little on my plate after cooking everything. If you wish to make this dish without the oil, the sauce will still be decadent and satisfying while also providing you with protein. For the noodles, I used brown rice with green tea from Star Anise Foods. I love their products. Some of their noodles come with soup base, which I think is genius for a quick weeknight meal. I also love their name...so cute! ☺️
Peanut Noodles for One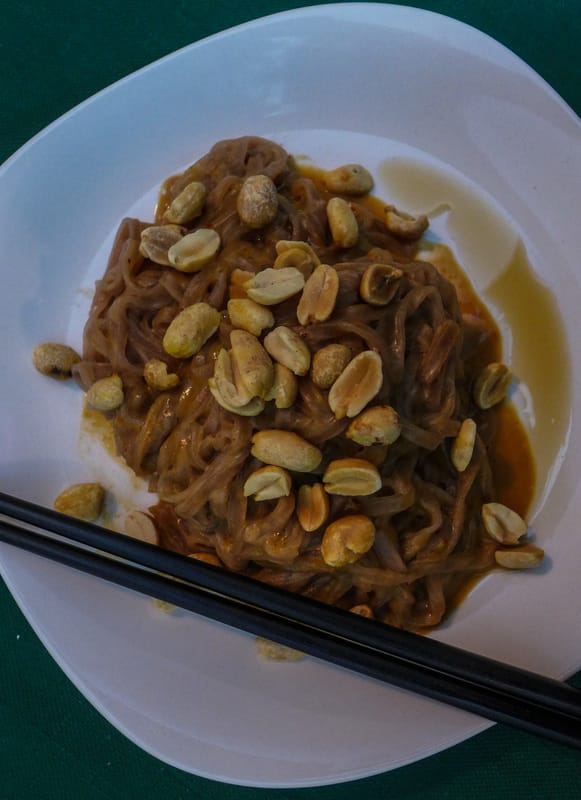 Ingredients Yield: 1 serving Free from: Gluten, Refined Sugar*, Oil-free option
Instructions
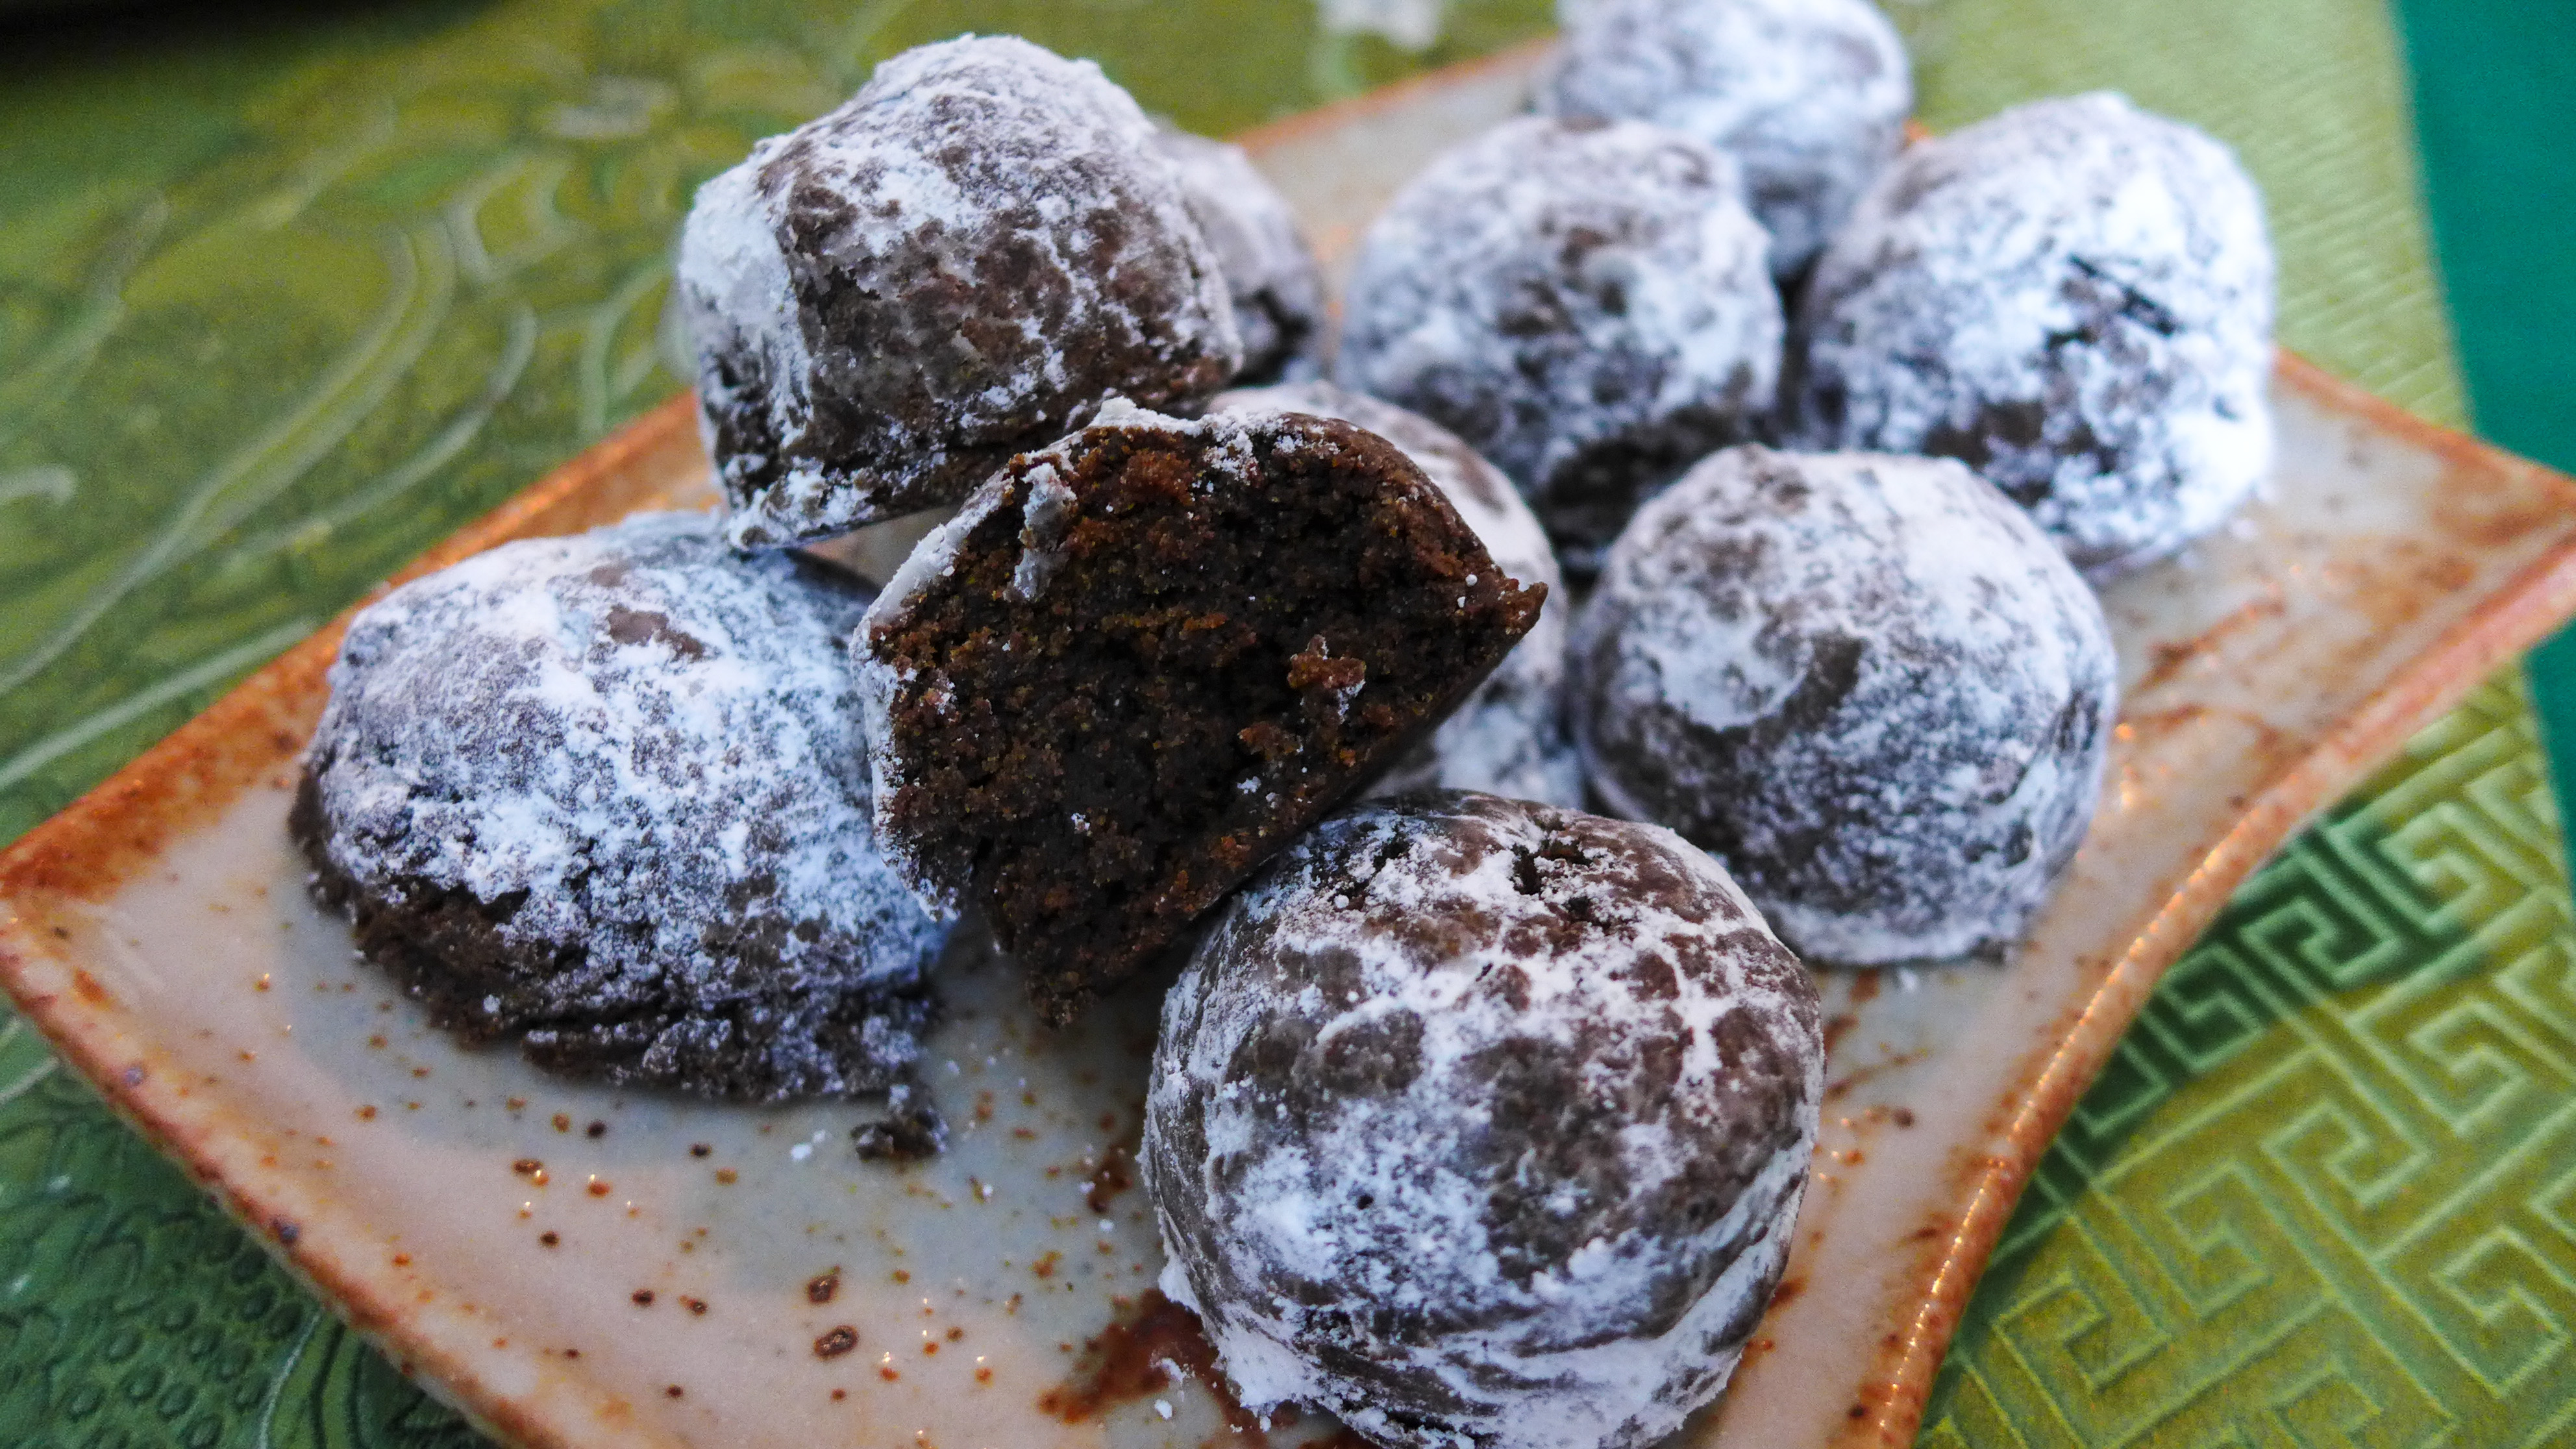
  Holiday baking is something that I normally go overboard on...but I feel so behind today! I know it's only the Monday after Thanksgiving, but I feel like Christmas is already here. Lights and decorations are going up all around me and all I have to show are two dish towels with reindeer on them. 😳 #firstworldrpoblems, I guess... I decided to bake some quick, easy, delicious and somewhat healthy cookies for this post. I'm a huge fan of Chocolate Covered Katie, one of the best dessert blogs I've ever encountered. She makes easy recipes that have accessible ingredients, delicious crave-able flavors, and offers all the substitutions you never knew you needed. Her blog was one of the first ones I read when I started to experiment with vegan baking. I had no idea what stevia was and had no clue that you could bake a cake in the microwave. She showed me the truth and I am bestowing my knowledge unto you now. Behold! My recreation of a recipe from CCK's cookbook (which you should probably buy): These pixie cookies are delicate and fluffy drops of cake-like chocolate with a hint of cool peppermint and rolled in powdered sugar to make them look like they've been on a romp in the snow. ❄️☃ These take only 12-15 minutes to bake and they are small, so if you are feeding a crowd of up to 9 people, you're perfectly fine without doubling the recipe. Also, if you have peppermint extract (or peppermint stevia at your own risk), you can whip these cookies up any time because they only use staple pantry ingredients. My rendition has a few minor changes so make sure you check the ingredients in case you need to plan ahead. Otherwise, whip up a batch now and join me in cookie heaven! 🍪🍫😇💖 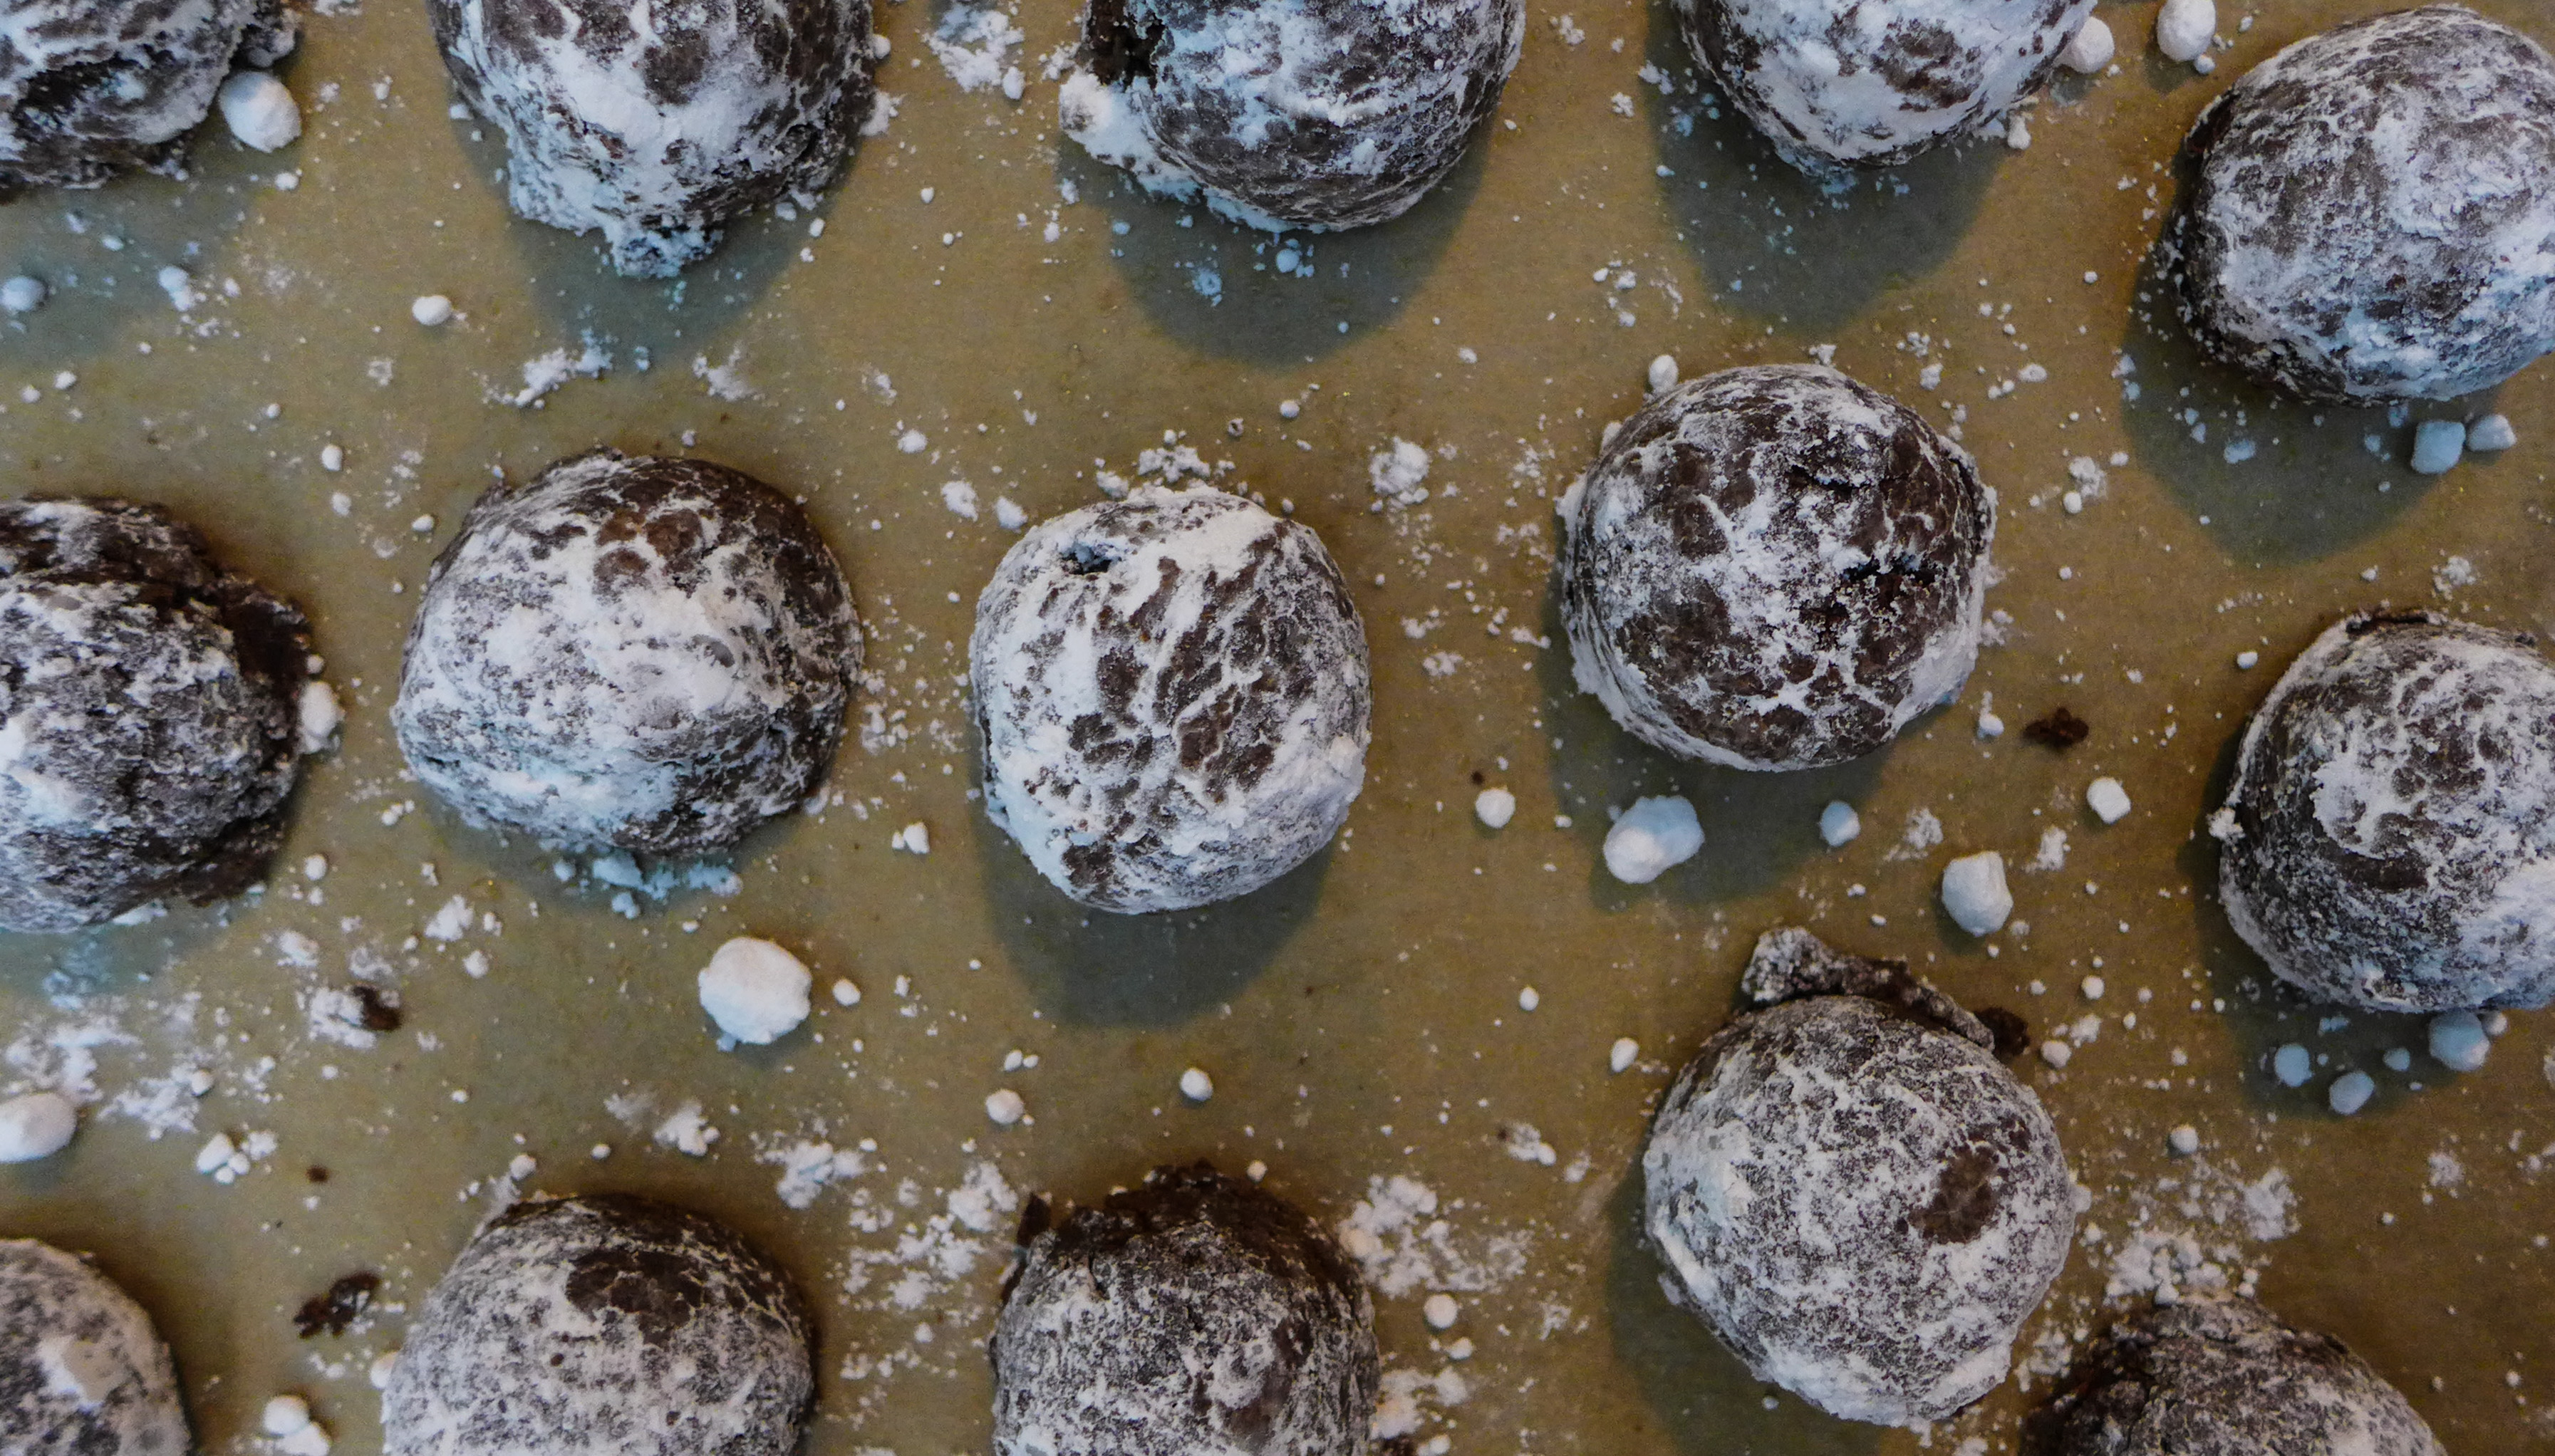 Mint Chocolate Pixie CookiesAdapted from Chocolate-Covered Katie Ingredients Free from: Gluten, Refined Sugar, Nuts, Soy* Yield: About 18-24 cookies
Instructions
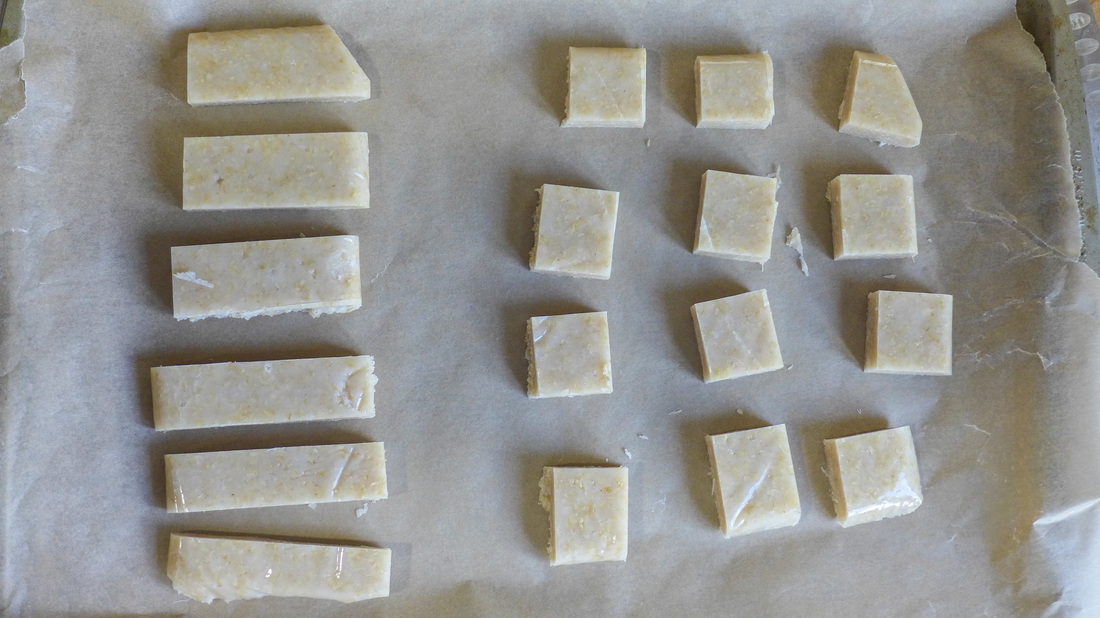
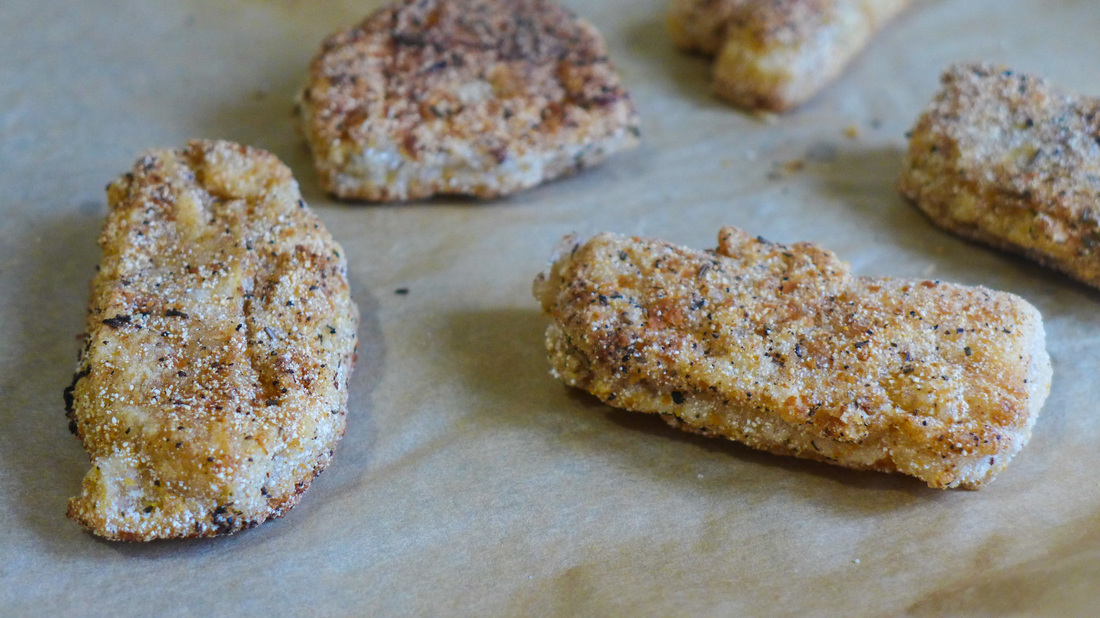
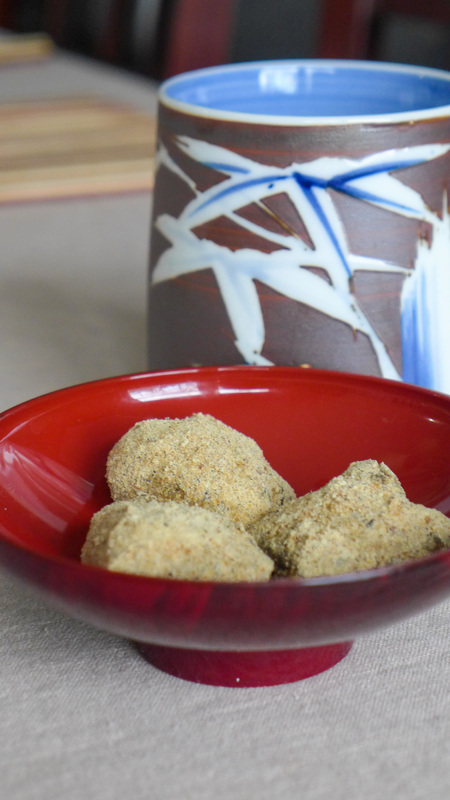
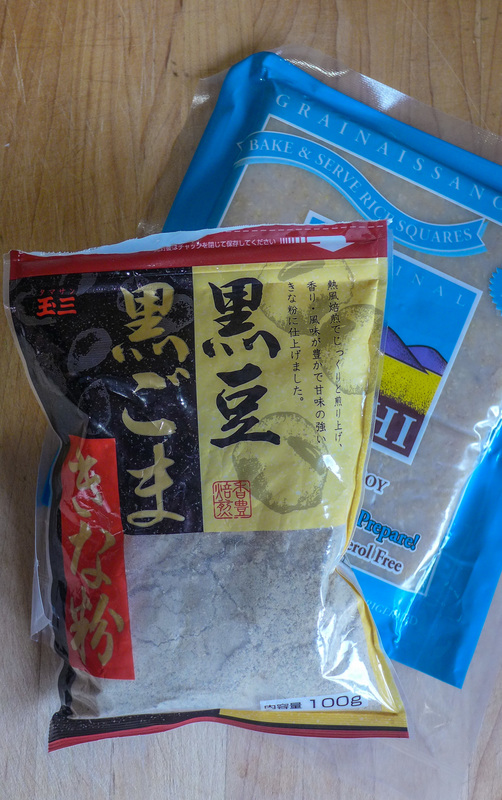
 □ 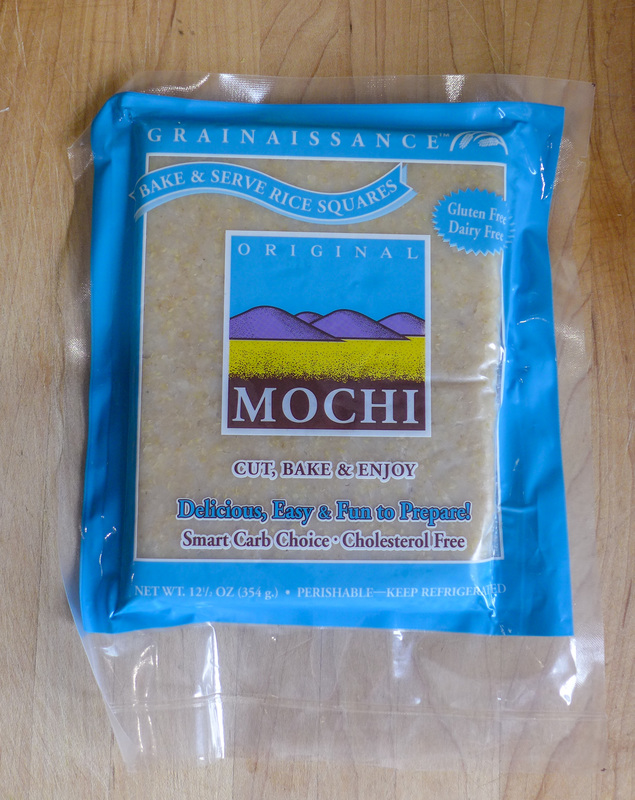 Last year for VeganMoFo, I ventured to make my own mochi from scratch and it was tasty! Sometimes, though, I want mochi for a snack and I'm not able to make it myself. I try not to buy the prepared mochi desserts as they contain a scary amount of sugar! When I was in cooking school, my instructor Christine introduced the class to a great brand called Grainaissance that makes mochi for cooking at home and it's made with wholesome ingredients and brown rice. 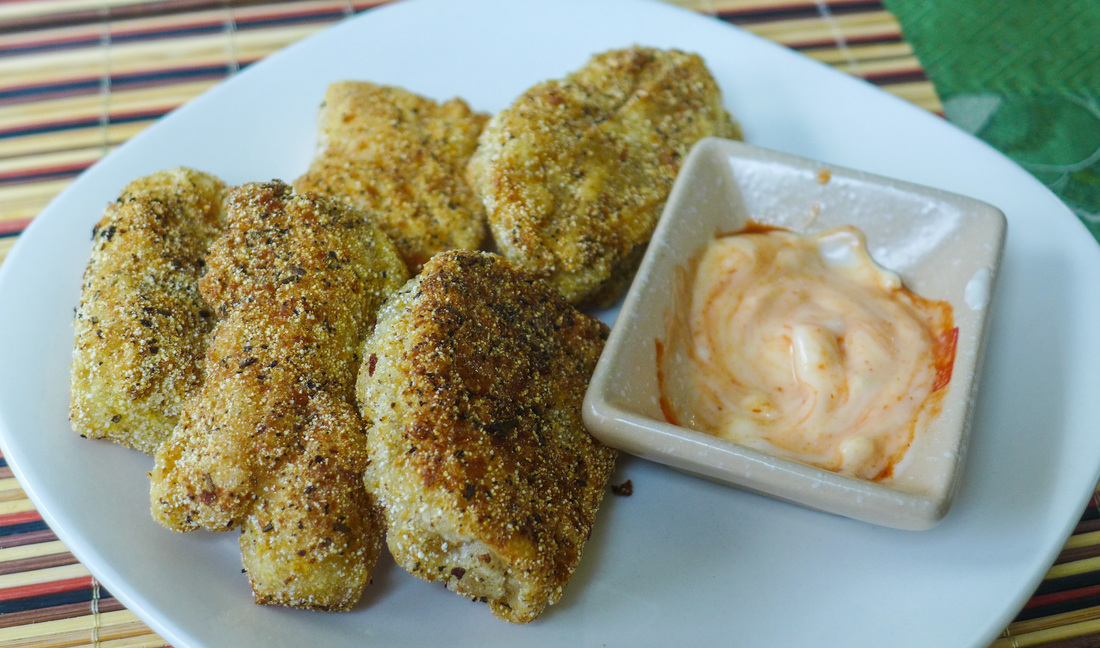 I grabbed a pack one day just to have in case I needed a quick breakfast one morning. What I ended up doing with said pack will amaze you! ;) I cut the block of mochi in half and prepared it 2 ways: one sweet and traditional and one savory and crazy! If you're feeling one resulting mochi over the other, feel free to prepare your entire block that way. I wanted a little of both, as usual, so I went a little nuts. The mochi "chicken" nuggets that I'm highlighting here are surprisingly easy to make. I love that mochi is naturally sticky so all you need to do to get something to stick to it is coat it in a little water. No egg wash needed! ^_^ The breading that I created definitely tastes like the outside of a chicken nugget. The texture of the fried mochi is slightly more firm than a mozzarella stick. So, if you're into mozzarella sticks and/or chicken (or meat-free chicken) nuggets, try this recipe. It's much less processed, contains no soy, has whole grains, fiber and protein and is absolutely delicious. The mochi nuggets came out crunchy on the outside (and I mean, crunchyyy!) and soft and chewy on the inside. It's a great snack for watching football, too (if you're into that). The kinako mochi is very simple to make and is a great accompaniment to tea or coffee. These little bites are slightly sweetened with coconut sugar to highlight the nutty flavor of the kinako. It's a great way to enjoy something sweet without overindulging.  Mochi "Chicken" Nuggets
 Instructions
 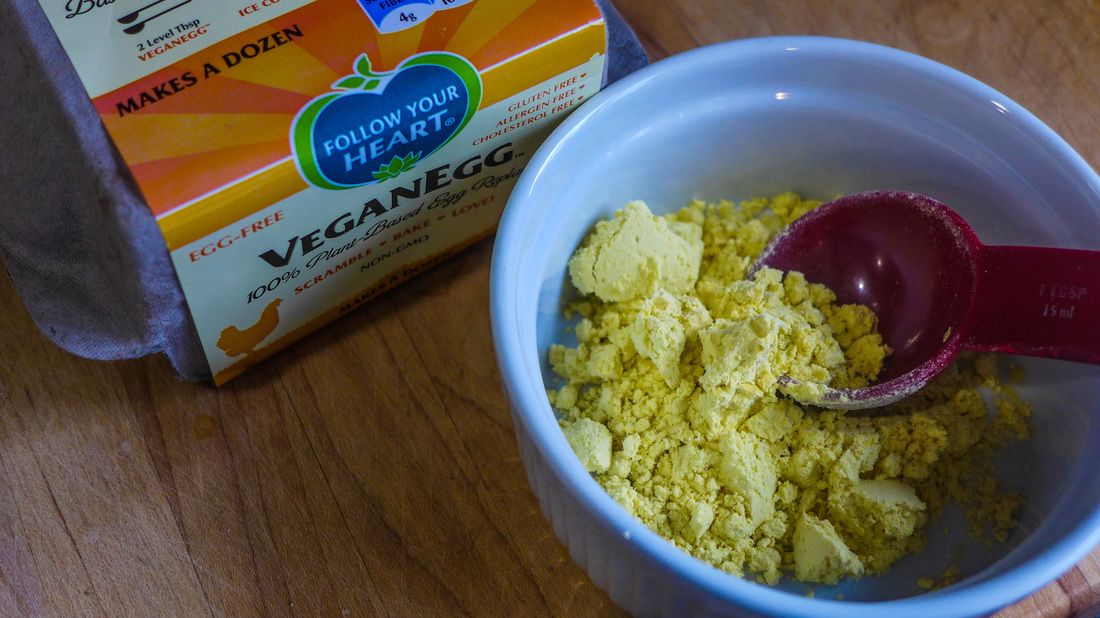
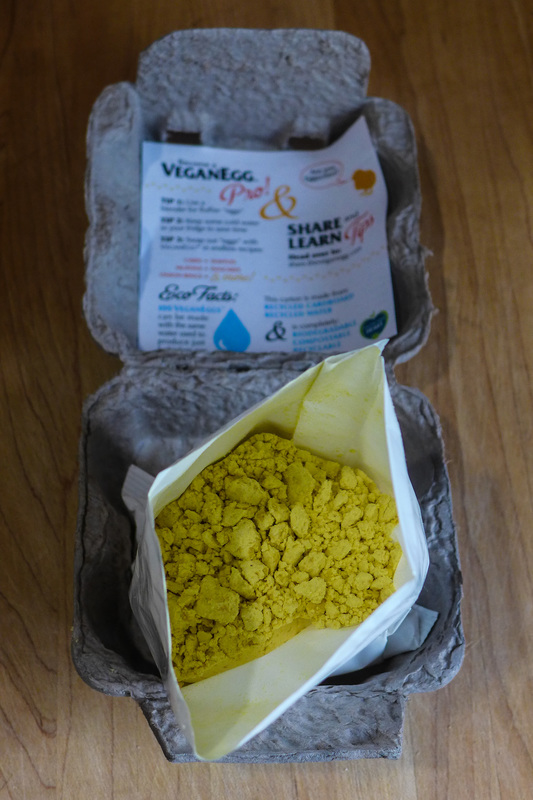
I've made tofu scramble countless times since becoming vegan and I've had the satisfaction of making an egg-like meal with delicious ingredients and scrumptious flavors. This, however, was the very first time since 2011 that I felt as if I was cooking actual eggs again. It was a very strange feeling. 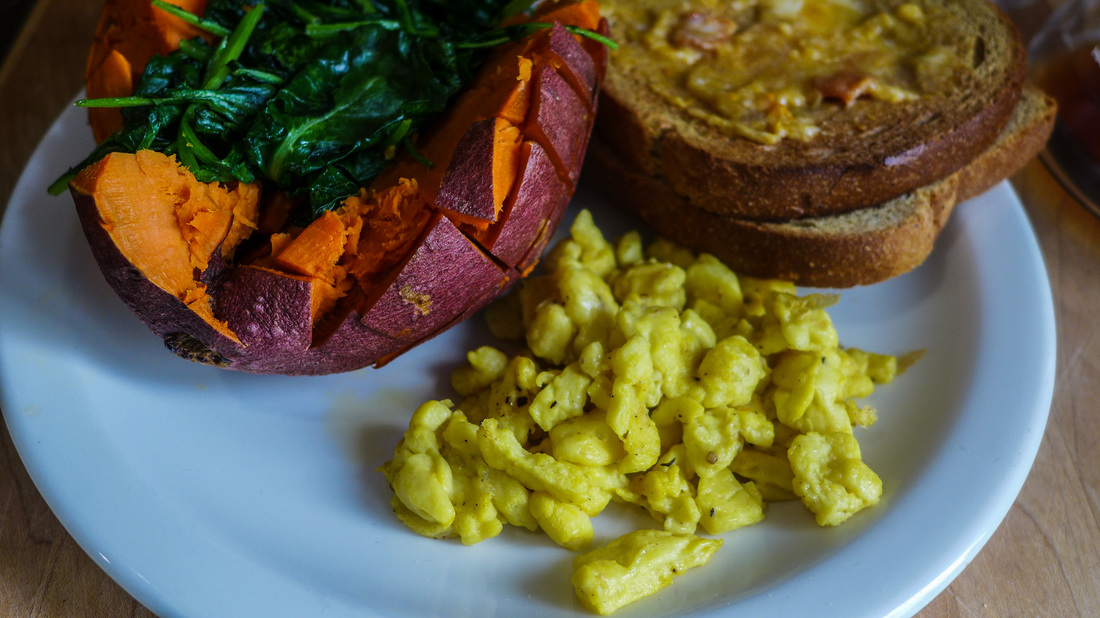 That looks straight up like scrambled eggs, doesn't it? Weird. Making the VeganEgg was a simple process today. I wanted to make the product as the instructions said to so that I could taste it as it was without fancy additions or techniques getting in the way. This was tough to do, though. I always want to tinker! ^_^ The VeganEgg is fairly simple to make. All you need is some cold water to mix with the provided powder and voila! The resulting mixture almost seems like pancake batter in consistency. In fact, once I poured the batter into my pan, I felt as if I was going to make a pancake. Once I started to move the mixture around a bit, though, I noticed what all the fuss was about. EGGS! The VeganEgg cooks just like regular eggs do for the most part. It slightly sticks to the sides of the pan, it becomes spongey and fluffy as it firms up, and starts to become fragrant. Boy, does this stuff smell like eggs. What I loved most about the product is that it doesn't overcook easily like real eggs do. Whenever I would cook real eggs, I would always err on under cooking them (which in hindsight was a terrible idea!) so they would not become rubbery and hard. The VeganEgg takes a little longer to cook, maybe about 4-5 minutes on medium-low heat. I added only about 1/2 teaspoon of olive oil in my pan to cook the VeganEgg with and it was perfect. I seasoned with salt and pepper only in order to keep the flavor integrity of the product. I felt the flavor was nice but not over-powering. It was also not overly-eggy, which I think would've been a turn off. I did experience illness several times after eating real eggs and ever since the smell has somewhat deterred me. 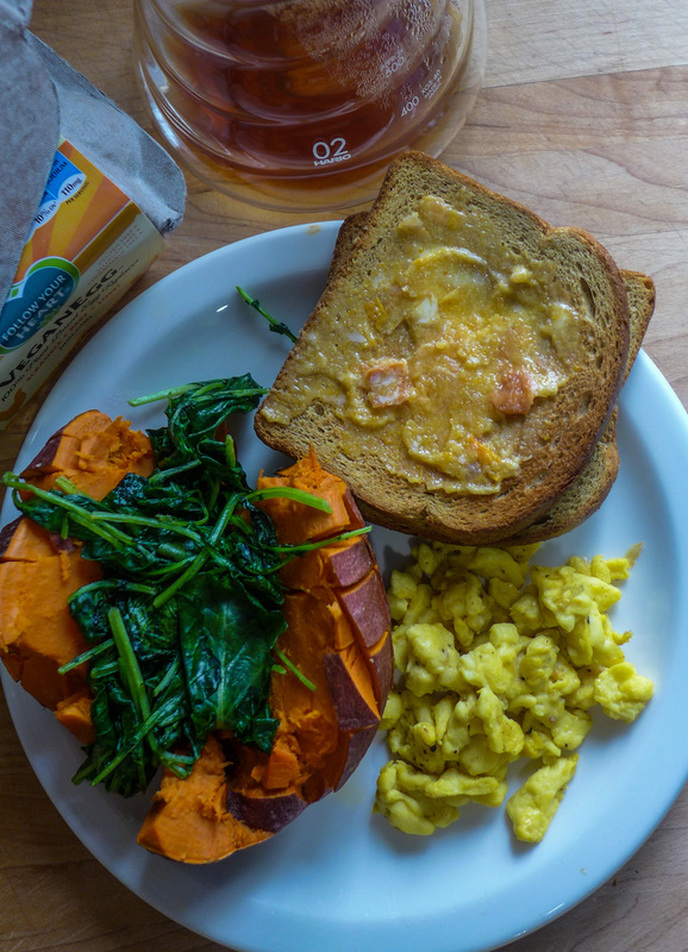 The full spread! I love how the VeganEgg cooks. It "browns" a little to add texture to the scramble but does not greatly alter the color. My scramble was fluffy and light yet slightly drier than normal eggs. Although, i suppose this is a good thing since real eggs are full of cholesterol. I liked the plain preparation of the VeganEggs, but I'm itching to do more with them. Since they retained their shape very well, I think they would be perfect for making omelettes. When I flipped the VeganEggs initially while cooking, they stayed in a very perfect circle until I broke them up intentionally. I would love nothing more than to stuff them with mushrooms, spinach and onions next time! Mmmm... I had a fun time eating these VeganEggs with a nutritious vegan breakfast of a baked sweet potato, sauteed baby kale, and two slices of toast slathered with vegan butter and persimmon jam. Oh, I made some coffee too in my V60! ;) Since I don't eat a full breakfast too often, I like to go a little nuts when I make it at home. I figured this was a special occasion, so why not? 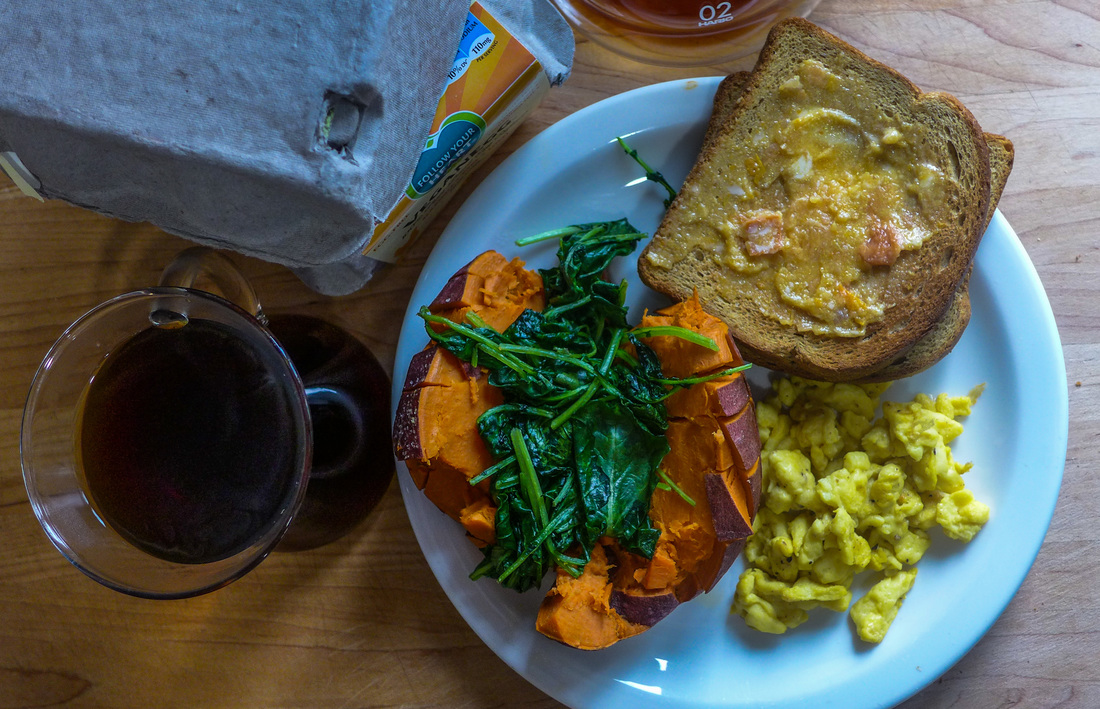 In short, I absolutely recommend the VeganEgg. I haven't used it for any other purpose except scrambling, but that was enough to sell me! Don't be surprised to see new posts coming soon of baked goods, quiche, frittatas, omelettes, or anything else you could possibly do with eggs. I'm headed deep into vegan egg land and I don't expect to come back until I've explored every corner of it! Happy breakfasting, everyone! If you have any suggestions as to what I should make next with the VeganEgg, let me know! I'm down for it all. 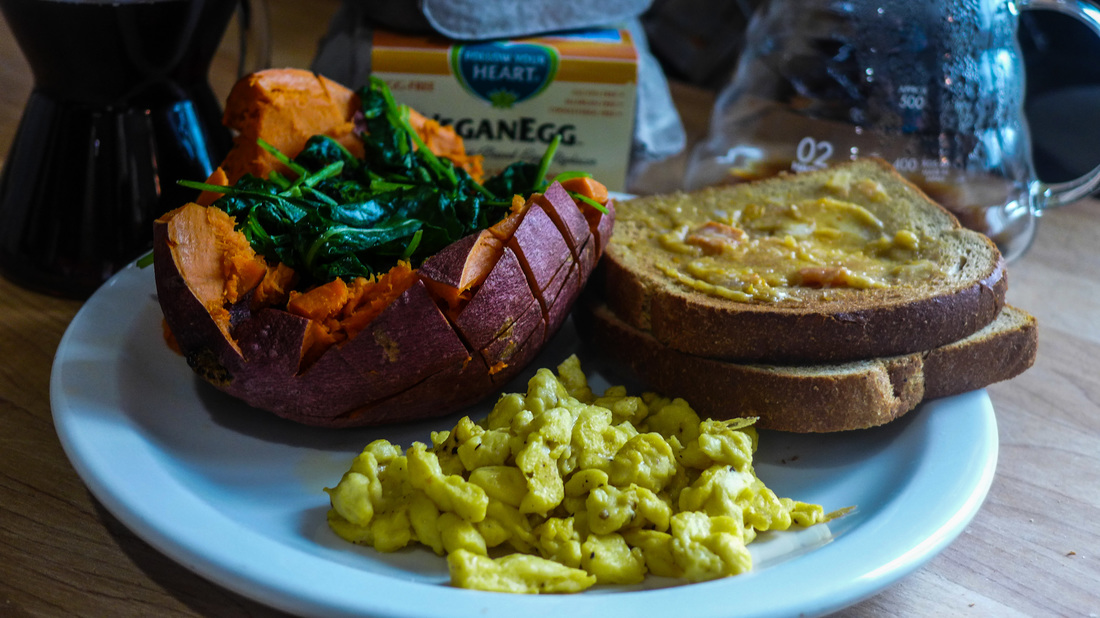 |
I'm Jess!This is my very first food blog! I post revised conventional recipes of foods that I hold near and dear to my heart. My cooking here is all gluten-free and cruelty-free, but full of flavor and comfort.  


 Archives
December 2017
Categories
All
|

 RSS Feed
