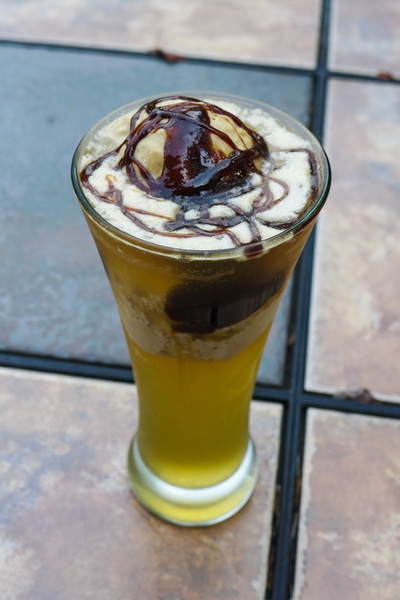
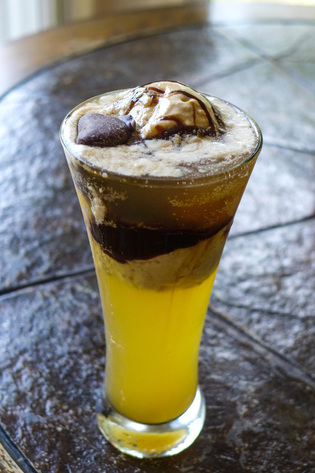
 Today's prompt is totally awesome, I must say! A weird food combo that you love! I actually had a tough time thinking of what to make for this. Then, it hit me. I love kombucha. Liking kombucha as a vegan/healthy eater isn't that weird, but I love it as a replacement for soda. 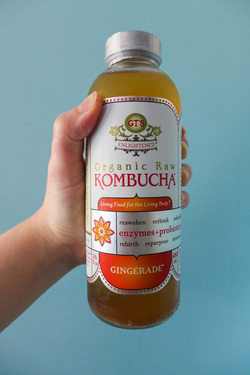 I'd chug that. I'd chug that. I like to take it to the movies. Kombucha and popcorn? Oh yes. Or, anything salty and kombucha is my jam. I had yet to use it in a dessert dish...until now! =D I was perusing the bulk section at my favorite natural foods store one day with my mom and I gave one particular product some more attention than I normally would: chocolate covered ginger. I like ginger. I'm not the biggest fan of sweetened ginger, but I love it in savory cooking. I usually think of East Asian and Indian cuisine when I think of ginger. The chocolate and ginger struck me as slightly out of the ordinary, but possibly delicious. I moved on. Then, it dawned on me. If I use kombucha for a soda replacement and I am ginger dessert-curious, shouldn't I just figure out how to combine the two into a wonderful treat? Well, yes...and I did! 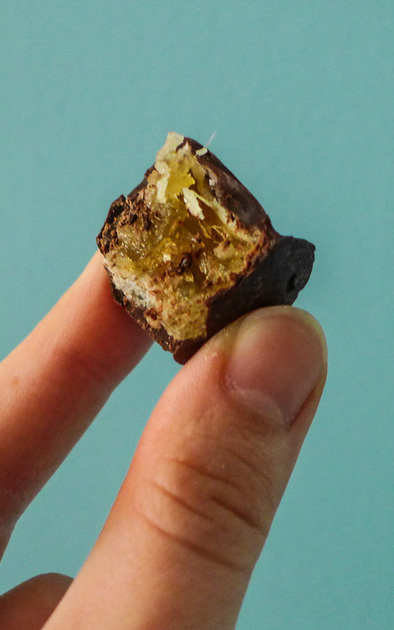 Thus, the kombucha float was created. I'm sure I'm not the first one to think of this idea, but I certainly hope I'm the first one to make this flavor combo: ginger kombucha (I used G.T. Dave's...it's my favorite brand!), homemade salted caramel ice cream (made with coconut milk!), and topped with tasty chocolate ginger nuggets. What a concept. When I assembled the whole drink, my mind was blown. I was never a fan of floats until now. Although, I still like everything inside of a float separately just fine. I don't think a float is something I ever crave on its own. But, I must say, this is pretty damn good. ;)  I hope this isn't too weird for you all. Try different flavor combos...I'm sure the possibilities are endless! Cheers! ^_^ Salted Caramel Ginger Kombucha Floats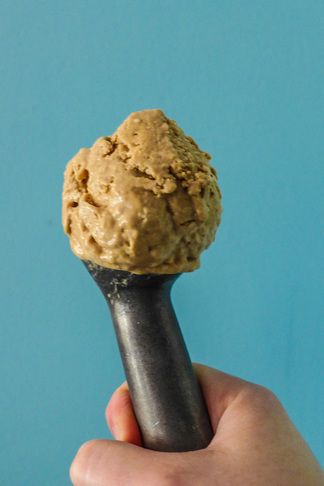 Yield: about 2 large floats (16 oz each) Adapted from Chocolate Mousse Ice Cream Ingredients
Ice Cream Ingredients Caramel
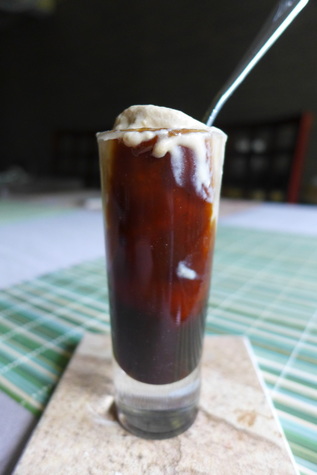 Tip: Use any excess caramel and ice cream for a shooter after you finish your floats. It's a great pick-me-up. ;) Tip: Use any excess caramel and ice cream for a shooter after you finish your floats. It's a great pick-me-up. ;) Ice Cream
Instructions
 Float Assembly
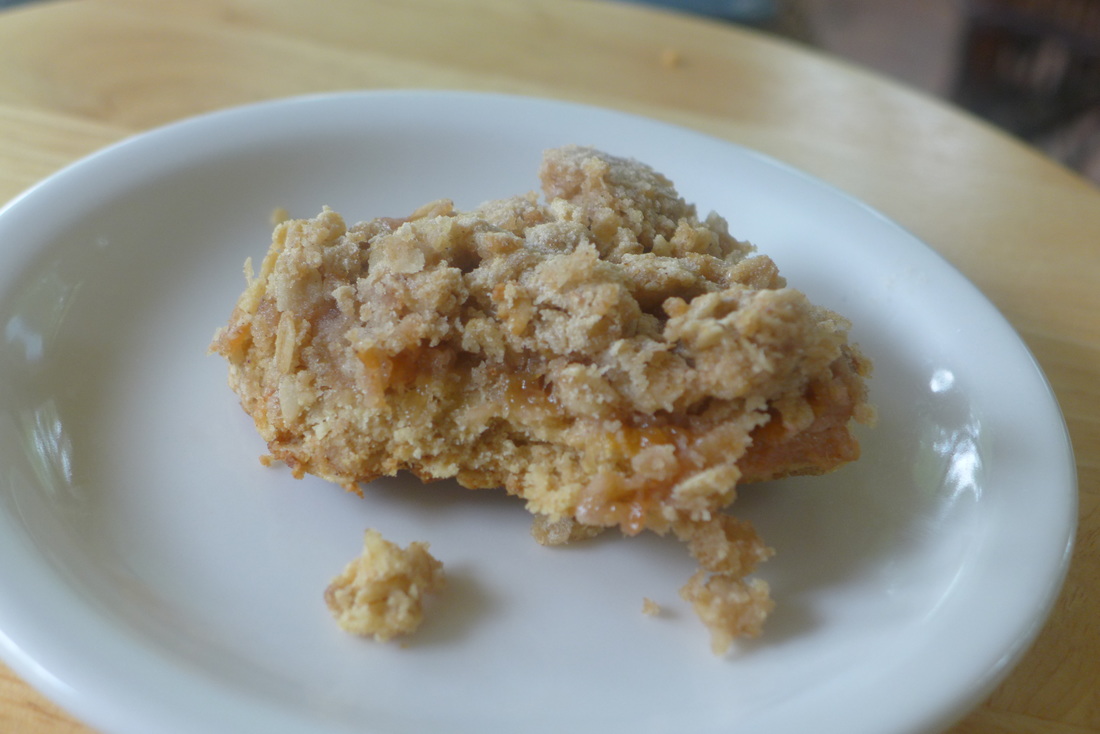
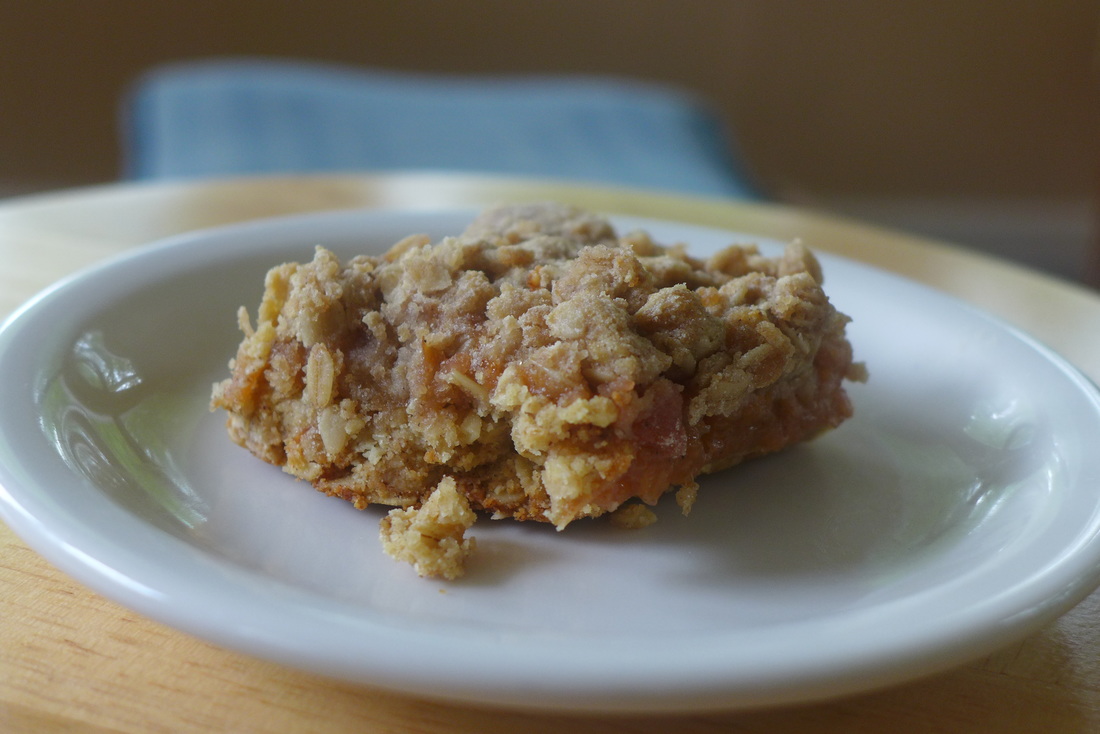 I am so happy that summer fruit is in full swing right now! I made some peach crumble bars about a week ago for a graduation party. I love coming up with desserts for this particular group of friends because it's quite a challenge to make something that everyone can eat. I love a challenge. ;) I am vegan, of course. My friends who hosted the party are unable to eat: dairy, soy and nuts. Most people who talk to me about accommodating friends with specific dietary needs have a certain venom in their voices. It must be tough for those who have to purchase expensive allergen-free desserts from the store. More often than not, if you're unable to get them fresh, you have to splurge on frozen products. I don't know about anyone else, but I only enjoy frozen things if they happen to be ice cream. Or smoothies. Or milkshakes. Or chocolate. Honestly, some chocolate tastes really good frozen. Moving on. 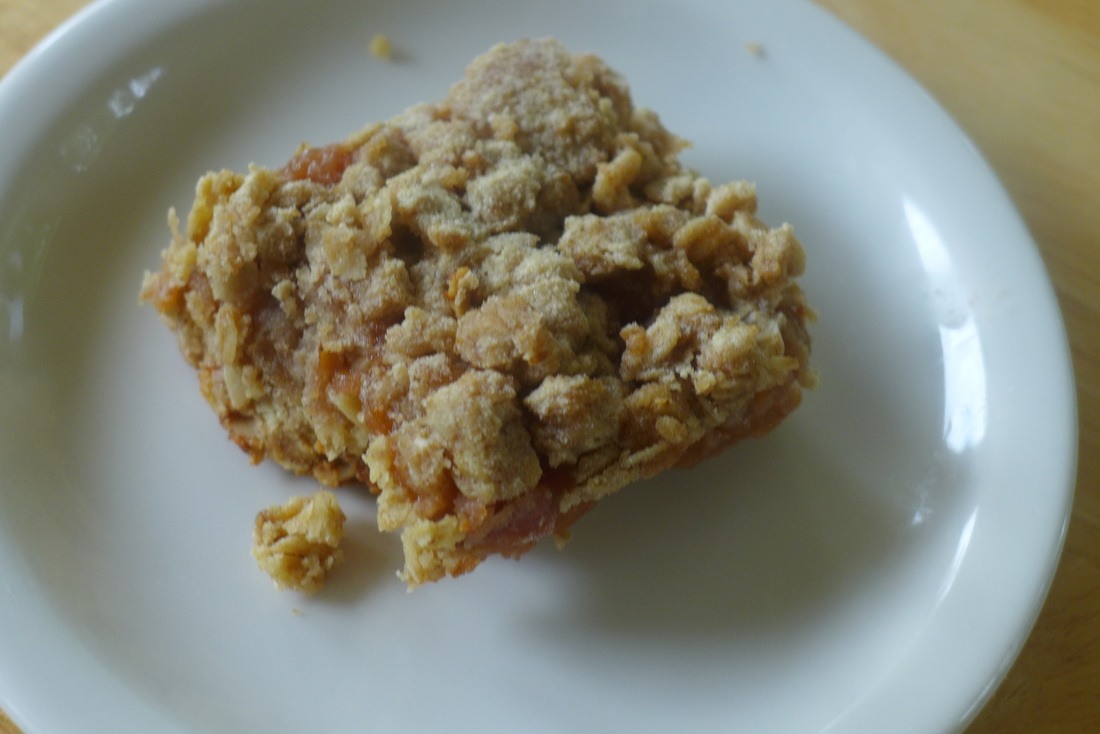 So, I made these crumble bars because they seem to fit the bill perfectly. I had some perfectly ripe peaches, oats, gluten-free flour, and all the other ingredients just lying around in my kitchen wasting away. I decided to give them all a purpose. I love peaches in the summer. They're juicy, sweet, tangy, and soft. Nothing better in a salad, on pancakes, in my smoothies, and just, generally, around and in my mouth. They also cook down very nicely into jam or compote. I made the latter for these crumble bars and it was the easiest process in the world. I would definitely recommend a Vitamix/food processor/stick blender for the compote. It's not necessary, of course. I've also made the compote without blending the peaches beforehand and it came out just as delicious. The amount of time and texture does change when you blend the fruit, though. I found that it comes out more consistently and is easier for slicing the finished bars. Chunky or smooth, it's up to you. Now, if you would care to indulge (but not too much because this is kind of healthy), go grab some ripe peaches and crumble them! ^_^ Peach Crumble Bars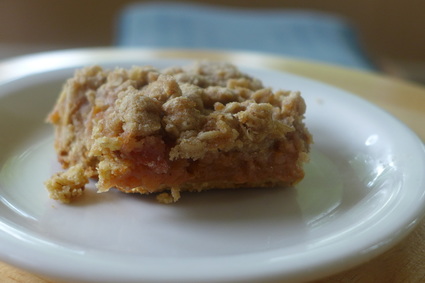 Yield: approx 9-12 servings (1-8x8 square pan) Soy, Nut, & Gluten Free Ingredients
For the compote
For the crumble
Instructions Oven 350 F.
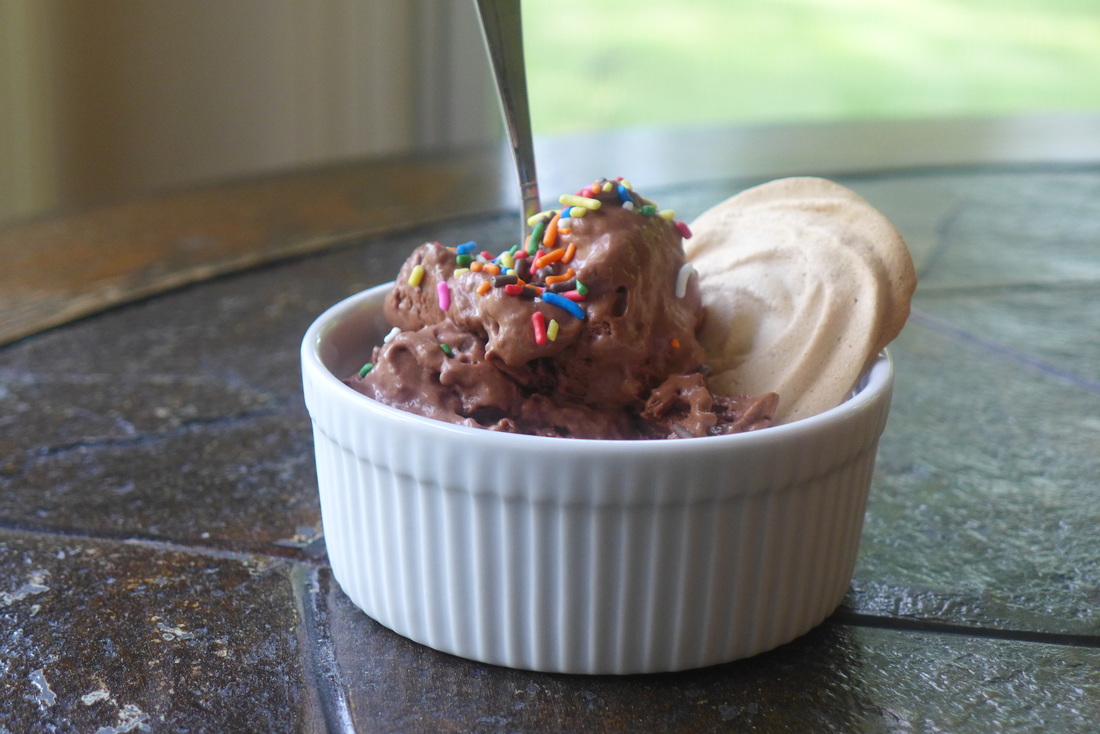
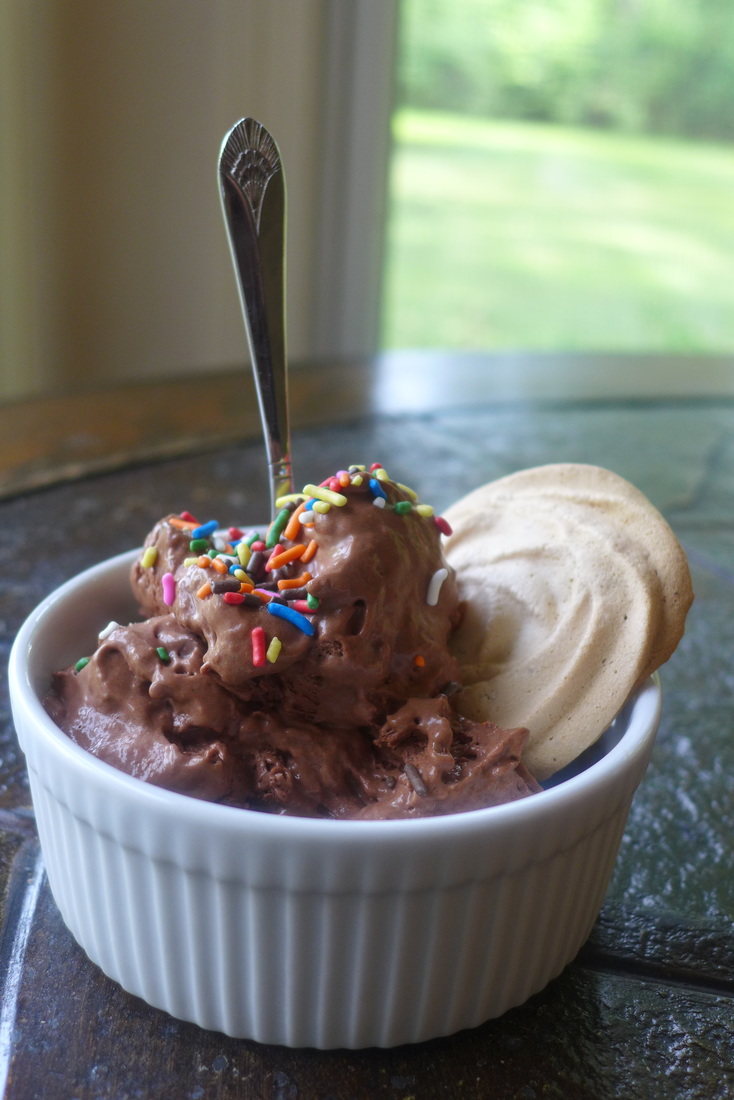
 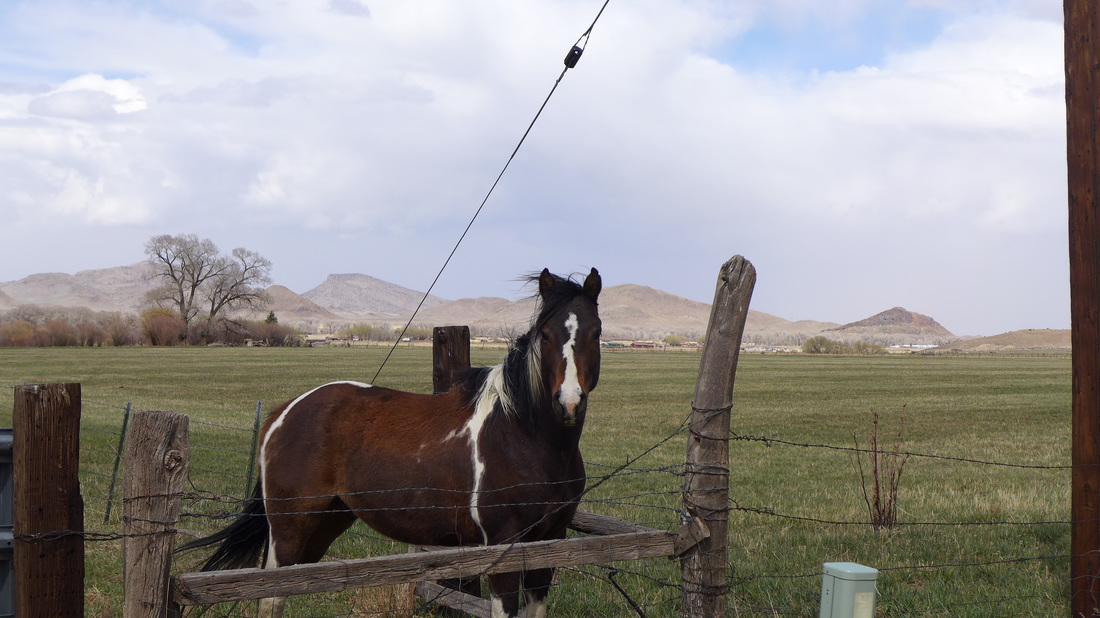 About a month ago, my boyfriend and I took an amazing trip to Colorado and Utah. We only dabbled in Utah for a short while and mostly stayed in Colorado. Most of our trip consisted of driving which is why my photos are landscapes, landscapes and more landscapes! Since it was my first time exploring the inland part of the Western U.S., I was a bit in awe of the drastic differences in climate that I experienced. I remember experiencing some form of snow at least once a day during the week that we were traveling. Some days would drop 20 degrees and then spike back up again. Rain followed us through the mountains and often turned to snow or sleet. The desert was the most interesting, as it was dry, sunny, and hot with a cold breeze. I loved it! I also ate some pretty interesting food while on the road. We stayed in a different place for each night, which gave us plenty of opportunity to explore local food options (or, eat Asian fusion for 3 nights in a row because that was the best vegan option in town). Luckily, we found some awesome markets (and the ever-faithful Whole Foods) on the road that supplied us with breakfast, snacks, etc. I'm glad I can highlight some of the food gems that we found on our trip for you. Hopefully this will entice you to visit the area one day...it's amazingly beautiful. It's definitely somewhere I'd love to go again.  Vegan Adventures in Colorado & Utah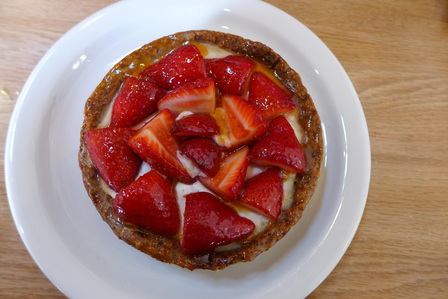 The Beet Box Bakery & Cafe Denver, CO The Beet Box is such an amazing cafe which quite an unassuming appearance. When I first found their menu online, I freaked out. "This is what I would make for my own cafe!" Boy, was I totally right. The pastries the Beet Box keeps in their case are different from day to day. They always make everything fresh and in house, including their breads. The first thing I got was a sandwich as I was famished from not eating on the plane ride (yes, this was our first stop after getting off the plane!). 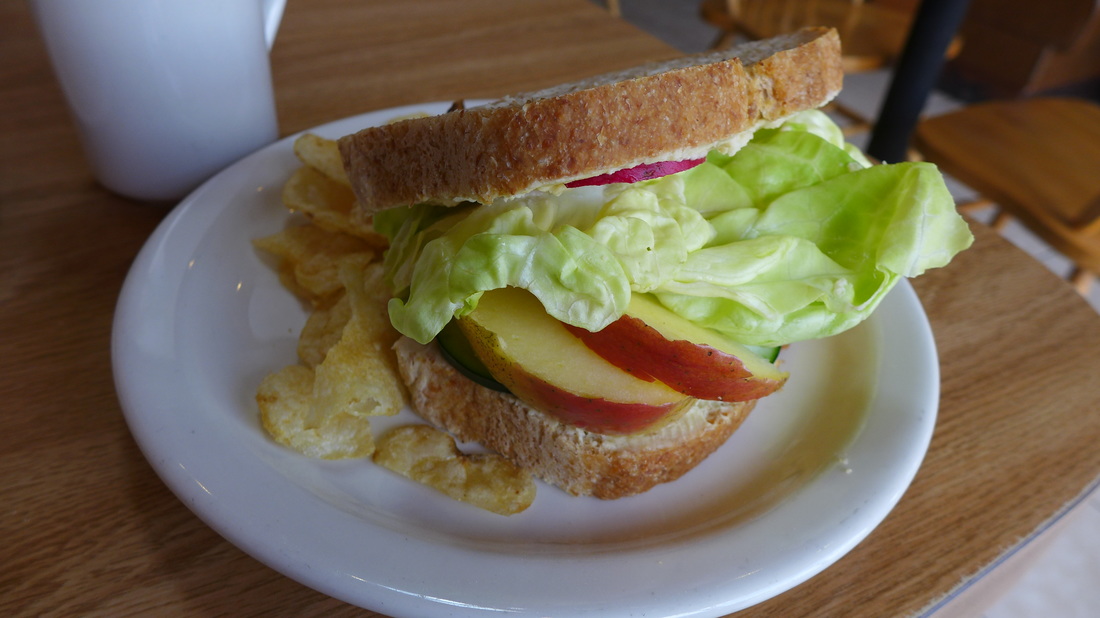 Yes, I was quite pleased with my decision. This is a delicious sandwich that I wish I had created. Gluten-free bread, hummus, onion, radish, apple, cucumber and butter lettuce. My God. Among the other delicious things we ate there (a total of two trips, I promise!) were cinnamon scones, a strawberry fruit tart, roasted beet sandwich, curry cauliflower croissant, and a cashew cheese mushroom panini. Definitely a spot I would hit up any time of day if you're in Denver looking for vegan eats.  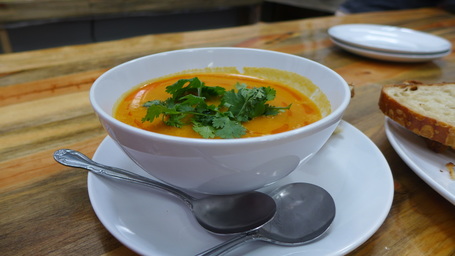 Happy Leaf Kombucha Denver, CO Up next is a small kombucha bar and cafe in Denver called Happy Leaf Kombucha. Their cafe was amazing in its aesthetic. Their bar and tables were all rustic woods. The art on the walls was the most impressive that I've seen for sale locally in a long time. We stopped in here to get a light snack and some kombucha, since I'm a big kombucha fan. I'm used to drinking GT Dave's , which is delicious, but it isn't on tap! I must say I was a huge fan of Happy Leaf's product. The kombucha was totally clear and very easy to drink. It didn't sting as much as any other bottled kombucha I've had before. The flavor was subtle as well without too much sweetness. We ate some homemade hummus while we were there, which was delicious and fresh. They had a soup on special that day as well. It was spicy, smooth, and not too overpowering. A great find. 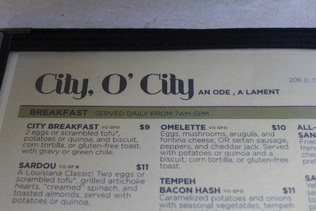 City O' City Denver, CO One of the most impressive vegetarian restaurants I've ever been to, hands down, is this wonderful place. City O' City had a great vibe. It was hip, casual yet smart, modern yet comfortable, and inventive yet accessible in their food and beverage offerings. We went here for dinner the very first night we spent in the city after coming in on the plane that morning. We had received a recommendation for this place and we were so hungry that we went over immediately. After dark, the restaurant dims the lights for a very private sensual feel. This place is kind of magical; I just don't know what else to say. The first time I ate at City O' City, I got a savory waffle for dinner because why not?! Waffles are things that I seldom make for myself, but I really do love them. I was definitely not disappointed. This waffle was insane. It was a dense, almost cornbread-like batter with thinly peeled spring vegetables on top that had been sauteed lightly. To top the whole thing off, they poured a vegan cheese fondue over everything. The cheese was thin in texture so it didn't overwhelm the dish at all. Genius. The second time (yes, we went here twice as well) we went to City O' City was the very last day on our trip. We stayed in Denver for the entire day because our flight was overnight, so we took our time with breakfast. Always a treat. I couldn't help myself. I got a waffle again! This waffle was the WoW (waffle of the week!!!). It was a cinnamon raisin waffle topped with granola, vegan cream cheese, and orange peel. Absolutely to die for. Oh, and we also found Sasquatch. This place has everything you could ever want, so just go and enjoy. <3 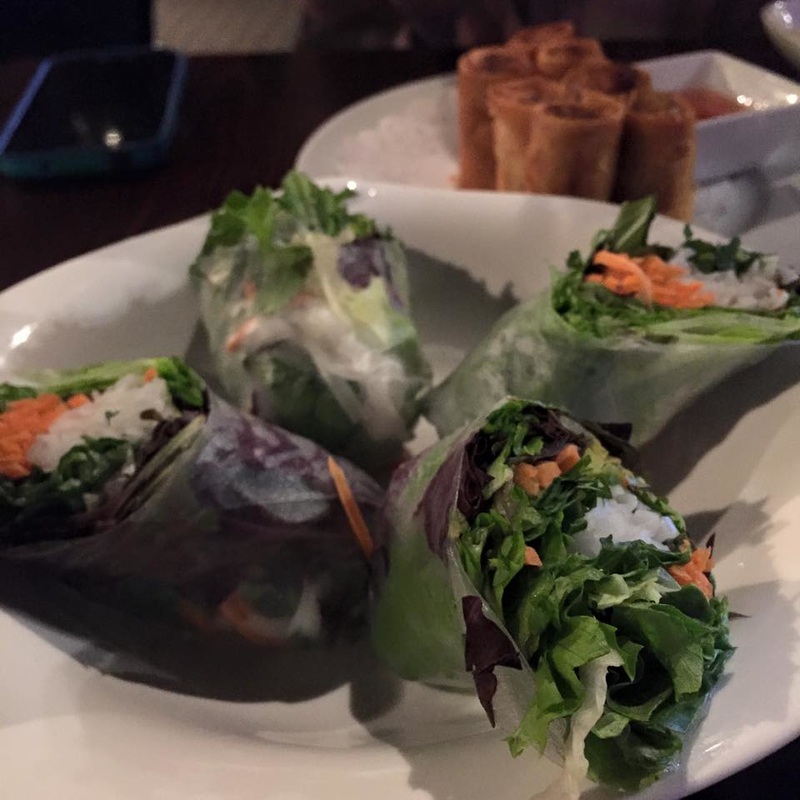 During our travels through the mountains and desert, we had to eat on the go a lot. I'm sure you all know how tricky this can be for plant based eaters and those with dietary restrictions. We had a surprisingly easy time finding things! There were an abundance of Asian restaurants in every major town we drove through, which always had at least a few vegetarian options. Some places were better than others. These summer rolls were one of the better things we found. ^_^  So true, so true. We also had to make some stops while driving for snacks. We were so lucky to find small and big businesses that offered vegan options for quick food. Oddly enough, we consumed a lot of freshly pressed juices on our trip. I was afraid I wouldn't be able to eat many vegetables while on the road. What a worry wort. I also grabbed a fair amount of kombucha from the store in addition to those that I got on tap. What can I say? I'm addicted to it.  My boyfriend is kind of a barista (like, kind of). ;) So, while we traveled, we tried different coffee shops in search of delicious espresso and coffee to keep us energized. Just like with the Asian restaurants, some of the coffee shops were better than others. We found some surprisingly good cups of coffee while on the road, though. It was such an exciting moment to find one that really hit the spot. Some of the notable shops we found were Corvus Coffee and Deja Brew among others. 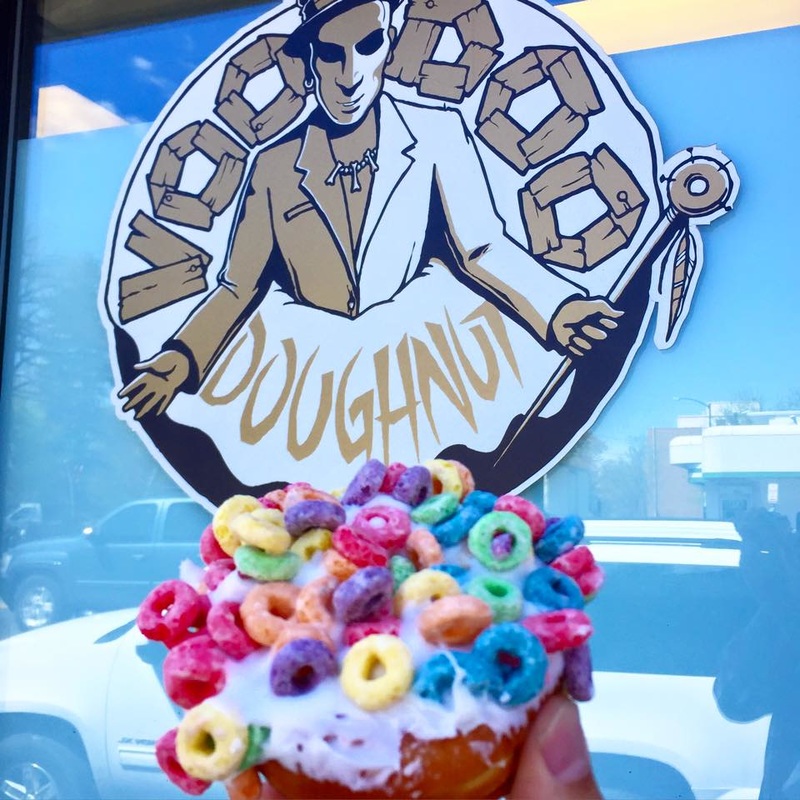 Voodoo Doughnuts Denver, CO About a year ago, I visited my very fist Voodoo Doughnuts location in Portland. I am certianly a lucky gal to have the pleasure of visiting another location a year later. The Voodoo in Denver seemed to have a slightly larger selection of vegan doughnuts, although it could have just been the time of day that we dropped by. My boyfriend got a fruit loops doughnut (I mean, genius again) and I got a maple cream filled doughnut. I was a bit overwhelmed so I didn't finish the whole thing, but man did I enjoy it! Overall, I'd say my first experience in Colorado was a success. I got to eat a lot of amazing food, spend time with an amazing guy, and see some amazing natural sights. I climbed stuff, soaked in a hot spring, met some buffalo and horses, met up with some friends, and generally had one of the greatest trips of my life. I'd do it again in a heartbeat! Here's until the next time that I travel! I won't keep you out of the loop, I promise! In the meantime, go to Denver. It's a rad place. ;D 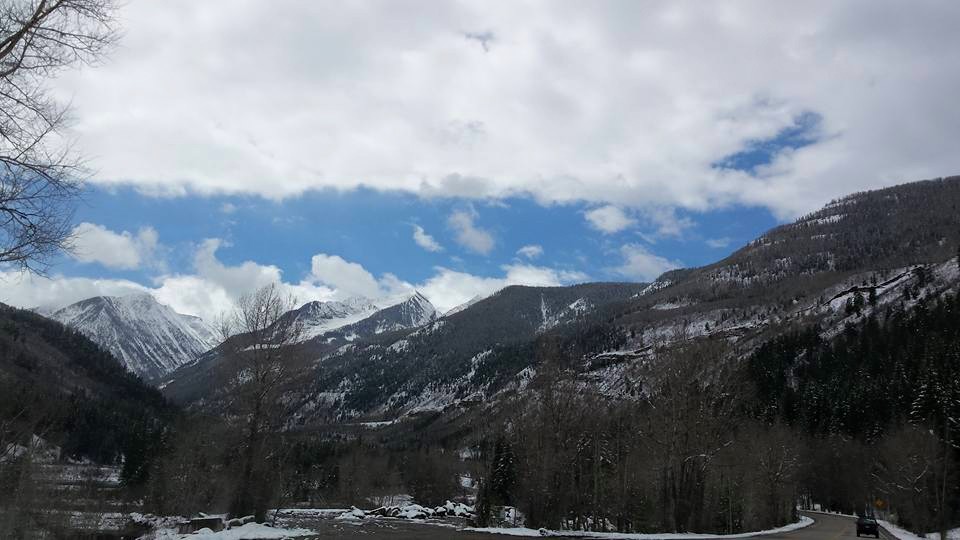 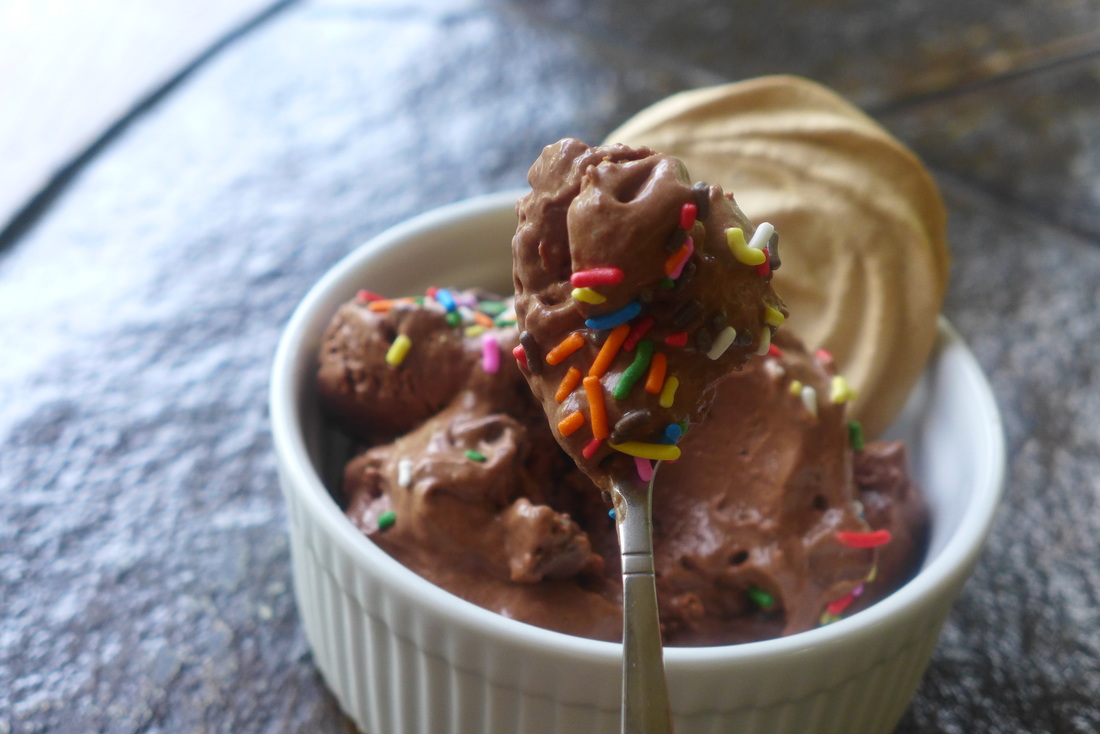 That's a spoonful, alright. So, with some free time on my hands, some spare cans of chickpeas in my pantry, and a big craving for chocolate left me no choice but to make some delicious ice cream mousse. I made a homemade ice cream cake around this time last year. The result was sweet, creamy, dense and satisfying. There is something to be said for that type of ice cream and usually it's "mmmmm!". But, today, I wanted to try something different. I wanted to create a light, fluffy yet richly flavored ice cream that would stand up to any dairy-filled gelato or frozen custard. I turned once again to my new-found friend aquafaba! I recently made a sponge cake using aquafaba (chickpea brine) and I was quite pleased with the results. I wasn't quite prepared, however, to witness how wonderful aquafaba is on its own. 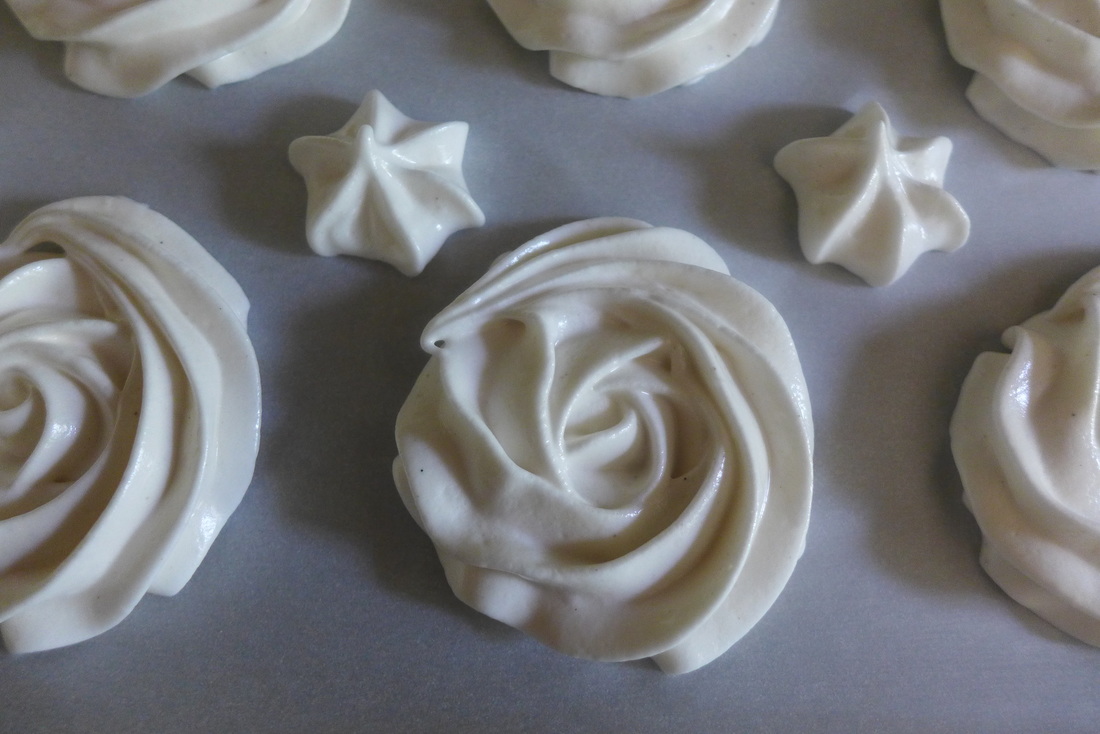 This time, instead of making my vegan meringue in the food processor, I used my trusty Kitchen Aid mixer! I absolutely love my mixer. It was my grandmother's first and now it's mine. It helps me make sweet and beautiful creations that I otherwise wouldn't on my own. I was so surprised to see how quickly the meringue whipped up and also how stiff (!) it got with the whip attachment! It behaved just like a traditional egg white meringue would. It also didn't deflate on me! ;) 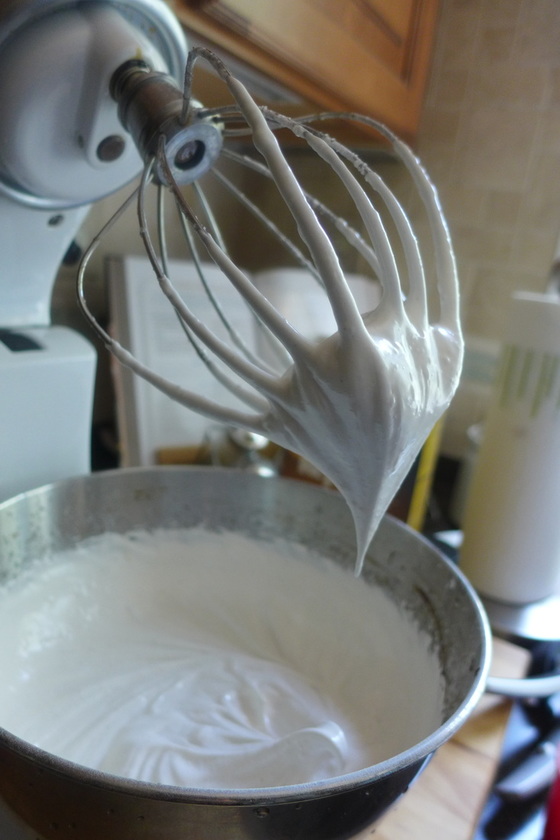 Yeah. Nice peak. ;) I ended up with an entire batch of meringue that I didn't have a use for. So, in order to test its pipe-a-bility (?) I made little meringue cookies with my pastry bag. I've also never, even with eggs, attempted to make meringue cookies. They were never something I actually liked, so I never felt compelled to make them. My grandma loves meringue so I'm hoping I can make these for her one day and just not tell her that they're vegan. ;D I was pleased with the meringue's consistency and its ability to hold up to piping. I made well-defined rosettes with ease and they never collapsed, even after baking them. I think I may have over-baked my cookies a tad, but they seemed to have the correct consistency inside. I still don't think I think them though...too sweet for me. ^_^' At least they look cute! Here is the recipe for my meringue. It's absolutely amazing if done in a mixer with a whip attachment. I can't vouch for any other method except the food processor one, and I wouldn't recommend that method for this recipe. Vegan Meringue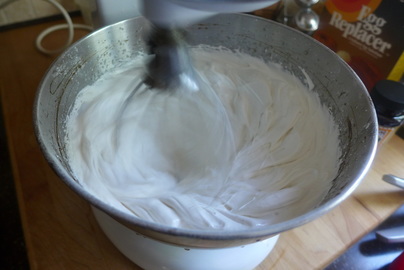 Yield: about 4-5 cups of finished meringue Ingredients
Instructions
 Now, on to the good stuff... Chocolate Mousse Ice Cream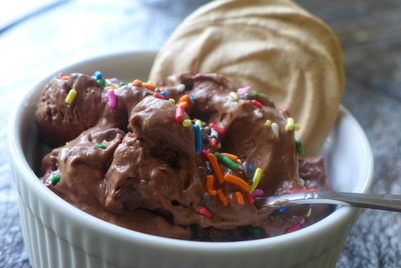 Adapted from: Chocolate Coconut Ice Cream from Vegan Chocolate by Chef Fran Costigan Yield: a little more than a pint Soy, Dairy, Gluten, and Nut free! Ingredients
Instructions
 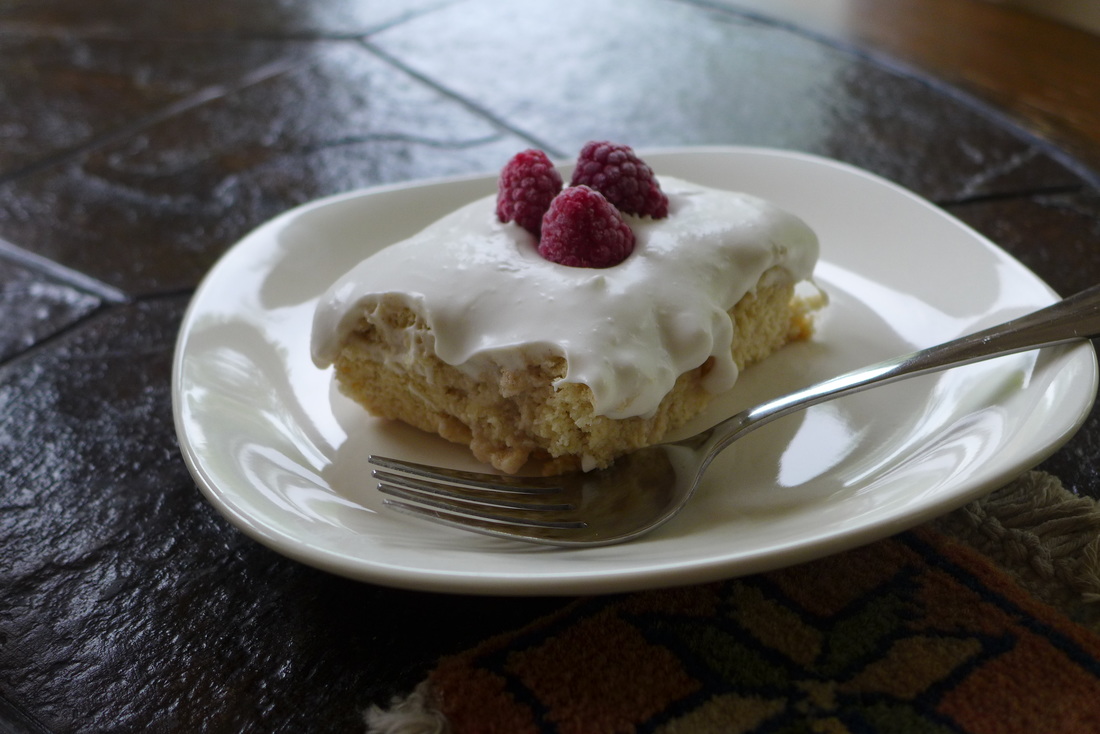 Well, it's Cinco de Mayo again! Cinco de Mayo is a holiday that I normally don't celebrate. It's in the same category as St. Patrick's Day for me. Growing up, my family and I would have themed dinners for these holidays. When I got older, I came to know these two holidays as excuses to drink themed alcoholic beverages. Although I do not partake in either of these traditions anymore, I still like to look at different themed recipes for the sake of inspiration. This year, I decided to make a cake that I did not think I was going to like. Tres Leches cake is something that I make during the day at work but not something I've ever wanted to actually eat. The idea of soaking a cake in sweetened condensed milk, evaporated milk, and whole milk makes me a little queasy. It seems incredibly rich and sweet, which are two things I do not enjoy very much in my desserts. I like either one of them, but not both in one recipe. In order to broaden my baking horizons, I decided to create my own version of a tres leches cake that was gluten free, vegan, and less rich and sweet. The result of my efforts was surprisingly delightful! I absolutely loved the way that my cake turned out. I've jumped on the aquafaba wave (egg white substitute made from chickpea brine). I learned of the magical powers of chickpea brine from this Facebook group. Ever since I became vegan, I've dreamed of creating something that mimicked angel food cake, sponge cake, castella, etc. I loved the spongy, almost dry texture. It's something that I never wanted to eat a lot of, but I loved baking cakes that came out this way. They're beautiful, perfect for decorating, and lower in fats for perfectly light summer desserts. When I went in search of a traditional tres leches cake recipe, I found a cake that seems sponge-like in its description. The cake contained a lots of eggs and dry ingredients. They did not call for fats or liquids of any kind. I thought this was the perfect opportunity to try my first attempt at making vegan chickpea egg whites! 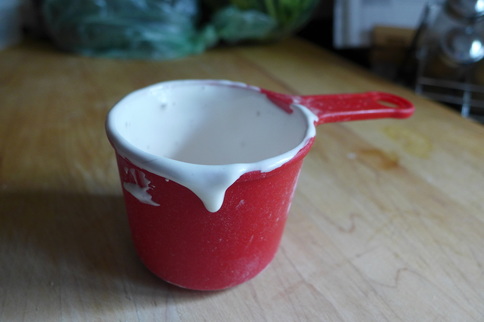 The rest of the tres leches recipe was quite simple when I found a way to make the cake. There is a soaking liquid, which I just substituted non-dairy milk for (and some cinnamon for flavor). ;) The whipped cream topping was a simple fix: coconut whipped cream! Coconut whipped cream is the stuff dreams are made of. I love eating it in the summer. It's basically the most delicious and simple dessert to make if you have nothing else on hand. I always try to keep my pantry stocked with cans of coconut milk for last minute dessert ideas. In the end, I made the cake successfully. I soaked the cake in my milk and cinnamon mixture. Then, I topped the entire thing with mounds of delicious coconut cream that I made in my Vitamix (no need for a mixer if you have this handy). To top the cake off and add some acidity, I dropped some frozen raspberries into the cream. I'm a changed vegan. I do like tres leches cake and I'm going to eat it all. ^_^ 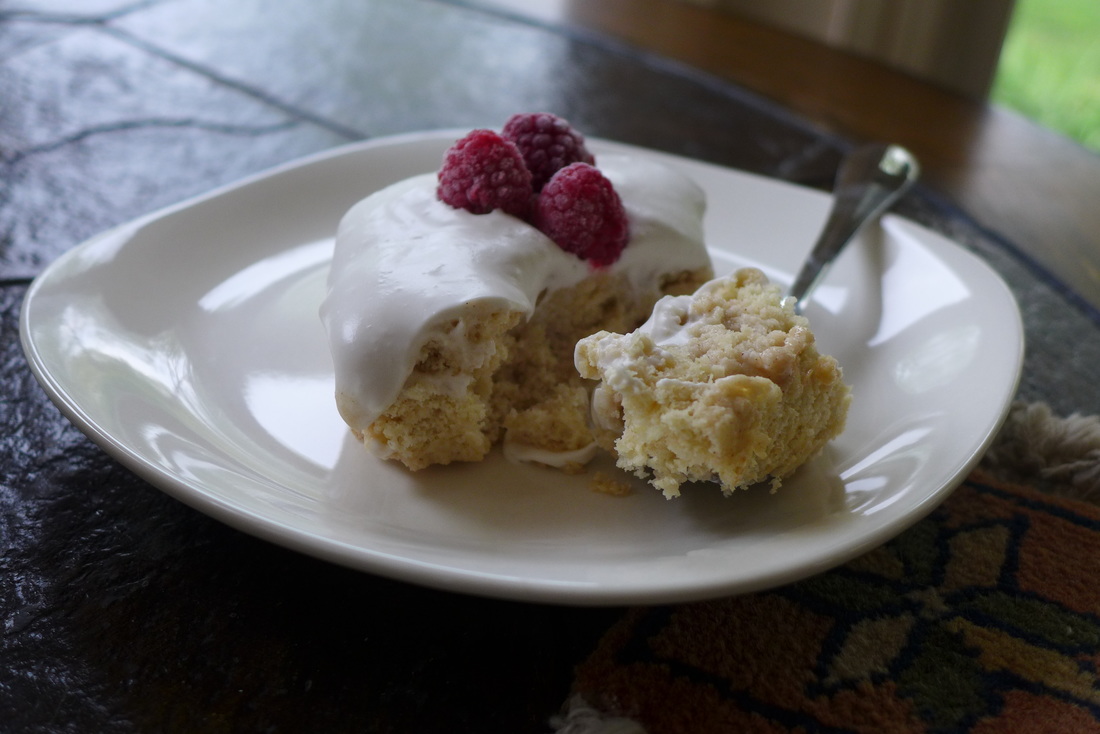 Vegan Tres Leches Cake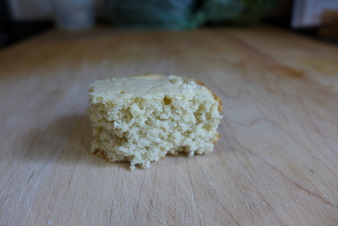 This cake has a delightful texture and is a bit dry...perfect for soaking! This cake has a delightful texture and is a bit dry...perfect for soaking! Ingredients Cake recipe adapted from Latina Magazine Yields: 6-8 servings Gluten-free, Dairy-Free, Egg-free, Oil-free Cake:
Chickpea Egg Whites:
Soaking Liquid:
* If you have dietary restrictions/allergies regarding these types of milk, feel free to use your preferred non-dairy milk! It also does not have to be two types. If you have only one, the cake will still come out fine. =) Coconut Whipped Cream
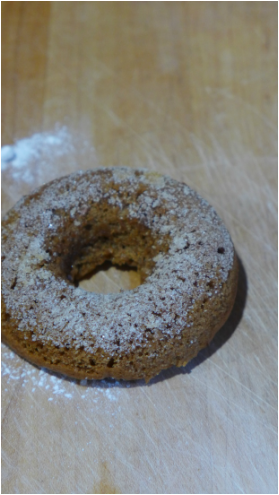
Instructions For the cake: Mix all dry ingredients in a large mixing bowl together with a wooden spoon/whisk. Place chickpea brine in a large food processor/mixing bowl fitted with a whip. Whip chickpea brine and slowly add in the sugar. Add cream of tartar and Ener-G powder slowly as well. Continue to whip brine mixture until it turns into a meringue-type consistency, about 12 minutes. Check periodically for firmness. Different machines will take longer or shorter. In my food processor it took approximately 12-14 minutes. After the meringue is ready, add half of it to the bowl of dry ingredients and fold in gently. Fold in the second half of the meringue gently, making sure not to over-work the batter. Pour the batter into a greased 8x8 square cake pan. Bake on 360 F for about 20 minutes or until a tester comes out clean. Chill the cake in the fridge until completely cooled, about 1 hour. For the soaking liquid: Combine both non-dairy milks (or just 1 if using) with cinnamon in a blender. Once the cinnamon is dissolved, set the milk aside and grab the cake from the fridge. Poke some holes in the cake that should be completely cooled by now. Pour the milk mixture over the cake, making sure to soak the entire cake. Place the cake back in the fridge to soak while you make the coconut whipped cream. For the coconut whipped cream: Open the can of coconut cream that has been chilling in the fridge. Scrape the cream from the top of the can with a spoon and place in a blender/mixer bowl, being careful not to get much liquid in the process. Set the liquid aside for another use. Add some sweetener to the coconut cream and extract, if using. Blend the coconut cream until it is thick and spreadable, about 2 minutes. If using a mixer, beat the coconut cream (preferably with a whip) mixture until desired whipped consistency is achieved. When you are ready to serve the cake, remove it from the fridge and top it with the coconut cream. Cut the cake into individual squares for serving and top with some fresh/frozen fruit for a deliciously refreshing dessert! Enjoy! 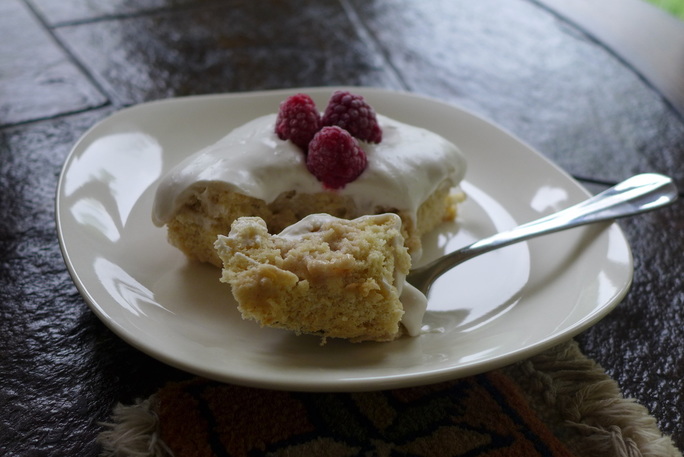 First of all, Happy World Vegan Day!!!! =D What better way to celebrate being vegan than with cruelty-free, delicious doughnuts!!!! <3 It's hard to believe that I (an avid baker) haven't tried to make actual doughnuts before. I've made doughnut recipes in muffin tins before, yes, but that doesn't really count... This fall, after seeing many an apple cider doughnut picture on Instagram, I decided it was time to make my own homemade doughnuts. I've always loved the allure of a warm doughnut in the chilly fall months. There's something wonderful about it. There also must be a hot mug of something to go with said doughnut. The two cannot be separate. It's impossible. About a year ago, I got my hands on this wonderful book:  Babycakes NYC is a famous bakery in (you guessed it) New York City. There are two other locations in California and Orlando, Florida. I, unfortunately, have never had the privilege to visit any of the bakeries (...yet!). However, I've admired their baking and cake decorating from afar for years now. I've had my eye on their recipes, too. Being able to transform every day baked goods (like, doughnuts, snickerdoodles, chocolate chip cookies, madelienes, etc.) into vegan and gluten-free treats is something miraculous when done correctly. I give Erin McKenna major props for creating all that she has. Her recipes yield accurate and effective results, which is important. I never feel good about trying a new recipe only for it to fail and become garbage. =( What I also love about Erin's recipes are the fact that they are all made using real ingredients. For fats, she mostly uses coconut oil or some other neutral oil. She shies away from using any processed vegan substitutes. These products have their places in baking, sure...However, to use them all the time is kind of cheating in my book! I love to be able to taste food in the most pure form I can. There is nothing to hide in these desserts. Each baked good you will make from this book will taste pure (and sweet! I'll get to that in a minute...). The only alterations I've made to Erin's basic cake doughnut recipe (my favorite!) are the key flavor ingredients (pumpkin, apple, banana...) and the type of sugar. She uses vegan sugar, which is fine, of course. I have this thing with sugar...I don't particularly like it in large quantities. It's extremely sweet, and I'll admit, I like to use it for certain things that must be just that (frosting, dusting sugar, etc.). But, again, using sugar in large quantities I find overpowers other ingredients in a recipe. I always try to strive for balance in everything I cook, even desserts. Desserts don't have to feel like their socking you over the head with sweetness...they can be complex and satisfying at the same time! (I promise...) ;) 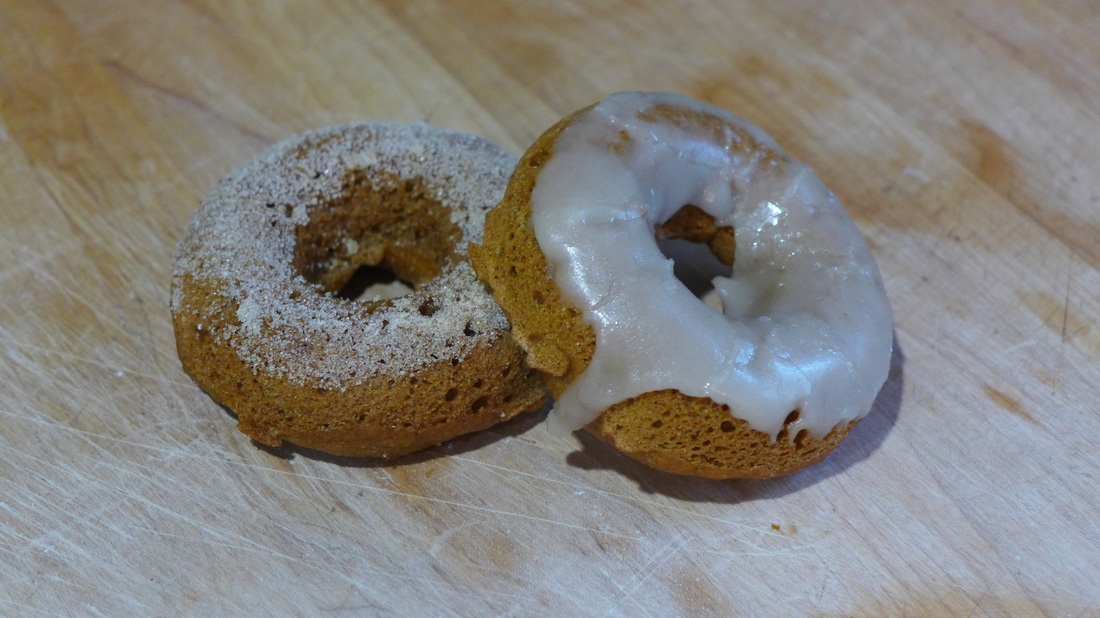 I DID use real sugar for the toppings here...just FYI! ;) For the batter itself, I used coconut sugar. For anyone who has read my other recipes, you probably know by now that coconut sugar is my go-to sweetener. Well, that and maple syrup! But, for the sake of these autumnal flavored doughnuts, I wanted the deep caramel-like complexity of coconut sugar. Coconut sugar is also wonderful because it's less sweet and also low-GI for anyone who is sugar conscious. However, to kick these doughnuts up a notch, top them with glaze and real sugar. Since the cake itself is only mildly sweet and a little spicy (thanks to cinnamon and friends), the sweetness on top balances and pulls the whole thing together! I try to think about these things. ;) So, without further introduction, here are Babycakes NYC doughnuts three ways. Enjoy and have fun with other flavors!
Instructions Oven 325 F
Maple Glazed Pumpkin Doughnuts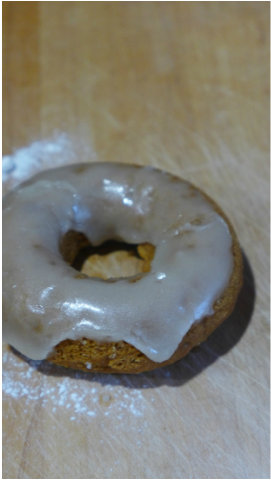 Source: see above Yield: 12 doughnuts (same) Ingredients
Instructions Oven 325 F. Same as above. Dip each doughnut in the glaze once completely cooled. Maple Glaze
Whisk together all ingredients until desired consistency is achieved. Thin out with more maple syrup if needed. Banana Doughnuts with Peanut Butter Glaze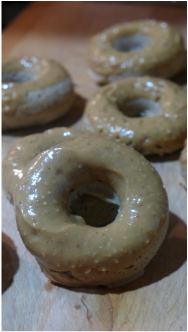 Source: see above Yield: 12 doughnuts Ingredients
Instructions
Oven 325 F. Same as above. Dip each doughnut in peanut butter glaze after they have cooled completely. Peanut Butter Glaze
Whisk together until thick but still liquid. Add more coconut oil if needed to thin out. Enjoy and make a little extra for the ones you love. Show them that vegans can (and do) eat more than kale and grass and stuff. =P 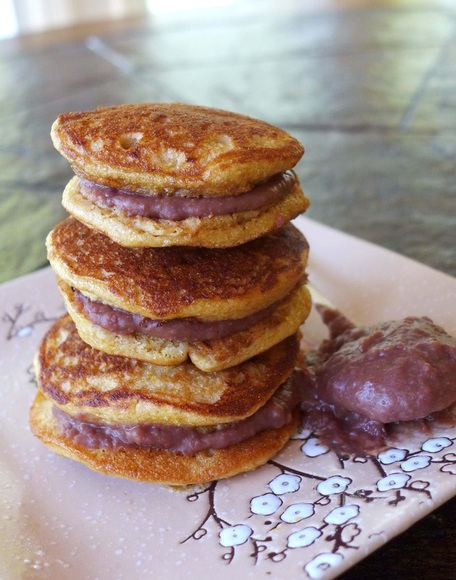 Dorayaki are delicious snacks that can be enjoyed for any meal of the day. They are usually treated as a dessert in Japan because they are quite sweet. Dorayaki are simply pancake and red bean sandwiches. I have also had some filled with a custard-like cream which are also delicious. I've always gotten them made fresh from a food stand with my grandma and grandpa as a treat when I was younger. I've finally found a great homemade recipe for gluten=free and vegan dorayaki that are more wholesome! I would totally eat these for breakfast and feel no shame! The pancakes I made are just made like a traditional pancake: on a skillet. There are special cake moulds you can purchase to shape dorayaki into various things...like fish. These fish-shaped cakes are referred to as taiyaki. They're pretty cute. 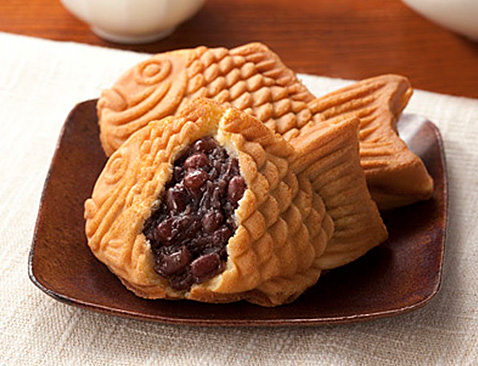 There's something weird about this photo...fish guts come to mind. =( 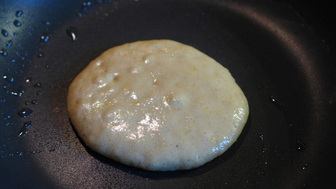 I love the little flecks of orange in there! I love the little flecks of orange in there! The filling I made is a sweet jam of sorts made out of azuki beans. These beans are the same ones that I used in my onigiri recipe. They are so versatile! I've found, while working with beans in sweet recipes, that adding a bright flavor can help bring everything together. I love adding orange to red beans. I think the bright and sweet fragrance helps to liven up the beans and add some depth to them. Traditionally, red bean paste (tsubu-an) is made with a ton of white sugar. I'm not a fan of one-note desserts. Anything that is too sweet is inedible in my book, so I try to dial back sweeteners and add in other flavors for interest. I usually dial back the sugar that's called for in any dessert recipe by up to half and I can't say I notice any decrease in quality of taste. Sometimes, I can't do this, if I'm making icing for example. However, there are always other types of sweeteners that are great substitutes for sugar...but that's for another post! ^_^ I loved the earthy taste of these dorayaki. I added orange zest and juice to both the cakes and the filling to compliment and balance the red beans. I loved the fragrance of the batter as it cooked! Never underestimate the power of aromatherapy! If you aren't too keen on azuki beans, try using any other jam of your choice. You can also put nut butter in between the cakes...how could that be bad? If you don't care for orange, or want to mix it up, try adding in lemon zest, apple juice, cinnamon, pumpkin, or any other feel-good flavor you can think of. Hmm...pumpkin spice dorayaki...that just might be my next post! =D So, like I said, try these little guys out for your next after school/after gym/after sleeping snack and then maybe for dessert later in the day... ;) Multi-purpose foods rock. 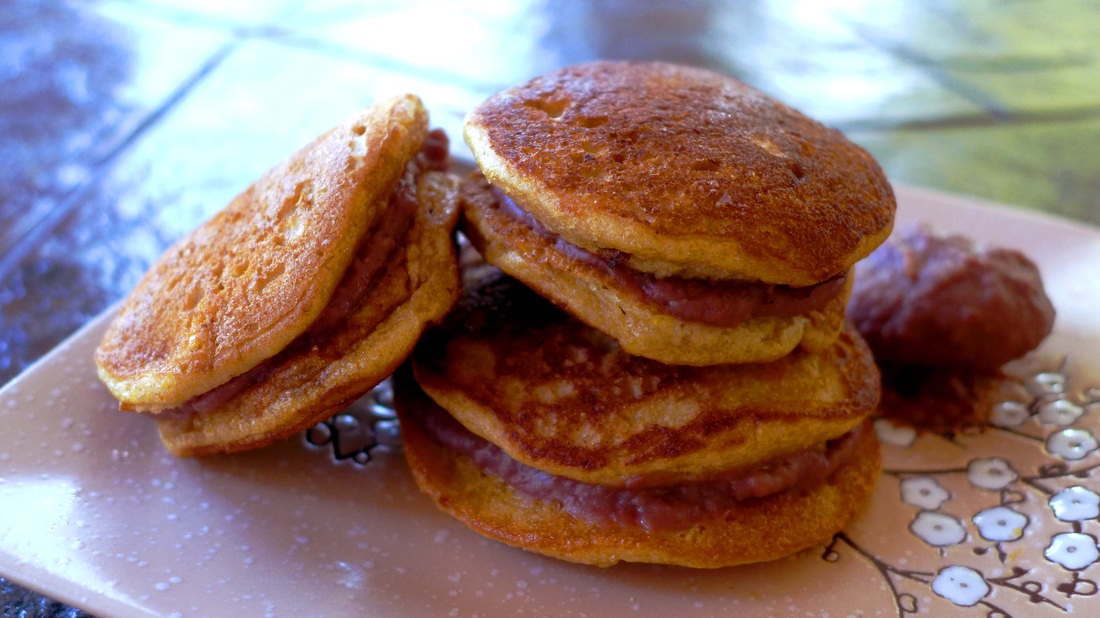 Homemade DorayakiYield: about 5 assembled cakes (2 pancakes each) Cake recipe adapted from Kansha by Elizabeth Andoh Ingredients Cake
* Alternately, you may use 1/4 cup more gluten-free all purpose flour in place of the millet and tapioca, though this may change the consistency a bit. It may be more dense. Instructions
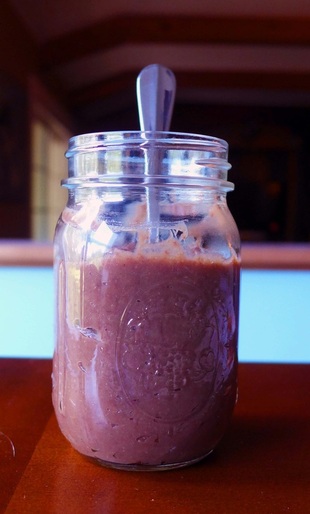 Tsubu-An (Red Bean Jam) Yield: a little more than 1 cup Ingredients
Instructions
MoFo is almost over...I think I have 1 more surprise for you all. Thank you for reading and check back often! 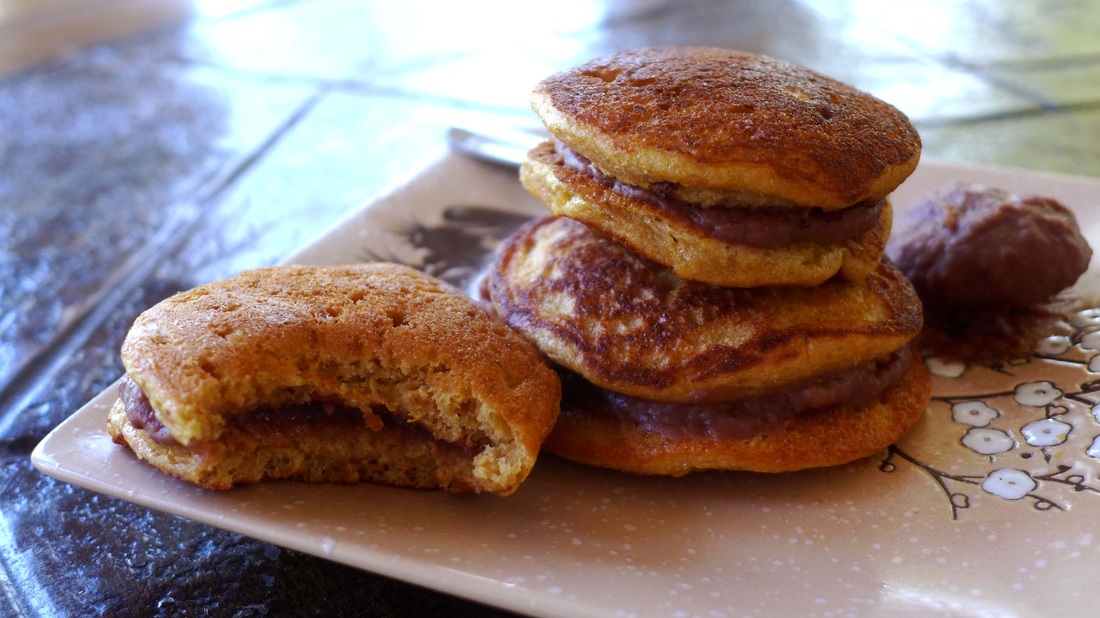 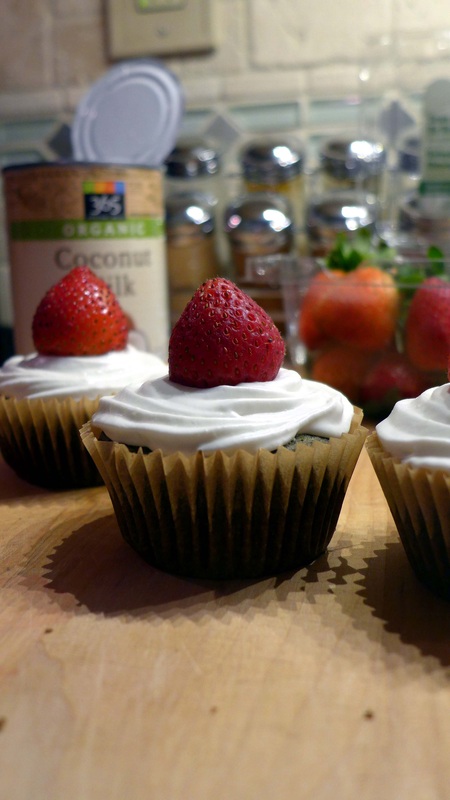
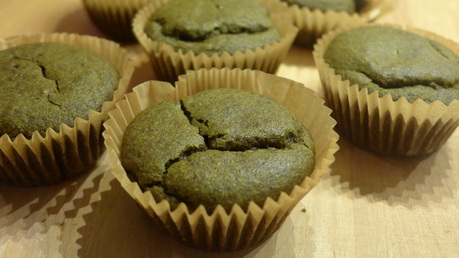
Sometimes, you just want a specific cake. Ever since I've had delicious Japanese-style strawberry shortcake, I've been on a mission to recreate it in my own kitchen. Although it's been a while since I've had a traditional cake made with eggs, I can still remember the springy and light texture that I enjoyed so much. I loved how the cake was not too heavy. This type of cake is a variety called castella cake, which is of a Portuguese origin. Sponge cakes are difficult to recreate into a vegan and gluten-free variety because they usually call for a lot of eggs or egg whites for volume. But, somehow, some way, I've formulated a recipe that yields a light and springy (but more delicate) sponge cake that is free of egg, dairy and gluten! This recipe was a bit of a work in progress so I made it a few times. I'll share the cupcake version as well as the full-on cake version! I decided to share this recipe as a matcha (green tea) flavor since I wanted to drive home the Japanese theme. The cake can be made into a vanilla flavor by omitting the matcha powder and adding in some vanilla extract. Easy, right? =) The strawberry shortcake that I loved so much was made with heavy whipped cream. I used to love and hate whipped cream before I became vegan. I loved the way it tasted and I loved how it was less sweet than buttercream, but I hated how I felt after I ate it. I felt borderline sick after consuming whipped cream. I also felt this way after eating eggs sometimes...you can see why I've chosen to eat the way I do! If coconuts didn't exist, I don't know what I would do. Coconuts have allowed me to enjoy whipped cream again without the sick feeling (or the guilty feeling for that matter!). I'm sure it is now almost common knowledge that coconut cream can be a wonderful substitute for whipped cream in any situation (unless it's super hot out). If you aren't familiar with how to make coconut whipped cream, please head on over to this page and read all about it! It's the easiest thing in the world...and it tastes way better than traditional heavy cream, at least I think so. ;) 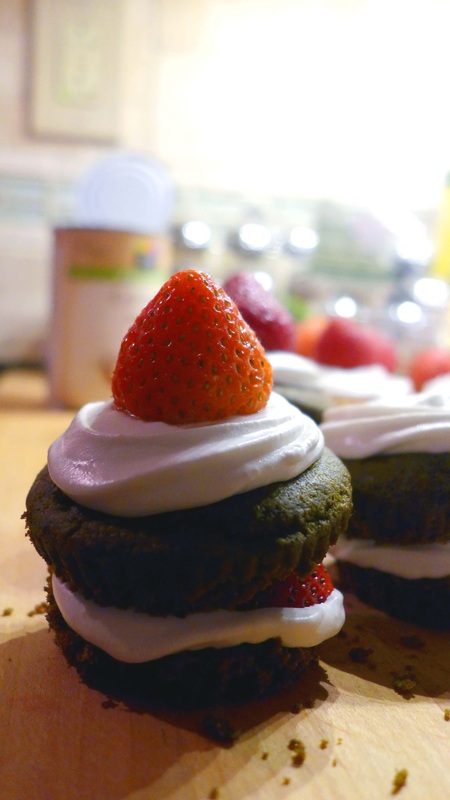
Naked shot! =P
I recommend using ripe organic strawberries for this recipe. It's the end of the summer season, so the strawberries are still beautiful by me! If you want to make this cake in the winter and eat seasonally, maybe use some fruit preserves or serve with a custard filling instead. This is a great cake base for all types of flavors and ingredients, so play around! (I just realized that these cakes look really Christmas-y because of the green, red, and white...whoops!) ^_^' Green Tea Strawberry Shortcake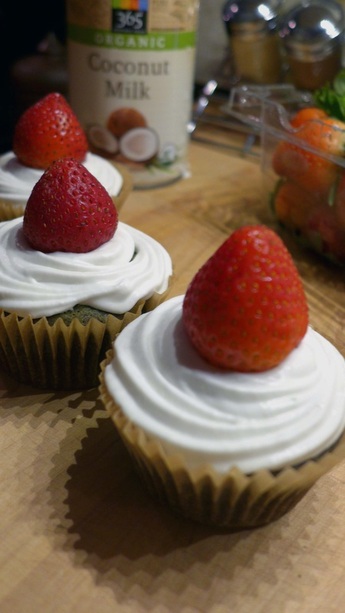 Are those shadows not cool-looking?! Super geometric! Are those shadows not cool-looking?! Super geometric! Yield:
Ingredients
* coconut sugar will change the flavor of the cake a little to something more reminiscent of caramel; I wanted a neutral sweetness so I used Florida Crystals Instructions Preheat oven to 325 degrees F.
#nofilter super naked cakes!
**Sifting the flours will ensure your batter will be smoother. If you skip this step, you will have to work extra hard to get the lumps out when you stir everything! Here is a picture of how I made the cake look for it's 6" size. I used a strawberry buttercream on this one instead of whipped cream. Although, if you make your whipped cream stiff enough, you can certainly use it for icing. I would add some confectioner's sugar and/or Ener-G egg powder to it for stability. 
Happy baking, fellow MoFo'ers! =P
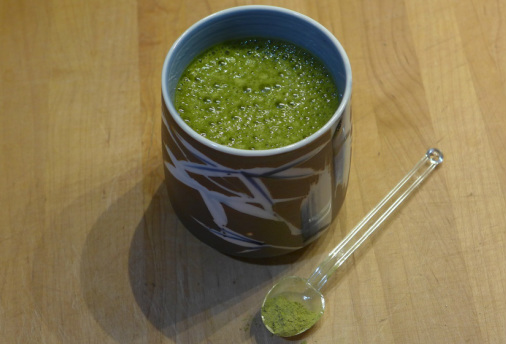
This post for VeganMoFo is a bit more simple. Ever since I decided to create Japanese-inspired recipes, I've been on a matcha kick. I have another recipe including matcha for later this week that I hope will be a hit! Matcha is a powdered green tea for anyone who isn't familiar. It's very concentrated and can be quite bitter. The traditional way to prepare matcha is quite a long and specific process. There is an entire tea ceremony culture tied to the preparation and serving of matcha tea. I've had very good quality matcha before and it's absolutely delicious. It comes out almost like a frothy latte without anything added to it but hot water. I've tried to obtain a frothy and thick texture with this matcha smoothie recipe. Matcha tastes much different when it is cold to me. I taste more bitter notes and less grassy ones. I feel as though matcha needs some sort of sweetness to balance out its bold flavor. I kept this smoothie (or shake, if you prefer) simple but with balanced ingredients that also offer substantial nutritional benefits. The spinach offers awesome amounts of vitamins and minerals while also being full of phytochemicals. The matcha is packed with antioxidants and is an essential ingredient to a long and healthy life. I've added some soft and sweet banana to the mix to give flavor, a creamy texture, and a bunch of fiber. This smoothie is best served cold, but you could try it warmed up if you'd like. I wanted to keep the spinach and banana raw since it's still summer. I love this as a dessert, breakfast or light snack. It's also your best friend when you find yourself craving green tea ice cream! 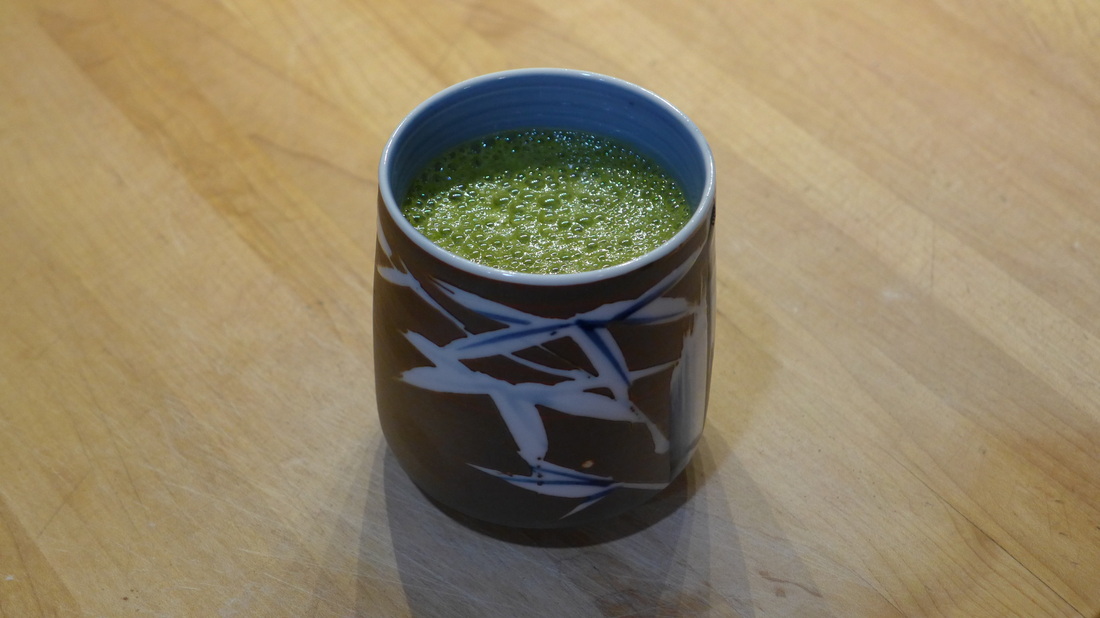
Matcha Green SmoothieIngredients
Instructions
*Try frozen for a delicious icy treat that will definitely remind you of green tea ice cream! ^_^ 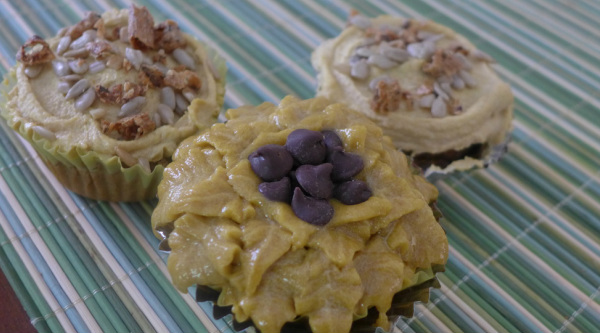
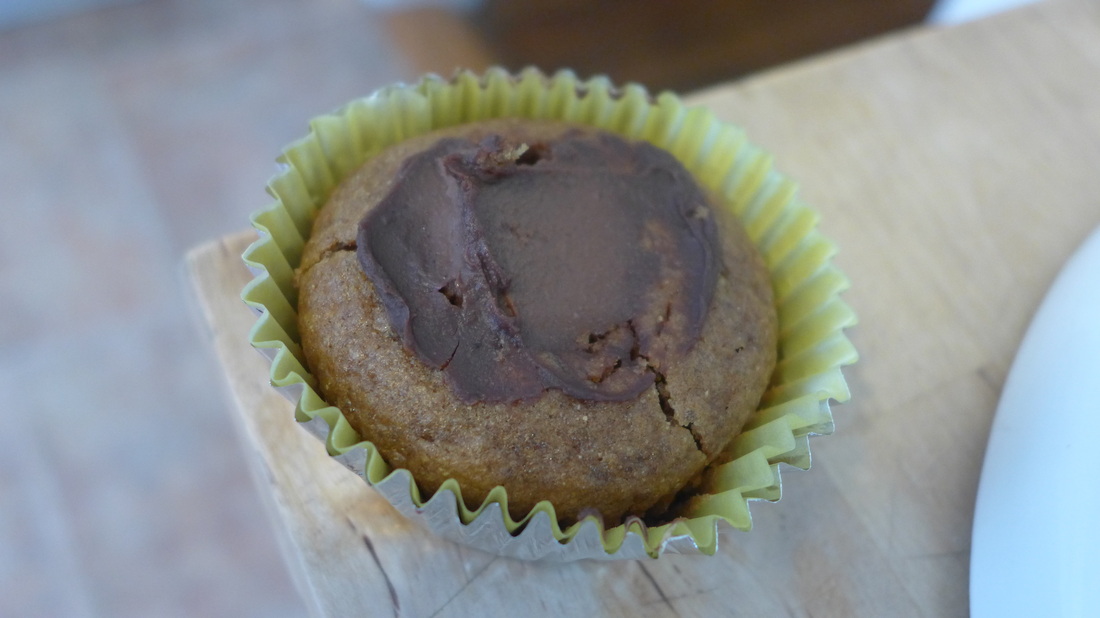
This post will be somewhat personal...I don't think that having a blog would be complete without some personal and slightly emotional content (related to food, of course!). There are many, many reasons why I am vegan today. My dear friend Emily introduced me to the lifestyle in highschool. She was a vegetarian when I met her. She introduced me to wonderful staple foods like hummus and falafel that were quite foreign to me at the time. These are now part of my normal diet and I absolutely could not thank her enough for leading me to them! As I was becoming vegetarian, Em was trying to become vegan. I thought I was having a tough time! I remember she would stash hummus in her purse to smear on bagels. She also switched some clothing and accessories for cruelty-free materials. The hardest part about the transition for her was giving up ice cream. It probably didn't help at all that we both worked at an ice cream shop.... Needless to say, she phased in and out of veganism for a while before quitting. I believe she may have picked it back up after highschool, though. I know it's been a long, long journey for me. I didn't even entertain the idea of veganism until I graduated college and began to read inspirational literature like The Vegan Girl's Guide to Life and Food, Inc.. Over all, I look to this lifestyle as a way of minimizing suffering and maximizing positive vibes (the health benefits and feelings of closeness to the earth are added bonuses!). Emily was still my first exposure to veganism, though. I was always inspired by her interests in activism, animal rights, and conscious living. Another big reason for my adherence to this diet and lifestyle is the preservation of her memory. For reasons still unclear, Emily's life was taken while she was away at college in Gettysburg, PA. This came as a shock to everyone who knew her and to her school community. This tragedy shook us all to the core. We have all tried desperately to keep Em's spirit and memory alive in any way we can. Her family created a memorial fund in her honor; memorial trees, plaques and peace poles were erected in places her life greatly affected. Em's ashes were also scattered around the globe in amazing places that she would have loved to travel to. As one of my dearest friends and greatest role models, Emily will always have a place in the forefront of my mind and heart. I try to do right by her every day in all the ways that I can. As you can see, this effort has manifested into the creation of vegan food. The recipe I'm sharing with you today is based on flavors that Em loved (she had great taste) and her favorite flower. I made these to celebrate her birthday which was yesterday. Every year, I try to either make and/or eat a delicious vegan cupcake for the occasion. I don't think she'd have it any other way. :) So, without further a-do, I present (Emily's) Loaded Sunbutter Cupcakes! These babies are basically a twist on a Take 5 candy bar, which Em was rather fond of. Instead of peanut butter, I used sunflower seed butter to pay homage to one of the most beautiful and dramatic flowers on Earth. Each cupcake is: sunflower seed butter cupcake filled with a dark chocolate mousse and topped with a sunflower seed buttercream frosting. I sprinkled sunflower seeds and gluten-free pretzel crumbs on most of them for garnish. For one, I piped a sunflower and finished the center with chocolate chips. This can be done with plain buttercream and colored yellow, but I wanted the flavor of the sunbutter on mine. Get creative with yours! These are supposed to be fun! :D 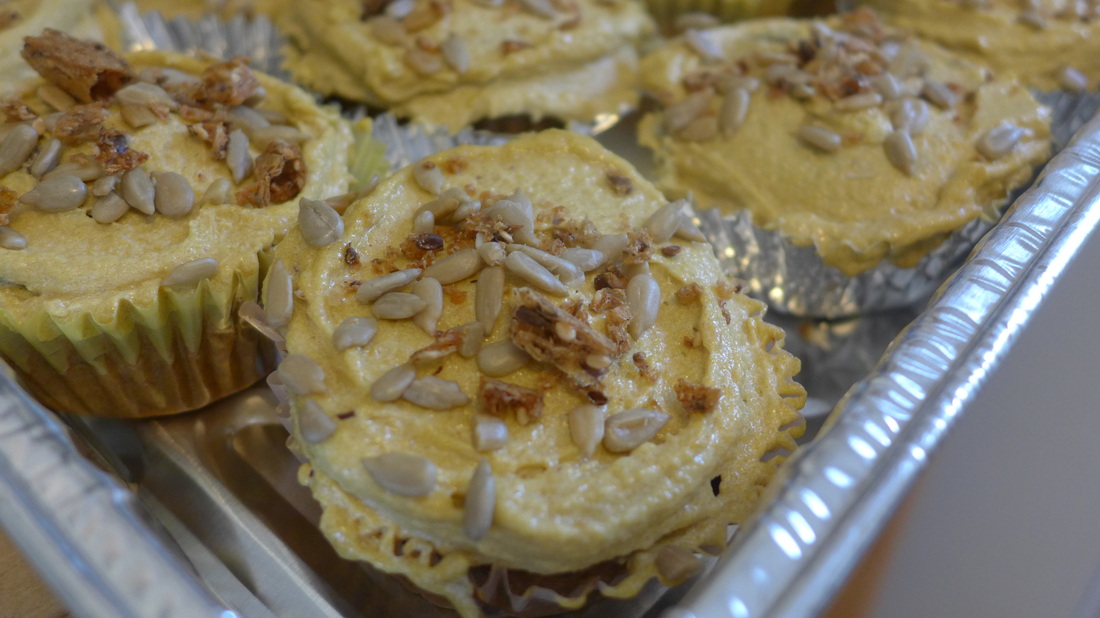
Emily's Loaded Sunbutter Cupcakes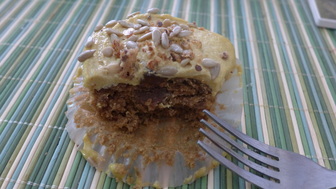 Yield: 15 cupcakes (I used 2 mini ice-cream scoops for each) Adapted from Vegan Cupcakes Take Over the World by Isa Chandra Moskowitz (She's the vegan cupcake GENIUS! If it weren't for this book, I may not be a vegan...maybe....) ;) Ingredients For the cake
Instructions Preheat oven to 350 F.
For the mousse filling Ingredients
Instructions
For the Sunbuttercream **To make this frosting completely natural/clean, sub the processed fats for refined coconut oil/palm fruit oil; Just make sure the frosting stays cool...otherwise, it may be a bit runny.** Ingredients
Instructions
Assembly
Sunflower Tutorial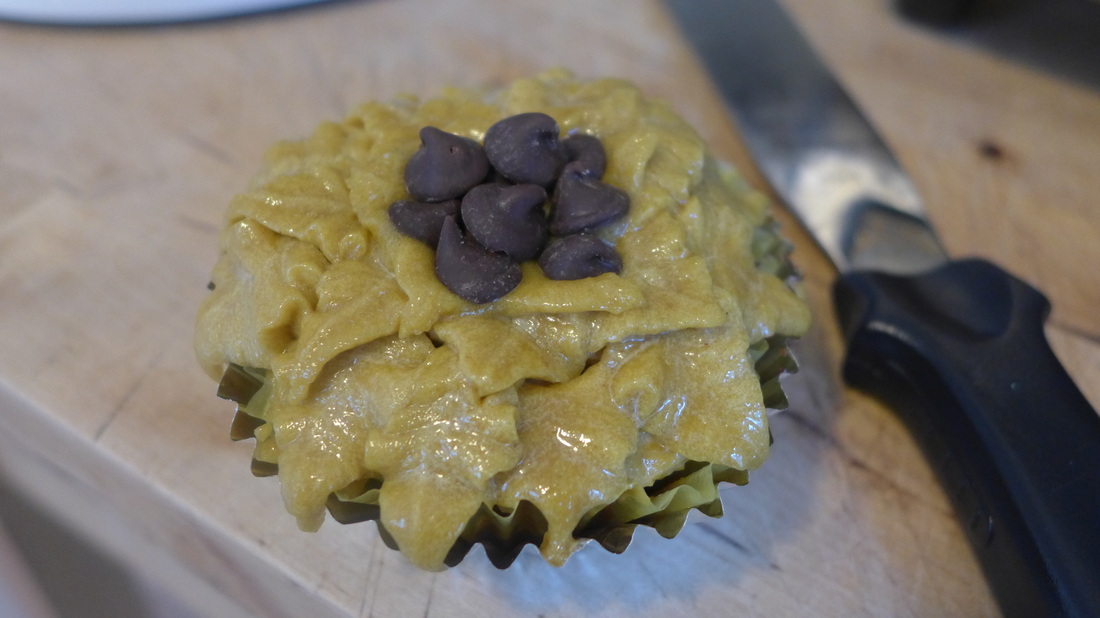
Instructions
I hope you enjoy making these cupcakes as much as I did! They're also fun to eat, too... For more information on my girl Emily, you can visit her memorial fund website. She was truly an amazing soul. I hope I've inspired you like she's inspired me time and time again. Peace, Love, Cupcakes <3 

|
I'm Jess!This is my very first food blog! I post revised conventional recipes of foods that I hold near and dear to my heart. My cooking here is all gluten-free and cruelty-free, but full of flavor and comfort.  


 Archives
December 2017
Categories
All
|
 RSS Feed
